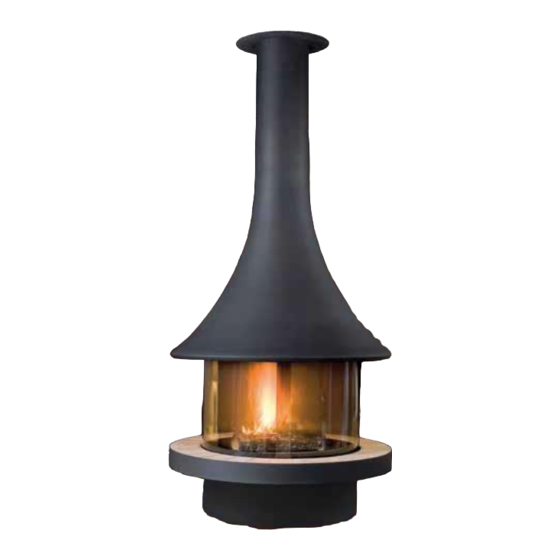
ORTAL CIRCLE 70 User Manual
Curved & islands fireplaces
Hide thumbs
Also See for CIRCLE 70:
- Technical manual (76 pages) ,
- Owner's operation and maintenance manual (21 pages)
Advertisement
Table of Contents
- 1 Preparation – Curved Fireplaces
- 2 Installation – Curved Fireplaces
- 3 Maintenance – Curved & Island Fireplaces
- 4 Installation – Wall Mounted Curved Fireplaces
- 5 Installation – Island Models
- 6 Ortal Chimney Assembly Instruction
- 7 Glass Types
- 8 Log Sets and Stones
- 9 Clearances for Circle 70 EU / 7565 Curved Tunnel
- Download this manual
See also:
Technical Manual
Advertisement
Table of Contents

Related Manuals for ORTAL CIRCLE 70


Summary of Contents for ORTAL CIRCLE 70
- Page 1 ® YOUR LIFE. YOUR FIRE. Ortal Curved & Islands Fireplaces User’s Manual...
- Page 2 [USA Fireplace Models [THIS ISTALLATION MANUAL INCLUDES ASSEMBLY INSTRUCTIONS FOR THESE MODELS: STAND ALONE 7565 CURVED TUNNEL – DOUBLE GLASS STAND ALONE 7565 CURVED – DOUBLE GLASS ISLAND 130 – DOUBLE GLASS ® YOUR LIFE. YOUR FIRE.
- Page 3 [Europe Fireplace Models [THIS ISTALLATION MANUAL INCLUDES ASSEMBLY INSTRUCTIONS FOR THESE MODELS: CIRCLE 70 CIRCLE 70 [270] CIRCLE 70 [DG] CIRCLE 70 [270] [DG] ISLAND 70 ISLAND 130 ISLAND 130 [DG] ® YOUR LIFE. YOUR FIRE. INSTALLER: Installation must be performed by a...
- Page 4 J.C. Bordelet Chimney Assembly Instruction ......34 Ortal Chimney Assembly Instruction ........35 Glass Types ................36 Log Sets and Stones ............. 37 Clearances for Circle 70 EU / 7565 Curved Tunnel ....38 Clearances for Circle 70 EU / 7565 Curved Tunnel DG ....39...
-
Page 5: Preparation – Curved Fireplaces
[Preparation – Curved Fireplaces [ PRE-INSTALLATION PREPARATIONS A round fireplace can be installed with a cone or flat top. When a cone is installed, it must be installed BEFORE installation of the fireplace begins (according to the installation instructions on page 25 and depending upon the model of the selected cone. -
Page 6: Installation – Curved Fireplaces
[Installation – Curved Fireplaces [GRILL COVER • Unpack the unit. • Unscrew the 4 Phillips screws on the top of the unit. • Lift the grill cover top up and away from the unit. [DECORATIVE COVERS • Gently hand lift 4 peripheral decorative covers. These decorative covers are secured in position with magnetic supports. - Page 7 [Installation – Curved Fireplaces [BURNER UNIT REMOVAL • Carefully lift the burner unit by unscrewing 8 base plate screws, and manually lift and remove the entire burner plate upwards. [PREPARATIONS • Gently and securely rotate and position the fireplace base on its side. It is recommended that you prepare a soft material to place underneath the fireplace base for protection.
- Page 8 [Installation – Curved Fireplaces [FIREPLACE BASE INSTALLATION: • Position the fireplace base centered underneath the vent pipe cone. • Make sure there is gas and electrical access underneath the fireplace base.
- Page 9 [Installation – Curved Fireplaces [LEG PLACEMENT: • With the fireplace base centered under the vent pipe cone, secure the legs to the floor with anchor screws. Note: This step is important to avoid any fireplace movement during use. • After securing the leg fixtures to the floor, release all adjustment screws to level the fireplace.
- Page 10 [Installation – Curved Fireplaces [GAS AND ELECTRICAL CONNECTIONS: • Install and connect the gas access valve to the supply line, and connect the gas pipe positioned between the gas valve to the burner. • Connect the electrical wiring to the burner controller according to model specifications.
- Page 11 [Installation – Curved Fireplaces [GLASS TRIMS: • Slightly release both flat glass panel trim screws to allow easy installation for the next steps. • NOTE: Do not disassemble the glass trims. [TOP COVER: • Gently release both flat glass panel trim screws on the top cover, and lift the trims by sliding them out while the screws remain in place for easy installation on the next step.
- Page 12 [Installation – Curved Fireplaces [TOP COVER POSITION: • Make sure the top cover and base are aligned during the installation by lining up both the "V" position marks on the fireplace top and base.
- Page 13 [Installation – Curved Fireplaces [VENT PIPE CONNECTION Once the fireplace top cover is settled on the base, thread the vent pipe segment into place. Then, connect the bottom vent pipe segment to the top cover using drill screws.
- Page 14 [Installation – Curved Fireplaces [TOP COVER POSITIONING: Raise the top cover with the vent pipe segment up into the cone to a height that allows the central glass panels to be inserted into place. Attach the 3 or 4 support struts to symmetrically support the weight of the top cover and vent pipe.
- Page 15 [Installation – Curved Fireplaces [SECURING THE TOP COVER: Take note of the height indicators on the back of the top cover support struts. You will need to adjust the length of the struts to accompany the various steps of installation of the fireplace: Position 1: High Position 2: Middle Position 3: Low...
- Page 16 [Installation – Curved Fireplaces [GLASS PANEL INSTALLATION: • Firmly grasp the top cover from above and gently install the flat glass panel in the bottom trim while centering the glass, and tighten into position. • Make sure the glass panel edges do not exceed the fireplace outer base circumference.
- Page 17 [Installation – Curved Fireplaces [TOP COVER POSITIONING: • While holding both flat glass panels parallel and perpendicular to the base, lower and position the top cover to rest on top of the glass edges. • Before lowering the top cover, adjust the height of the legs if necessary to ensure that the entire unit is level.
- Page 18 [Installation – Curved Fireplaces [FLAT GLASS PANEL INSTALLATION: • While the cover is positioned on top of the flat glass, make sure that the high temperature seal is still in place, and attach the top trim to the correct position. •...
- Page 19 [Installation – Curved Fireplaces [TOP GRILL INSTALLATION: • After securing the 2 internal flat glass panels and before continuing with the curved glass installation process, return the grill cover to the correct location, and secure it with the 4 Phillips screws. NOTE: Perform this step carefully to avoid damage to the glass panels.
- Page 20 Use only one top cover glass bracket for each glass panel until all 3 panels are in place. This allows for easier adjustments. The remaining brackets can be added later to complete the process. • Position the ORTAL logo plate to point to the fireplace front.
- Page 21 [Installation – Curved Fireplaces [CURVED GLASS PANEL INSTALLATION: • Install the next curved panel as in the previous step, and make sure that panel edges remain collinear and parallel after tightening the brackets. • Remove a single support strut at each step to enable insertion of each curved glass panel until glass installation is complete.
- Page 22 [Installation – Curved Fireplaces [CURVED GLASS PANEL INSTALLATION: • Before completing the installation of the last curved glass panel, arrange the logs or stone decorations on top of the burner. • After completing the logs or stone decorative arrangements, install the last curved glass panel to close off the fireplace.
- Page 23 [Installation – Curved Fireplaces [FINAL STEP: • Complete the glass brackets installation and make sure that all glass brackets are securely tightened on the top cover and the fireplace base circumference. • Replace the 4 peripheral decorative covers on the magnetic supports to complete the installation process.
-
Page 24: Maintenance – Curved & Island Fireplaces
[Maintenance – Curved & Island Fireplaces [MAINTANANCE: The following maintenance instructions are for Round & Island Fireplaces (Island 130 and Standalone 7565 Curved Tunnel) An annual maintenance procedure MUST be performed by a licensed installer! The installer must verify the working condition of the entire fireplace installation and specifically the following items: Internal Glass - Verify that the straight internal glass panels are in good shape: No chips, cracks or breaks. -
Page 25: Installation – Wall Mounted Curved Fireplaces
[Installation – Wall Mounted Curved Fireplace [VENT PIPE ASSEMBLY Position the vent pipe cone in place according to the manufacturer’s instructions. Thread the vent pipe segment into place according to the manufacturer’s instructions. Prop the vent pipe segments above the fireplace using a piece of wood or metal. - Page 26 [Installation – Wall Mounted Curved Fireplace [POSITIONING THE FIREPLACE Remove the glass panels from the fireplace and slide the fireplace, without the lower base, into place under the vent pipe cone. This is achieved by first laying the fireplace on its side and then straightening it underneath the cone.
- Page 27 [Installation – Wall Mounted Curved Fireplace [AFFIXING FIREPLACE IN PLACE The fireplace needs to be affixed to the wall. For safety purposes, the fireplace must not be hung using the holes indicated in the illustration.
- Page 28 [Installation – Wall Mounted Curved Fireplace [VENT PIPE ASSEMBLY Remove the 5 bolts holding the small ring in the center of the top cover of the fireplace. Then remove the small ring and place it on the burner on the lower part of the fireplace.
- Page 29 [Installation – Wall Mounted Curved Fireplace [FINISHING INSTALLATION At this point, lower the vent pipe segment from the top cover of the fireplace (threaded through the cone in an earlier step). Connect the vent pipe segment to the large ring using drill screws.
-
Page 30: Installation – Island Models
[Installation – Island Models [BEFORE YOU BEGIN THE ISLAND FIREPLACE ASSEMBLY: • Wear protective gloves when handling fireplace components. • Make sure that you have TWO installers present during installation or service process. • Note: If you stop at any point in the installation process, make sure that any exposed parts are protected from project site debris. - Page 31 [Installation – Island Models [INSTALLATION • Secure the legs of the unit to the base and make sure that the unit is level and aligned in the correct position per the design. • Install and secure the 2 temporary supporting profiles at the corners of the island.
- Page 32 [Installation – Island Models [INSTALLATION • Fit the glass upper retaining strips into position, and finger tighten them only at this stage while it still supports the top weight panel. • Install selected interior media per image. Place media (e.g., rocks, pebbles) in the center and not between the exterior and interior short sides on either side.
- Page 33 [Installation – Island Models [INSTALLATION • Cut the flue parts as necessary, and place the canopy into position with the flue inside, as indicated by the installation clearances. • Lift the canopy and join the flue joint to the fire top panel, ensuring that the joint is sealed and mechanically sound.
- Page 34 [Bordelet Chimney Assembly Instruction...
-
Page 35: Ortal Chimney Assembly Instruction
[Ortal Chimney Assembly Instructions Assembly Instructions for a chimney on a Installation on a sloped roof Installation on a flat roof sloped roof. Adjust the tilt mechanism to match the slope of the roof. Attach the stabilizers to the roof beams using 4 M10 screws •... -
Page 36: Glass Types
[Glass Types (for double glass models) -
Page 37: Log Sets And Stones
[Log Sets and Stones [English Long Branch and English Short Branch for Burner 45 [White Stones (SMALL PEBBLES) for Burner 45 2 LONG BRANCHES and 5 SHORT BRANCHES and one Bag 4 Bags (Beige) [Visit our website for additional information regarding logs and pebbles. -
Page 38: Clearances For Circle 70 Eu / 7565 Curved Tunnel
[Clearances for Circle 70 EU / 7565 Curved Tunnel... - Page 39 [Clearances for Circle 70 EU / 7565 Curved Tunnel for DG...
Need help?
Do you have a question about the CIRCLE 70 and is the answer not in the manual?
Questions and answers