Philips DE5205 User Manual
Hide thumbs
Also See for DE5205:
- User manual (214 pages) ,
- User manual (74 pages) ,
- User manual (22 pages)

Subscribe to Our Youtube Channel
Related Manuals for Philips DE5205


Summary of Contents for Philips DE5205
- Page 1 DE5205 User Manual © 2016 Koninklijke Philips N.V. All rights reserved. 4241 210 92651...
-
Page 3: Table Of Contents
Contents 6 Cleaning 1 Important Safety Cleaning the body of the dehumidifier 2 Your Philips 2-in-1 Air Cleaning the water tank Dehumidifier and Purifier Cleaning the pre-filter Product Overview (fig.a) Cleaning the air quality sensor Controls Overview (fig.b) 3 Getting started... -
Page 4: Important
If the power cord is • damaged, you must have Safety it replaced by Philips, a service center authorized Read this user manual carefully before by Philips, or similarly you use the dehumidifier, and save it for future reference. - Page 5 Do not block the air inlet Do not use this • • and outlet, e.g. by placing dehumidifier when you items on the air outlet or in have used indoor smoke- front of the air inlet. type insect repellents or in Do not insert your fingers places with oily residues, •...
- Page 6 Run the power cord under Do not stand on, sit • • carpeting, rugs, or runners. on, or lean against the Arrange the cord away dehumidifier. This may from areas where it may be cause the dehumidifier to tripped over. tip over causing injury.
- Page 7 Only use the original cooking. • Philips filters specially If the appliance is not used • intended for this appliance. for a long period of time, Do not use any other filters.
-
Page 8: Your Philips 2-In-1 Air Dehumidifier And Purifier
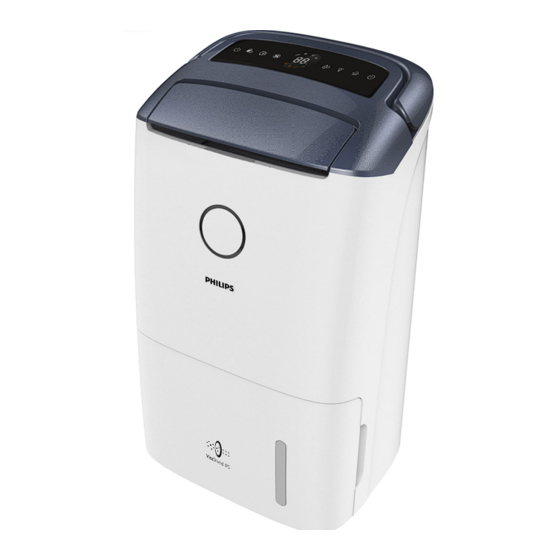
2 Your Philips 2-in-1 Air Dehumidifier and Purifier Congratulations on your purchase, and welcome to Philips! To fully benefit from the support that Philips offers, register your product at www.Philips.com/welcome. Product Overview (fig.a) Unilateral rotating wheels Handle Display panel Louver... -
Page 9: Getting Started
3 Getting started Positioning the dehumidifier To increase the dehumidifying Installing the filter effectiveness, position the dehumidifier in a location that can draw the most air. Note Note Make sure that the appliance is • When the dehumidifier is operating, •... -
Page 10: Using The Dehumidifier
4 Using the Touch the button once to turn on the appliance (fig.h). dehumidifier » The current humidity level is displayed on the screen. » After measuring the air quality for a short time, the air quality The air quality light sensor automatically selects the color of the air quality light. -
Page 11: Changing The Fan Speed
Continuous mode Note In continuous mode, the appliance Do not point the airflow of the • constantly works with the optimal dehumidifier directly at the body dehumidifying settings. for a prolonged period of time, especially where there is someone Touch the button repeatedly to who is unable to adjust the select the continuous mode (fig.j). -
Page 12: Using The Swing Function
Touch the fan speed button Setting the Timer select the desired fan speed (fig.o). » The fan speed and display With the timer function, you can let on the screen. the dehumidifier operate for a set Touch the button again to exit number of hours. -
Page 13: Setting The Child Lock
5 Draining the Note dehumidifier During defrosting, the dehumidifier • operates in clothes dry mode. The dehumidifier will resume • working and operate the previous settings after defrosting is Emptying the water tank completed. When the water tank is full: Setting the child lock »... -
Page 14: Cleaning
6 Cleaning Remove the water tank from the dehumidifier (fig.v). Insert the Philips provided hose into the drainage hole (fig.{). Note Push the protective cover of • Always turn the appliance off and drainage outlet rightwards to open unplug the appliance from the it (fig.|). -
Page 15: Cleaning The Water Tank
Allow the pre-filter to air dry Cleaning the water tank thoroughly before placing back in the dehumidifier. Clean the water tank every day to keep it clean. Note Switch off the dehumidifier and To optimize the lifetime of the unplug from the electrical outlet. •... -
Page 16: Cleaning The Air Quality Sensor
7 Replacing the Cleaning the air quality HEPA filter sensor Clean the air quality sensor every 2 months for optimal functioning of the dehumidifier. HEPA filter replacement indicator Note If the humidity level in the room • This dehumidifier is equipped with a is very high, condensation may HEPA filter replacement indicator to develop on the air quality sensor... -
Page 17: Storage
8 Storage Note Do not touch the pleated filter • surface, or smell the filters as they Turn off the dehumidifier and have collected pollutants from the unplug from the wall outlet. air. Clean the dehumidifier, air quality sensor, empty the water tank and Remove all packaging material from wash the pre-filter (see chapter the new HEPA filter (fig.e). -
Page 18: Troubleshooting
This chapter summarizes the most common problems you could encounter with the dehumidifier. If you are unable to solve the problem with the information below, visit ontact the Consumer Care Center in your country www.philips.com/support or c for assistance. Problem Possible solution •... - Page 19 Problem Possible solution The airflow that comes out of the air outlet • The pre-filter is dirty. Clean the pre-filter (see chapter is significantly "Cleaning"). weaker than before. The air quality • One of the filters has not been placed in the appliance. does not improve, Make sure that all filters are properly installed in the even though the...
-
Page 20: Guarantee And Service
If EMF standards applicable at the time of there is no Consumer Care Center in producing the products. your country, go to your local Philips Philips is committed to develop, dealer. produce and market products that cause no adverse health effects.
Need help?
Do you have a question about the DE5205 and is the answer not in the manual?
Questions and answers
I have been using my Philips DE5205 for 2 months now and the water tank has not collected any water. Everything seems to we working (auto turns on and off) but the tank is bone dry. The humidity level is set to 50% and that value fluctuates by a few % as the machine is turned on /off. Is my machine dehumidifying or is it broken?