
Related Manuals for Philips DE5205/81


Summary of Contents for Philips DE5205/81
- Page 1 DE5205/81 DE5206/81 DE5207/81 User manual ZH-T 使用手冊 © 2021 Philips Domestic Appliances Holding B.V. All rights reserved. 3000 059 53741...
-
Page 3: Table Of Contents
Contents 1 Important 6 Cleaning Safety Cleaning the body of the dehumidifier 2 Your Philips 2-in-1 Air Cleaning the water tank Dehumidifier and Purifier Cleaning the pre-filter Cleaning the air quality Product Overview (fig.a) sensor Controls Overview (fig.b) 3 Getting started... -
Page 4: Important
If the power cord is • damaged, you must have Safety it replaced by Philips, a service center authorized Read this user manual carefully before by Philips, or similarly you use the dehumidifier, and save it for future reference. - Page 5 Do not block the air inlet Do not use this • • and outlet, e.g. by placing dehumidifier when you items on the air outlet or in have used indoor smoke- front of the air inlet. type insect repellents or in Do not insert your fingers places with oily residues, •...
- Page 6 Run the power cord under Do not stand on, sit • • carpeting, rugs, or runners. on, or lean against the Arrange the cord away dehumidifier. This may from areas where it may be cause the dehumidifier to tripped over. tip over causing injury.
- Page 7 Only use the original cooking. • Philips filters specially If the appliance is not used • intended for this appliance. for a long period of time, Do not use any other filters.
-
Page 8: Your Philips 2-In-1 Air Dehumidifier And Purifier
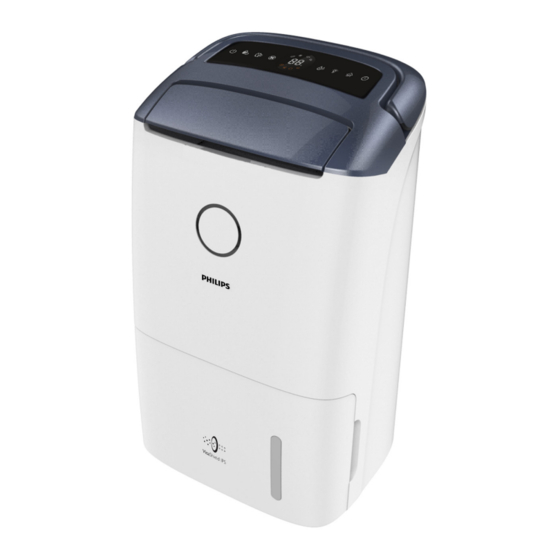
2 Your Philips 2-in-1 Air Dehumidifier and Purifier Congratulations on your purchase, and welcome to Philips! To fully benefit from the support that Philips offers, register your product at www.Philips.com/welcome. Product Overview (fig.a) Handle Unilateral rotating wheels Louver Display panel... -
Page 9: Getting Started
3 Getting started Positioning the dehumidifier To increase the dehumidifying Installing the filter effectiveness, position the dehumidifier in a location that can draw the most air. Note Note Make sure that the appliance is • When the dehumidifier is operating, •... -
Page 10: Using The Dehumidifier
4 Using the Touch the button once to turn on the appliance (fig.h). dehumidifier » The current humidity level is displayed on the screen. » After measuring the air quality for a short time, the air quality The air quality light sensor automatically selects the color of the air quality light. -
Page 11: Changing The Fan Speed
Continuous mode Note In continuous mode, the appliance Do not point the airflow of the • constantly works with the optimal dehumidifier directly at the body dehumidifying settings. for a prolonged period of time, especially where there is someone Touch the button repeatedly to who is unable to adjust the select the continuous mode (fig.j). -
Page 12: Using The Swing Function
Touch the fan speed button Setting the Timer select the desired fan speed (fig.o). » The fan speed and display With the timer function, you can let on the screen. the dehumidifier operate for a set Touch the button again to exit number of hours. -
Page 13: Setting The Child Lock
5 Draining the Note dehumidifier During defrosting, the dehumidifier • operates in clothes dry mode. The dehumidifier will resume • working and operate the previous settings after defrosting is Emptying the water tank completed. When the water tank is full: Setting the child lock »... -
Page 14: Cleaning
6 Cleaning Remove the water tank from the dehumidifier (fig.v). Insert the Philips provided hose into the drainage hole (fig.{). Note Push the protective cover of Always turn the appliance off and • drainage outlet rightwards to open unplug the appliance from the it (fig.|). -
Page 15: Cleaning The Water Tank
Allow the pre-filter to air dry Cleaning the water tank thoroughly before placing back in the dehumidifier. Clean the water tank every day to keep it clean. Note Switch off the dehumidifier and To optimize the lifetime of the unplug from the electrical outlet. •... -
Page 16: Cleaning The Air Quality Sensor
Replacing the Cleaning the air quality HEPA filter sensor Clean the air quality sensor every 2 months for optimal functioning of the dehumidifier. HEPA filter replacement indicator Note If the humidity level in the room • This dehumidifier is equipped with a is very high, condensation may HEPA filter replacement indicator to develop on the air quality sensor... -
Page 17: Storage
8 Storage Note Do not touch the pleated filter • surface, or smell the filters as they Turn off the dehumidifier and have collected pollutants from the unplug from the wall outlet. air. Clean the dehumidifier, air quality sensor, empty the water tank and Remove all packaging material from wash the pre-filter (see chapter the new HEPA filter (fig.e). -
Page 18: Troubleshooting
This chapter summarizes the most common problems you could encounter with the dehumidifier. If you are unable to solve the problem with the information below, visit ontact the Consumer Care Center in your country www.philips.com/support or c for assistance. Problem Possible solution •... - Page 19 Problem Possible solution The airflow that comes out of the air outlet • The pre-filter is dirty. Clean the pre-filter (see chapter is significantly "Cleaning"). weaker than before. The air quality • One of the filters has not been placed in the appliance. does not improve, Make sure that all filters are properly installed in the even though the...
-
Page 20: Guarantee And Service
If requirements and to stay well within the there is no Consumer Care Center in EMF standards applicable at the time of your country, go to your local Philips producing the products. dealer. Philips is committed to develop, produce and market products that cause no adverse health effects. - Page 21 目錄 1 重要事項 7 更換HEPA濾網 HEPA 濾網更換指示燈 安全 更換 HEPA 濾網 2 您的飛利浦清淨除濕機 產品概覽 (圖 a) 8 收納 控制項概覽 (圖 b) 9 疑難排解 3 快速入門 10 保固與服務 安裝濾網 擺放除濕機 訂購零件或配件 4 使用除濕機 11 聲明 電磁場 (EMF) 空氣品質指示燈 開關機 回收 設定濕度 變更風速...
-
Page 22: 重要事項
重要事項 基於安全考慮,在缺乏監督 • 及適當指示之下,本產品不 適用於孩童及任何身體、知 覺或心理功能障礙者,或缺 安全 乏使用經驗及知識者。 請勿讓孩童將產品當成 • 在使用除濕機前,請先仔細閱讀本使用手 玩具。 冊,並保留說明以供日後參考。 請勿透過插入及拔出電源線 危險 • 的方式來開關除濕機。 請勿在除濕機周圍噴灑殺蟲 • 請勿在出風口上方或進風口 劑或芳香劑等任何易燃物 • 前面放置物品,擋住進出 質,以免發生觸電和/或火災 風口。 等危險。 請勿將手指或物體插入進風 請勿飲用除濕後蓄積的水, • • 口及出風口,以免身體受傷 亦勿用於飼養動物或澆灌植 或產品故障。 物。清空水箱時,請將水倒 入排水孔。 注意 請勿頻繁開關本產品。 警示 • 如果為除濕機供電的電源插 在連接本產品的電源之前,... - Page 23 請勿在燃氣設備、加熱裝置 不得摔落除濕機,否則可能 • • 或壁爐附近使用除濕機。 造成個人傷害、損壞地板, 請勿在浴室或其他有水的地 或因漏水而損及家用品。 • 方使用除濕機,避免除濕機 請勿在除濕機頂部放置任何 • 被水弄濕或沖濕。 物品。 使用本除濕機乾衣時,請將 請勿站或坐在除濕機上,也 • • 衣物懸掛在一定距離以外的 不得依靠在除濕機上,否則 地方,以免衣物殘留的水滴 可能使除濕機傾倒,進而造 滴入除濕機。 成傷害。 本除濕機為家用產品,僅限 請勿移除或拆解水箱中的浮 • • 於正常操作環境 (5°C - 35°C) 標,否則除濕機無法偵測滿 下使用。 水,可能會導致溢水。 請勿在溫差變化極大的地方 請勿使用清潔劑、清潔液、 • • 使用除濕機。 研磨粉、經化學處理的除塵...
- Page 24 請勿將產品放置在冷氣機正 請勿坐在或站在產品上。 • • 下方,以免冷氣機滴水, 本產品配備單邊滾輪,站或 造成產品發生短路以及漏電 坐在本產品上可能引發潛在 危險。 傷害。 請僅使用產品專用的飛利浦 • 保險絲規格: 原廠濾網。請勿使用其他 T2.0A 250V 濾網。 T5.0A 250V 焚燒濾網可能對人體或其他 • 生物造成不可逆的損害。請 勿將濾網當成燃料,或以類 似目的使用濾網。 請務必使用產品頂部的握把 • 提起或搬動產品。 請勿在溫差變化極大的地方 • 使用除濕機,否則可能會造 成除濕機內部凝結水珠。 請將本產品遠離使用無線電 • 電波的電器至少 2 公尺以避 免干擾,例如電視、無線電 廣播、無線電信號控制的 時鐘。 本產品無法清除一氧化碳 •...
-
Page 25: 您的飛利浦清淨除濕機
2 您的飛利浦清淨除濕機 感謝您購買本產品。歡迎來到飛利浦的世界! 請至 www.Philips.com/welcome 註冊您的產品,以獲得飛利浦提供的完整支援。 產品概覽 (圖 a) 握把 單邊滾輪 送風葉片 顯示面板 出風口 連續排水口 空氣品質感測器 電源線 空氣品質指示燈 進風口後護蓋 水箱 進風濾網 奈米級勁護濾網HEPA S1系列 軟管 (FY1119) 控制項概覽 (圖 b) 電源開/關按鈕 濕度設定按鈕 兒童安全鎖按鈕 燈光開/關按鈕 自動搖擺風向按鈕 空氣淨化專用模式按鈕 風速設定按鈕 定時按鈕 顯示屏幕 顯示屏幕 HEPA 濾網更換警示... -
Page 26: 快速入門
3 快速入門 4 使用除濕機 空氣品質指示燈 安裝濾網 空氣品質指示燈顏色 空氣品質等級 藍色 很棒 備註 紫羅蘭色 普通 • 安裝濾網前,請確定產品插頭已拔掉。 紫紅色 不健康 紅色 很不健康 使用本產品前,請先拆下濾網所有包裝材 料,並將濾網放入產品內,如下所述。 產品電源開啟後,空氣品質指示燈會自動 拉開後護蓋頂部,將其自產品取下 亮起,並依序閃爍所有燈色。過一會兒 (圖 c)。 後,空氣品質感測器會選擇符合周遭空氣 取出 HEPA 濾網和進風濾網 粒子品質的相應顏色。 (圖 d)。 拆下 HEPA 濾網的所有包裝材料 開關機 (圖 e)。 先將 HEPA 濾網放入除濕機,接著再 備註... -
Page 27: 設定濕度
手動 設定濕度 • 重複按下風速設定按鈕 ,選擇所需 風速 (圖 l)。 您可將濕度設定在百分之 、 、 、 或 。 乾衣模式 按一或多下 按鈕設定想要的濕度 • 若要選擇乾衣模式,按下 按鈕直到 值,濕度指示燈隨之亮起 (圖 i) 。 為止 (圖 m)。 顯示 » 除濕機隨即進入乾衣模式。 備註 » 除濕機會以最高風速運作。 • 當濕度降至選擇的濕度值時,除濕機便 及 出現在螢幕上。 » 會自動停止除濕,但風扇會繼續運轉。 未設定濕度,預設值是 60%。 •... -
Page 28: 使用搖擺功能
除濕機除霜 備註 • 無論產品目前的運作模式為何, 按下 按鈕時便會進入空氣淨化專用 備註 模式。 • 除霜功能只有在除濕機於除濕模式下運 • 濕度設定和乾衣模式在空氣淨化專用模 作時才會啟用。 式下會關閉。 本除濕機配備了除霜感測器,用以確保於 使用搖擺功能 寒冷天氣使用時仍處於最佳狀態。除濕機 會自動偵測是否有必要除霜。 導風葉片能向上搖擺至 90 度。使用搖擺功 如有必要除霜: 能引導氣流。 » 指示燈會亮起 (圖 s)。 按下 按鈕,啟動搖擺功能 » 隨即開始除霜,直至除濕機完全除 (圖 p)。 霜為止。 再按一下 按鈕,停用搖擺功能。 備註 秘訣 • 解凍期間,除濕機處於乾衣運作模式。 •... -
Page 29: 使用燈光開/關按鈕
5 清空除濕機水箱 使用燈光開/關按鈕 透過開/關燈按鈕,就能視需要開啟或 關閉空氣品質指示燈、顯示螢幕及功能 清空水箱 指示燈。 按一下開/關燈按鈕 ,空氣品質指示 水箱滿水時: 燈隨即熄滅。 » 產品會發出嗶聲, 指示燈亮 再按一下開/關燈按鈕 ,顯示螢幕 起。 隨即變暗。 » 產品隨即自動進入空氣淨化專用 三度按下開/關燈按鈕 ,所有燈號即 模式。 會再次亮起。 將手指放入除濕機的側凹處,輕拉出水 箱。握住水箱兩邊,將其從除濕機取出 (圖 v)。 把水倒入水槽 (圖 w)。 用乾淨的布擦乾水箱外部 (圖 x)。 將水箱放回除濕機中(圖 y)。 備註 • 水箱清空後,除濕機即會恢復運轉。 使用連續排水 本除濕機亦能連接軟管排水。如此可讓除... -
Page 30: 清潔除濕機的機體
6 清潔 備註 • 使用連續排水時仍需將水箱放回除濕 機,否則除濕機無法正常運作。 備註 • 請確認軟管已上緊,以防除濕機漏水。 • 使用連續排水時,請確認軟管平放且 • 清潔前請務必關閉本產品電源,並從電 未打結。 源插座拔掉插頭。 • 確認軟管未浸在水中,且低於連續排 • 切勿讓產品浸入水或其他液體中。 水孔。 • 切勿使用漂白劑或酒精等具磨蝕性或刺 • 將軟管出水口放在能輕易排水的地方。 激性的洗劑清潔產品的任何部分。 • 長時間連續排水或無人看顧時,請每週 • 只有進風濾網可水洗。空氣清淨濾網不 檢查除濕機一次。 可水洗。 • 勿試圖 以吸塵器清理濾網或空氣品質 感測器。 清潔除濕機的機體 定期清潔除濕機的內部與外殼,可避免累 積灰塵。 使用柔軟乾布清潔產品的內外部。 出風口亦可使用柔軟乾布清潔。 清潔水箱... -
Page 31: 清潔進風濾網
清潔進風濾網 清潔空氣品質感測器 每 2 個月清理一次空氣品質感測器,可確 當螢幕顯示F0和 時,請清潔進風濾網。 保除濕機發揮最佳效果。 備註 備註 • 進風濾網可水洗並可用吸塵器清潔。 • 若房間濕度過高,空氣品質感測器可能 有水滴凝結,在這種情況下,縱使空氣 關閉除濕機的電源,從電源插座拔掉 品質良好,空氣品質指示燈也可能指示 插頭。 空氣品質不佳。若發生此種情形,請清 潔空氣品質感測器,或依手動風速設定 握住除濕機,將後護蓋頂部朝自己拉出 (圖 c)。 使用本除濕機。 • 若在佈滿灰塵的環境中使用除濕機,可 從本產品拆下進風濾網 (圖 €)。 能需要更常清潔。 如果進風濾網很髒,請使用軟刷來清除 灰塵。以流動的自來水清洗進風濾網 關閉除濕機的電源,從電源插座拔掉 (圖 )。 插頭。 先確保進風濾網徹底風乾後,再放回 請使用軟刷來清潔空氣品質感測器的進 除濕機。 風口及出風口 (圖 ƒ)。 備註... -
Page 32: 更換Hepa濾網
8 收納 更換HEPA濾網 HEPA 濾網更換指示燈 關閉除濕機的電源,從電源插座拔掉 插頭。 清潔除濕機、空氣品質感測器、清空 本除濕機配備了 HEPA 濾網更換指示燈, 水箱並清洗進風濾網 (參閱「清潔」單 用以確認除濕機運作時濾網處於最佳狀 態。當 HEPA 濾網需更換時,螢幕即會顯 元)。 示 HEPA 濾網更換警示 收納之前,請確保所有零件徹底乾燥。 。 若 14 天未更換 HEPA 濾網,除濕機會停止 將濾網和進風濾網分別包在氣密塑膠 運作並自動鎖定。您得立即更換 HEPA 濾 袋中。 網。 將除濕機、濾網和進風濾網存放在涼爽 乾燥處。 更換 HEPA 濾網 接觸過濾網後,請務必徹底清洗雙手。 備註... -
Page 33: 疑難排解
9 疑難排解 本單元概述您使用除濕機時可能遇到的常見問題。如果下方資訊無法解決您遇到的問題,請 聯絡您所在國家/地區的客戶服務中心 造訪 www.philips.com/support,或 尋求協助。 問題 可能的解決方法 • 計時器設為特定時間間隔。重設或關掉計時器。 • 嘗試插入不同的電源插座或檢查電源開關。 產品插電並開機後仍 • 請確認水箱已清空並正確放入除濕機。 舊無法運轉。 • 濾網警示狀態會顯示濾網代碼。更換相應濾網,並重設濾網壽 命計數器 (參閱「更換濾網」單元)。 • 即使除濕機電源已開 濾網更換指示燈持續亮起,但卻未更換相應濾網,如今產品已 啟,仍無法運作。 鎖定。在此情況下,請更換濾網並重設濾網壽命計數器。 水箱已清空但 指 • 從除濕機移除水箱,再將它放回除濕機。 示燈仍亮起。 • 請確認濾網潔淨且處於良好狀態。 • 請確認入風口和出風口未堵住。 房內無除濕或除濕效 • 房間濕度低於除濕機設定值。選擇較低濕度。 果低。 •... - Page 34 問題 可能的解決方法 • 使用除濕機的前幾分鐘,可能會產生塑膠味。這是正常現象。 濾網髒污時除濕機可能也會飄出異味。在此情況下,請清潔或 除濕機飄生異味。 更換濾網。 • 若除濕機飄出燒焦味,請關機並拔掉插頭。聯絡您所在國家/地 區的客戶服務中心尋求協助。 • 如果除濕機噪音很大,可將風速變更為較低的速度等級。夜間 除濕機過大聲。 於臥室使用本產品時,請選擇較低風速。 • 請確認除濕機安放在平穩處。 除濕機不斷要求更換 • 您或許未重設濾網壽命計數器。將除濕機插上電源,按下 啟 濾網,但濾網已經更 按鈕 3 秒。 動除濕機,按住定時 換了。 螢幕顯示錯誤代碼 「E1」、「E2」、 • 除濕機故障。請聯絡您所在國家/地區的客戶服務中心。 「E3」、「E4」或 「E5」。 ZH-T...
-
Page 35: 保固與服務
10 保固與服務 11 聲明 電磁場 (EMF) 若您需要相關資訊,或是有任何問題,請 造訪飛利浦網站:www.philips.com,或 聯絡您所在國家/地區的飛利浦客戶服務中 本飛利浦產品符合所有電磁場暴露的相關 心 (您可在全球保證書上找到電話號碼)。 適用標準和法規。 若您所在國家/地區沒有客戶服務中心, 請洽詢當地的飛利浦經銷商。 符合 EMF 標準 Philips Domestic Appliances Holding 訂購零件或配件 B.V. 製造銷售多項消費性產品,這些產品就 如同其他電器,通常能收發電磁訊號。 如果您必須更換零件或想購買其他零件, 飛利浦的一大企業原則,就是針對自身的 請聯絡您的飛利浦經銷商,或造訪 產品進行必要的健康與安全檢測,以符合 www.philips.com/support。 所有適用的法律規定,以及在產品生產期 如果您有取得零件方面的問題,請聯絡您 間符合適用的 EMF 標準。 所在國家/地區的飛利浦客戶服務中心 (您 飛利浦致力於開發、生產及銷售不危害健 可在全球保證書上找到電話號碼)。... - Page 36 設備名稱:飛利浦清淨除濕機, 型號(型式): DE5205/81 DE5206/81 Equipment name DE5207/81 Type designation (Type) 限用物質及其化學符號 Restricted substances and its chemical symbols 單元 Unit 鉛 汞 鎘 六價鉻 多溴聯苯 多溴二苯醚 Hexavalent Polybrominated Polybrominated Lead Mercury Cadmium chromium biphenyls diphenyl ethers (Pb) (Hg) (Cd) (PBB) (PBDE) 馬達...
Need help?
Do you have a question about the DE5205/81 and is the answer not in the manual?
Questions and answers