
Related Manuals for Sunny SF-E906


Summary of Contents for Sunny SF-E906
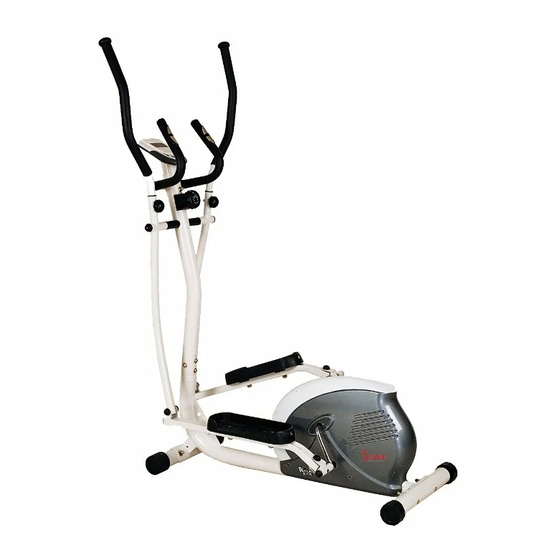
- Page 1 MAGNETIC ELLIPTICAL TRAINER SF-E906 USER MANUAL IMPORTANT! Read all instructions carefully before using this product. Retain owner’s manual future reference. customer service, please contact: support@sunnyhealthfitness.com...
-
Page 2: Important Safety Information
IMPORTANT SAFETY INFORMATION We thank you for choosing our product. To ensure your safety and health, please use this equipment correctly. It is important to read this entire manual before assembling and using the equipment. Safe and effective use can only be assured if the equipment is assembled, maintained, and used properly. -
Page 3: Exploded Drawing
EXPLODED DRAWING... -
Page 4: Specification
PARTS LIST SPECIFICATION SPECIFICATION Alloy wrap Φ28*4*Φ24*12*Φ16.1 Main frame Alloy wrap Φ32*3*Φ28*21*Φ19.4 Front stabilizer Bushing Φ32*Φ25*L83 Rear stabilizer Handlebar post 36L/R Chain cover 5L/R Handle bar Crank 250*165*72.5*1/2*20 Screw ST4*19*Φ7 6L/R Swing rod Foam grip Φ26*5*510 Screw M5*16 Middle handlebar Screw M8*16 Foam grip Φ23*5*420 Bolt M8*16... -
Page 5: Assembly Instructions
ASSEMBLY INSTRUCTIONS STEP 1: Attach the Front & Rear Stabilizer (No. 2 & 3) onto the Main Frame (No. 1) with 4 Bolt (No.42), 4 Arc Washer (No. 56) and 4 Nuts (No. 57). - Page 6 STEP 2: Connect the Sensor Wire (No. 15) with Trunk Line (No. 14). Next, connect the Tension Control (No. 19) with the Tension Wire (No. 20). NOTE: Before connecting these wires, set the Tension Control (No. 19) to the lowest tension, Level 1.
- Page 7 STEP 3: Attach the Swing Rod (No. 6L/R) onto the Handlebar Post (No. 4) using Bolt (No. 41), Spring Washer (No. 52), Wave Washer (No. 51) and Washer (No. 49). Finish by attaching the End Caps (No. 27). Attach the Connecting Rod (No. 10L/R) onto the crank on the Main Frame (No. 1) using Bolts (No.
- Page 8 ATTENTION The Right & Left Hinge Bolt (No. 47R/L) must fully penetrate the nylon ring inside the pedal arm joint and the cranks. This will ensure the stability and durability of your Elliptical Trainer. In order to install hinge bolt properly, keep it perfectly straight as the bolt goes through the pedal arms and the crankshaft.
- Page 9 STEP 4: Insert the Handlebars (No. 5L/R) into the corresponding Swing Rods (No. 6L/R) and lock using Knob (No. 30). Finish off by attaching the End Caps (No. 27).
- Page 10 STEP 5: A ttach the Pedals (No. 12L/R) onto the Connecting Rod (No. 10L/R) with the Bolts (No. 44), Washers (No. 50) and Nuts (No. 58).
- Page 11 STEP 6: Use Bolt (No. 43), Arc Washer (No. 56), Spring Washer (No. 52) and Nut (No. 57) to attach the Middle Handlebar (No. 8) onto the Handlebar Post (No. 4).
- Page 12 STEP 7: Connect the wire of Computer (No. 13) with Trunk Line (No. 14). Secure Computer (No. 13) onto the Handlebar Post (No. 4) with Screw (No. 17) then insert Hand Pulse Wire (No.16) into the hole on the back of Computer (No. 13). The assembly is now complete!
-
Page 13: Exercise Instructions
EXERCISE INSTRUCTIONS Using your elliptical bike will provide you with several benefits. It will improve your physical fitness, tone your muscles, and in conjunction with a calorie controlled diet, help you lose weight. WARM-UP PHASE The purpose of warming up is to prepare your body for exercise and to minimize injuries. Warm up for two to five minutes before strength-training or aerobic exercising. -
Page 14: Exercise Computer
EXERCISE COMPUTER FUNCTIONAL BUTTONS: MODE: Press to select functions. Press and hold the MODE button for 3 seconds to reset time, distance and calories. SET: (if available) Press to set values of time, pulse, distance and calories when not in scan mode. -
Page 15: Specifications
SPECIFICATIONS: Auto Scan Every 6 seconds Running Time 00:00 ~ 99:59 (Minute:Second) The max pick-up signal is Current Speed 999.9KM/H or MILE/H (or 9999RPM) FUNCTION Trip Distance 0.0 ~ 999.9 KM or MILE Calories 0 ~ 9999 Kcal Total Distance 0 ~ 9999 KM or MILE Pulse Rate 40-240BPM...
Need help?
Do you have a question about the SF-E906 and is the answer not in the manual?
Questions and answers