Table of Contents
Advertisement
Advertisement
Table of Contents

Subscribe to Our Youtube Channel
Related Manuals for Logik L66DAB11


Summary of Contents for Logik L66DAB11
- Page 1 DAB Radio Instruction Manual L66DAB11...
-
Page 4: Table Of Contents
Contents Unpacking ............................5 Product Overview ..........................6 Front View .................................. 6 Rear View ................................... 6 Control Panel ................................7 Power Source ..........................8 Mains Power ................................8 Battery Power ................................8 Battery Life (Approx. hours) ..........................8 Knowing when to Replace the Batteries ......................8 Connections ...........................9 Connecting to the Earphones Socket...................... -
Page 5: Unpacking
Thank you for purchasing your new Logik DAB Radio. We recommend that you spend some time reading this instruction manual in order that you fully understand all the operational features it offers. You will also find some hints and tips to help you resolve any issues. -
Page 6: Product Overview
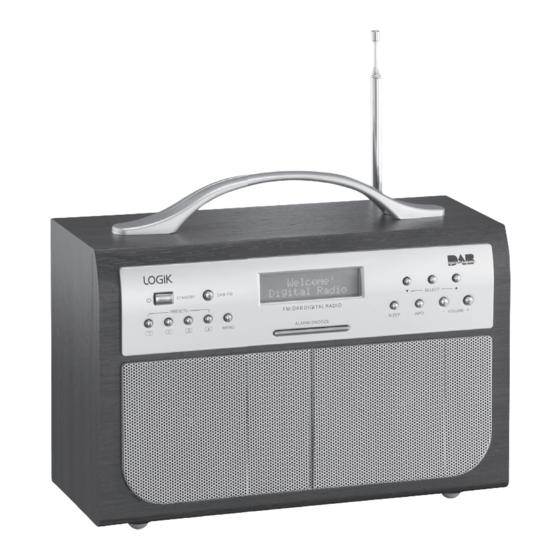
Product Overview Front View STANDBY DAB/FM SELECT FM / D AB D IG I TAL R A D I O MENU SLEEP SLEEP INFO – VOLUME ALARM/SNOOZE 1. Handle 3. Speakers 2. Control Panel Rear View 1. DAB / FM Aerial 3. -
Page 7: Control Panel
Control Panel STANDBY DAB/FM SELECT FM / DA B D I GITA L R A D IO – MENU SLEEP INFO VOLUME ALARM/SNOOZE STANDBY Button 7. PRESETS 1-4 Buttons To switch the unit to STANDBY / ON mode. To set a preset station 2. -
Page 8: Power Source
Power Source Mains Power Connect the mains cable (included) to the AC Socket and then the mains socket. To the Mains Socket Battery Power Insert 4 x C type (UM-2/R14) batteries (not included) correctly by following the polarity (+ or –) indications in the battery compartment. -
Page 9: Connections
Handling the Batteries • Improper or incorrect use of batteries may cause corrosion or battery leakage, which could cause personal injury or damage to property. • Install the batteries correctly by following the polarity (+ and –) indications in the battery compartment. -
Page 10: Basic Operation
Basic Operation Powering ON/OFF When you first connect the unit to the mains socket. The unit will be in STANDBY mode. STANDBY button to switch the unit on. • Press the STANDBY button again to switch the unit off. • Press the •... -
Page 11: Activating The Alarm Function And Selecting The Wake-Up Mode
Activating the Alarm Function and Selecting the Wake-up Mode To activate the alarm function, press the ALARM/SNOOZE button repeatedly to select the wake-up mode. The corresponding wake-up modes will change in sequence on every press as follows: BUZZER Stop pressing the button when the display shows your desired wake-up mode and the alarm is set. -
Page 12: System Reset
System Reset When you move the unit to another part of the country, your pre-tuned and stored DAB stations may no longer be available and you might need to reset the unit back to its original factory settings. To perform a factory reset, please do the following: Switch on the unit. -
Page 13: Dab Operation
DAB Operation If the unit is connected to the mains power and then switched on from standby for the first time, the unit will automatically enter into DAB mode and perform the auto scan function. During the scan the display will show “Scanning …”... -
Page 14: Manual Tuning
Manual Tuning As well as the auto tune function, you can manually tune the receiver. This can help you when aligning your aerial or when adding stations that were missed while auto tuning. Press the MENU button to enter the Tune Select Menu and then press the SELECT button to confirm. -
Page 15: Dab Display Modes
DAB Display Modes Every time you press the DISPLAY/INFO button, the display will cycle through the following display modes: Time/Date, Frequency, Audio Bit Rate, Signal Strength, DLS, Programme Type, Ensemble/Multiplex (Group name). The information is displayed on the lower segment of the display. Time/Date Time/Date The broadcaster (Radio station) provides clock... -
Page 16: Fm Operation
FM Operation Switching from DAB to FM Mode To switch the unit to FM mode, press the DAB/FM button repeatedly to select FM. The display will show the frequency. Auto Scan To search for an FM station, press and hold the buttons to start the forward/reverse auto scanning. -
Page 17: Fm Display Modes
FM Display Modes Every time you press the INFO button, the display will cycle through the following display modes: Programme Type, Time/Date, Radio Text, Channel Frequency. The information is displayed on the lower segment of the display. Programme Type Programme Type This describes the “Style”... -
Page 18: Maintenance
Maintenance Ensure to unplug the unit from the mains socket before cleaning. • To clean the unit, wipe the case with a slightly moist, lint-free cloth. • Do not use any cleaning fluids containing alcohol, ammonia or abrasives. • Do not spray an aerosol at or near the unit. Hints and Tips Problem Solution... -
Page 19: Safety Warnings
Safety Warnings • Read all the instructions carefully before using Ventilation the unit and keep them for future reference. • To prevent the risk of electric shock or fire hazard • Retain the manual. If you pass the unit onto a due to overheating, ensure that curtains and third party make sure to include this manual. - Page 20 Supervision Service • Children should be supervised to ensure that • To reduce the risk of electric shock, do not they do not play with the unit and the remote remove screws. The unit does not contain control. any user-serviceable parts. Please leave all maintenance work to qualified personnel.
- Page 21 NOTE: If you require a replacement for any of the items listed below, please quote their corresponding part numbers: Replacement Part Part Number Mains Cable 157-949072-313 Visit Partmaster.co.uk today for the easiest way to buy electrical spares and accessories. With over 1 million spares and accessories available we can deliver direct to your door the very next day.
Need help?
Do you have a question about the L66DAB11 and is the answer not in the manual?
Questions and answers