Table of Contents
Advertisement
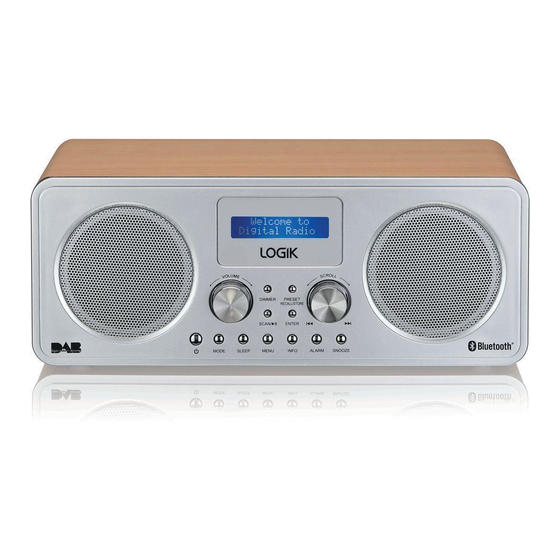
Safety Warnings - Bluetooth® DAB Radio
• Read all the instructions carefully before using
the unit and keep them for future reference.
• Retain the manual. If you pass the unit onto a
third party make sure to include this manual.
• Check that the voltage marked on the rating
label matches your mains voltage.
Damage
• Please inspect the unit for damage after
unpacking.
• Do not continue to operate the unit if you are
in any doubt about it working normally, or if it
is damaged in any way – switch off, withdraw
the mains plug and consult your dealer.
Location of Unit
• The unit must be placed on a flat stable
surface and should not be subjected to
vibrations.
• Do not place the unit on sloped or unstable
surfaces as the unit may fall off or tip over.
• The mains socket must be located near the
unit and should be easily accessible.
• This unit is designed for indoor use only.
Temperature
• Avoid extreme degrees of temperature, either
hot or cold. Place the unit well away from heat
sources such as radiators or gas/electric fires.
• Avoid exposure to direct sunlight and other
sources of heat.
Naked Flames
• Never place any type of candle or naked flame
on the top of or near the unit.
Moisture
• To reduce the risk of fire, electric shock or
product damage, do not expose this unit
to rain, moisture, dripping or splashing. No
objects filled with liquids, such as vases,
should be placed on the unit.
• If you spill any liquid into the unit, it can cause
serious damage. Switch it off at the mains
immediately. Withdraw the mains plug and
consult your dealer.
Ventilation
• To prevent the risk of electric shock or fire
hazard due to overheating, ensure that
curtains and other materials do not obstruct
the ventilation vents.
• Do not install or place this unit in a bookcase,
built-in cabinet or in another confined space.
Ensure the unit is well ventilated.
Safety
• Always disconnect the unit from the mains
supply before connecting/disconnecting
other devices or moving the unit.
• Unplug the unit from the mains socket during
a lightning storm.
Mains Adapter Cable
• Make sure the unit or unit stand is not resting
on top of the mains adapter cable, as the
weight of the unit may damage the cable and
create a safety hazard.
Mains Adapter
• The mains adapter will continue to draw
electricity from the mains supply when
plugged in the mains socket. In the interests
of safety and to avoid unnecessary energy
consumption, never leave the adapter
plugged in the mains socket while unattended
for long periods of time. Disconnect the
adapter from the power supply.
The mains plug is used as disconnect
device, the disconnect device shall
remain readily operable.
Interference
• Do not place the unit on or near appliances
which may cause electromagnetic
interference. If you do, it may adversely affect
the operating performance of the unit, and
cause a distorted picture or sound.
1
Advertisement
Table of Contents

Related Manuals for Logik L75DAB20


Summary of Contents for Logik L75DAB20
- Page 1 Safety Warnings - Bluetooth® DAB Radio Ventilation • Read all the instructions carefully before using the unit and keep them for future reference. • To prevent the risk of electric shock or fire • Retain the manual. If you pass the unit onto a hazard due to overheating, ensure that curtains and other materials do not obstruct third party make sure to include this manual.
- Page 2 Supervision • Children should be supervised to ensure that they do not play with the unit and the remote control. • Never let anyone especially children push anything into the holes, slots or any other openings in the case - this could result in a fatal electric shock.
- Page 3 Visit Partmaster.co.uk today for the easiest way to buy electrical spares and accessories. With over 1 million spares and accessories available we can deliver direct to your door the very next day. Visit www.partmaster.co.uk or call 0344 800 3456 (UK customers only). Calls charged at National Rate.
- Page 4 Currys Group Limited (co. no. 504877) 1 Portal Way, London, W3 6RS, UK EU Representative Currys Ireland Limited (259460) 3rd Floor Office Suite, Omni Park SC, Santry, Dublin 9, Republic of Ireland Bluetooth DAB Radio-Safety Warnings-211207V2...
- Page 5 Bluetooth® DAB Radio Instruction Manual L75DAB20...
-
Page 6: Table Of Contents
Contents Unpacking .............................. 4 Product Overview ..........................5 Front View .....................................5 Rear View ....................................6 Connections ............................7 Using the AUX Connection.............................7 Using Earphones ................................7 Charging from the USB Charging Port ........................8 Connecting to the Mains Power ......................9 Basic Operation ...........................10 Powering ON/OFF ................................10 ECO-Power Mode ................................10 Selecting Modes ................................10... - Page 7 FM Display Mode ................................19 Bluetooth® Operation ..........................20 AUX IN Operation ..........................21 Maintenance ............................21 Hints and Tips ............................21 Specification ............................22 Main Unit ...................................22 Mains Adapter (Use only provided adapter) ......................23...
-
Page 8: Unpacking
Thank you for purchasing your new product. We recommend that you spend some time reading this instruction manual in order that you fully understand all the operational features it offers. You will also find some hints and tips to help you resolve any issues. -
Page 9: Product Overview
Product Overview Front View DIMMER PRESET RECALL/STORE SCAN/ ENTER MODE SLEEP MENU INFO ALARM SNOOZE 1. Display 6. MODE Button 11. PRESET/RECALL/ STORE Button 2. DIMMER Button 7. SLEEP Button 12. ENTER Button 3. SCAN / Button 8. MENU Button 13. -
Page 10: Rear View
Rear View DC IN AUX IN 1. Aerial Earphones Socket 3. AUX IN Socket 4. USB 5V 1A socket 5. DC IN Socket... -
Page 11: Connections
Connections Using the AUX Connection Use a 3.5mm to RCA stereo audio cable to connect the audio output socket of the audio device to the AUX IN socket of the unit. Rear of the Unit Auxiliary Equipment (not included) DC IN AUX IN 3.5 mm to 3.5 mm stereo audio cable (not included) -
Page 12: Charging From The Usb Charging Port
Charging from the USB Charging Port The USB 5V 1A socket is designed only for charging mobile devices (e.g. MP3 player, mobile phone, etc.). It supplies 5V DC at a charging current of up to 1000 mA (1 A). Use a USB cable (not included) to connect mobile device to the USB 5V 1A socket of the unit and the mobile device will start charging. -
Page 13: Connecting To The Mains Power
Connecting to the Mains Power Before using, connect the supplied power cable to the mains cable socket at the rear of the unit and to the mains socket. Rear of the Main Unit To the Mains Socket DC IN AUX IN This unit will automatically scan for DAB radio stations when switched on for the first time. -
Page 14: Basic Operation
Basic Operation Powering ON/OFF Standby button to switch the unit on. • Press the Standby button again to switch the unit back to Standby mode. • Press the • To switch the unit off completely, disconnect the mains adapter from the mains socket. ECO-Power Mode This unit features an ECO-Power/Standby mode. -
Page 15: Manually Setting The Time And Date
Manually Setting the Time and Date You can manually set the time and date if you wish. Make sure you have set No update in Auto update settings. Otherwise, your radio will automatically find the correct time from a radio station and change the time. 1. -
Page 16: Setting The Alarm
Setting the Alarm Make sure you have preset FM and DAB stations before setting the Alarm. 1. The unit has two alarms. Press the ALARM button to set alarm 1 or alarm 2. The display will show “Alarm # Setup”. 2. -
Page 17: Sleep Function
Sleep Function This function allows you to program the unit to switch off by itself after a set period of time. 1. Press the SLEEP button to activate the Sleep Timer, “Set sleep time” shows on the display. Press the SLEEP button repeatedly or turn the SCROLL dial to adjust the setting. -
Page 18: Dab Operation
DAB Operation Ensure that you fully extend the aerial vertically before switching the unit on. When the unit is connected to the mains power and then switched on from standby for the first time, or you have just performed a factory reset the unit will automatically enter into the DAB mode and perform auto scan function. -
Page 19: Manual Tuning
Manual Tuning As well as the auto scan functions, you can manually tune the radio. This can help if you know your radio has missed stations. You will need to know which multiplex the missing radio station is in. 1. Press the MENU button and then turn the SCROLL dial to select Manual tune, and then press the ENTER button to confirm. -
Page 20: Dab Display Mode
DAB Display Mode Every time you press the INFO button, the lower segment of the display will cycle through the following display modes: Signal Strength Signal Strength The display will show a slide bar to indicate the signal strength, the stronger the signal, the longer the bar will be from left to right. -
Page 21: Fm Operation
FM Operation Switching from DAB to FM Mode Press the MODE button repeatedly to select FM mode. The display will show FM and then the current frequency. Auto Scan Ensure that you fully extend the aerial vertically before starting the auto scan. 1. -
Page 22: Storing Stations
Storing Stations You can store up to 30 of your favourite FM stations to the memory. This will enable you to access your favourite stations quickly and easily. 1. To store a preset, you must first be listening to the station that you would like to save, press and hold the PRESET RECALL/STORE button for about 2 seconds. -
Page 23: Fm Display Mode
FM Display Mode Every time you press the INFO button, the lower segment of the display will cycle through the following display modes: Radio Text Radio Text This displays the information about the current programme. Programme Type This describes the “Style” or “genre” of music that is Programme Type being broadcast e.g. -
Page 24: Bluetooth® Operation
1. Press the MODE button repeatedly to select Bluetooth mode. The word “Ready“ will flash on the display. 2. Activate your Bluetooth® device and select the search mode. “L75DAB20” will appear on your Bluetooth® device list. 3. Select “L75DAB20” and enter “0000” for the password if necessary. Once the connection is successful, the display will show “Connected“. -
Page 25: Aux In Operation
AUX IN Operation Before connecting to the mains socket, use the 3.5 mm audio stereo cable (not included) to connect to your external audio device through the AUX IN socket at the rear of the unit. 1. Press the MODE button repeatedly to select Auxiliary Input mode. 2. -
Page 26: Specification
• If reception is still poor, adjust the position of the aerial. Bluetooth Problem Solution I cannot find “L75DAB20” • Ensure the Bluetooth function is activated on your on my Bluetooth device. Bluetooth device. • Re-pair the unit with your Bluetooth device. -
Page 27: Mains Adapter (Use Only Provided Adapter)
Ecodesign Information Power Consumptions of Information 0.90 W on Power Standby mode Consumes Network Standby Power Consumptions Time interval for Power management function When unit is not in use for 15 switches the unit automatically into standby minutes, it switches to standby mode mode automatically;... - Page 28 Product Manuals and enter the model number. Declaration of Conformity (RER) Hereby, Currys Group Limited declares that the radio equipment type [L75DAB20] is in compliance with Radio Equipment Regulations 2017 (S.I. 2017/1206). The full text of the UK declaration of conformity is available at the following internet address: https:// www.currys.co.uk/...
Need help?
Do you have a question about the L75DAB20 and is the answer not in the manual?
Questions and answers