Table of Contents
Advertisement
Quick Links
Advertisement
Table of Contents

Related Manuals for Qiagen QIAgility


Summary of Contents for Qiagen QIAgility
- Page 1 November 2011 QIAgility User Manual ® Sample & Assay Technologies...
- Page 2 Biotechnologies, Inc.); Excel , Microsoft , Windows (Microsoft Corporation). Registered names, trademarks, etc. used in this document, even when not specifically marked as such, are not to ® ® ® be considered unprotected by law. © 2009-2011 QIAGEN, all rights reserved.
-
Page 3: Table Of Contents
Symbols on the QIAgility Introduction About this user manual General information 2.2.1 Technical assistance 2.2.2 Policy statement 2.2.3 Version management Intended use of the QIAgility 2.3.1 Requirements for QIAgility users General Description QIAgility principle The QIAgility 3.2.1 Instrument lid (1) 3.2.2 Feet (2) 3.2.3... - Page 4 Software installation 4.6.1 Uninstalling QIAgility software 4-14 Folders 4-14 4.7.1 “QProtocols” folder 4-16 4.7.2 Connecting the computer to the QIAgility 4-17 4.7.3 COM port configuration 4-17 4.7.4 Installation of AC power cord 4-18 Hardware Wizard 4-18 Setting up the QIAgility...
- Page 5 5-38 5.6.10 Set liquid-level tracking error level 5-39 5.6.11 Set tip usage options 5-41 5.6.12 Configure multi-eject options 5-43 Define worktable setup 5-44 5.7.1 Plate operations 5-44 5.7.2 Setting tip availability 5-52 Managing samples 5-53 QIAgility User Manual 11/2011 Contents-3...
- Page 6 Executing a run 6.4.1 Q Protocols 6.4.2 Selecting a saved run file 6.4.3 Creating a new run file 6.4.4 Preparing the worktable 6-10 6.4.5 Starting a run 6-11 Pausing/aborting a run 6-12 Exception handling 6-13 Contents-4 QIAgility User Manual 11/2011...
- Page 7 Removing and replacing the tip ejector chute 8.2.3 Replacing the HEPA filter Troubleshooting System setup Operation Warnings and errors 9.3.1 Warning and error messages 9.3.2 Instrument error codes Self diagnostic tools 9-10 9.4.1 Mechanical tests 9-12 9.4.2 Electrical tests 9-12 QIAgility User Manual 11/2011 Contents-5...
- Page 8 Safety Information (French, FR) Consignes de sécurité Utilisation appropriée Sécurité électrique Sécurité biologique 1.3.1 Échantillons Produits chimiques 1.4.1 Vapeurs toxiques Traitement des déchets Dangers mécaniques Sécurité relative à la maintenance Symboles sur le QIAgility C-10 Contents-6 QIAgility User Manual 11/2011...
- Page 9 1.3.1 Proben Chemikalien 1.4.1 Giftige Dämpfe Abfallentsorgung Gefahren durch mechanische Teile Sicherheitshinweise – Wartungsarbeiten Symbole auf dem QIAgility D-11 Appendix E ABI 7000/7500 SDS master mix naming conventions Appendix F Advanced Settings Appendix G Description of the Generic XML Format...
- Page 10 Contents This page intentionally left blank Contents-8 QIAgility User Manual 11/2011...
-
Page 11: Safety Information
Safety Information Safety Information Before using the QIAgility, it is essential that you read this user manual carefully and pay particular attention to the safety information. The instructions and safety information in the user manual must be followed to ensure safe operation of the instrument and to maintain the instrument in a safe condition. - Page 12 Risk of overheating [W2] CAUTION To ensure proper ventilation, maintain a minimum clearance of 10 cm at the sides and rear of the QIAgility. Slits and openings that ensure the ventilation of the QIAgility must not be covered. WARNING/ Risk of personal injury and material damage...
-
Page 13: Electrical Safety
Never click any buttons while parts of your body are within the instrument workspace. In case of emergency, switch off the QIAgility at the power switch at the rear of the instrument and unplug the power cord from the power outlet. -
Page 14: Biological Safety
Safety Information If the instrument becomes electrically unsafe, prevent other personnel from operating it, and contact QIAGEN Technical Services. The instrument may be electrically unsafe when: The line power cord appears to be damaged. It has been stored for a prolonged period of time in ... -
Page 15: Chemicals
For information on use and disposal of the tip disposal box, please see Section 3.2.8. For information about how to dispose of the QIAgility at the end of its economic life, see Appendix A. QIAgility User Manual 11/2011... -
Page 16: Mechanical Hazards
Do not apply any manual force to the Y-arm (i.e. the pipetting head). We strongly recommend restarting the system if the Y-arm was accidentally manually moved. To ensure satisfactory and safe operation of the QIAgility: Only use recommended tips and tip racks. Keep the instrument lid closed whenever possible. -
Page 17: Maintenance Safety
Safety Information Maintenance safety Perform the maintenance as described in Section 8. QIAGEN charges for repairs that are required due to incorrect maintenance. WARNING/ Risk of personal injury and material damage [W13] CAUTION Only perform maintenance that is specifically described in this user manual. -
Page 18: Symbols On The Qiagility
Safety Information Symbols on the QIAgility Symbol Location Description On the back Warning symbol of the instrument Near the tip Biohazard symbol chute outlet, and on the front edge of the worktable On the front Squeezing symbol edge of the... - Page 19 Location Description Type plate on RoHS mark for China (the the back of the restriction of the use of instrument certain hazardous substances in electrical and electronic equipment). Back of the Consult instructions for use instrument QIAgility User Manual 11/2011...
- Page 20 Safety Information This page intentionally left blank 1-10 QIAgility User Manual 11/2011...
-
Page 21: Introduction
Introduction Introduction Thank you for choosing the QIAgility. We are confident it will become an integral part of your laboratory. Before using the QIAgility, it is essential that you read this user manual carefully and pay particular attention to the safety information. -
Page 22: General Information
QIAGEN products. If you have any questions or experience any difficulties regarding the QIAgility or QIAGEN products in general, do not hesitate to contact us. -
Page 23: Policy Statement
QIAgility, the instrument is intended for the applications described in the respective QIAGEN kit handbooks. If the QIAgility is used with other than QIAGEN kits, it is the user’s responsibility to validate the performance of the product combination for any particular application. -
Page 24: Requirements For Qiagility Users
Introduction 2.3.1 Requirements for QIAgility users This table covers the general level of competence and training necessary for transportation, installation, use, maintenance, and servicing of the QIAgility. Task Personnel Training and experience Delivery No special requirements No special requirements Installation... -
Page 25: General Description
— up to 96 PCR reactions can be set up in approximately 30 minutes. Level sensing, facilitated by conductive tips, enables high-precision pipetting. 1. The QIAgility worktable is set up with a Master Mix Block, a Reagent Block, tips and plates/tubes. The instrument is then calibrated. -
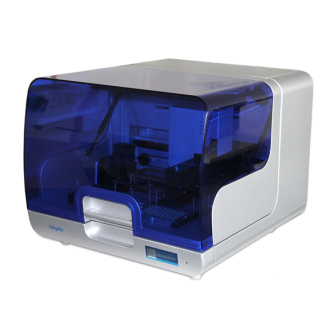
Page 26: The Qiagility
General Description The QIAgility Pipetting head (Robotic arm) Feet Tip Rack Holder and tips Tip chute Tip Rack Holder and tips HEPA filter Master Mix Block and Reagent Block UV lamp QIAgility User Manual 11/2011... -
Page 27: Instrument Lid
Feet (2) The feet of the instrument have a non-slip silicone base to ensure that the QIAgility remains securely positioned on a laboratory bench. Do not attempt to slide the instrument on a bench. Always lift the instrument to avoid damage to the silicone base of the feet. -
Page 28: Tip Chute
Tip chute. Tips used on the worktable are discarded through the tip chute. Located at the left hand side of the QIAgility, the tip chute is held in place by a locating block, allowing easy placement and removal for cleaning. -
Page 29: Uv Lamp
To operate the UV lamp: 1. Make sure that the UV lamp bulb is connected to the UV plug. 2. Make sure that the QIAgility instrument lid is securely closed. For increased safety, an electronic interlock ensures that the UV lamp operates only when the instrument lid is closed. -
Page 30: Pipetting Head (6) And Robotic Arm
Under no circumstances should the user apply any force to the Y-arm. This may misalign the arm and cause pipetting errors. Note: To prevent accidental damage, the wooden Y-arm support should always be fixed or locked before the QIAgility is moved. 3.2.7 Worktable The worktable is the instrument surface upon which items, such as plates, reagents, and tips are placed. -
Page 31: Accessory Panel
General Description 3.2.9 Accessory panel QIAgility accessory panel. Accessory 1 USB socket Accessory 2 Accessory power outlet Accessory 3 Main power input socket Serial RS-232 socket Power switch QIAgility User Manual 11/2011... -
Page 32: Internal Features Of The Qiagility
General Description 3.2.10 Internal features of the QIAgility X-axis Worktable Master Mix Block Y-axis Reagent Block Z-axis Pipetting head cover Tip Rack Holders and tips Pipetting head Y-arm Pipetting hub Tip ejector QIAgility User Manual 11/2011... - Page 33 The worktable has 6 SBS positions (127.76 mm x 85.48 mm) in which Tip Rack Holders and plates are located. In addition, the worktable supports the Master Mix Block and Reagent Block. The silver paint is epoxy paint which is hard wearing and UV resistant. QIAgility User Manual 11/2011...
- Page 34 General Description Master Mix Block The master mix block is intended to hold diluent and master mix on the worktable. The QIAgility is supplied with 2 Master Mix Blocks which can hold: 5 x 5 ml free-standing tubes 1 x 5 ml free-standing tubes, and 4 x 1.5 ml tapered ...
- Page 35 General Description Adapters The QIAgility is supplied with 3 SBS adapters: 2 x Adapter, 96 x 0.2 ml PCR Tubes 1 x Adapter, Flip-Cap 32 x 1.5 ml Tapered Base The 96-well adapters are intended to hold strip tubes and unskirted and half-skirted PCR plates.
- Page 36 General Description Sample tubes A range of tube types can be used with the QIAgility. The following sample tubes are supplied with the instrument: 5 ml free-standing tubes 200 µl PCR tubes Note: Supplied sample tubes are not guaranteed to be sterile.
-
Page 37: Liquid-Level Tracking
General Description Liquid-level tracking The QIAgility can track the liquid level using 1 of 2 methods: liquid-level sensing or liquid-level estimate. Liquid-level sensing For maximum accuracy and precision, the QIAgility is equipped with a liquid-level sensor. This feature enables the instrument to automatically detect when the pipet tip makes contact with the liquid as the tip descends. -
Page 38: Computer
The QIAgility is operated via a computer. A laptop with the correct specification for operation of the QIAgility and QIAgility Software is supplied as part of the QIAgility System. However, if a different computer is used to operate the QIAgility or to run the QIAgility Software, then the following desktop or laptop hosting systems are recommended. - Page 39 General Description The computer connects to the QIAgility by one of the following interfacing options: RS-232 (computer) — RS-232 (QIAgility) (Recommended) USB (computer) — USB (QIAgility) USB (computer) — converter — RS-232 (QIAgility) PCMCIA (computer) — converter — RS-232 (QIAgility) ...
- Page 40 General Description This page intentionally left blank 3-16 QIAgility User Manual 11/2011...
-
Page 41: Installation Procedures
Note: We recommend checking the packing list before installation. Requirements Site Choose the position for the QIAgility carefully. A change in position necessitates a recalibration. Place the QIAgility in its final position. The requirements for the QIAgility location and position are... -
Page 42: Ac Power Connection
Risk of overheating [W2] CAUTIUON To ensure proper ventilation, maintain a minimum clearance of 10 cm at the sides and rear of the QIAgility. Slits and openings that ensure the ventilation of the QIAgility must not be covered. CAUTION Damage to the instrument... -
Page 43: Unpacking The Qiagility
Risk of personal injury and material damage [W3] CAUTION The QIAgility is too heavy to be lifted by one person. To avoid personal injury or damage to the instrument, do not lift the instrument alone. After unpacking the QIAgility, check that the following... -
Page 44: Installing The Qiagility
Read the packing list to check that you have received all items. If anything is missing, contact QIAGEN Technical Services. Check that the QIAgility is not damaged and that there are no loose parts. If anything is damaged, contact QIAGEN Technical Services. Make sure that the QIAgility has equilibrated to ambient temperature before operating it. - Page 45 Installation Procedures 2. Move the pipetting head to the right and remove the transport lock from the worktable. 3. Unscrew the Z-axis locking screw. When this screw is removed, the pipetting head will drop. QIAgility User Manual 11/2011...
-
Page 46: Uv Lamp
The HEPA filter system is installed and connected before shipping. Note: Instructions for exchanging the HEPA filter system are given in Section 8.2.3. 4.5.3 Instrument calibration Before the instrument is used, some calibrations are required: position and height calibrations, tip offset QIAgility User Manual 11/2011... -
Page 47: Computer Setup And Installation Of Software
Software installation Install the QIAgility Software as follows: 1. Insert the QIAgility Software CD into the CD-ROM of the computer. 2. The installer splash screen will be displayed after a few seconds. If the splash screen is not automatically displayed, click on “Start Menu”, select “Run”... - Page 48 Installation Procedures 5. Click “Yes” to continue. 6. The “QIAgility Setup Wizard” will appear. This wizard will guide you through the installation. Instructions are displayed on each screen of the wizard. Note: We recommend using the default settings for all screens.
- Page 49 “Yes” button. The calibration settings and run files will be retained. To maintain the previous version of the software, click on the “No” button and browse for a different installation directory. Click on the “Next” button to continue. QIAgility User Manual 11/2011...
- Page 50 12. Select the additional tasks and then click on the “Next” button. Select “Create a desktop icon” to create a desktop icon to easily launch the software. Select “Create a Quick Launch” icon to generate a quick launch icon. 4-10 QIAgility User Manual 11/2011...
- Page 51 Installation Procedures 13. Review the displayed details. Click on the “Install” button. 14. The QIAgility Software will now be installed onto your computer. This could take a few minutes. 15. If you are using Windows XP, the following message will appear.
- Page 52 For correct installation of USB drivers, click on the “Continue Anyway” button. 16. If you are using Windows 7, the following message will appear. For correct installation of USB drivers, click on the “Continue Anyway” button. 4-12 QIAgility User Manual 11/2011...
- Page 53 “Next” button to continue with the software installation. 18. To directly launch the QIAgility Software, select “Launch QIAgility” and then click on the “Finish” button. If you do not want to launch the QIAgility software immediately, click on the “Finish” button to complete the installation process.
-
Page 54: Uninstalling Qiagility Software
1. Select “Start/Settings/Control Panel”. The “Control Panel” window will open. 2. Double-click on the “Add or Remove Programs” icon. 3. Select “QIAgility” from the list of installed programs and then click on the “Remove” button. To uninstall the software via the “Programs” menu: 1. - Page 55 Data — Diagnostic support packages are saved in SupportPack- this folder. ages Help Contains a PDF of the QIAgility User Manual, version 3.0. HTML Contains a HTML version of the release notes. Integration Contains XSL transformation files for...
-
Page 56: Qprotocols" Folder
Note: If no Q Protocols are present in the “QProtocols” folder, the “Protocols” tab will not be available. If a specific Q Protocol is not saved in the “QProtocols” folder, it will not be listed when the “Protocols” tab is selected. 4-16 QIAgility User Manual 11/2011... -
Page 57: Connecting The Computer To The Qiagility
USB port on the computer. 4.7.3 COM port configuration The COM port used to connect the computer to the QIAgility must be correctly configured in the software to enable the software to communicate with the QIAgility instrument. By default, the software is configured to use COM1, and this corresponds to the first RS-232 port on the system. -
Page 58: Installation Of Ac Power Cord
QIAgility is switched on (see Section 4.5.4). Connect the QIAgility to the power outlet as follows: 1. Ensure that the power switch of the QIAgility is set to the off position. 2. Check that the voltage rating on the label at the back of the QIAgility matches the voltage available at the installation site. - Page 59 1. Select ”No, not this time”, and then click on the “Next” button. 2. We recommend that you select “Install the software automatically”. 3. Click on the “Next” button to continue. 4. Click on the “Continue Anyway” button. QIAgility User Manual 11/2011 4-19...
-
Page 60: Setting Up The Qiagility
Section 4.8 for more details. 1. Ensure that the instrument lid is closed. 2. Set the power switch of the QIAgility to the on position and switch the computer on. The pipetting head should move upwards. If this does not happen, please consult the Troubleshooting section of this user manual. - Page 61 See Section 7.1.1 for more details about how to do this. Note: Tip ejector calibration must be performed before any other calibrations. 8. Perform the remaining calibrations in the order listed in Sections 7.1.2 to 7.1.6. QIAgility User Manual 11/2011 4-21...
- Page 62 Installation Procedures This page intentionally left blank 4-22 QIAgility User Manual 11/2011...
-
Page 63: Qiagility Software
QIAgility Software QIAgility Software The easy-to-use QIAgility Software has been specially developed for use with the QIAgility instrument. The software simulates the instrument worktable and enables the user to follow the progress of a run in real time, by highlighting the position of the pipetting head on the worktable. -
Page 64: Virtual Mode
Mode” will not affect calibrations on the actual instrument. When the instrument is running in “Virtual Mode”, the following message will be displayed at the top of the main software window, indicating that the software is running in “Virtual Mode”. QIAgility User Manual 11/2011... -
Page 65: Main Software Window
This section outlines the options that are available from these menus. In addition, when the right-hand pane is open, the following icon is available from the menu bar. See Section 5.3.4 for QIAgility User Manual 11/2011... - Page 66 Save As Saves the run file under the current file name, or under a new file name selected by the user. Any previous version will be replaced. All parameters except tip availability are saved. QIAgility User Manual 11/2011...
- Page 67 Lists the 8 run files which have been used most recently. Left-click to select and open one of these run files. Exit Closes the QIAgility Software. “Control” menu The “Control” menu provides options to send the instrument to its home position, start a run, or pause/abort a run.
- Page 68 Section 5.10.2 for further details. Import well Opens the “Import Well Data” dialog box, data which enables sample and reaction data to be imported from a file to a selected sample or reaction plate. See Section 5.9.7 for further details. QIAgility User Manual 11/2011...
- Page 69 Enable Access displayed. Access control can only be Control enabled by an “Administrator”. See Section 5.4.3 for further details. User Enables creation of user groups. See management — Section 5.4.4 for further details. Users & Groups QIAgility User Manual 11/2011...
- Page 70 See Section 7.1.3. Robot setup — Calibrates the volume that is pipetted. Calibrate Ensures that the correct volume is volumes accurately and precisely pipetted. See Section 7.1.6. QIAgility User Manual 11/2011...
- Page 71 See Section 7.1.1. Robot setup — Enables selection of the COM port which is Select COM port used for communication with the QIAgility. See Section 5.11. Robot setup — In “Virtual Mode”, this option enables or Enable UV light disables a “virtual”...
- Page 72 Run settings — Enables the additional volume of standard Set standard to be defined. See Section 5.6.4. extra volume Run settings — Enables configuration of tip usage. See Set tip usage Section 5.6.11. options 5-10 QIAgility User Manual 11/2011...
- Page 73 Generate file of unique file names for reaction exports. names for Unique file names are based on the run file reaction export name, time, and date. A tick will appear when this function is enabled. QIAgility User Manual 11/2011 5-11...
-
Page 74: Appendix F
See Section 5.7.1. “Help” menu Contents Opens a pdf file of the QIAgility User Manual. Save support Creates a zipped support package. Select a package file location and then click on the “OK”... -
Page 75: Toolbar
The log file is updated as new runs are carried out, with the oldest data being deleted. See Section 6.7.3. About QIAgility Displays information about the QIAgility, including the version number, serial number and firmware number. QIAGEN contact details, which may be required to place orders or to request technical support, are also displayed. - Page 76 This icon is not enabled when a Q Protocol is loaded. Generates a pre-run report to assist with workspace setup for the current run. Opens a PDF file of the QIAgility User Manual. 5-14 QIAgility User Manual 11/2011...
-
Page 77: Mode Indicator
Q Protocol. Indicates that the run file which is currently open is a locked User-Developed Protocol. 5.3.3 Mode indicator When the software is operating in “Virtual Mode”, the following indicator is displayed. QIAgility User Manual 11/2011 5-15... -
Page 78: Software Workspace
B1, B2, C1 and C2. Positions for the Master Mix Block and Reagent Block are labeled M1 and R1. Status bar The status bar displays the current status of the instrument during a run. Software version This bar displays the current software version. 5-16 QIAgility User Manual 11/2011... - Page 79 Tip reuse option This bar indicates the tip reuse mode. Double-click on the bar to open the “Tip Usage” dialog box. See Section 5.6.11 for more details about setting tip usage options. QIAgility User Manual 11/2011 5-17...
- Page 80 Zoom Displays details about the current plate. Click on the ”OK” button to return to the Info main software window. Toggles between an image of the current plate and the plate schematic. Toggle 5-18 QIAgility User Manual 11/2011...
- Page 81 Close Closes the right-hand pane. Next No function. Please refer to Section 5.9.1 for detailed information about the “Tip” right-hand pane. Standard Please refer to Section 5.9.2 for detailed information about the “Standard” right-hand pane. QIAgility User Manual 11/2011 5-19...
-
Page 82: User Management
User management functions are accessed from the menu bar (“Options/User management”). 5.4.1 User identification Unlike software that requires separate login authentication, the QIAgility Software user is defined as the current Windows user logged on the laptop on which the software is installed. 5-20 QIAgility User Manual 11/2011... -
Page 83: User Classes
If required, standard Windows file system write-protection mechanisms may be used to protect run-file data. 5.4.2 User classes The QIAgility Software supports the following user groups: QIAgility Operator QIAgility Designer ... - Page 84 Enable and disable the access control function in the software (“Enable User Access” option, see Section 5.4.3, page 5-23) Update group membership for each of the QIAgility groups (if the Manager is also an Administrator) Administrator An “Administrator“ has all the access rights of a Manager.
-
Page 85: Enabling Access Control
Upgrading the software does not affect user access control. 5.4.3 Enabling access control Upon installation, the QIAgility Software user access control features are disabled and all users have “Manager” access. (See the previous section for user group descriptions.) A Manager enables the user access control with “Options/User management/Enable access control”. - Page 86 QIAgility Software 4. Select the group to which the selected user should be assigned (i.e., “Administrators”, “QIAgility Manager”, “QIAgility Designer”, or “QIAgility Operator”) in the “Windows Groups” panel. 5. Click the button to move the selected group into the “Guest’s Groups:” panel.
-
Page 87: Change Current User
Windows and restart the software. Alternatively, select “Options/User Management/Change Current User”. The “Change User” window appears. The new user must enter his username and password, and click “OK” to log on. QIAgility User Manual 11/2011 5-25... -
Page 88: Revert To First User
5.5.1 Save calibrations on setup disk To create a ‘Setup Disk’: 1. Select “Options/Calibration Management/Save calibrations on setup disk”. 5-26 QIAgility User Manual 11/2011... -
Page 89: Load Calibrations From Setup Disk
‘Setup Disk’ and can be transferred to another computer. 5.5.2 Load calibrations from setup disk To transfer calibration settings from a ‘Setup Disk’ to a different computer: 1. Select “Options/Calibration management/Load calibrations from setup disk”. QIAgility User Manual 11/2011 5-27... -
Page 90: Delete Multiple Calibrations
4. Click on the “Yes” button to overwrite the existing calibration settings. 5.5.3 Delete multiple calibrations To delete existing calibration settings: 1. Select “Options/Calibration management/Delete multiple calibrations”. 2. The “Delete Multiple Calibrations” dialog box will appear. 5-28 QIAgility User Manual 11/2011... -
Page 91: Configure Run Settings
Standard extra 50 µl volume Master mix extra 30 µl minimum extra volume, plus 1 volume µl extra volume per reaction Air volumes 7 µl Tip re-use Use each tip for one operation only QIAgility User Manual 11/2011 5-29... -
Page 92: Configure Tip Air Intake
4. Click on the “OK” button to return to the main software window. 5.6.2 Configure pipet speed To configure the pipetting speeds: 1. Select “Options/Run settings/Configure pipette speed”. 2. The “Configure Pipetting Options” dialog box will open. 5-30 QIAgility User Manual 11/2011... - Page 93 Defines the aspirate/eject speed when reaction speed pipetting to and from reaction wells. Mixing speed Defines the speed of all mixing operations. 4. Click on the “OK” button to return to the main software window. QIAgility User Manual 11/2011 5-31...
-
Page 94: Set Master Mix Extra Volume
Defines the additional volume of volume master mix which is added for each reaction. 3. Adjust the minimum extra volume and per-reaction volume. 4. Click on the “OK” button to return to the main software window. 5-32 QIAgility User Manual 11/2011... -
Page 95: Set Standard Extra Volume
A concentration unit can be assigned to make concentration values in the run more meaningful when presented in forms and in reports. The assigned unit does not change the way in which concentrations are handled or constructed. QIAgility User Manual 11/2011 5-33... -
Page 96: Allow Use Of Multiple Reagent Volumes
If deactivated, the user sees the simple reagents table in the reaction configuration form. If multiple volumes for at least one reagent are used, and the user tries to deactivate the option, a message box appears: 5-34 QIAgility User Manual 11/2011... -
Page 97: Set Default File Location
5.6.7 Set default file location The default file location for all saved files is C:\Program Files\QIAgility\Data. Run files are stored in this directory. This directory contains three subdirectories — “Logs”, “Reports” and “SupportPackages”. See Section 4.7 for more details about these subfolders. - Page 98 Enables configuration of liquid/reagent colors. Selection Enables configuration of colors that Colours represent a liquid function and that represent members of a sample bank. In addition, colors used for selection and highlight indications can be configured. Sample Colours 5-36 QIAgility User Manual 11/2011...
- Page 99 QIAgility Software Liquid Colours Selection Colours Enables selection of a color. Adds selected color. QIAgility User Manual 11/2011 5-37...
-
Page 100: Adjust Liquid Level-Tracking Options
(i.e., if the liquid is covered with foil, or if the liquid is non-conductive). Detect liquid Instructs the instrument to use the liquid- level using level sensor to track the liquid level. See sensor Section 3.3. 5-38 QIAgility User Manual 11/2011... -
Page 101: Set Liquid-Level Tracking Error Level
Section 5.7.1.) 5.6.10 Set liquid-level tracking error level If a tube contains insufficient liquid to complete a reaction setup, an error message will appear. User intervention will be required to continue with the run. QIAgility User Manual 11/2011 5-39... - Page 102 3. A tick will appear next to the option that has been selected. Note: All errors are reported in the post-run report, regardless of which liquid-level tracking error is selected. This cannot be disabled. 5-40 QIAgility User Manual 11/2011...
-
Page 103: Set Tip Usage Options
Maximum Defines the maximum number of times tips number of times are reused. This option is only available to re-use tips when tip reuse has been selected. QIAgility User Manual 11/2011 5-41... - Page 104 “Multi-Eject Settings” button becomes an option. Click on this button to configure multi-eject options. See Section 5.6.12 for more details. 6. Click on the “OK” button to return to the main software window. 5-42 QIAgility User Manual 11/2011...
-
Page 105: Configure Multi-Eject Options
200 µl tips). Specify Initial Select to specify initial ejection volumes. Ejection The initial ejection volume is the volume Volume that is aspirated and ejected into the source well before ejecting into target wells starts. QIAgility User Manual 11/2011 5-43... -
Page 106: Define Worktable Setup
(no options When the selected plate or segment has available) “Tip”, “Reaction”, “Mix”, or “Sample” function, further options will be available in this panel. See Sections 5.7.2, 5.8.1, and 5.9.4 for further details about these options. 5-44 QIAgility User Manual 11/2011... - Page 107 “Adding/removing an accessory” in this section. Change plate Enables the plate function to be changed. function A tick will appear next to the plate function that has been selected. See “Changing the plate function” in this section. QIAgility User Manual 11/2011 5-45...
- Page 108 “Selected Plate Information”. Pipette Order Enables the pipet order to be selected from a drop-down menu. Available options vary depending on the selected plate type. 5-46 QIAgility User Manual 11/2011...
- Page 109 (horizontal label order). Filter to: Enables the list of plates in the “Plate” panel to be filtered. Select “QIAGEN”, “Other”, “Tips”, “Favorites”, and/or “Calibrated”. If “QIAGEN” is selected, only QIAGEN plate types will be displayed in the “Plate” list.
- Page 110 There are 7 plate functions — “Sample”, “Reagent”, “Mix”, “Reaction”, “Standard”, “Diluent”, and “Tip”. Sample A sample is always added to a reaction last. Samples must be assigned to a sample bank before they can be used in a reaction setup. 5-48 QIAgility User Manual 11/2011...
- Page 111 Tips must be set to available or unavailable. To change the plate function: 1. Right-click on the plate, or the segment of a plate, that is to be changed. The plate operations menu will appear. QIAgility User Manual 11/2011 5-49...
- Page 112 An image of the accessory will appear. Alternatively, to remove an accessory, select “No accessory” from the drop-down menu. 4. Click on the “OK” button to return to the main software window. A plate which is associated with an accessory 5-50 QIAgility User Manual 11/2011...
- Page 113 Note: All other plates/segments, unless otherwise defined using this function, will use the method that is defined in the “Options” menu. See Section 5.6.9 for more details about how to configure liquid-level tracking options from the “Options” menu. QIAgility User Manual 11/2011 5-51...
-
Page 114: Setting Tip Availability
2. Right-click on the plate. Tip availability options will appear in the upper panel of the plate operations menu. Set selected tips Sets a group of tips to “Available” or to “Available”/- “Unavailable”. Before using this option, “Unavailable” tips must be selected. 5-52 QIAgility User Manual 11/2011... -
Page 115: Managing Samples
Bank” dialog box. The “Update Sample Bank” dialog box can be accessed from the plate operations menu, or from the “Sample” right-hand pane. See Section 5.9.5 for more detailed information about managing sample banks using the “Sample” right-hand pane. QIAgility User Manual 11/2011 5-53... - Page 116 Remove selected Opens the “Update Sample Bank” dialog wells from box and enables selected wells to be sample bank removed from an existing sample bank. 5-54 QIAgility User Manual 11/2011...
- Page 117 Select to create a new sample bank. Insert a sample bank name. Sample bank names must be unique within the run. Existing Bank Select to modify an existing sample bank. Current sample banks that are defined for the selected plate/segment are listed. QIAgility User Manual 11/2011 5-55...
- Page 118 Adds selected wells to the sample bank. The and Close “Update Sample Bank” dialog box will then be closed. Delete Selection Deletes selected wells from the sample and Close bank. The “Update Sample Bank” dialog box will then be closed. 5-56 QIAgility User Manual 11/2011...
- Page 119 1. To select all of the wells within a plate, left-click on a plate with “Sample” or “Reaction” function. To select a group of wells within a plate, left-click on the plate and then drag. Selected positions will be highlighted red. QIAgility User Manual 11/2011 5-57...
-
Page 120: View And Edit Information Using The Right-Hand Pane
Tip availability is updated in real time while the software is operating, and is recorded when software is shut down. Tip availability should therefore be correct when the software is restarted. However, correct tip availability should always be checked before starting a run. 5-58 QIAgility User Manual 11/2011... -
Page 121: Standards
QIAgility Software Two tip types can be used with the QIAgility — 50 µl and 200 µl. In the software worktable, 50 µl tips are colored blue, and 200 µl tips are colored red. To view information about current tip availability, tip requirements, tip location and tip type, left-click on a plate with “Tip”... - Page 122 If desired, click in the box and enter a different name. No. of dilution Defines the number of dilution concentrations concentrations. Concentrations Defines the concentration of the first of first standard. standard Enable mixing Enables mixing during dilution. during dilution 5-60 QIAgility User Manual 11/2011...
- Page 123 3. If desired, click in the “Standard name” field and enter a different name for the premade standard dilution series. 4. Enter the number of dilution concentrations. The “Standard Data” table will automatically be updated with default dilution ratios and concentrations. QIAgility User Manual 11/2011 5-61...
- Page 124 3. After entering each concentration, click on the “OK” tab to update the table. If desired, click on the “Restore Defaults” button to return to the original default concentrations. 4. Click on the “OK” button. 5-62 QIAgility User Manual 11/2011...
- Page 125 8. Specify the “Minimum volume to prepare if unused”. Alternatively, the dilution series can be set up from a list of concentrations. To do this: 1. Select “Use standard?” and “Use pre-mixed standard series?”. QIAgility User Manual 11/2011 5-63...
-
Page 126: Reagents
When the per-reaction volume of reagent is <1 µl (i.e., outside the QIAgility pipetting range), the reagent must be added to a master mix. Reagents are set up using the “Reagent” right-hand pane. To view the “Reagent”... - Page 127 Viscous? Enables a reagent to be defined as viscous. If a reagent is defined as viscous, a lower pipetting speed will be used. QIAgility User Manual 11/2011 5-65...
-
Page 128: Master Mix
5.9.4 Master Mix Master mixes can be prepared using the QIAgility, or a premade master mix can be used. Master mixes can be added to reaction wells. By default, master mix is pipetted into a reaction well first, because it normally constitutes the greatest volume of the reaction. - Page 129 A commercial master mix, and the individual primers, must be defined as reagents in the software and then combined into a master mix by the QIAgility. By default, master mixes are located on the Master Mix Block, but they can also be located on other plates. Master mixes are set up using the “Mix”...
- Page 130 “Master mix extra volume” option in the “Run settings” menu. This setting is ignored when the mix is used in at least one reaction configured in the run. 5-68 QIAgility User Manual 11/2011...
- Page 131 Select to save the master mix setup. Enter a file name and a location, then click on the “Save” button. This option is useful when the master mix is used regularly, but the sample and reaction configuration changes. QIAgility User Manual 11/2011 5-69...
- Page 132 Instructs the instrument to pause after the manually load final component of the master mix has reagents after been added. This allows the user time to final ingredient manually add more reagents to the master added mix. 5-70 QIAgility User Manual 11/2011...
- Page 133 3. Define the “No. of times to mix each reagent”, and the “No. of times to mix at end”. 4. If desired, select “Wait for confirmation after adding final ingredient?” and “Wait for confirmation after performing final mix?”. These options are useful if extra reagents QIAgility User Manual 11/2011 5-71...
- Page 134 Master Mix Block and repeat the above procedure. Changing the reagent insertion order Diluent is usually the component with the largest volume and is therefore, by default, added to the master mix first. However, the insertion order can be adjusted. 5-72 QIAgility User Manual 11/2011...
- Page 135 Preparing master mix without reaction setup Master mixes can be prepared without being assigned to a reaction. To do this: 1. Set up a master mix, as described in the “Preparing a master mix for reaction setup” section. QIAgility User Manual 11/2011 5-73...
- Page 136 1. Click on the “Load” button in the “Machine-mixed Master Mix” panel. 2. Select a file and then click on the “Open” button. 3. The “Reagent Selector” window will appear. The reagents are listed in the “Reagents” panel in white boxes. 5-74 QIAgility User Manual 11/2011...
- Page 137 When a master mix has been setup using the right-hand pane, the master mix can be copied to a different well which also has “Mix” function. To copy a master mix: 1. Right-click on a well which contains a master mix. QIAgility User Manual 11/2011 5-75...
-
Page 138: Samples
Sample banks can be continuous groups of wells, or a combination of individual wells, but they cannot span multiple plates or plate segments. See Section 5.9.7 for more detailed information about importing and exporting data into the “Sample” right-hand pane. 5-76 QIAgility User Manual 11/2011... - Page 139 Displays the “Update Sample Bank” dialog box, which enables a new sample bank to be created. See Section 5.8.1. Edit Bank Displays the “Update Sample Bank” dialog box, which enables an existing sample bank to be modified. See Section 5.8.1. QIAgility User Manual 11/2011 5-77...
- Page 140 (vertical pipette order), but to export the data by row (horizontal label order). Copy all Select to copy the “Sample Data” list. The data can be pasted into an Excel file. 5-78 QIAgility User Manual 11/2011...
- Page 141 2. An additional column will appear in the sample list. 3. To add or remove a sample from a sample bank, left- click on a cell within this column. A checkbox will appear in the cell. QIAgility User Manual 11/2011 5-79...
-
Page 142: Reactions
It also enables reaction data to be imported from a spreadsheet and exported to another file. See Section 5.9.7 for more detailed information about importing and exporting information into the “Reaction” right-hand pane. 5-80 QIAgility User Manual 11/2011... - Page 143 “Reaction List” and then click on the “Copy” button. If there is more than one reaction in the list, a submenu will appear. Select “Copy in- place?”, “Copy to end of list?” or “Cancel”. QIAgility User Manual 11/2011 5-81...
- Page 144 Click on the icon again to remove the highlights. Highlights diluent, standards and sample banks, which are involved in a selected reaction, in orange. Click on the icon again to remove the highlights. 5-82 QIAgility User Manual 11/2011...
- Page 145 (vertical pipetting order), but to export the data by row (horizontal label order). Copy all Select to copy the “Reaction Data” list. The data can be pasted into an Excel file. QIAgility User Manual 11/2011 5-83...
- Page 146 This is different to the data presented when hovering the cursor over a reaction well on the software worktable. In this case, only liquids added to the well are shown. 5-84 QIAgility User Manual 11/2011...
- Page 147 Where the selected liquid handling operation supports the action, the highlighted wells can be directly entered into a sample bank as follows. Right-click the liquid handling operation to show the “Create Sample Bank from QIAgility User Manual 11/2011 5-85...
- Page 148 “Add” button from the “Reaction” right-hand pane. When the option “Allow multiple reagent volumes” is activated in the “Run Settings” menu (see section 5.6.6) the “Reaction Configuration” dialog box is displayed with the advanced reagents view: 5-86 QIAgility User Manual 11/2011...
- Page 149 Defines the unmixed reagents that will be reagents added to the reaction. All named reagents (Simple which have been assigned a per-reaction reagents view) volume will be listed. The default volume of selected reagents will be added to the reaction. QIAgility User Manual 11/2011 5-87...
- Page 150 When selected, the operation prepares successive reactions using a sample from the bank, then diluent, then the next sample from the bank, and so on. 5-88 QIAgility User Manual 11/2011...
- Page 151 Setting up a reaction list Note: If the total number of reactions configured on one plate exceeds the number of reaction wells a warning will QIAgility User Manual 11/2011 5-89...
- Page 152 The “Plate/well Selector” window, which displays a schematic of the worktable setup, will appear. 8. Left-click on a reaction plate to select it. The “Reaction Configuration” dialog box will reappear. 5-90 QIAgility User Manual 11/2011...
- Page 153 Add pause (30 Adds a 30 second pause to the reaction sec.) list. Add pause Adds a pause of defined length to the (arbitrary) reaction list. QIAgility User Manual 11/2011 5-91...
- Page 154 Add serial Enables the user to perform a serial dilution step dilution. The user can select which dilutions to add to reactions. 5-92 QIAgility User Manual 11/2011...
- Page 155 To introduce a pause of defined length: 1. Left-click on a “Reaction” plate. 2. The “Reaction” right-hand pane will appear. 3. Click on the “Special” button. 4. Select “Add pause (arbitrary)”. 5. The “Configure Pause” dialog box will appear. QIAgility User Manual 11/2011 5-93...
- Page 156 2. The “Reaction” right-hand pane will appear. 3. Click on the “Special” button. 4. Select “Add ‘reset ejection position’” 5. The pipetting head will move to the first position of the current plate segment when performing this step. 5-94 QIAgility User Manual 11/2011...
- Page 157 1. Left-click on a “Reaction” plate. 2. The “Reaction” right-hand pane will appear. 3. Click on the “Special” button. 4. Select “Add sample bank pooling step”. 5. The “Sample Pooling” dialog box will open. QIAgility User Manual 11/2011 5-95...
- Page 158 Use new tips Instructs the instrument to use a new tip for each pooled liquid per sample in the sample bank. This option avoids contamination of sample wells, but tip consumption is higher than with other options. 5-96 QIAgility User Manual 11/2011...
- Page 159 0. A value of 0 indicates that the software should choose an appropriate, recommended value. 6. Select “Tip Ejection Mode” — “Multi-pickup”, “Re-use tips”, or “Use new tips”. QIAgility User Manual 11/2011 5-97...
- Page 160 To copy a sample bank: 1. Left-click on a “Reaction” plate. 2. The “Reaction” right-hand pane will appear. 3. Click on the “Special” button. 4. Select “Add sample bank duplication step”. 5-98 QIAgility User Manual 11/2011...
- Page 161 Use new tips Instructs the instrument to use a new tip for each sample and each duplication volume. Sample bank Defines the sample bank to be copied. QIAgility User Manual 11/2011 5-99...
- Page 162 Left-click on the selected plate to return to the “Bank Duplication” dialog box. 11. Define the “First well” and the “Volume”. 12. Click on the “Add” button to configure the first sample bank copy. 5-100 QIAgility User Manual 11/2011...
- Page 163 1. Left-click on a “Reaction” plate. 2. The “Reaction” right-hand pane will appear. 3. Click on the “Special” button. 4. Select “Add sample dilution step”. 5. The “Sample Dilution” dialog box will appear. QIAgility User Manual 11/2011 5-101...
- Page 164 See Section 5.6.12 for more details about how to configure multi- eject options. Re-use tips Instructs the instrument to reuse a single tip for all dilutions per sample. 5-102 QIAgility User Manual 11/2011...
- Page 165 See Section 5.6.12 for more details about how to configure multi-eject options. 7. Select the diluent and the sample bank that will be used in the dilution from the drop-down menus. QIAgility User Manual 11/2011 5-103...
- Page 166 Section 5.8.1 for details about how to do this. 2. Left-click on a “Reaction” plate. 3. The “Reaction” right-hand pane will appear. 4. Click on the “Special” button. 5. Select “Add serial dilution step”. 6. The “Serial Dilution” dialog box will appear. 5-104 QIAgility User Manual 11/2011...
- Page 167 Defines the first well of the reaction plate into which the serial dilution will be targeted. Min. volume Defines the minimum total volume for each dilution in the series. Enable mixing Instructs the instrument to mix during during dilution. dilution? QIAgility User Manual 11/2011 5-105...
- Page 168 Note: To remove a dilution, left-click on a copy in the “Dilutions” list, and then click on the “Remove” button. 12. Click on the “OK” button to return to the main software window. The dilutions will be added to the “Reaction List”. 5-106 QIAgility User Manual 11/2011...
- Page 169 4. Select “Add sample bank normalization”. 5. The “Sample Normalization” dialog box will appear. Diluent Defines the diluent to be used for the sample normalization. Sample bank Defines the sample bank to be used for the sample normalization. QIAgility User Manual 11/2011 5-107...
- Page 170 Allow Specifies that the tip used to pipet diluent contamination will also be used to pipet source sample. The tip will collect diluent, then sample, and will then eject the liquid into the target well. 5-108 QIAgility User Manual 11/2011...
- Page 171 This function enables liquids from multiple sources to be moved into a waste well (i.e., enabling pooling). 1. Left-click on a “Reaction” plate. 2. The “Reaction” right-hand pane will appear. 3. Click on the “Special” button. QIAgility User Manual 11/2011 5-109...
- Page 172 Use a new tip Instructs the instrument to use a new tip to for each move each sample. sample Re-use tips Instructs the instrument to reuse tips when moving samples to the waste well. 5-110 QIAgility User Manual 11/2011...
-
Page 173: Importing And Exporting Reaction And Sample Data
These simulated tabs or carriage returns automatically move the data input point (cursor) on the data table to the next input cell each time a bar code is read. QIAgility User Manual 11/2011 5-111... - Page 174 Excel files, save the spreadsheet as a CSV (Comma Delimited) file type. 1. Left-click on a “Sample” or “Reaction” plate to view the right-hand pane. 2. Click on the “Import” button. The “Import Well Data” dialog box will appear. 5-112 QIAgility User Manual 11/2011...
- Page 175 The ‘Tab’ character will be used as a separator. Comma The ‘Comma’ character will be used as a separator. ASCII Char The specified ASCII value (e.g., 9 (Tab), 44 (Comma), 32 (Space), 58 (Colon)) will be used as a column separator. QIAgility User Manual 11/2011 5-113...
- Page 176 8. The “Sample Bank Options” panel of the form describes how data is to be imported to one or more sample banks in the run. To activate these options, select “Add 5-114 QIAgility User Manual 11/2011...
- Page 177 During the import, the software ensures that for the data set imported each sample bank name in the column is created or updated to include the corresponding member well. QIAgility User Manual 11/2011 5-115...
- Page 178 When active, the “Import Preview” pane shows only those rows where the concentration filter criteria are met. Defines the minimum concentration of the Concentration concentration range. Defines the maximum concentration of the Concentration concentration rage. 5-116 QIAgility User Manual 11/2011...
- Page 179 Click on the “Import” button. Repeat for each sample bank column in the file. It can also be done using the concentration filter function. Arrange the import file so that it has a column QIAgility User Manual 11/2011 5-117...
- Page 180 1. Left-click on a “Sample” or “Reaction” plate to view the right-hand pane. 2. Click on the “Export” button. The “Export Samples” or “Export Reaction Info” dialog box will appear. 3. Select an “Export Mode” from the drop-down menu. 5-118 QIAgility User Manual 11/2011...
- Page 181 (using the substitution pattern %2%0%P%0%I, as described in “Data fields” in this section). This describes the mapping of a tube/well location (plate and well label) to its contents (sample identification). QIAgility User Manual 11/2011 5-119...
-
Page 182: Appendix E
ABI 7000/7500 SDS absolute software v1.2.3 for absolute quantification quantification. Master mixes must be named in the QIAgility software according to special conventions which allow the identification of Detector, Reporter, Quencher entities required by the ABI SDS software. See Appendix E. -
Page 183: Appendix G
(Sample ID). Sample ID A list of sample identifiers present in the reaction well. Reaction ID The user-assigned label associated with the reaction well. Sample Name A list of sample names present in the reaction well. QIAgility User Manual 11/2011 5-121... - Page 184 ‘Page 1’. “Empty Label” None No identification is used (blank). Label The well label is used as the identifier. Label Number The index of the well in the pipetting sequence is used as the identifier. 5-122 QIAgility User Manual 11/2011...
- Page 185 7. Click on the “Save” button to continue. Data fields Data fields, which are available for export, and their export string designators, are as follows. Substitution symbol Sample export Reaction export Separator (comma, Separator (comma, tab) tab) QIAgility User Manual 11/2011 5-123...
- Page 186 Target volume Substitution symbol Sample export Reaction export Name (sample), including volume Name (reagents), including volume Final contents including full names, excluding volumes Name (sample), excluding volume Name (reagents), excluding volume Sample volume Final concentration 5-124 QIAgility User Manual 11/2011...
- Page 187 The %0 between the individual data fields indicates that a separator is to be inserted. A separator will result in a comma in the case of a *.csv file. In an Excel spreadsheet, a column break would be inserted. QIAgility User Manual 11/2011 5-125...
-
Page 188: Progress Report
The wizard can also be used to set up master mixes without setting up reactions. This section outlines the “PCR Setup Wizard” screens that will guide the user through the setup. Instructions are displayed on each screen. 5-126 QIAgility User Manual 11/2011... - Page 189 1. Select “Wizard/PCR Setup Wizard”, or select “PCR Setup Wizard” from the splash screen that appears when the software is started. 2. The “QIAgility Setup Wizard” will appear. 3. Select the desired options and then click on the “Next” button.
- Page 190 Function” button. A submenu will appear. To update the plate function, select “Sample”, “Reaction”, “Reagent”, Standard”, or “Mix”. 8. Repeat step 7 for all plates on the worktable. 9. Click on the “Next” button to continue. 5-128 QIAgility User Manual 11/2011...
- Page 191 “Viscous?” column, check the box, and then click on the “OK” tab. Repeat this procedure to change a reagent from non-viscous to viscous. QIAgility User Manual 11/2011 5-129...
- Page 192 Repeat this step until all reagent segments you want to use are defined. 13. Click “Next” to continue. 14. Left-click on a well in the Master Mix Block to select the location of the master mix. The “Master Mix Component Selection” dialog box will appear. 5-130 QIAgility User Manual 11/2011...
- Page 193 16. Click on the “OK” button to continue. 17. The “Standards Editor” screen will appear. (Steps 17 to 21 will only appear if you selected “I want to use standards in this run” on the first page of the wizard.) QIAgility User Manual 11/2011 5-131...
- Page 194 Concentrations of successive wells in the series are determined by multiplying the concentration of the preceding well in the series by the dilution ratio. 19. Define the “Number of dilution concentrations”, the “Concentration of undiluted standard”, and the “Dilution ratio”. 5-132 QIAgility User Manual 11/2011...
- Page 195 24. Existing sample banks will be listed on the left side of the dialog box. Use the buttons beneath the list to manage the sample bank list. Alternatively, left-click on a plate with “Sample” or “Reaction” function. The “Update QIAgility User Manual 11/2011 5-133...
- Page 196 Target plate Defines the target plate that the reaction will be pipetted into. Opens the “Plate/well Selector” screen, which enables selection of the target reaction plate. Adds a reaction to the “Reactions” list. 5-134 QIAgility User Manual 11/2011...
-
Page 197: Optimisation Wizard
The “Optimisation Wizard” enables matrix combinations of reactions, based on different concentrations of reagents, to be set up. For example, to optimize a probe and primer (forward and reverse combined), a reaction could be set up with 3 QIAgility User Manual 11/2011 5-135... - Page 198 2. The “Optimisation Wizard” will appear. 3. Select option “1”, “2”, or “3”. These options define the number of variables to be optimized. 4. Click on the “Next” button to continue. 5-136 QIAgility User Manual 11/2011...
- Page 199 5. Define the reagent name. 6. Define the volume of reagent to use in the final reaction. 7. Define the number of different concentrations to use. The number of rows in the “Reagents” table will be adjusted accordingly. QIAgility User Manual 11/2011 5-137...
- Page 200 12. To reset the location of any reagent, double-click on a reagent in the list, then left-click and drag again. Alternatively, click on the “Reset All” button to clear all reagent locations, other than those that were defined upon entering the screen. 5-138 QIAgility User Manual 11/2011...
- Page 201 Defines the master mix to be used. Create Opens the “Plate/well Selector” window, Premixed MM which enables a premixed master mix to be set up. Target plate Defines the target plate that the reactions will be pipetted into. QIAgility User Manual 11/2011 5-139...
- Page 202 19. Left-click on a well in the Master Mix Block to select the location of the master mix. 20. The following message box will appear. 21. Enter the volume of master mix to be used per reaction. 5-140 QIAgility User Manual 11/2011...
-
Page 203: Using "Empty Project
Then click on the “Open” button. 3. Select the correct plate type in the software for each position on the worktable. The plate types selected in the software must match the actual worktable setup. See QIAgility User Manual 11/2011 5-141... -
Page 204: Example Reactions
Sample bank with reagents not used in master mix Sample bank with master mix and reagents not used in a master mix No template control with master mix Alternate samples or standards with no template control Empty wells 5-142 QIAgility User Manual 11/2011... - Page 205 3. Enter the number of replicates in the “Target wells” panel. 4. Click on the “OK” button. Sample bank with reagents not used in master mix 1. Select the sample bank from the “Samples” panel. 2. Select the reagents from the “Unmixed reagents” panel. QIAgility User Manual 11/2011 5-143...
- Page 206 4. Click on the “OK” button. Empty wells 1. Select “No samples (empty wells)” from the “Samples” panel. 2. Enter the number of empty wells in the “Target wells panel”. 3. Click on the “OK” button. 5-144 QIAgility User Manual 11/2011...
-
Page 207: Checking The Reaction Setup
5.11 Selecting the COM port 1. Select “Options/Robot Setup/Select COM port”. 2. The “Configure Serial Interface” dialog box will open. QIAgility User Manual 11/2011 5-145... -
Page 208: Service Register
Note: The software lists only eligible COM ports and marks the mostly likely port on which the instrument can be found with an asterisk (*). For correct communication of the laptop (supplied with the QIAgility) with the instrument: Select COM1 if you are using RS-232 (recommended) ... - Page 209 Displays the current user name. Comment Allows the user to enter and save comments with the acknowledgment of a service. Acknowledge Confirms that the selected service has been Service completed. Exit Closes the “Service Register” dialog box. QIAgility User Manual 11/2011 5-147...
- Page 210 Note: After acknowledgment of a pipettor service, volume calibration must be done before the start of the first run. An error is shown at the start of a run if no volume calibration has been done. 5-148 QIAgility User Manual 11/2011...
- Page 211 QIAgility Software QIAgility User Manual 11/2011 5-149...
- Page 212 QIAgility Software This page intentionally left blank 5-150 QIAgility User Manual 11/2011...
-
Page 213: Operating Procedures
Operating Procedures This section describes how to operate the QIAgility. Before proceeding, we recommend that you familiarize yourself with the features of the QIAgility by referring to Sections 3.2 and 3.2.10. The QIAgility lid must remain closed during operation of the instrument. - Page 214 Operating Procedures computer, or if the instrument is switched off, the software will run in “Virtual Mode”. See Section 5.2 for more details about “Virtual Mode” operation. 3. The welcome dialog will open. QIAgility User Manual 11/2011...
-
Page 215: Using The Uv Lamp
1. Remove all plates and accessories from the worktable. Note: The tip ejector must be present. 2. Close the instrument lid. 3. Click on the icon on the toolbar. 4. The “UV Lamp Control” dialog box will appear. QIAgility User Manual 11/2011... - Page 216 Enables the user to set UV lamp exposure times of between 1 second and 30 minutes, using the arrows. Start Initiates UV lamp operation. Close software Shuts down the QIAgility Software when UV when UV lamp operation is complete. finishes? Enable Lamp Switches the UV lamp on.
-
Page 217: Operating The Hepa Filter
Q Protocols are run files which have been developed to directly facilitate specific PCR applications. Q Protocols are installed within the “QProtocols” subfolder. To access this folder, select “Installation directory of QIAgility Software\QIAgility\QProtocols” (e.g., C:\“Program Files\QIAgility\QProtocols). Q Protocols are locked. Edit access is only permitted to... - Page 218 If the user attempts to overwrite an existing Q Protocol, the following message will appear. Using a Q Protocol 1. Start the QIAgility software, as outlined in Section 5.1. Note: If the QIAgility software is already operating, press icon in the toolbar.
- Page 219 4. Select the “Protocols” tab. All Q Protocols that are saved in the appropriate folder (i.e. “QProtocols”) will be displayed. 5. Select the desired Q Protocol. 6. Click on the “Open” button. 7. A description of the Q Protocol will appear. QIAgility User Manual 11/2011...
-
Page 220: Selecting A Saved Run File
1. Select “File/Open”, or click on the icon. 2. Select a file and then click on the “Open” button. To open a recently used run file using the toolbar: 1. Click on the icon on the toolbar. QIAgility User Manual 11/2011... -
Page 221: Creating A New Run File
There are 2 wizards, “PCR Setup Wizard” and “Optimisation Wizard”, which can be used to create a new run file. Alternatively, a new file can be created by selecting “Empty Project (last used layout)” or “Empty Project (default layout)” when the software is started. QIAgility User Manual 11/2011... -
Page 222: Preparing The Worktable
See Section 5.7.2 for more details about how to do this. The following picture outlines how to insert tips into Tip Rack Holders. 4. Place the correct plates on the worktable. 6-10 QIAgility User Manual 11/2011... -
Page 223: Starting A Run
“Save” button. If the run file has already been saved, click on the “Cancel” button to continue. 3. The pre-run “Checklist” dialog box will appear. QIAgility User Manual 11/2011 6-11... -
Page 224: Pausing/Aborting A Run
Pauses will be logged in the post-run report. If the run is aborted, the instrument will discard the tip and return to its resting position. To pause a run: 1. Click on the icon in the toolbar, or select “Pause/Abort” from the “File” menu. 6-12 QIAgility User Manual 11/2011... -
Page 225: Exception Handling
The Y-arm will move to its resting position. This provides access to the worktable, allowing the error to be resolved. Click on the “OK” button to continue with the run. Ignore error The instrument will continue with the run as normal. QIAgility User Manual 11/2011 6-13... -
Page 226: Reports/Log Files
6.7.1 Pre-run report The pre-run report is automatically generated before starting a run file. It contains the following information: Run file Software version Instrument details Run time (estimate) Protocol information 6-14 QIAgility User Manual 11/2011... - Page 227 3. Select “Wizards/Generate report”. The pre-run report will be displayed. Alternatively, the pre-run report can be generated when starting a run. To do this: 1. Select the icon from the toolbar. 2. The “Save file” dialog box will open. QIAgility User Manual 11/2011 6-15...
-
Page 228: Post-Run Report
Run duration Exceptions: Date and time of exception Instrument activity at time of exception Details of the exception User response Note: Any exceptions are highlighted in the post-run report. 6-16 QIAgility User Manual 11/2011... -
Page 229: Log Files And Support Packages
Word document are available via the toolbar at the top of the “Post-run Report”. The “Post-run report” is automatically saved in a subdirectory called “Reports” in the current run file save directory. The default directory is C:\Program Files\QIAgility\Data. 6.7.3 Log files and support packages Log files A new log file is generated when the software starts, when a run starts, or when a log file reaches 16 MB in size. - Page 230 3. Select a location in which to save the support package. 4. Click on the “OK” button. To select the correct support package: 1. Select “Help/Choose support package”. 2. The “Support Package Chooser” dialog box will appear. 6-18 QIAgility User Manual 11/2011...
- Page 231 “Choose by Date” and “Choose by Exception” tab. In addition, support packages can be viewed based on the type of exception. To do this, select “All Exceptions”, “User paused job”, or “User aborted job” from the drop- down menu. QIAgility User Manual 11/2011 6-19...
-
Page 232: Importing And Exporting Reaction/Sample Data
Step 8. If the current run file has not been saved, the following message will appear. 6. Select the “Yes” or “No” button. 7. If “Yes” is selected, the “Save File” dialog box will appear. Select a file location and then click on the “Save” button. 6-20 QIAgility User Manual 11/2011... - Page 233 The following message will appear. 13. Click on the “OK” button. 14. Set the power switch of the QIAgility to the off position. Moving to a safety position This is the recommended method of shutting down the instrument.
- Page 234 If the head holds a tip it will not be discarded. As the instrument is switched off, the pipetting head will drop approximately 70 mm. This will not damage the instrument but may result in a pipet tip being picked up. 6-22 QIAgility User Manual 11/2011...
-
Page 235: Instrument Setup And Calibration
Instrument Setup and Calibration Instrument Setup and Calibration Before starting any runs, the QIAgility must be calibrated. This section outlines the calibrations that must be performed. If the QIAgility is moved, we recommend recalibrating the plate positions. Unless the pipetting mechanism has been serviced, or pipetted volumes are found to be inaccurate, there is no need to recalibrate the volume. - Page 236 9. Check the pipetting hub position. If it is located correctly, click on the “Yes” button to continue. The Z-axis position will now be located. The “Tip Ejector Calibration” dialog box will reappear. Proceed to step 14. QIAgility User Manual 11/2011...
- Page 237 “Locate Z Axis” button. 12. The following message box will appear. 13. Click on the “Yes” button. The instrument will now locate the Z-axis position. 14. Click on the “Test” button, the following message box will appear. QIAgility User Manual 11/2011...
-
Page 238: Calibrate Plate Positions
Do not click on any software buttons while parts of your body are within the instrument worktable. Before starting the procedure: Open the instrument lid. Place plates to be calibrated onto the worktable. QIAgility User Manual 11/2011... - Page 239 Revert to saved Restores the X- and Y-positions from the most recently saved values. Raise tip Raises the tip. Lower tip Lowers the tip. Home Z Axis Raises the pipetting head to the top (home) position. QIAgility User Manual 11/2011...
- Page 240 If desired, click on the “Check Pos” button to confirm that the correct position has been saved. 8. To perform position calibrations on other plates, repeat steps 3–7. 9. When position calibrations are complete, click on the “Close” button. QIAgility User Manual 11/2011...
-
Page 241: Calibrate Plate Heights
Lists the plates that are currently located on Calibrate the worktable. Select All Selects all of the plates in the “Plates to Calibrate” list. Clear All Deselects all of the plates in the “Plates to Calibrate” list. QIAgility User Manual 11/2011... - Page 242 It is recommended that 4 wells are used to calculate the average. 5. Click on the “Autodetect (checked items)” button to initiate calibration. 6. Review the message and click on the “Yes” button to continue. QIAgility User Manual 11/2011...
- Page 243 Manual plate height calibration 1. Complete steps 1–4 of “Automatic plate height calibration”. 2. Click on the “Manual Setup (highlighted item)” button. 3. A dialog box will appear, click on the “Yes” button to continue. QIAgility User Manual 11/2011...
- Page 244 The goal of manual plate height calibration is to set this so that the tip is just above the base of the tube/well. 5. Adjust the height of the tip in the “Adjust Height” panel. 7-10 QIAgility User Manual 11/2011...
-
Page 245: Optimal Height Calibration
It is recommended that this calibration is performed upon initial installation and when the user starts a new lot number of tips. The collar size of 50 µl and 200 µl tips should be equal, but small variations sometimes exist. QIAgility User Manual 11/2011 7-11... - Page 246 Ensure that 50 µl and 200 µl tips are available, that Tip Rack Holders are calibrated and that correct tips are set as available. 1. Select “Options/Robot setup/Calibrate tip offsets”. 2. The “Configure tip offsets” dialog box will appear. 7-12 QIAgility User Manual 11/2011...
- Page 247 Start Starts the tip offset calibration. Abort Aborts the current tip offset calibration. Reset All Resets the tip offset calibration settings to the factory default values. QIAgility User Manual 11/2011 7-13...
-
Page 248: Calibrate Volumes
“Option 1” from the “Volume Calibration Wizard”. Note: Volume calibration must be done before the start of the first run on a newly-installed QIAgility. An error is shown at the start of the run if no volume calibration has been done. - Page 249 Project (default layout)”, as outlined in steps 1–2 of Section 5.10.3. 2. Select “Options/Robot Setup/Calibrate Volumes”. 3. The “Volume Calibration Wizard” dialog box will appear. Options 1–3 will be displayed. 4. See the following sections for detailed information about Options 1–3. QIAgility User Manual 11/2011 7-15...
- Page 250 3. Click in the appropriate cell in the “Value (P axis units)” column to manually change the P-axis units. 4. Click on the “Next” button. 5. Click on the “Yes” button to continue. 7-16 QIAgility User Manual 11/2011...
- Page 251 Select one of these calibrations to display the associated calibration data in the table. 9. To update the default volume calibration with the displayed calibration settings, click on the “Use displayed settings as new calibration” button. QIAgility User Manual 11/2011 7-17...
- Page 252 1. Select “Option 2” from the “Volume Calibration” dialog box. 2. The “Volume Calibration Wizard — History of Calibration Data” dialog box will open. 3. Proceed as for steps 8–12 of “Option 1”. 7-18 QIAgility User Manual 11/2011...
- Page 253 2. The following message will appear. 3. Click on the “Yes” button. 4. Click on the “Cancel” button in the “Volume Calibration” dialog box. The volume calibrations will now be updated with the factory default calibration settings. QIAgility User Manual 11/2011 7-19...
- Page 254 Instrument Setup and Calibration This page intentionally left blank 7-20 QIAgility User Manual 11/2011...
-
Page 255: Maintenance Procedures
Only perform maintenance that is specifically described in this user manual. Servicing The QIAgility is supplied with a warranty that lasts for 1 year, beginning on the date of shipment. The warranty includes all repairs due to mechanical breakdown. Application development, software upgrades, accessories, and disposable items are not included in the warranty. -
Page 256: Regular Maintenance
Do not use solvents, or reagents containing acids, alkalis, or abrasives to clean the QIAgility. WARNING Risk of electric shock [W14] Do not open any panels on the QIAgility. Risk of personal injury and material damage Only perform maintenance that is specifically described in this user manual. CAUTION... -
Page 257: Periodic Maintenance
8.2.1 Decontaminating the QIAgility To remove DNA/RNA from the worktable and to eliminate cross-contamination, the QIAgility must be routinely decontaminated. Proceed as follows: 1. Remove all loading blocks and the tip ejector chute from the worktable. Wash these in detergent and rinse with clean water. -
Page 258: Removing And Replacing The Tip Ejector Chute
2. Grasp the chain connected to the tip ejector chute. 3. Using the chain, pull out the sliding security bolt. 4. Remove the tip ejector/tip ejector chute. Replacing the tip ejector chute 1. Open the lid. 2. Replace the tip ejector chute. QIAgility User Manual 11/2011... -
Page 259: Replacing The Hepa Filter
Replacing the HEPA filter 1. Lift the HEPA filter lid section. 2. Remove the lid. 3. Unscrew the 4 thumb screws. 4. Remove the “H” Frame. 5. Remove the HEPA filters. 6. Replace the HEPA filters and reassemble. QIAgility User Manual 11/2011... - Page 260 Maintenance Procedures This page intentionally left blank QIAgility User Manual 11/2011...
-
Page 261: Troubleshooting
“Virtual Mode”. See Sections 4.5 and 5.11. QIAgility Software does not launch a) QIAgility Software Install the QIAgility Software. See Section 4.6 not installed b) Old version of The QIAgility Software operates with Windows XP Microsoft Windows Professional or Windows 7. -
Page 262: Operation
Uneven levels in reaction tubes a) Air bubbles trapped The liquid-level sensor functions equally well on in sample tubes or air bubbles or the liquid surface. Centrifuge the master mix tubes sample plate to remove air bubbles. QIAgility User Manual 11/2011... - Page 263 Less than 5 µl DNA It is recommended to use at least 5 µl DNA template used in template is used in reactions. reactions QIAgility User Manual 11/2011...
- Page 264 Ensure the plate chosen in the software matches the physical plate. Consider disabling the “Detect insufficient volume on aspirate” advanced setting (see Appendix F). QIAgility User Manual 11/2011...
- Page 265 Software does not start and the “A required library file is not correctly installed or registered” error message is displayed Present version of Reinstall the most recent version of the QIAgility the software software. conflicts with an older version of the software Software running incorrectly with a “Software error: aborting”...
-
Page 266: Warnings And Errors
There is an insufficient supply of 200 µl large tips tips. Well too full Too much liquid will be ejected into a well. Well too small A well cannot contain sufficient liquid to supply the run. QIAgility User Manual 11/2011... - Page 267 There are not enough output wells in the output wells reaction plate. Too many The number of programmed standards standards exceeds the maximum number of standards. The software can accommodate a maximum of 16 dilution series. QIAgility User Manual 11/2011...
-
Page 268: Instrument Error Codes
All instrument errors are associated with an error number. All error numbers start with 40000. If an instrument error occurs, immediately save a support package and contact QIAGEN Technical Services. See Section 6.7.3 for details about how to save a support package. Instrument error codes... - Page 269 An attempt was made to move an axis beyond its limit. Too many replies were specified in send Packet. An incorrect checksum was encountered in a received packet. The first reply was corrupt. The second reply was corrupt. The local receive FIFO overflowed. QIAgility User Manual 11/2011...
-
Page 270: Self Diagnostic Tools
Failure to do this may result in permanent damage to the pipetting head. 1. Select “Help/Self diagnostic tools”. The “Robot Self Diagnostic Tools” dialog box will appear. 9-10 QIAgility User Manual 11/2011... - Page 271 Test Close Closes the dialog box. Go Home Homes all axes and resets the positional reference for the instrument for subsequent movements including tip ejection. Clear Clears the content of the messages text Messages box. QIAgility User Manual 11/2011 9-11...
-
Page 272: Mechanical Tests
Mechanical tests Check Home-Opto Alignment This test ensures that the optical homes in X-, Y- and possibly Z-axes in QIAgility instruments are 3, 4, and 5 steps away from their L297 software home, respectively. Check for loss of steps This test establishes whether the instrument has reliable movement. - Page 273 Liquid Sensor Test This test checks that the liquid sensor circuitry is functioning correctly, so that it only triggers when the conductive tip touches the liquid. QIAgility User Manual 11/2011 9-13...
- Page 274 Troubleshooting This page intentionally left blank 9-14 QIAgility User Manual 11/2011...
- Page 275 In “Normal Mode” operation, run files can be executed. Power switch A button located at the back of the QIAgility. It allows the user to switch the QIAgility on and off. Q Protocol Q Protocols are run files which have been developed by QIAGEN to directly facilitate specific PCR applications.
- Page 276 The toolbar consists of a series of icons, from which a range of software functions can be accessed. Sample A sample is always added to a reaction last. Samples must be assigned to a sample bank before they can be used in a reaction setup. 10-2 QIAgility User Manual 11/2011...
- Page 277 This is particularly useful for checking new run files. In “Virtual Mode” all software functions are enabled. Worktable The instrument worktable supports tips racks, plates/tubes, the Master Mix Block, and the Reagent Block. QIAgility User Manual 11/2011 10-3...
- Page 278 Glossary This page intentionally left blank 10-4 QIAgility User Manual 11/2011...
- Page 279 Appendix A Appendix A Technical data QIAGEN reserves the right to change specifications at any time. Environmental conditions Operating conditions Power 100–240 V AC, 50–60 Hz, 250 VA Mains supply voltage fluctuations are not to exceed 10% of the nominal supply voltages.
- Page 280 41 kg (90.2 lb.) standard configuration Capacity Up to 96 samples per run Software QIAgility Software is supplied with the QIAgility System. Default protocols are available for use with the QIAgility Software and can be downloaded from www.qiagen.com/goto/QIAgility. QIAgility User Manual 11/2011...
- Page 281 Recycling can be provided by QIAGEN upon request at additional cost. In the European Union, in accordance with the specific WEEE recycling requirements, and where a...
- Page 282 QIAGEN GmbH Germany is not responsible for any radio television interference caused by unauthorized modifications of this equipment or the substitution or attachment of connection cables and equipment other than those specified by QIAGEN GmbH, Germany.
- Page 283 Low Voltage Directive (LVD) 2006/95/EC Electromagnetic Compatibility 2004/108/EC Directive (EMC) and the relevant harmonised standards IEC 61010-1 (Ed.2.0) IEC 61010-2-081 (Ed.1.0) IEC 61326-1 IEC 61000-6-2 Hombrechtikon, February 8, 2011 Pit Muggli Senior Director, Quality & Compliance QIAgility User Manual 11/2011...
- Page 284 Appendix A This page intentionally left blank QIAgility User Manual 11/2011...
-
Page 285: Appendix B B
Appendix B Appendix B Liability clause QIAGEN shall be released from all obligations under its warranty in the event repairs or modifications are made by persons other than its own personnel, except in cases where the Company has given its written consent to perform such repairs or modifications. - Page 286 Appendix B This page intentionally left blank QIAgility User Manual 11/2011...
-
Page 287: Appendix C C
Appendix C Safety Information (French, FR) Consignes de sécurité Avant d’utiliser le QIAgility, il est impératif de lire attentivement ce manuel et de porter une attention particulière aux consignes de sécurité. Afin de garantir un fonctionnement de l’appareil en toute sécurité et de maintenir l’appareil en bon état de marche, il est impératif... - Page 288 AVERTISSEMENT/ Risque d’accident corporel et de détérioration ATTENTION du matériel [W3] Le QIAgility est trop lourd pour être soulevé par une seule personne. Afin d’éviter tout accident corporel et toute détérioration du matériel, ne pas soulever l’appareil seul. AVERTISSEMENT/ Risque d’accident corporel et de détérioration ATTENTION du matériel...
- Page 289 ATTENTION Détérioration de l’appareil [C1] La lumière directe du soleil peut décolorer les pièces de l’appareil et abîmer les éléments en plastique. Tenir le QIAgility à l’abri de la lumière directe du soleil. ATTENTION Détérioration de l’appareil [C2] Éviter de renverser de l’eau ou des produits chimiques sur le QIAgility.
- Page 290 UV de fonctionner tant que le capot de l’appareil est ouvert. Ce dispositif ne doit en aucun cas être désactivé. Afin que le QIAgility fonctionne de manière satisfaisante et en toute sécurité, suivre les conseils suivants : Le cordon d’alimentation de l’appareil doit être branché...
-
Page 291: Échantillons C
Appendix C Techniques de QIAGEN. L’appareil peut présenter un danger électrique dans les cas suivants : Le cordon d’alimentation présente des signes de détérioration. L’appareil a été stocké pendant une longue période dans des conditions non conformes à celles énoncées dans l’Annexe A. - Page 292 † ACGIH : American Conference of Government Industrial Hygienists (États-Unis d’Amérique) (Conférence américaine des hygiénistes industriels gouvernementaux). ‡ COSHH : Control of Substances Hazardous to Health (Royaume-Uni) (Contrôle des substances dangereuses pour la santé). QIAgility User Manual 11/2011...
- Page 293 être générées. Traitement des déchets Le matériel en plastique usagé peut contenir des produits chimiques dangereux. Ces déchets doivent être convenablement collectés et mis au rebut conformément aux réglementations de sécurité locales. QIAgility User Manual 11/2011...
- Page 294 Appendix C Pour plus d’informations sur la mise au rebut du QIAgility, voir l’Annexe A. Dangers mécaniques AVERTISSEMENT Pièces mobiles [W12] Éviter le contact avec les pièces en mouvement lorsque le QIAgility est en marche. Ne jamais placer les mains sous le bras robotisé lorsque celui-ci s’abaisse.
- Page 295 Attendre l’arrêt complet du bras robotisé. Cela peut prendre jusqu’à 10 s. Sécurité relative à la maintenance Procéder à la maintenance comme décrit à la Section 8. QIAGEN facture les réparations rendues nécessaires suite à une maintenance inappropriée. AVERTISSEMENT/ Risque d’accident corporel et de détérioration ATTENTION du matériel...
- Page 296 Appendix C Symboles sur le QIAgility Symbole Emplacement Description Table de Symbole de mise en garde travail et près de la plaque signalétique Table de Symbole de danger biologique travail et près de la sortie des tips Table de Symbole de risque d’écrasement...
- Page 297 N17965) l’appareil Plaque Label RoHS pour la Chine signalétique à (restriction de l’utilisation de l’arrière de certaines substances dangereuses l’appareil dans l’équipement électrique et électronique) À l’arrière de Consulter les consignes l’appareil d’utilisation. QIAgility User Manual 11/2011 C-11...
- Page 298 Appendix C This page intentionally left blank C-12 QIAgility User Manual 11/2011...
-
Page 299: Appendix D
Safety Information (German, DE) Sicherheitshinweise Lesen Sie dieses Handbuch sorgfältig durch, bevor Sie den QIAgility benutzen. Beachten Sie dabei insbesondere die Sicherheitshinweise. Die Gebrauchsanweisungen und Sicherheitshinweise im Handbuch müssen befolgt werden, um einen sicheren Betrieb des Geräts zu gewährleisten und das Gerät in einem sicheren Zustand zu erhalten. -
Page 300: Sachgemäße Handhabung
WARNUNG/ Verletzungsgefahr und Beschädigung des Geräts [W3] ACHTUNG Der QIAgility ist zu schwer, um von einer einzelnen Person gehoben zu werden. Zur Vermeidung einer Verletzung oder Beschädigung des Gerätes heben sie das Gerät nicht alleine an. WARNUNG/ Verletzungsgefahr und Beschädigung des Geräts... -
Page 301: Elektrische Sicherheit
Maus und drücken Sie nicht auf eine Taste der Tastatur, während sich Ihre Hände oder andere Körperteile im Arbeitsbereich des Roboterarms befinden. Schalten Sie im Notfall den QIAgility aus (der Netzschalter befindet sich auf der Geräterückseite), und ziehen Sie den Netzstecker aus der Steckdose. - Page 302 Gerätehaube geschlossen sein muss, bevor die UV- Lampe eingeschaltet werden kann. Diese Verriegelung sollte auf keinen Fall deaktiviert werden. Um einen zufriedenstellenden und sicheren Betrieb des QIAgility zu gewährleisten, befolgenden Sie bitte die nachstehenden Richtlinien: Das Netzkabel muss an eine Wechselstrom-Steckdose ...
-
Page 303: Biologische Sicherheit
Geräts nicht mehr gewährleistet werden kann, muss das Gerät gegen unbefugte oder unabsichtliche Benutzung gesichert werden. Kontaktieren Sie anschließend den Technischen Service von QIAGEN. Die elektrische Sicherheit des Geräts ist nicht mehr gegeben, wenn: das Netzkabel beschädigt ist; ... - Page 304 übernationaler, nationaler und regionaler Ebene eingehalten werden. OSHA: Occupational Safety and Health Administration (Vereinigte Staaten von Amerika) † ACGIH: American Conference of Government Industrial Hygienists (Vereinigte Staaten von Amerika) ‡ COSHH: Control of Substances Hazardous to Health (Vereinigtes Königreich) QIAgility User Manual 11/2011...
-
Page 305: Chemikalien
Alle Arbeiten mit flüchtigen Lösungsmitteln oder toxischen Substanzen müssen unter einem funktionierenden Laborabzugssystem durchgeführt werden, damit die möglicherweise entstehenden Dämpfe abziehen können. Abfallentsorgung Benutzte Kunststoff-Laborartikel können gefährliche Chemikalien enthalten. Derartige Abfälle müssen gemäß den geltenden regionalen Sicherheitsbestimmungen gesammelt und entsorgt werden. QIAgility User Manual 11/2011... -
Page 306: Gefahren Durch Mechanische Teile
Sich bewegende Geräteteile [W12] Vermeiden Sie jeglichen Kontakt mit sich bewegenden Geräteteilen, während der QIAgility in Betrieb ist. Auf gar keinen Fall dürfen sich Ihre Hände unter dem Roboterarm befinden, wenn dieser herunterfährt. Versuchen Sie nicht, Reaktionsgefäße oder Platten zu entnehmen oder zu bewegen, während der Roboterarm arbeitet. -
Page 307: Sicherheitshinweise – Wartungsarbeiten
Stellen Sie keine Gegenstände auf den Roboterarm. Wählen Sie die Option “Pause” in der Werkzeugleiste der QIAgility Software, um das Gerät anzuhalten, bevor Sie Reaktionsgefäße oder Platten von der Arbeitsplattform entfernen. Warten Sie, bis der Roboterarm die gerade ablaufende Bewegung beendet hat –... - Page 308 Beschädigung der QIAgility Gerätehaube [C5] Verwenden Sie weder Alkohol noch Lösungsmittel oder Reagenzien, die Säuren, Laugen oder Abrasivstoffe enthalten, um die QIAgility Haube zu reinigen. Alkohol schädigt die Gerätehaube. Verwenden Sie zum Reinigen der Gerätehaube ausschließlich destilliertes Wasser. ACHTUNG Beschädigung der QIAgility Seitenwände [C6] Reinigung sie niemals die Gerätehaube und Seitenwände...
-
Page 309: Symbole Auf Dem Qiagility
Appendix D Symbole auf dem QIAgility Symbol Beschreibung Arbeitsplattform und Symbol „Achtung“ nähe Typenschild Auf der Symbol „Biogefährdung“ Arbeitsplattform und nähe „Tip chute“ Ausgang Arbeitsplattform Symbol „Quetschgefahr“ Typenschild auf der CE-Kennzeichnung Rückseite des Instruments Typenschild auf der Symbol der CSA- Rückseite des... - Page 310 C-Tick-Mark-Zeichen für Rückseite des Australien Instruments (Herstellerkennung: N17965) Typenschild Markierung gemäß RoHS- Rückseite des Richtlinie für China Instruments (Beschränkung der Verwendung bestimmter gefährlicher Stoffe in Elektro- und Elektronikgeräten) Auf der Rückseite Bedienungsanleitung des Instruments beachten. D-12 QIAgility User Manual 11/2011...
-
Page 311: Abi 7000/7500 Sds Master Mix Naming Conventions
For absolute quantification, the ABI software requires each reaction to be associated with a detector, reporter and quencher. To achieve this, master mixes used in the exported reactions must be named in the QIAgility software according to the convention: [?:]D_R_Q{:D_R_Q} Indicates a string of characters, which excludes “:”. - Page 312 Appendix E detector/reporter/quencher sets. To achieve this, master mixes used in the exported reactions must be named in the QIAgility software according to the convention: M:D_R_Q:D_R_Q “M” is the marker name. All other items are the same as for “Absolute Quantification”.
- Page 313 Appendix F Advanced Settings Advanced run settings are available to adjust specific applications on the QIAgility. These functions should be modified only under direct instructions from QIAGEN. Tip pickup mode This defines the strategy used for collecting tips from the Tip Rack Holder.
- Page 314 “Reaction” right-hand pane, work only with volumes up to the largest capacity tip supported on the QIAgility (i.e., 200 µl). Activating this option allows those functions to work with volumes larger than 200 µl. By default, this function is activated.
- Page 315 By default, this function is activated. Require extra volume in intermediate wells When activated a tick is visible. By defining sample banks in reaction plates, it is possible to construct new reactions from others previously constructed. The wells in such sample QIAgility User Manual 11/2011...
- Page 316 When activated, this function suppresses this warning, allowing the operation to proceed regardless. By default, this function is activated. QIAgility User Manual 11/2011...
- Page 317 Recommended settings cause the pipettor to probe the surface at least twice looking for successive level detections which are within a small tolerance before proceeding with dispensing. By default, recommended settings to multiprobe the surface are activated. QIAgility User Manual 11/2011...
- Page 318 Ensure that 50 µl tips are available, that the Tip Rack Holder is calibrated, and that the correct tips are set as available. 1. Select “Options/Robot Setup/Calibrate plate height”. 2. The “Configure Plate Heights” dialog box will appear. QIAgility User Manual 11/2011...
- Page 319 This enables the user to confirm the value to be recorded as the auto-detected height. Take average Defines the number of wells from which to of how many take an average. wells? QIAgility User Manual 11/2011...
- Page 320 This displays a graphic of the first segment to be calibrated based on the selected checkboxes. It also indicates the wells to be calibrated, according to the selected number of wells to average. Ensure that empty tubes are present in the indicated well locations. QIAgility User Manual 11/2011...
- Page 321 This value can be saved using the “Save” button, or the process at step 8 can be performed again by selecting “Retry”. If “Require confirmation from QIAgility User Manual 11/2011...
- Page 322 10. If more than one plate was selected in the “Plates to Calibrate” list, the instrument will calibrate each plate in turn. Repeat steps 8 and 9 for each plate. 11. When all calibrations are complete, click the “Close” button. F-10 QIAgility User Manual 11/2011...
-
Page 323: Description Of The Generic Xml Format
<Size>96</Size> <Wells> <Well> <Label>A1</Label> <WellID/> <WellNo>1</WellNo> <StandardWellName>A:1</StandardWellName> <Color>5775359</Color> <TubeType>BioSprint_250</TubeType> <Concentration>37</Concentration> <FinalWellVol>80</FinalWellVol> <EventOccurred>0</EventOccurred> <Contents> <Diluent> <SocketName>M1</SocketName> <WellLabel>A</WellLabel> <Vol>40</Vol> </Diluent> <Mix> <SocketName>M1</SocketName> <WellLabel>B</WellLabel> <Vol>10</Vol> <Name>Mix B</Name> </Mix> <Reagent> <SocketName>R1</SocketName> <WellLabel>I</WellLabel> <Vol>2.5</Vol> <Name>10X Buffer</Name> </Reagent> <Sample> <SocketName>C1</SocketName> <PlateID/> <WellLabel>A1</WellLabel> QIAgility User Manual 11/2011... - Page 324 To make the user’s selection for empty wells and sample labels evaluable, two parameters are passed to the XSL transformation. These are: SampleLabelType Possible values: SL_FullID = 0 SL_SampleID = 1 SL_ReactionID = 2 SL_SampleName = 3 QIAgility User Manual 11/2011...
- Page 325 Appendix G EmptyLabelType Possible values: EL_Empty = 0 EL_WellID = 1 EL_WellOrder = 2 EL_WellNumber = 3 They can be evaluated during the transformation. QIAgility User Manual 11/2011...
- Page 326 Appendix G This page intentionally left blank QIAgility User Manual 11/2011...
- Page 327 Risk of personal injury and material damage [W3] CAUTION The QIAgility is too heavy to be lifted by one person. To avoid personal injury or damage to the instrument, do not lift the instrument alone. If you need to transport the QIAgility, package the instrument as follows: 1.
- Page 328 Appendix H This page intentionally left blank QIAgility User Manual 11/2011...
- Page 329 UV lamp, 4-6 Instrument lid, 3-3 Decontamination, 8-3 Intended use, 2-3 Dilution series, 5-63 Lid, 3-3 Errors, 6-13, 9-6 Liquid-level tracking error codes, 9-8 liquid-level estimate, 3-13 Exporting data, 5-111 liquid-level sensing, 3-13 Log files, 6-17 QIAgility User Manual 11/2011 Index-1...
-
Page 330: Produits Chimiques C
C-2 Servicing, 8-1 service register, 5-146 Q Protocols, 6-5 Sicherheit ”QProtocols” folder, 4-16 Chemikalien, D-7 QIAgility elektrische, D-3 hardware features, A-2 Gefahr durch mechanische Teile, internal features, 3-8 mechanical data, A-2 sachgemäße Handhabung, D-2 Index-2 QIAgility User Manual 11/2011... - Page 331 Storage conditions, A-1 Worktable, 3-6, 3-9, 5-44, 6-10 Support packages, 6-18 Symbols, 1-8 X-axis, 3-9 Y-arm, 3-9 Technical assistance, 2-2 Y-axis, 3-9 Tip chute, 3-4, 8-4 Z-axis, 3-9 Tip disposal box, 3-6 Tip ejector, 3-9 QIAgility User Manual 11/2011 Index-3...
- Page 332 Index This page intentionally left blank Index-4 QIAgility User Manual 11/2011...
- Page 334 Australia Orders 1-800-243-800 Fax 03-9840-9888 Technical 1-800-243-066 Austria Orders 0800-28-10-10 Fax 0800-28-10-19 Technical 0800-28-10-11 Belgium Orders 0800-79612 Fax 0800-79611 Technical 0800-79556 Orders 0800-557779 Fax 55-11-5079-4001 Technical 0800-557779 Brazil Canada Orders 800-572-9613 Fax 800-713-5951 Technical 800-DNA-PREP (800-362-7737) China Orders 86-21-3865-3865...
Need help?
Do you have a question about the QIAgility and is the answer not in the manual?
Questions and answers