Cognex DataMan 503 Quick Reference Manual
Hide thumbs
Also See for DataMan 503:
- Quick reference manual (26 pages) ,
- Reference manual (173 pages) ,
- Quick reference manual (12 pages)
Table of Contents
Advertisement
Quick Links
Advertisement
Table of Contents

Related Manuals for Cognex DataMan 503


Summary of Contents for Cognex DataMan 503
- Page 1 ® DataMan Quick Reference Guide 5/25/2016 Version 5.6.3...
-
Page 2: Legal Notices
Copyright © 2016. Cognex Corporation. All Rights Reserved. Portions of the hardware and software provided by Cognex may be covered by one or more U.S. and foreign patents, as well as pending U.S. and foreign patents listed on the Cognex web site at: http://www.cognex.com/patents. -
Page 3: Table Of Contents
Setting Up Your DataMan Reader Layout Dimensions DataMan 503 Specifications DataMan 503 Imager Specifications Installing a C-Mount Lens Synchronized Acquisition Using Your DataMan 503 Reader Installing the DataMan Software Troubleshooting an Ethernet Connection Industrial Protocols DataMan 503 Triggering Multi-Reader Triggering Training the Reader... -
Page 4: Symbols
Symbols Symbols The following symbols indicate safety precautions and supplemental information. WARNING: This symbol indicates the presence of a hazard that could result in death, serious personal injury or electrical shock. CAUTION: This symbol indicates the presence of a hazard that could result in property damage. Note: Notes provide supplemental information about a subject. -
Page 5: Getting Started
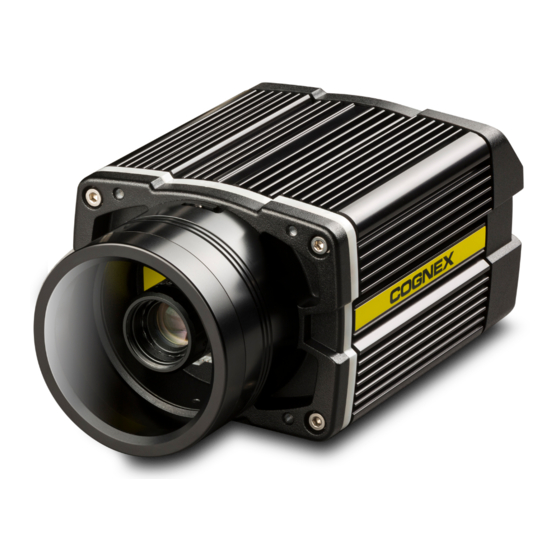
Getting Started Getting Started This section provides general information about the DataMan 503 reader as well as about the DataMan 503 accessories and systems. About DataMan 503 The DataMan 503 is a high-performance, fixed-mount ID reader that offers the following advanced features:... -
Page 6: Dataman 503 Accessories
Getting Started DataMan 503 Accessories C-MOUNT LENS OPTIONS 16 mm, 25 mm and 35 mm lens (LEC-CFFxx-F8) (xx specifies focal length) FIELD OF VIEW EXPANDERS Xpand 15 (DMA-FOVE-15) Xpand 25 (DMA-FOVE-25) EXTERNAL LIGHT SVL Light Bar (IVSL-YLW300-xxx) HIGH POWER ILLUMINATIONS... -
Page 7: Dataman 503 Systems
Getting Started I/O extension cable, 5m straight (CKR-200-CBL-EXT) RS-232 M8 to SUB-D cable (CCB-M8X4-xx) Synchronization Cable (DM503-SYNC-012 - 1.2 meter, DM503-SYNC-05 - 5 meter) DataMan 503 Systems High-Speed PArt Omnidirectional Code 1DMax™ — Best- IDQuick™ — Moving Applications Reading In-Class 1-D... -
Page 8: Setting Up Your Dataman
Setting Up Your DataMan Setting Up Your DataMan This section provides information on the physical appearance of the DataMan 503 reader. It also details the steps of installing the lenses and filters of the reader, and gives information on the imager itself. - Page 9 Setting Up Your DataMan Type Signal Color Meaning GREEN Good read Good/bad read Bad read YELLOW Link up Action Communication blink Activity Decode yield, train Peak meter progress/quality...
-
Page 10: Dimensions
Setting Up Your DataMan Dimensions Observe the following DataMan 503 dimensions when installing your reader. -
Page 11: Dataman 503 Specifications
Maximum current: 500 mA (at 25ºC) Requirements Maximum power: 18W (external lights) 10/100/1000 Ethernet Speed Full duplex or half duplex Duplex Mode DataMan 503 Imager Specifications Specification DataMan 503 Imager Image Sensor 2/3 inch CMOS Image Sensor Properties 5.5μm square pixels Image Resolution (Pixels) -
Page 12: Installing A C-Mount Lens
Installing a C-Mount Lens DataMan 503 ships with no lens installed. You must install a standard C-mount lens before using your reader. For reading distances and field of view charts, see the DataMan Fixed Mount Reference, available through the Windows Start menu or the DataMan Setup Tool Help menu. -
Page 13: Synchronized Acquisition
Setting Up Your DataMan Synchronized Acquisition In Single, Burst, Continuous, and Self trigger modes, it is possible to synchronize image acquisition on multiple devices using the synchronization interface. Synchronization allows using one shared strobed illumination to expose all sensors simultaneously. You can synchronize up to 16 readers, with optionally triggering them in a defined sequence to avoid opposing readers from blinding each other. -
Page 14: Using Your Dataman 503 Reader
Detected readers will appear under COM ports. 5. Click Refresh to update the list of connected devices. 6. Select a COM port that lists DataMan 503 and click Connect. Troubleshooting an Ethernet Connection Based on your network configuration, the DataMan Setup Tool may not be able to communicate with the reader and it will not appear in the list of Network devices. -
Page 15: Industrial Protocols
Using Your DataMan 503 Reader Industrial Protocols The DataMan 503 series readers support the following industrial protocols: EtherNet/IP PROFINET MC Protocol Modbus TCP Select industrial protocol samples and tools you want to use when you install the DataMan Software. There are three ways to enable or disable Industrial Protocols. Using either method, a reboot is required for the changes to come into effect. -
Page 16: Dataman 503 Triggering
The high-speed image acquisition and processing capabilities of the DataMan 503 allow it to detect and decode codes at up to 80 codes per second, multiple decodes per scan. If you set a higher re-read delay than the trigger interval, there is a code output only once until the code is out of the field of view for the duration of the re-read delay. -
Page 17: Training The Reader
Using Your DataMan 503 Reader Multi-reader triggering is used to support extended field of view reading and reading codes from multiple product surfaces: To configure multi-reader triggering, click Toggle Group Triggering in the group editor page of the DataMan Setup Tool. -
Page 18: Training Feedback
Using Your DataMan 503 Reader Note: Only a single symbol of each symbology kind can be trained. Training Feedback The second LED from the left on the reader glows green to indicate that it is currently trained, or yellow to indicate that it is not trained. -
Page 19: Connections, Optics And Lighting
Connections, Optics and Lighting Connections, Optics and Lighting This part contains descriptions about the external light control, I/O Cables, RS-232 cable,high-speed output lines, high- speed output wiring, Ethernet M12 to RJ45 cable, and acquisition triggering. I/O Cable (CCBL-05-01) The I/O breakout cable provides access to trigger and high-speed outputs. Unused wires can be clipped short or tied back using a tie made of non-conductive material. -
Page 20: External Light Control (Ccb-M12X4Ms)
Connections, Optics and Lighting External Light Control (CCB-M12x4MS) A 4-pin cable is provided for the external light control. Current load: average: 500mA, peak: 1A (max. 100µs) Note: This socket does not work if the external light is connected to one of the outputs on the I/O cable. -
Page 21: High-Speed Output Lines
Connections, Optics and Lighting High-Speed Output Lines The high-speed outputs can be used as either NPN (pull-down) or PNP (pull-up) lines. For NPN lines, the external load should be connected between the output and the positive supply voltage (<28V). The outputs pull down to less than 3V when ON, which causes current to flow through the load. - Page 22 Connections, Optics and Lighting To connect the high-speed outputs to a relay, LED or similar load, connect the negative side of the load to the output and the positive side to +24V. When the output switches on, the negative side of the load is pulled down to less than 3V, and 24 appears across the load.
-
Page 23: Ethernet M12 To Rj45 Cable (Ccb-84901-Y00X-Xx)
Connections, Optics and Lighting Ethernet M12 to RJ45 Cable (CCB-84901-y00x-xx) The Ethernet cable provides Ethernet connection for network communications. The Ethernet cable can be connected to a single device or provide connections to multiple devices via a network switch or router. P1 Pin# Signal Name Wire Color... -
Page 24: Compliance Information, Warnings And Notices
Use of controls or adjustments or performance of procedures other than those specified herein may result in serious injury. Do not attempt to service or repair this product - return it to Cognex for service. Do not permit anyone other than Cognex Coproration to service, repair, or adjust this product. -
Page 25: Compliance Statements
Compliance Statements Compliance Statements The DataMan 503 series meets or exceeds the requirements of all applicable standards organizations for safe operation. However, as with any electrical equipment, the best way to ensure safe operation is to operate them according to the agency guidelines that follow. - Page 26 Compliance Statements The crossed out wheeled bin symbol informs you that the product should not be disposed of along with municipal waste and invites you to use the appropriate separate take-back systems for product disposal. If you need more information on the collection, reuse, and recycling systems, please contact your local or regional waste administration.
Need help?
Do you have a question about the DataMan 503 and is the answer not in the manual?
Questions and answers