Table of Contents
Advertisement
Quick Links
Advertisement
Table of Contents

Related Manuals for Bernina L460


Summary of Contents for Bernina L460
- Page 1 BERNINA L 460 | L 450 Instruction Manual...
-
Page 3: Table Of Contents
(Stitch 7, 8, 13, 30) ̶ recommended thread Reading Instructions ⦁ Test sewing ̶ Front view L 450 / L 460 ̶ Side view L 450 / L460 ⦁ Adjusting thread tensions ̶ ̶ L 450 4-/3-thread overlock ⦁ Accessory ⦁... -
Page 4: Safety Instructions
WARNING! user servicing adjustments mentioned in the instruction manual. 12. Do not use bent needles. As a protection against burns, fire, electric shock or 13. Always use the original BERNINA stitch plate. injury to persons: wrong stitch plate cause 1. - Page 5 SERVICING DOUBLEINSU- LATED PRODUCTS Environmental Protection In a double-insulated product two systems of insu- BERNINA is committed to the protection lation are provided instead of grounding. No of the environment. We strive to minimize grounding means is provided on a double-insulated...
-
Page 6: Reading Instructions
Reading Instructions Reading Instructions DANGER! Very important! Risk of injury! Tips and hints! The tag is not always at the top of the page but also at the top of the description! Hint for L 450 users All pictures show the L 460 except for specifically marked ones. - Page 7 Make sure to study this instruction manual in order to get full benefit of all these functions. Should you require further assistance, your BERNINA dealer will be a good choice to visit. He also carries a selection of optional accessories, which extends the application range of your BERNINA overlocker/serger even further.
-
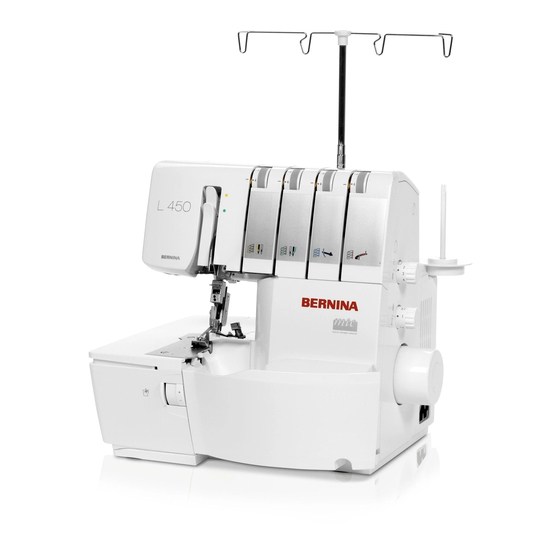
Page 8: Front View L 450 / L 460
Machine overview Front view L 450 / L 460 1 Sewing table 17 Needle Pad 33 Lower looper 2 Presser foot release lever 18 Looper Cover 34 Thread pretension 3 Needle holder 19 Accessories Storage 35 SpoolStabilizer 4 Presser foot lifter 20 Safety indicator 36 Thread Stand 5 Thread Cutter... -
Page 9: Side View
Machine overview Side view L 450 / L460 L 450 L 460... -
Page 10: Accessory
Accessory 1 Foot Control / Power Cord (L 450) (Typ YC-483N for 230V or YC 482E for 120V) 2 Foot Control (L 460 - BERNINA Typ LV 1) 3 Power Cord (L 460) 4 Cut-offsbin Accessory storage in the looper cover 5 Needle set 130/705H (2x No.70, 3x No.80) -
Page 11: Machine Setup
Machine Setup Machine Setup Foot control and power cord Connection for L 460 ⦁ Insert the plug of the foot control into the respective sockets (1). ⦁ Insert the plug of the power cord into the respective sockets (2). ⦁ The power switch (3) turns the machine and the sewing light on/off. -
Page 12: Extension Table (L 450 Optional)
Machine Setup Extension Table (L 450 optional) The extension table provides a large working surface for your sewing projects. ⦁ To attach, slide the extension table from the left side horizontally along the ditch until it engages. ⦁ To remove, slide the table to the left side while pushing the release button at the back of the table. -
Page 13: Spool Stabilizer
Machine Setup Spool Stabilizer Spool stabilizer for cones With small cones the Spool stabilizer (1) is used with the narrow end upwards. With large cones the Spool stabilizer (2) is used with the narrow end downwards. Spool caps for domestic type spools For standard type spools, use the spool cap (3). -
Page 14: Operating Instructions
Operating Instructions Operating Instructions Control elements Power switch The power switch controls both the machine power and the sewing light. When leaving the machine unattended, or servicing the machine, switch the machine off, and remove the power cord from the wall outlet. Looper cover ⦁... -
Page 15: Foot Control
Operating Instructions Foot control ⦁ The pressure on the foot control regulates the sewing speed. Needle up/down (L 460) After sewing, the needle always stops at its highest position. ⦁ Adjust the up/down position of the needle by sinking the heel back on the foot control. Safety LED L 460 When the Safety LED is activated, the machine will not run. -
Page 16: Handwheel And Handwheel Position Indicator Window
Operating Instructions Handwheel and handwheel position indicator window ⦁ The handwheel turns counter-clockwise. ⦁ Open the looper cover to check the handwheel position indicator. Then set the hand- wheel to threading position. ► With the L 460, the needle stops at threading position automatically after sewing. ⦁... -
Page 17: Fhs Free Hand System L
Wurde der Nähfuss mit dem Nähfussheber angehoben (3), kann er mit dem Kniehebel gesenkt werden, in dem dieser ganz nach rechts gedrückt und langsam losgelassen wird. Die seitliche Position des Kniehebels kann durch ein BERNINA-Fachgeschäft etwas angepasst werden. 1 Kneelifter Socket... -
Page 18: Needle Inserter
Operating Instructions Needle Inserter To handle the needle conveniently use the Needle Threader / -Inserter which is provided in the Accesssories Storage. ⦁ Sliding the Needle Inserter over the needle before loosening the set screw avoids dropping the needle. ⦁ The new needle is held in place by the Needle Inserter while inserting and tightening the screw. -
Page 19: Knife
Operating Instructions Knife Deactivating the knife ⦁ Open the sewing table and the looper cover. ⦁ Press the knife activating knob on/off (1) und turn clockwise (2) until the knife engages at the lower position. ⦁ Close the sewing table and the looper cover. Activating the knife ⦁... -
Page 20: Needle And Thread
Operating Instructions Needle and Thread Needle This overlocker is prepared to hold needles of the system 130/705H (standard household needles, equivalent to HAx1 of the system 15x1 H). For standard applications use universal needles of the sizes No.70-90 (equivalent to 10-14 in the US). -
Page 21: Needle And Thread Matching
⦁ Pull the thread chain gently to the back when starting to sew. Always test sew decora- tive threads before starting to sew the project. BERNINA recommends using high- quality threads such as Mettler Seracor®, Serafloc®, Seralene®,Poly Sheen® and Isacord. -
Page 22: Adjusting And Setting
Adjusting and Setting Adjusting and Setting Stitch length Turn the Stitch Length dial until the desired length is obtained. The higher the number, the longer the stitch. The stitch lenght is infinitely variable and can be adjusted from 0.8 - 4.0 mm, even while sewing. -
Page 23: Mtc Thread Control (Micro Thread Control)
Adjusting and Setting mtc Thread control (Micro Thread Control) This machine is equipped with the patented fine tuning feature mtc. mtc provides easy controlling of the amount of the overedge thread along the fabric edge. Always start at neutral position (center) when threading the machine to a new stitch con- figuration. -
Page 24: Differential Feed Adjustment
Adjusting and Setting Differential Feed adjustment The machine provides two feed dogs which move independently. Feed Dogs can be adjusted to each other to transport the fabric evenly and to prevent unwanted puckering or waving. Even while sewing the Feed Dogs can be adjusted infinitly variable. The adjustment can be made in the range of 0.7 (stretching effect) to 2 (gathering effect). -
Page 25: Threading And Sewing
Threading and Sewing Threading and Sewing Stitch overview The basic values can vary depending on materials used. Refer to chapter Sewing sample, page 31... -
Page 26: Threading - General Information
Threading and Sewing Threading - General information Threading preparation ⦁ Switch the machine off (power switch "0"). ⦁ align the thread guide parallel to the Thread Stand. ⦁ Open the looper cover. ⦁ If wanted, open the sewing table and deactivate the knife by pushing in and turning the knife acivating knob until it clicks in. -
Page 27: 3-Thread Overlock (Stitch No. 1, 3-8, 30)
Threading and Sewing 4-/3-thread overlock (Stitch No. 1, 3-8, 30) Threading the upper looper (blue) ⦁ Prepare maschine threading. „Threading - General information“ see page 24. ⦁ Make sure that the handwheel is in threading position (Handwheel position indicator window) (1) and the presser foot is lifted. -
Page 28: Threading The Lower Looper (Red)
Threading and Sewing Threading the lower looper (red) ⦁ Prepare maschine threading. („Threading - General information“ see page 24). ⦁ Make sure that the handwheel is in threading position (Handwheel position indicator window) (1) and the presser foot is lifted. ⦁... -
Page 29: Threading The Right Needle (Green)
Threading and Sewing Threading the right needle (green) ⦁ Prepare maschine threading. („Threading - General information“ see page 24). ⦁ Make sure that the handwheel is in threading position (Handwheel position indicator window) (1) and the presser foot is lifted. ⦁... -
Page 30: Threading The Left Needle (Yellow)
Threading and Sewing Threading the left needle (yellow) ⦁ Prepare maschine threading. („Threading - General information“ see page 24). ⦁ Make sure that the handwheel is in threading position (Handwheel position indicator window) (1) and the presser foot is lifted. ⦁... -
Page 31: 3-Thread Overlock
Threading and Sewing 3-thread overlock By threading the left needle a seam width of 5-9 mm will be pro- duced. By threading the right needle a seam width of 3-7 mm is generated. ⦁ Store the needle which is not used in the needle pad behind the looper cover. -
Page 32: Narrow Seam, Rolled Hem And Picot Stitch (Stitch 7, 8, 13, 30)
Threading and Sewing Narrow seam, Rolled Hem and Picot stitch (Stitch 7, 8, 13, 30) recommended thread Narrow seam Rolled hem Rolled hem with 3 threads with 3 threads with 2 threads Polyester, nylon, silk No. Thread for the needle Nylon No.100 50-100 Upper looper... -
Page 33: Test Sewing
Threading and Sewing Test sewing Maximum Material passage for your project is 6 After threading is completed, use a spare piece of the same fabric to be used to sew and do a test sewing. ⦁ Preset the basic thread tension, position of the Rolled Hem Selection lever, the Cutting Width, Stitch Length, Differential Feed and the Upper Looper Converter as required. -
Page 34: Adjusting Thread Tensions
Threading and Sewing Adjusting thread tensions The thread tension can be altered for every thread via the thread tension adjustment. ⦁ Turning the dial upwards increases the tension. ⦁ Turning the dial upwards decreases the tension. 1 Increasing the tension 2 Decreasing the tension 4-/3-thread overlock Balanced thread... -
Page 35: Sewing Examples
Threading and Sewing Sewing examples Securing a Seam Seam begin ⦁ Sew to form a 4cm/1.5" chain (1). ⦁ Position the fabric and sew one stitch. ⦁ Bring the needles down. ⦁ Raise the presser foot. ⦁ Pull the thread chain gently to the left and place it in front under the presser foot. -
Page 36: Securing The Thread Chain
Threading and Sewing Securing the thread chain ⦁ Leave a 12cm/5" chain at the beginning and the end of the seam so that it can be knotted or pulled through the first/last few stitches with a darning needle. Undoing stitches To remove stitches already sewn, snip off the needle thread(s) at intervals and pull out looper thread(s). -
Page 37: Decorative Effects
Using the blind hem foot facilitates the creation of decorative stitches. When thicker thread is used, release the thread tension of the loopers and adjust the stitch length. Further practical sewing tips can be found in the BERNINA Overlock manual. -
Page 38: Differential Feed Applications
Threading and Sewing Differential feed applications The Differential feed The differential feed (1) is designed to prevent unwanted puckering or waving on the one hand and on the other hand seams can be gathered with intention (1). It is optimal for waver-free seams in knitted fabrics. -
Page 39: Maintenance
⦁ Apply a few drops of oil to the points indicated by arrows (2). 1 Cleaning 2 Oiling Use good quality machine oil all the time. Contact your BERNINA dealer for details. -
Page 40: Troubleshooting Guide
Maintenance Troubleshooting Guide Problem Cause Solution Page Irregular Stitch ̶ Incorrect thread tension(s). ⦁ Adjust the thread tension(s). 23, 32 ⦁ 18, 19 ̶ Incorrect needle size. Choose the correct needle size for thread and fabric. ⦁ 24ff ̶ Incorrectly threaded. Re-thread the machine. -
Page 41: Optional Accessories
Optional Accessories Optional Accessories Blind stitch foot Blind stitch feet are available in two sizes at the BERNINA specialized store. 0.5 for thin up to medium weight fabrics / 1.0 for medium weight up to heavy weight fabrics. ⦁ Attach the appropriate blind stitch foot. -
Page 42: Elasticator Foot
Optional Accessories Elasticator Foot The Elasticator foot is available at the BERNINA specialized store. This foot will guide the elastic and at the same time it applies pressure to the elastic with a specially designed tension controlled roller. ⦁ Attach the Elasticator foot. -
Page 43: Multi-Purpose Foot
Optional Accessories Multi-purpose Foot Piping The Multi-purpose foot is available at the BERNINA specialized store. ⦁ Attach the Multi-purpose foot. ⦁ 4- or 3-thread overlock. ⦁ Piping (corded bias fold tape). ⦁ Place folded piping between fabric layers. ⦁ Sewing on braid or ribbon for straight seams. -
Page 44: Gathering Foot
Optional Accessories Gathering foot The Gathering foot is available at the BERNINA specialized store. Gathering ⦁ Attach the Gathering foot. ⦁ Set up a 4- or 3-thread overlock. ̶ Differential feed 1.5 - 2 ̶ Increase the thread tension of the needle thread. -
Page 45: Appendix
⦁ Safety LED Foot control ⦁ Type YC-483N for 230V ⦁ BERNINA LV 1 ⦁ YC 482E for 120V (Canada/USA) Dimensions witout Retractable Guide ⦁ 320 x 305 x 295 ⦁ 320 x 305 x 295... - Page 46 Imprint Remarks Copyright 2015 BERNINA International AG, CH-8266 Steckborn 2nd Edition - 2016/06 en 5074506.0.04...
-
Page 47: Thread Chart
Thread Chart 4-th 4-thread overlock 4-thread OL Threading / thread tension setting Machine Setup L 460 L 450 Rollhem Upper Cutting Stitch Differential Stitch Left needle Right needle Upper Lower Rolled Upper Cutting Stitch Differential Selection Looper L 460 L 450 Width Length Feed... - Page 48 3-th 3-thread super stretch 3-thread super stretch Threading / thread tension setting Machine Setup L 460 L 450 Rollhem Upper Cutting Stitch Differential Stitch Left needle Right needle Upper Lower Rolled Upper Cutting Stitch Differential Selection Looper L 460 L 450 Width Length Feed...
-
Page 49: 3-Thread Overlock (Ln)
3-th 3-thread over lock(left needle) 3-thread overlock (LN) (Left needle) Threading / thread tension setting Machine Setup Rollhem Upper Cutting Stitch Differential Selection Looper L 460 L 450 Width Length Feed L 460 L 450 Lever Coverter Stitch Stitch Left needle Right needle Upper Lower... -
Page 50: 3-Thread Overlock (Rn)
3-thread over lock(right needle) 3-thread overlock (RN) (Right needle) Threading / thread tension setting Machine Setup Rollhem Upper Cutting Stitch Differential L 460 L 450 Selection Looper L 460 L 450 Width Length Feed Lever Stitch Coverter Stitch Left needle Right needle Upper Lower... -
Page 51: 3-Thread Flatlock (Ln)
3-thread 3-thread flatlock(left needle) 3-thread flatlock (LN) (Left needle) Threading / thread tension setting Machine Setup Rollhem Upper Cutting Stitch Differential L 460 L 450 Selection Looper L 460 L 450 Width Length Feed Stitch Lever Coverter Stitch Number Left needle Right needle Upper Lower... -
Page 52: 3-Thread Flatlock (Rn)
3-thread 3-thread flatlock(right needle) 3-thread flatlock (RN) (Right needle) Threading / thread tension setting Machine Setup Rollhem Upper Cutting Stitch Differential L 460 L 450 Selection Looper L 460 L 450 Stitch Width Length Feed Left needle Right needle Upper Lower Rolled Upper... -
Page 53: 3-Thread Narrow Seam
3-thread 3-thread narrow seam 3-thread narrow seam Threading / thread tension setting Machine Setup Rollhem Upper Cutting Stitch Differential L 460 L 450 Selection Looper L 460 L 450 Width Stitch Length Feed Left needle Right needle Upper Lower Rolled Upper Cutting Stitch... -
Page 54: 3-Thread Rolled Hem
3-thread 3-thread roll hem 3-thread rolled hem Threading / thread tension setting Machine Setup Rollhem Upper Cutting Stitch Differential L 460 L 450 Selection Looper L 460 L 450 Width Length Feed Stitch Left needle Right needle Upper Lower Rolled Lever Upper Cutting... -
Page 55: 2-Thread Overlock (Ln)
2-thread 2-thread wrapped overlock(left needle) 2-thread overlock (LN) (wrapped overlock left needle) Threading / thread tension setting Machine Setup Rollhem Upper Cutting Stitch L 460 Differential L 450 Selection Looper Stitch L 460 L 450 Left needle Right needle Upper Lower Width Rolled... -
Page 56: 2-Thread Overlock (Rn)
2-thread w 2-thread wrapped overlock(right needle) 2-thread overlock (RN) (wrapped overlock right needle) Threading / thread tension setting Machine Setup Rollhem Upper Cutting Stitch L 460 Differential L 450 Selection Looper Stitch L 460 L 450 Width Length Feed Left needle Right needle Upper Lower... -
Page 57: 2-Thread Flatlock (Ln)
2-thread 2-thread flatlock(left needle) 2-thread flatlock (LN) (Left needle) Threading / thread tension setting Machine Setup Rollhem Upper Cutting Stitch Differential L 460 L 450 Selection Looper L 460 L 450 Width Length Feed Stitch Left needle Right needle Upper Lower Rolled Upper... -
Page 58: 2-Thread Flatlock (Rn)
2-thread 2-thread flatlock(right needle) 2-thread flatlock (RN) (Right needle) Threading / thread tension setting Machine Setup Rollhem Upper Cutting Stitch Differential L 460 L 450 Selection Looper L 460 L 450 Width Length Feed Stitch Left needle Right needle Upper Lower Rolled Upper... -
Page 59: 2-Thread Rolled Hem
2-thread 2-thread roll hem 2-thread rolled hem Threading / thread tension setting Machine Setup Rollhem Upper Cutting Stitch Differential L 460 L 450 Selection Looper L 460 L 450 Width Length Feed Stitch Lever Coverter Stitch Left needle Right needle Upper Lower Rolled... -
Page 60: 2-Thread Overlock (Ln)
2-thread 2-thread over lock(left needle) 2-thread overlock (LN) (Left needle) Threading / thread tension setting Machine Setup Rollhem Upper Cutting Stitch Differential L 460 L 450 Selection Looper L 460 L 450 Width Length Feed Stitch Left needle Right needle Upper Lower Rolled... -
Page 61: 2-Thread Overlock (Rn)
2-thread 2-thread over lock(right needle) 2-thread overlock (RN) (Right needle) Threading / thread tension setting Machine Setup Rollhem Upper Cutting Stitch Differential L 460 L 450 Selection Looper L 460 L 450 Width Length Feed Stitch Left needle Right needle Upper Lower Rolled... -
Page 62: 3-Thread Picot Stitch
3-thread picot stitch 3-thread picot stitch Threading / thread tension setting Machine Setup Rollhem Upper Cutting Stitch Differential L 460 L 450 Selection Looper L 460 L 450 Width Length Feed Stitch Left needle Right needle Upper Lower Rolled Upper Cutting Stitch Differential... - Page 64 Copyright 2015 BERNINA International AG, CH-8266 Steckborn 2nd. Edition - 2016/06 en 5074506.0.04...