Table of Contents

Related Manuals for Bernina Serger


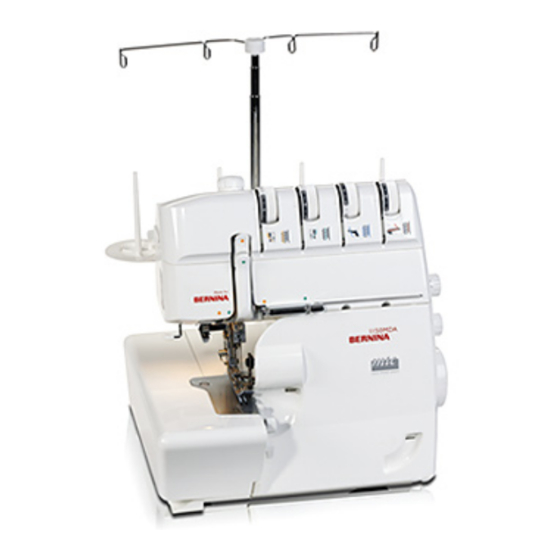
Summary of Contents for Bernina Serger
- Page 1 Basic Serger Use For all current BERNINA sergers except the 009DCC ©2010 BERNINA of America, Inc. Permission granted to copy and distribute in original form only. Content may not be altered or used in any other form or under any other branding.
-
Page 2: Table Of Contents
2-Thread Flatlock ......................22 Color-Coded Threading Charts ................... 23 1150MDA Basic Serger Use 800DL 1300MDC 700D The information in this workbook applies to the current line of BERNINA Sergers. Note: Some exercises apply only to certain models equipped with the feature being highlighted. -
Page 3: Introduction
Sometimes called the microwave of sewing, your serger will speed your sewing in several ways, letting you produce more in less time. The speed of the serger is faster than a sewing machine and because it performs several operations (trimming, seaming, and overcasting) at the same time, you sew faster, and in the process, produce neater and more professional-looking results. -
Page 4: Needle And Thread
You also want a good-quality thread – such as Mettler Metrocor – that is not “fuzzy” and does not leave excessive lint in the lower part of your overlock machine. Serger threads are sold on cones for economy and convenience; regular spools of thread may be used but will not last very long when forming serger stitches. - Page 5 1300MDC Screen Information...
-
Page 6: 4-Thread Balanced Stitch
Presser Foot: 4-thread overlock Stitch: Thread the serger for a 4 thread overlock stitch using thread colors to match the color-coded threading path on the serger. Adjust all thread tension settings as indicated below. Fold the fabric in half to 3” x 6”. -
Page 7: Adjusting Tension Settings
Adjusting Tension Settings Examine your 4-thread sample. The illustrations below show examples of unbalanced stitches and how to correct the settings to balance the stitch. When making corrections in the tension settings, increase or decrease the settings as needed, moving the dial ½ to 1 number at a time. Stitch a seam using the new settings and then evaluate the new stitch. -
Page 8: Micro Thread Control
Divide the fabric into 4 equal sections along one side, finger-press the folds to form creases. Thread the serger for a 4-thread overlock stitch using thread colors to match the color-coded threading path on the serger. Adjust all thread tension settings as indicated below. -
Page 9: Stitch Length
Using a fabric marker, divide the fabric into four equal sections along the folded edge. Thread the serger for a 4-thread overlock stitch using thread colors to match the color-coded threading path on the serger. Adjust all thread tension settings as indicated below. -
Page 10: Cutting Width
Divide and mark the fabric into three equal sections along the folded edge. Thread the serger for a 4-thread overlock stitch using thread colors to match the color-coded threading path on the serger. Adjust all thread tension settings as indicated below. -
Page 11: Differential Feed
Differential Feed: Stretchy Fabrics Knit ribbing, three pieces, 3” x 6” each Fabric: 80/12 Universal Needle: 4 cones of serger thread (blue, red, green, yellow) Thread: Standard Presser Foot: 4-thread overlock Stitch: Thread the serger for a 4-thread overlock stitch using thread colors to match the color-coded threading path on the serger. -
Page 12: Thread Overlock
Presser Foot: 4-thread overlock Stitch: Thread the serger for a 4-thread overlock stitch using thread colors to match the color-coded threading path on the serger. Adjust all thread tension settings as indicated below. With differential set at N, serge on one 6” edge. If fabric is lightweight enough you will have a puckered edge. - Page 13 Using a fabric marker, divide the fabric into 3 equal sections along the 12” side. Thread the serger for a 4-thread overlock stitch using thread colors to match the color-coded threading path on the serger. Adjust all thread tension settings as indicated below.
-
Page 14: Securing Serged Seams
Place the fabric under the presser foot so that the first stitch will enter the fabric when you begin stitching. Slide the Stitch Selection lever towards the body of the serger. Serge for about 1”, overstitching the previous stitching. Guide the fabric so as not to cut the previous stitching. -
Page 15: Presser Foot Tape Guide
Presser Foot: 4-thread overlock Stitch: Thread the serger for a 4-thread overlock stitch using thread colors to match the color-coded threading path on the serger. Adjust all thread tension settings as indicated below. Locate the tape guide on the presser foot. -
Page 16: 3-Thread Balanced Stitch: Wide And Narrow
Snug the needle set screw after removing the needle. Thread the serger for a wide 3-thread overlock stitch using the LEFT needle and thread colors to match the color-coded threading path on the serger. Adjust all thread tension settings for a balanced stitch as indicated below. -
Page 17: Inside Corners
Using the small screwdriver and brush/needle insertion tool, remove the left needle. Snug the needle set screw after removing the needle. Thread the serger for a narrow 3-thread overlock stitch using thread colors to match the color-coded threading path on the serger. Adjust all thread tension settings for a balanced stitch as indicated below. -
Page 18: Outside Corner
Using the small screwdriver and brush/needle insertion tool, remove the left needle. Snug the needle set screw after removing the needle. Thread the serger for a narrow 3-thread overlock stitch using thread colors to match the color-coded threading path on the serger. Adjust all thread tension settings for a balanced stitch as indicated below. -
Page 19: 3-Thread Rolled Hem
Thread the serger for a narrow 3-thread overlock stitch using thread colors to match the color-coded threading path on the serger. Adjust all thread tension settings for a rolled edge as indicated below. Pull the Stitch Selection Lever toward you. -
Page 20: 3-Thread Flatlock Stitch
Snug the needle set screw after removing the needle. Thread serger for a wide 3-thread flatlock stitch. Adjust all thread tension settings as indicated below. Note: Sample was stitched with regular thread but a heavy thread such as YLI Jeans Stitch or Designer 6 can be used in the upper looper for a more decorative look. -
Page 21: 2-Thread Rolled Hem
Note: This is an optional accessory for the 700D. Thread the serger for a 2-thread using thread colors to match the color-coded threading path on the serger. Adjust all thread tension settings as indicated below. Pull the Stitch Selection lever toward you. -
Page 22: 2-Thread Flatlock
Attach the Upper Looper Converter to the upper looper. Note: This is an optional accessory for the 700D. Thread serger for a wide 2-thread flatlock stitch using thread colors to match the color-coded thread paths on the serger. Adjust all thread tension settings as indicated below. Note:... -
Page 23: Color-Coded Threading Charts
4-Thread Balanced Stitch... - Page 24 3-Thread Wide Balanced Stitch Narrow 3-thread Overlock Stitch The diagram above shows threading for a wide 3-thread balanced overlock stitch. To thread for a narrow 3-thread balanced overlock stitch, simply use the right needle instead of the left and follow the green threading path.
- Page 25 3-Thread Wide Flatlock Stitch Narrow 3-thread Flatlock Stitch The diagram above shows threading for a wide 3-thread flatlock stitch. To thread for a narrow 3-thread flatlock stitch, simply use the right needle instead of the left and follow the green threading path.
- Page 26 3-Thread Rolled Hem...
- Page 27 2-Thread Flatlock Stitch...
- Page 28 2-Thread Rolled Hem...
Need help?
Do you have a question about the Serger and is the answer not in the manual?
Questions and answers