Table of Contents

Related Manuals for Bernina L 460


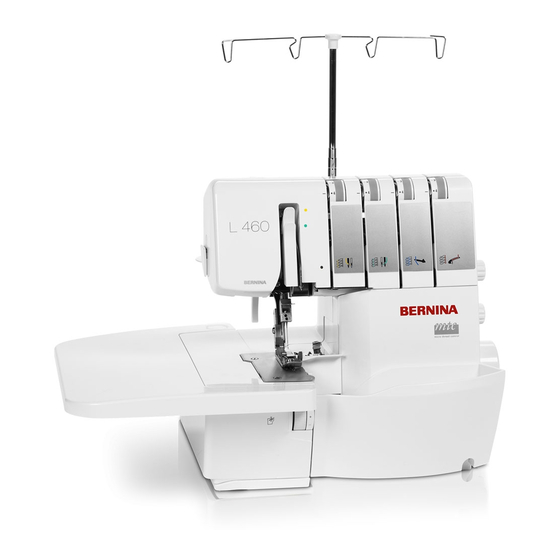
Summary of Contents for Bernina L 460
- Page 1 Overlocker Workbook 1 Basic Overlocker Use For current BERNINA models ©2020 BERNINA of America. Permission granted to copy and distribute in original form only. Content may not be altered or used in any other form or under any other branding.
-
Page 2: Table Of Contents
2-Thread Rolled Hem ....................21 2-Thread Flatlock ....................... 22 Color-Coded Threading Charts ................... 23 The information in this workbook applies to the current line of BERNINA Overlockers. Note: Some exercises apply only to certain models equipped with the feature being highlighted. -
Page 3: Introduction
BERNINA Overlocker Workbook 1 Congratulations on the purchase of your new BERNINA overlocker. The information in this workbook will help you learn the basics of using your new piece of sewing equipment. Even though it is very different from your sewing machine, once you learn to incorporate these techniques into your sewing, you’ll wonder how you ev-... - Page 4 Needle and Thread BERNINA Overlocker Workbook 1 Overlocker Needles BERNINA overlocks use the same type of nee- dles as most sewing machines: 130/705H. Recommended needle sizes for your overlocker are 70/11, 80/12 and 90/14. Larger needles can interfere with looper movement and cause dam- age;...
-
Page 5: 4-Thread Overlock Stitch
“dots” of thread. Green: Needle stitches should appear as a line of straight stitching running through the middle of the overlock stitching Suggested Settings L 460/L 450 Upper Looper Lower Looper Left Needle Right Needle Stitch Length... -
Page 6: Adjusting Tension Settings
Adjusting Tension Settings BERNINA Overlocker Workbook 1 Examine your 4-thread sample. The illustrations below show examples of unbalanced stitches and how to correct the settings to balance the stitch. When making corrections in the tension settings, increase or decrease the settings as needed, moving the dial ½ to 1 number at a time. Stitch a seam using the new settings and then evaluate the new stitch. -
Page 7: Micro Thread Control (Mtc)
Different fabrics and threads will affect the formation of the stitch so the MTC setting may Suggested Settings vary from fabric to fabric. L 460/L 450 Upper Looper Lower Looper Left Needle Right Needle... -
Page 8: Stitch Length
Stitch length adjustments may be needed to accommodate thicker or thinner threads or different weights of fabric. Suggested Settings General guidelines for stitch length settings: L 460/L 450 1-1.5mm: rolled hems and decorative edges Upper Looper 2-2.5mm: seaming and general overlocking... -
Page 9: Cutting Width
Rotate the upper knife up. Adjust cutting width to the widest setting. Rotate the upper knife down into cutting position. On the L 460 and L 450, the cutting width can be adjusted without moving the knife. Sew to the first mark on the fabric, stopping when the knife edge is on the mark. -
Page 10: Differential Feed
Mark the differential settings on the fabric sample. Return the differential feed setting to 1. N or 1 (normal) Suggested Settings L 460/L 450 Upper Looper Lower Looper Left Needle Right Needle Stitch Length Cutting Width... - Page 11 Mark the differential settings on the fabric sample. Return the differential feed setting to 1. 0.7mm 1 or N (normal) Suggested Settings L 460/L 450 Upper Looper Lower Looper Left Needle Right Needle Stitch Length Cutting Width...
- Page 12 Sew to the end of the fabric. Return the differential feed to 1. Set the stitch length to 2.5. Move the thread tension dials to return tensions to normal settings. Suggested Settings L 460/L 450 Upper Looper Lower Looper Left Needle Right Needle...
-
Page 13: Securing Seams
Suggested Settings Stitch for about 1”, overstitching the previous stitching. Guide the fabric so as not to cut the previous stitching. Optional: Rotate upper L 460/L 450 knife up to deactivate. Upper Looper Raise the toe of the presser foot and rotate the fabric 90° clockwise. -
Page 14: Presser Foot Tape Guide
6” side, catching the tape or ribbon in the stitched edge. Remove the fabric from under the presser foot and examine the seam. It will not stretch; the tape or ribbon has stabilized the seam. Suggested Settings L 460/L 450 Upper Looper Lower Looper Left Needle Right Needle... -
Page 15: 3-Thread Overlock Stitch: Wide And Narrow
Adjust all thread tension settings for a balanced stitch as indicated below. Suggested Settings Stitch along the raw edges opposite the wide balanced stitch. L 460/L 450 Upper Looper Lower Looper Left Needle Right Needle... -
Page 16: Inside Corners
• Use the handwheel to lower the needle into the fabric. • Lift the presser foot and straighten the corner towards you. • Lower the presser foot; continue stitching. Suggested Settings L 460/L 450 Upper Looper Lower Looper Left Needle... -
Page 17: Outside Corners
This will free the thread Suggested Settings from the stitch tongue. • Lift the presser foot and L 460/L 450 carefully pivot the fabric Upper Looper 90° clockwise. • Return the Stitch Selection Lower Looper Lever to normal (away from you). -
Page 18: 3-Thead Rolled Hem
Suggested Settings The Rolled Hem Selection Lever moves the stitch fin- Others L 460/L 450 ger in and out of position. Upper Looper Push the lever forward for normal serging so the stitch... -
Page 19: 3-Thread Flatlock
Gently pull the fabric flat. Suggested Settings Others L 460/L 450 Return stitch length and thread tension Upper Looper levers to their normal settings. -
Page 20: 2-Thread Rolled Hem
” from the raw edge. Return stitch length and thread tension levers to normal. Return the Rolled Hem Selection Lever to normal serging posi- tion. Suggested Settings L 460/L 450 Upper Looper converter Lower Looper Left Needle Right Needle... -
Page 21: 2-Thread Flatlock
This stitch is not strong enough for Suggested Settings seaming but can be used as an edge finish for light to medium L 460/L 450 weight fabrics. Gently pull the fabric flat. Return stitch length and thread tension levers to normal. -
Page 22: Color-Coded Threading Charts
4-Thread Overlock BERNINA Overlocker Workbook 1 05/14/2020... - Page 23 3-Thread Wide Overlock BERNINA Overlocker Workbook 1 Narrow 3-thread overlock The diagram above shows threading for a wide 3-thread balanced overlock- er stitch. To thread for a narrow 3- thread balanced overlocker stitch, simply use the right needle instead of the left and follow the green threading path.
- Page 24 3-Thread Wide Flatlock BERNINA Overlocker Workbook 1 Narrow 3-thread flatlock The diagram above shows threading for a wide 3-thread flatlock stitch. To thread for a narrow 3-thread flatlock stitch, simply use the right needle instead of the left and follow the green threading path.
- Page 25 3-Thread Rolled Hem BERNINA Overlocker Workbook 1 Pull Rolled Hem Selec- tion Lever toward you. 05/14/2020...
- Page 26 2-Thread Flatlock BERNINA Overlocker Workbook 1 05/14/2020...
- Page 27 2-Thread Rolled Hem BERNINA Overlocker Workbook 1 05/14/2020...
Need help?
Do you have a question about the L 460 and is the answer not in the manual?
Questions and answers