Table of Contents
Advertisement
Advertisement
Table of Contents

Subscribe to Our Youtube Channel
Related Manuals for ClearOne magicbox aavelin


Summary of Contents for ClearOne magicbox aavelin
- Page 1 User Manual v2.90a Copyright © 2007 MagicBox, Inc. All Rights Reserved Aavelin User Manual - 1 -...
- Page 2 - 2 - Aavelin User Manual...
-
Page 3: Table Of Contents
Overview..........................11 Installation..........................14 Hardware & Software Setup................... 22 Getting Started and Publishing ..................36 Creating and Adding Content..................49 Scheduling and Other Page Settings ................67 Appendix A - Infra-Red Control..................74 Appendix B - Weather Station ..................80 Appendix C - TxStream Data Service................85 Appendix D - Adtec MPEG Player ...................88 Aavelin User Manual - 3 -... - Page 4 Text in this style of box indicates a feature that is available only in the Professional edition of Aavelin Composer software. Customer Support Should you have any questions about installing or using your MagicBox Aavelin system, visit our website at http://www.magicboxinc.com and click on ‘Support’.
- Page 5 Copyright and Use This manual and the software described herein are copyrighted with all rights reserved. Under the copyright laws, neither this manual nor the software may be copied, in whole or in part, without the written permission of MagicBox, Inc. MagicBox®, Aavelin™, and Aavelin Composer™...
- Page 6 Executive Producer: Tom Searcy Special Thanks: Garrett Andres, Scott Bowman, Ann Davies, Brad Holland, Ashish Warranty The Aavelin player unit hardware is warranted against defects in parts and labor for a period of one year from the date of purchase when governed by the standard warranty.
- Page 7 MagicBox Inc.'s liability is limited solely to the repair or replacement of the defective product, in its sole discretion, and shall not in any event include damages for loss of use or loss of anticipated profits or benefits or other incidental or consequential costs, expenses, or damages, including without limitation any data or information which may be lost or rendered inaccurate, even if MagicBox, Inc.
-
Page 8: Important Safety Instructions
WARNING: A grounded-type power cord is required in order to meet the FCC emission limits and also to prevent interference to the nearby radio and television reception. It is essential that only the supplied power cord be used. Use only shielded cables to connect I/O devices to this equipment. - Page 9 10. If the device will not be used for a long time period, it should be disconnected. 11. Absolutely no objects or liquids should enter the device via its openings. This could cause a fire or an electrical shock. 12. Do not open the device unless instructed to do so by an authorized customer service personnel.
- Page 10 - 10 - Aave...
-
Page 11: Overview
The Aavelin Digital Signage and Video Messaging system allows you to create slides and other content on your PC with graphics and text which can then be played back on numerous types of video monitors using the Aavelin unit. A variety of applications can be served by an Aavelin, including advertising, announcements, schedules, point of sale displays, and more. - Page 12 Backgrounds can come from many sources, including other Windows applications, your own scanned photos or digital camera images, the MagicBox background libraries, and more. You can copy and paste text directly into Aavelin Composer from other programs such as Microsoft Word, Corel Word Perfect, Netscape, etc.
- Page 13 Crawl: Also referred to as a crawl region, or overlay region – an area of text at the top or bottom of the screen, separate from the page area, that contains scrolling or static text. Time Domain: Another name for page and crawl scheduling. Previous versions of the Aavelin software used this term.
-
Page 14: Installation
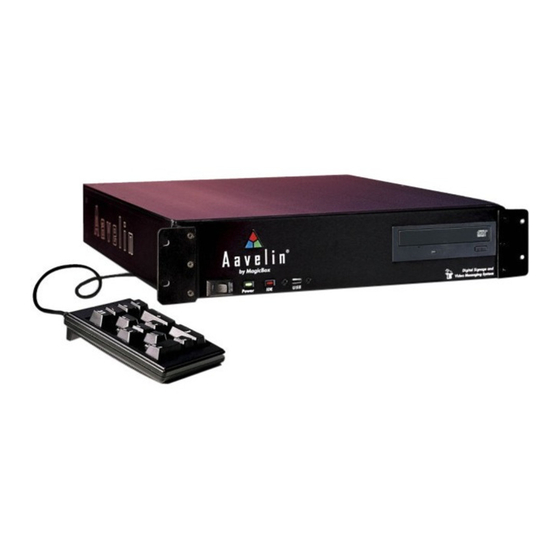
Box Contents Before you begin setup of your Aavelin unit, make sure that the following components are included in the original packaging: Aavelin Main System Unit Control Keypad Power Cord BNC to RCA Adapter Plug BNC Video Cable S-Video Cable Null Modem Serial Cable Aavelin Composer CD-ROM Aavelin Training DVD... -
Page 15: Hardware Installation
Hardware Installation The Aavelin’s chassis is a 2U rack space enclosure. Ideally, the Aavelin will be installed in a rack mount case or cabinet in a climate-controlled room. If a rack mount installation is not available, the Aavelin unit should be placed on a stable, flat, level surface. - Page 16 Connect a Monitor The Aavelin unit supports several different types of display devices as shown below: The “VGA/RGB” port supports any PC-style RGB monitor or compatible plasma monitor. The “S-Video” port supports professional video monitors with multipin inputs labeled “S-Video”, “S-VHS”, or “Y/C”. The “Composite Video”...
- Page 17 Ethernet networking can be a complex subject. If you are not familiar with terms such as “TCP/IP”, “IP Address”, “Subnet Mask”, etc., We recommend that you have your Network Administrator assist you with the initial setup of the Aavelin unit. Connect a Modem (Optional) If you will be using a modem with your unit, (US Robotics Sportster 33.6 or 56K modems are...
- Page 18 Connect Audio Sources (Optional) Current AV100 and AV200 playback systems feature 4 audio connections – 3 inputs (MIC, Line 1, and Line 2) and 1 output (AV400, AV400P, and some previous Aavelin models have only MIC and Line 1 inputs). Line inputs 1 and 2 are located on top, and the MIC input (right) and stereo output (left) are located below.
- Page 19 Adding Content” chapter for further details. Connect the Power Once you are sure everything is properly connected, connect the power cable to the rear of the Aavelin unit and then plug it into a power outlet on a surge protector or battery backup unit. Plugging the Aavelin directly into a wall socket is not recommended.
-
Page 20: Software Installation
Software Installation To install the Aavelin Composer software, your computer must meet the following requirements: • Windows 2000, XP, or Vista • 50MB Hard Drive Space • CD-ROM Drive • Super VGA card with True Color (24-bit or 32-bit) modes (800x600 or higher desktop resolution required) •... - Page 21 After the installation is complete, click on the ‘Finish’ button to exit the Wise Installer application. An icon will be placed on your desktop that can be double-clicked to launch the application. Alternatively, you can launch the application via the Start menu, under ‘Programs’, ‘MagicBox’, and ‘Aavelin Composer’.
-
Page 22: Hardware & Software Setup
The Aavelin unit’s functions are accessed using the included wired control keypad. Control Keypad Buttons Menu This key will enter and exit the Aavelin unit’s menu system. The menu display will be sent to all the video outputs simultaneously, temporarily enabling any outputs that are turned off. Exit the menu screen by pressing “Menu”... - Page 23 Use the up and down arrows on the control keypad to highlight a menu item. Once the desired item is highlighted, press the Select key. Each of the setup menus is described on the following pages. Video Settings Menu The Video Settings menu controls how the Aavelin outputs video during the playback of projects.
- Page 24 Set Date & Time Menu From the Main menu, highlight “Set Date & Time” and press Select. The Set Date and Time menu, below, will appear: When you create pages on your PC, you can set starting and ending dates and times., therefore it is very important that the date and time on the playback system are set accurately to assure proper playback.
- Page 25 Use the up and down arrow buttons to highlight the desired time zone, and press the Select key to highlight “Set” and press the Select key again to confirm the settings. Press the right arrow key and select to return to the main menu. Network Settings Menu All Aavelin units feature built-in support for Ethernet networking.
- Page 26 Gateway - In some networks, setting just the TCP/IP address may be sufficient. However, in more complex networks, a “Gateway” value is required. Set the Gateway value to the one used on your network the same way you entered the previous two addresses. (This value is provided by your network administrator.) If you are installing the Aavelin unit behind a router, the router address must be entered in the Gateway setting...
- Page 27 If your network connection is successful, you should see results similar to the following: C:\Windows>ping 10.1.1.4 Pinging 10.1.1.4 with 32 bytes of data: Reply from 10.1.1.4: bytes=32 time<10ms TTL=255 Reply from 10.1.1.4: bytes=32 time<10ms TTL=255 Reply from 10.1.1.4: bytes=32 time<10ms TTL=255 Reply from 10.1.1.4: bytes=32 time<10ms TTL=255 Reply from 10.1.1.4: bytes=32 time<10ms TTL=255 Ping Statistics for 10.1.1.4:...
- Page 28 At this time, insert the CD-Rom labeled ‘Aavelin Playback Update’ into the CD- Rom drive of the Aavelin. After a few seconds, you will hear the disc spin-up, and the red IDE light and the green activity light on the CD-Rom drive will blink. When this happens, press the Select key while ‘Update from CD’...
- Page 29 The main menu has the following choices: New Project, Open Project, Delete Project, Publish, Setup, About, and Exit. The Setup Menu Click on Setup from the main menu to enter the setup menu. You will see a window similar to the one below: General The General tab, shown above, allows you to set the default font style, size, and justification.
- Page 30 Do not specify the root of a drive (i.e., ‘C:\’, ‘H:\’) for the project, stock image, or import/export path. The “Object Tracker” size controls the thickness of the “handles” of objects in the Page Editor. You can increase this size to make the handles easier to grab for users with disabilities.
- Page 31 The Project to Publish section allows you to select a project file to always publish to this site. This will save you a step at publish time, but only if you always use the same file. Connection Method Depending on the way each Aavelin unit is connected, there are different ways to set up each site description.
- Page 32 When publishing, Aavelin Composer will automatically dial the modem and send your project’s pages to the Aavelin unit. TCP/IP - The “Network” publish method is for Aavelin units that are connected to your corporate LAN or to the Internet. Enter the IP address of the unit. This must be the same address that has been programmed into the Aavelin unit at setup time.
- Page 33 The names of the sites will be listed in Alphabetical order, and an icon will appear next to each site name indicating the connection method selected: Removable Media Direct Serial Modem Network Test Connection At this time you can test a connection to ensure your PC can talk to the Aavelin.
- Page 34 Set Password The Aavelin system can be password protected, allowing only authorized users to publish content. By default, Aavelin systems are shipped with no password. If you wish to set one, simply select your site from the list and click on the Set Password button. Aavelin Composer will then connect to the system and see if a password is already set.
- Page 35 It is not necessary to install Aavelin Composer on the server machine… it will just be used to store project files and images. Users on other computers will access files which are stored on this machine, so it is important that it remain powered on and connected to the LAN at all times.
-
Page 36: Getting Started And Publishing
This section will show how to create a new project, open an existing project, manage and work within a project, and change the global project settings as well. These simple steps are necessary before you can begin adding and changing content. Creating a New Project A project is a collection of content that the Aavelin system will play back in sequence. - Page 37 Display Orientation Landscape: Orientation where the display is wider than it is tall. Typically considered to be the standard orientation. Portrait: For tilt-axis displays. Select Portrait (left) or Portrait (right) depending on which way the display will be turned. Resolution The resolutions available will be dependant on the choices made in the previous steps.
- Page 38 Double-click on a project to open it for editing. Working Within a Project Once a project has been opened, you will be presented with the project overview screen, similar to one of the two samples shown below: The Aavelin Composer software can display your project to you in Thumbnail (left) or List (right) views.
- Page 39 If there are more pages than will fit in the view, you can use the scroll bars at the right and bottom to navigate through the list or thumbnails. Adding and Removing Pages New pages can be added to the project using either the Append Page or Insert Page buttons.
- Page 40 Editing a page will open the Page Editor window (standard pages) or bring up the Page Properties sheet (video overlay pages). Both are discussed in the following chapter, “Creating and Adding Content”. Project Properties In addition to every page having its own properties, the Project itself has a set of properties.
- Page 41 Try changing this value to 12. When you leave the Project Properties menu, all pages using the default dwell will have changed from 15 (the current setting) to 12. You can tell which pages are set to use the default dwell by looking at the Dwell column in the list.
- Page 42 Here are descriptions of each of the above options: HTML Output Filename: The main HTML file (the place where most users will start browsing) is named here. By default, the file will be named with your project name, an underscore, and “index”. (For example, “tutorial_index.html”). The project name is forced to lower case because most web servers are case sensitive and most users tend to type in lower case when typing web addresses.
- Page 43 The Background setting is the main web page background. The Text setting is for any text in the HTML page. The Link setting controls the color of the borders around the thumbnail images that the user can click to zoom into a page. (Visited links will appear slightly darker, and active links that the user is clicking on will temporarily appear slightly lighter.) All thumbnails are arranged in a table with one color surrounding the...
- Page 44 Click on the Write HTML button to generate (or update) the HTML pages for the project. Note: the project must be saved prior to writing HTML. Omitting Specific Pages Sometimes you may not want a page from your project to show up in the HTML version.
- Page 45 Append to existing import/export file: This adds the selected page to an existing .MBT file. One .MBT file can contain multiple exported pages. After selecting this, you will be prompted to select an .MBT file to append to. The default folder for .MBT files is specified in Composer setup.
- Page 46 Saving Your Work As you create and edit pages, it is important to save your work as you go along so that if the power fails or your computer has problems, you don’t lose all the changes you have made. To save your changes to the project, you can either exit from the project editor (you will be asked if you want to save...
- Page 47 The preview window provides controls to pause and resume playback (Pause, Play), advance immediately to the next page (Next), and exit the preview window. Without intervention, the preview window will automatically advance pages and overlay region items according to the dwell times that have been programmed.
- Page 48 For the purposes of this tutorial, select the Publish to Single Site method and then click Next. The other publish methods are described in the Reference section of this manual. The Publish Wizard will now ask you to specify a destination site for publishing.
-
Page 49: Creating And Adding Content
Content is the artwork and programming that make up the visual and aural components of your project. Content can be a simple graphic, a block of text, background music, a DVD, and more. Aavelin content can be divided into a few simple categories: Standard Pages –... - Page 50 The object can be moved around on the page by clicking on any section of the white object handles, holding down the mouse button and dragging the object. The object can be resized by clicking and dragging any of the black points on the outline.
- Page 51 The Safe Text Area Guides Notice the rectangle inside the page editor near the border of the window. This rectangle represents what is called the “Safe Text Area”, or sometimes the “Safe Title Area.” Computer monitors and television screens are somewhat different in how they display images.
- Page 52 Double-click on one of the enabled color buttons to select a particular color using the color picker tool. Aavelin Composer lets you select from a palette of 64 predefined colors designed to look good on video. You can also design your own custom colors by selecting User Defiend Color and adjusting the red, green, and blue slider bars as desired.
- Page 53 Click on an image once to select it and a preview of it will appear below. Confirm your selection by clicking on the Open button. You will be returned to the Page Background dialog, and note that your selection is now shown in the file name space.
- Page 54 To edit the text, simply click inside the box and you will see a familiar blinking cursor. You can type in text manually, or paste from an existing document (text formatting will be stripped during the copy/paste process). Text objects can be moved and resized like other objects by clicking on and dragging the object outline.
- Page 55 Images Image objects differ from background images in that they can be resized and positioned freely in the page editor like other objects. To add an image to your page, simply click in the Insert Picture button in the page editor. The image object will be added on to the page and the properties dialog for it will be displayed automatically.
- Page 56 Flash files are created using 3 party software. Aavelin Composer allows you take Flash files that have been created in such a program and integrate it into an Aavelin project. For more information, visit these link: http://www.macromedia.com http://www.swishzone.com To add a Flash file onto a page as an object, click on the Insert Flash button in the page editor.
- Page 57 Once you have selected the desired Flash file, click on the ‘OK’ button to return to the page editor. To see a preview of the Flash file in the page editor, you will need the Flash player for Windows installed. It can be downloaded free of charge from this location: http://www.macromedia.com/go/getflashplayer Use the Object Tracker Handle to position and size the Object on the page as...
- Page 58 Flash files can be very resource intensive and it is possible to overload the Aavelin’s processor and/or memory leading to poor system performance. For optimal performance, we recommend keeping the object size small on the page and removing resource intensive visual effects from the Flash file (such as blur transitions, etc).
- Page 59 The lower half of the “Credit Roll” tab features controls to adjust the Background, Border, and Outline of the entire credit roll object. The font and associated properties for the credit roll object is controlled from the Font tab. Select the font, color, and outline/shadow properties as desired. The Size field is disabled as it controlled instead by the Visible Lines field on the Credit Roll tab.
- Page 60 the OK button is enabled. Clicking on the Cancel button will close the dialog and remove the object from the page. Click on the Select Frame button to browse for a frame graphic. If you do not want a graphical border around the video, select NoBorder_VidFrame4x3 aspect.png or NoBorder_VidFrame16x9 aspect.png for the frame graphic, depending on the aspect ratio of the video that will be passing through.
- Page 61 Simply select the Video Input that corresponds to the physical connector on the rear of the Aavelin that the video source is connected to. If you will be triggering a device, refer to the appropriate appendix for Infra-Red control or Adtec MPEG playback.
- Page 62 The Aavelin allows for up to 4 independent crawl regions to be displayed at once; a maximum of two at the top of the display (T1 and T2), and two and the bottom (B1 and B2). With all 4 regions enabled, they are positioned as shown below: If, for example, only region T2 is enabled, it will be shown where T1 is displayed above, flush with the very top edge of the screen.
- Page 63 Font/Appearance: Each region’s appearance can be set independent from the others. This Font dialog works in much the same way as with Text Objects in the Page Editor. Font type, style, outline, and shadow can all be customized. The Background tab of this dialog defined the region’s backdrop. Available choices are Transparent (no background), Solid (one color), Ramp (two colors), and Pattern (two colors).
- Page 64 Static: The region item will be centered on the screen for the specified dwell time, and will not move. After the specified dwell time, the next region items will be displayed. If there is only the one region item, it will remain on screen without interruption. Crawling: The region item will crawl across the screen from right to left, at the speed defined on the Overlay Region tab.
- Page 65 Press ‘Ok’ and the region item will be added to the list. Scheduling The scheduling tab of the crawl object properties sheet allows you to set one or more scheduling conditions for each item in a crawl region. Scheduling controls are the same as those for pages. Refer to the “Scheduling”...
- Page 66 External Pass-Thru: This can simply be an audio stream that accompanies a DVD/VHS video playback, or an audio-only source for background music, such as a CD player. Flash: Macromedia Flash objects can contain audio to accompany the video and graphics they also contain, or they can be audio-only to provide a voiceover or narration to a page.
-
Page 67: Scheduling And Other
Every page in a project has what are called “Properties.” These are settings other than those that control the actual contents of the page. For example, the duration a page appears and the transition effect used are page properties. Click on a page in the project view to highlight it, and click on the “Page Properties”... -
Page 68: Display Settings
Include When Writing HTML: Aavelin Composer Professional writes pages as HTML files as well. Uncheck this box if you don’t want the page written as HTML. Log to File: Check this box to Include this page in playback records written to the Aavelin unit. These logs are reserved for future use. Background: For standard pages (Aavelin pages), the page background is set here. - Page 69 Scheduling The Scheduling tab allows you to place various conditions and restrictions on pages that determine when they will appear on screen. By default, a page is set to “Run Always” upon being created, meaning that the page shows up each time the playback system repeats through the project.
- Page 70 This can be useful to dramatically change a pages scheduling with just a few clicks of the mouse. Multiple fields can be used to establish very different schedules, and they can be toggled between easily by checking the Use box. Regular Scheduling Regular scheduling is used to make a page expire on a specific date, or be valid only during certain times or on certain days of the...
- Page 71 arrow keys on the keyboard can be used, and numbers can be typed in specifically as well). Finally, Aavelin Composer allows you to schedule pages with regard to Day of Week. Click once on your range to select it, and click on the “Run on Days”...
- Page 72 Building on the first example, the second range shown here adds a second condition – play for 15 seconds at a time from 4pm to midnight. Event Scheduling Event scheduling specifies an exact date and time when a page will play.
- Page 73 Adtec MPEG Player: The Aavelin can also issue commands to Adtec MPEG players, allowing for the incorporation of encoded MPEG content into a project. Refer to the “Aavelin RT Video Pass-Through” section for further information. Aavelin User Manual...
-
Page 74: Appendix A - Infra-Red Control
– – This section will explain how to use the Aavelin system with the VTR/DVD Control Option. Throughout this section, we will use the term VTR to describe a Video Tape Recorder. This term is interchangeable with the term VCR, which stands for Video Cassette Recorder. - Page 75 Route Emitter 1 to your VTR/DVD player. Look closely at the front panel of the VTR/DVD you want to control. The Emitter should face directly to the VTR/DVD’s Infra-Red Receiver. Adhesive panels have been attached to provide for a permanent fit. Route the other Emitters, labeled 2, etc.
- Page 76 After power-up, if there continues to be no display, check cable routing; especially if the cables are routing through the VTR/DVD. This can be a common source of trouble. This problem is resolved by referring to the VTR/DVD Manufacturer’s instructions for setting the Video Input. Aavelin Playback VTR Playback Setup With the Aavelin system Powered Up and running, press the Menu key on the keypad.
- Page 77 When issuing commands, look to the VCR or DVD players’ display screen for an acknowledgment, such as “Play” or “Stop” – the Aavelin’s attached output may or may not show the video at this stage, depending on how it is configured and what project it has been told to play, and should not be watched to judge the success of a test command.
- Page 78 Click on the ‘Add’ button to add the first command in the sequence. Select ‘VTR/DVD Infra Red Control” from the drop down selection box and click ‘Ok’. Select the first command from the ‘Command’ list, and the emitter number of the cube attached to the deck you wish to trigger.
- Page 79 Not all VHS/DVD combo decks are supported. Check with MagicBox for recommendations prior to selecting a player. Playback Duration The steps above leave one important bit of information missing – how long is the tape or disc that will be played back? Whatever the duration of the video that will be played back, it needs to be inserted into the ‘Dwell Time’...
-
Page 80: Appendix B - Weather Station
– – This section will explain how to use the optional Weather Station with the Aavelin system. Optional Feature The Weather Station is an optional component to the Aavelin system. It is available in basic or deluxe versions (part numbers AVW1 and AVW2, respectively) The Weather Station is a collection of sensors that attach to a centrally located junction box. - Page 81 Set the Ultimeter’s leap year – This is outlined on page 24 of the weather station’s manual. Set the Barometric Pressure – This is outlined on page 25 of the weather station’s manual. Plan the installation – Suggested cable lengths and some additional tips can be found on page 15 of the weather manual.
- Page 82 Refer to page 17 of the Weather Station manual for specific mounting and sensor placement tips. Installing the Anemometer (Wind Vane) The Anemometer connects to the port on the Junction Box indicated by this icon: Refer to pages 12 and 19 of the Weather Station manual for additional information on the Anemometer.
- Page 83 Weather information on the Aavelin is displayed in Overlay Regions, or Crawl Lines. For more information on Overlay Regions, view the “Project Properties” section earlier in this manual. Open the project that the weather data will be shown in, and click on the “Project Properties”...
- Page 84 Current Temperature: Displays the current temperature. Current Temperature w/ High/Low: Display the current temperature along with High/Low values for the current day. Current Wind-Speed w/ Direction: Displays the current wind-speed along with the wind direction. Daily Rain-Fall: Displays the daily rainfall in inches. Dew-Point: Weather Deluxe only.
-
Page 85: Appendix C - Txstream Data Service
– – TxStream is a subscription Data Feed Service from MagicBox. Using TxStream, customizable weather forecasts for a specific geographic region can be displayed as crawling text on screen. Optional Feature TxStream is an optional subscriptions service for the Aavelin system (part number AVTX1). - Page 86 TxStream Delivery Method Currently, ‘Network TCP/IP’ is the only valid option. This will connect directly to the TxStream Data Server. Select ‘Disconnect’ if you wish to completely disable the TxStream item. Filter State/Region/Sub-Region: Begin by selecting the state whose data you wish to receive. The ‘Region’ list will be populated with available regions for that state.
- Page 87 Misc Settings Forecast = Today + X Days: Change this value to define the length of the forecast. Allowable values are 0 (today only) to 7 (8 days total forecast). Include Issued Forecast Time Info: If this option is checked, the date/time information of the forecast will be displayed between the Prefix label (see below) and the actual forecast data.
-
Page 88: Appendix D - Adtec Mpeg Player
– – Adtec MPEG Players supported by the Aavelin require some specific configuration before they are able to be triggered automatically by the Aavelin player unit. The Adtec player must be placed on the network as all communication between it and the Aavelin takes place via Ethernet. Configuring the Player To configure the Adtec player’s network settings, use the RJ-11 to DB-9 serial cable included with the Adtec player. - Page 89 Set the COM port properties as pictured above. Bits per second: 38400 Data bits: 8 Parity: None Stop bits: 1 Flow control: Xon/Xoff Press the ‘OK’ button to connect. The network addresses can be set using the following commands. Note that each command is preceded with ‘* ‘...
- Page 90 Startup When on, the player will begin playing clips immediately upon startup. Recommended: Off * stu off DVD Copying Two commands that ease the loading of MPEG spots via the DVD drive. When enabled, MPEG spots on a DVD will be automatically copied to the player’s hard drive, and the DVD will be ejected from the drive when done.
- Page 91 UDP Code: Leave this at “0” Finally, modify the site properties for the Aavelin unit that the Adtec player is connected to. From the Sites tab of setup, double-click on that Aavelin site. At the bottom of the General tab, select the Adtec device in the Attached Adtec MPEG Player field.
- Page 92 I cannot publish using a direct serial connection Direct serial publishing requires the use of a Null Modem serial cable. A standard “straight-through” serial cable will not work. An appropriate serial cable ships with every Aavelin system. If you have lost this cable or require a new one, you can contact support@magicboxinc.com to order one.
- Page 93 Normal Amp Draw Below 0.62 A 74.4 Watts Can I use content from Microsoft PowerPoint in a project? PowerPoint allows you to save a presentation as a series of .JPG images – these images can these be used within Composer. Look for this under ‘Save As…’...
Need help?
Do you have a question about the magicbox aavelin and is the answer not in the manual?
Questions and answers