Canon IR 2420 Printer Manual
Hide thumbs
Also See for IR 2420:
- User manual (598 pages) ,
- Network manual (113 pages) ,
- Remote manual (54 pages)

Related Manuals for Canon IR 2420


Summary of Contents for Canon IR 2420
- Page 1 UFR II Printer Guide UFR II Printer Guide Please read this guide before operating this product. After you finish reading this guide, store it in a safe place for future reference.
- Page 2 imageRUNNER 2422/2420 UFR II Printer Guide...
-
Page 3: Manuals For The Machine
Manuals for the Machine The manuals for this machine are divided as follows. Please refer to them for detailed information. Depending on the system configuration and product purchased, some manuals may not be needed. Guides with this symbol are PDF manuals included on the Guides with this symbol are printed manuals. -
Page 4: How This Manual Is Organized
Includes the Symbol Sets Supported, Specifications, and the Index. Considerable effort has been made to ensure that this manual is free of inaccuracies and omissions. However, as we are constantly improving our products, if you need an exact specification, please contact Canon. -
Page 5: Table Of Contents
Contents Preface ............vi How to Use This Manual . - Page 6 Chapter 2 Troubleshooting Printing Problems ..........2-2 Printer Trouble .
-
Page 7: Preface
Preface Thank you for purchasing the Canon imageRUNNER 2422/2420. Please read this manual thoroughly before operating the machine to familiarize yourself with its capabilities, and to make the most of its many functions. After reading this manual, store it in a safe place for future reference. -
Page 8: Displays Used In This Manual
Displays Used in This Manual Screen shots of computer operation screens used in this manual may differ from the ones you actually see, depending on the model or options you have installed. The buttons and other objects that are related to operations during the procedure are marked with a , as shown in the example below. -
Page 9: Illustrations Used In This Manual
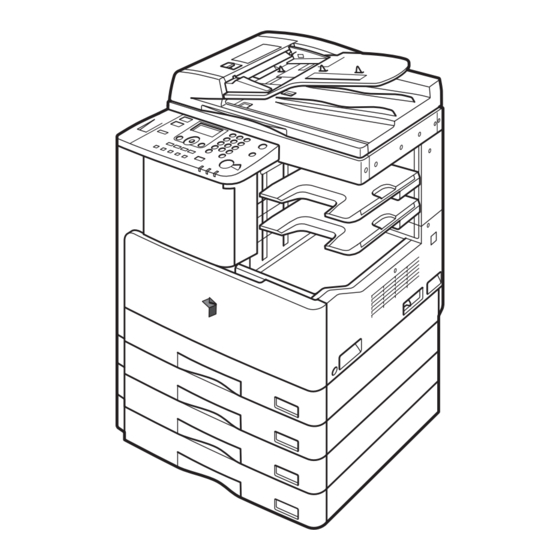
Illustrations Used in This Manual The machine illustrations used in this manual are those of the imageRUNNER 2420 with the following optional equipment attached: the Feeder (DADF-P2), Finisher-U2, Additional Finisher Tray-C1, Cassette Feeding Module-J1, and Cassette Feeding Module-K1. Abbreviations Used in This Manual In this manual, product names are abbreviated as follows: Microsoft Windows 2000 operating system: Windows 2000... -
Page 10: Trademarks
Trademarks Macintosh and Mac OS are trademarks of Apple Inc., registered in the U.S. and other countries. Microsoft, Windows, Windows Vista, and Windows Server are either registered trademarks or trademarks of Microsoft Corporation in the United States and/or other countries. Other product and company names herein may be the trademarks of their respective owners. -
Page 11: Legal Notices
Disclaimers The information in this document is subject to change without notice. CANON INC. MAKES NO WARRANTY OF ANY KIND WITH REGARD TO THIS MATERIAL, EITHER EXPRESS OR IMPLIED, EXCEPT AS PROVIDED HEREIN, INCLUDING WITHOUT LIMITATION, THEREOF, WARRANTIES AS TO MARKETABILITY, MERCHANTABILITY, FITNESS FOR A PARTICULAR PURPOSE OR USE OR NON-INFRINGEMENT. -
Page 12: Using The Machine As A Printer
Using the Machine as a Printer CHAPTER This chapter describes what you should know and do before printing documents from a computer, such as customizing the Printer Settings and canceling print jobs. Using the Printer Settings Menu ..........1-2 Settings Menu. -
Page 13: Using The Printer Settings Menu
Using the Printer Settings Menu The <Printer Settings> menu enables you to access common features. Below is an abbreviated outline of the <Printer Settings> menu structure. NOTE Depending on the printer environment, some settings may not be available. A sequence of steps for selecting the Printer Settings is illustrated below. For details on the available printer settings, see “Settings Menu,”... - Page 14 Press (Additional Functions). The Additional Functions menu appears. Use [ ] or [ ] to select Additional Functions <Printer Settings> ➞ press [OK]. Audible Tones The Printer Settings menu appears. Common Settings Copy Settings Printer Settings Use [ ] or [ ] to select the Printer Settings setting that you want to change ➞...
-
Page 15: Settings Menu
Settings Menu This section provides detailed information on the Printer Settings. NOTE The default settings are indicated in bold. Default Paper Size A4, A4R, A3, A5R, B4, B5, B5R, LTR, LTRR, LGL, STMTR, EXEC, COM10, Monarch, DL, ISO-C5, ISO-B5 This setting defines the default paper size used when the paper size cannot be set from the printer driver in the computer, or when no paper source is specified. -
Page 16: Default Paper Type
105 g/m - Heavy Paper 3: 106 g/m to 128 g/m • Canon transparency film is recommended for printing on transparencies. • Canon label paper is recommended for printing on labels. • Two-sided printing is not available for Heavy Paper, Transparency, or Labels. -
Page 17: 2-Sided Printing
2-Sided Printing Off, On This setting selects one- or two-sided printing. In the 2-Sided Printing mode, the document is printed on both sides of the paper. To select an option, use [ ] or [ ] to select the desired paper size ➞ press [OK]. IMPORTANT •... -
Page 18: Enabling The Duplex Unit-A1
Enabling the Duplex Unit-A1 To perform 2-Sided Printing, enabling the Duplex Unit-A1 manually on the printer driver is required on some cases, such as when the machine is connected to a computer with a USB cable. You can also check whether the Duplex Unit-A1 is enabled by the procedure below. - Page 19 Click the [Device Settings] tab to display the [Device Settings] sheet ➞ select the [Duplex Unit] check box ➞ click [OK]. For Windows 7 Settings Menu...
- Page 20 ■ For Macintosh: NOTE The screen shots in the procedure below are from Mac OS X 10.4. Open [System Preferences] ➞ click [Print & Fax]. Click [Printing] ➞ select your printer ➞ click [Printer Setup]. For Mac OS X 10.5 or later, select your printer ➞ click [Options and Supplies]. Select [Installable Options] ➞...
- Page 21 IMPORTANT Confirm also that the options other than the Duplex Unit-A1 are properly configured. Be sure to select only those options that are actually installed in the machine. 1-10 Settings Menu...
-
Page 22: Print Quality
Print Quality ■ Image Refinement On, Off This setting smoothes the jagged outlines of characters and graphics. Use [ ] or [ ] to select <Off> or <On> ➞ press [OK]. If <On> is selected, smoothing is performed before printing. Select <Off> to disable the function. NOTE The effects of image refinement may vary depending on the types of characters and graphics on the printed document. -
Page 23: Page Layout
Page Layout ■ Binding Long Edge, Short Edge This setting determines whether the binding position is along the long edge or the short edge of the paper. When binding for two-sided printing, the image orientation is automatically adjusted for correct layout. When the binding position is on the long edge of the paper: Two-sided printing Two-sided printing... - Page 24 ■ Margin -50.0 mm to +50.0 mm (in increments of 0.5 mm); 0.0 mm This setting sets the page margin in millimeters or inches. The settings can be set between -50.0 mm and +50.0 mm in increments of 0.5 mm. Press [ ] to increase the width of the inside margin.
-
Page 25: Combining The Binding And Margin Settings
Combining the Binding and Margin Settings The figures below illustrate how the Binding and Margin settings are combined. You can set the paper orientation using the printer driver. (See the Windows Printer Driver Guide, Mac Printer Driver Guide, or the help on the printer driver.) 1-14 Settings Menu... -
Page 26: Finishing
Finishing Group, Collate, Staple, Rotate + Group, Rotate + Collate, Offset + Group, Offset + Collate Use [ ] or [ ] to select the desired finishing mode ➞ press [OK]. Some of the above options require the optional Finisher-U2 and are not available unless the Finisher-U2 is attached to the machine: : Available N/A: Not Available... - Page 27 Rotate + Collate This setting prints all pages of each copy (collating), and rotates every other complete copy 90 degrees to indicate where each copy starts. Offset + Group This setting prints all copies of the same page before printing the next page. It offsets every other complete set of pages to indicate where each new set starts.
-
Page 28: Error Time Out
NOTE • Rotate modes are not available if the machine is equipped with the optional Finisher-U2. • To use the Staple or Offset mode, the optional Finisher-U2 must be attached. • Rotate + Group and Rotate + Collate are available for selection if the paper size is A4, A4R, B5, B5R, LTR, or LTRR. -
Page 29: Auto Size Detection
NOTE When a job is being processed, the Processing/Data indicator blinks on the control panel. Auto Size Detection Off, On Paper of the selected size in the printer driver may be absent in any of the machine’s paper drawers. If the Auto Size Detection setting is enabled, the machine will automatically substitute paper of an available size for the missing, according to the following table: Printer Driver Setting... -
Page 30: Canceling A Print Job
Canceling a Print Job There are several ways to cancel a job. This section describes how to cancel a job using the Stop key and using the System Monitor screen. NOTE Several prints may be output even after you canceled a job. Using the Stop Key You can cancel a print job using the Stop key. -
Page 31: Using The System Monitor Screen
Use [ ] or [ ] to select <Cancel> Job Status Details ➞ press [OK]. Cancel The Cancel screen appears. Status: Waiting Dept. ID: 0000001 Type: Printer ] to select <Yes> ➞ Use [ ] or [ Cancel? press [OK]. The job is canceled. - Page 32 Use [ ] or [ ] to select <Status> Print Status/Log ➞ press [OK]. Status The Status screen appears. Use [ ] or [ ] to select the job Status you want to cancel ➞ press [OK]. Copy Printing If there is only one print job, just press [OK]. Printer Waiting The Job Status Details screen appears.
- Page 33 ] to select <Yes> ➞ Use [ ] or [ Cancel? press [OK]. If you do not want to cancel the job, select <No> to return to the previous display. The selected job is canceled. Repeat steps 4 and 6 to cancel another job. NOTE •...
- Page 34 Do not attempt to solve problems other than those described in this chapter. If you cannot solve a problem, contact your local authorized Canon dealer. Printing Problems ............2-2 Printer Trouble .
-
Page 35: Printing Problems
If you have difficulties in printing, we recommend that you resolve with the following remedies. NOTE Please contact your local authorized Canon dealer if a problem persists, or if you encounter problems not listed in the following sections. Printer Trouble Indicators off and display blank. - Page 36 Printing does not start. Cause 1 Output tray is full of paper during the print job. (When Inner 2 Way Tray-E2 is set up, the selected tray is full of paper.) Remedy Remove the paper in the tray. Cause 2 The machine and host computer are not properly connected.
-
Page 37: Print Problems
Paper excessively curled after coming out of the machine. Cause You may be using paper that curls too easily. Remedy Ensure that the paper you are using meets the specifications. (See Chapter 8, “Appendix,” in the Reference Guide.) Remove the paper stack, turn it over, reload in the drawer and try again. -
Page 38: Other Print Problems
Other Print Problems Correcting Poor Print Quality Printed text faded or streaked with white. Cause The level of toner remaining in the toner cartridge may be low, or the toner is not evenly distributed inside the cartridge. Remedy Replace the Toner Cartridge. (See Chapter 6, “Routine Maintenance,” in the Reference Guide.) Printed pages are dirty or have white specks. - Page 39 Black stripes appear on multiple sheets in sequence Cause The life of the cartridge is old or damaged. Remedy Contact your local authorized Canon dealer. Other Print Problems...
- Page 40 Appendix CHAPTER This chapter summarizes the specifications of the machine and contains the index. Printer Settings Menu ........... . 3-2 Symbol Sets Supported .
-
Page 41: Printer Settings Menu
Printer Settings Menu The following table lists all settings of the Printer Settings menu. (The default settings are indicated in bold.) Applicable Additional Functions Available Settings Page Printer Settings A4, A4R, A3, A5R, B4, B5, B5R, LTR, LTRR, Default Paper Size LGL, STMTR, EXEC, COM10, Monarch, DL, p. -
Page 42: Symbol Sets Supported
Symbol Sets Supported This section provides a list of the character code tables for the characters in each symbol set. ISO Substitution Table The shaded characters in the table are replaced with the corresponding ones in the following table according to the graphic set used. Symbol Sets Supported... - Page 43 Symbol Sets Supported...
-
Page 44: Specifications
Specifications This section lists the specifications of the machine. Controller Specifications ARC 128 MHz Memory Capacity (RAM) DDR: 64 MB (ROM) Flash: 8 MB Host interface One USB2.0 High Speed connector Software Specifications Printer Language UFRII LT Effective Printable Reduced to 5 mm from the top, bottom, left, and right edges of the Area paper, and 10 mm from the top, bottom, left, and right edges of the envelope. -
Page 45: Index
Index Numerics 2-Sided, 3-2 Image Refinement, 1-11, 3-2 2-Sided Printing, 1-6 Initialize Printer, 1-18, 3-2 ISO Substitution Table, 3-3 Auto Size Detection, 1-18, 3-2 Margin, 1-13, 3-2 Binding, 1-12, 3-2 Page Layout, 1-12, 3-2 Print Quality, 1-11, 3-2 Printer Settings Overview, 3-2 Default Paper Size, 1-4, 3-2 Default Paper Type, 1-5, 3-2... - Page 46 CANON INC. 30-2, Shimomaruko 3-chome, Ohta-ku, Tokyo 146-8501, Japan CANON U.S.A., INC. One Canon Plaza, Lake Success, NY 11042, U.S.A. CANON CANADA INC. 6390 Dixie Road Mississauga, Ontario L5T 1P7, Canada CANON EUROPA N.V. Bovenkerkerweg 59-61 1185 XB Amstelveen, The Netherlands (See http://www.canon-europe.com/ for details on your regional dealer)
Need help?
Do you have a question about the IR 2420 and is the answer not in the manual?
Questions and answers