Advertisement
Table of Contents
- 1 User Instructions
- 2 Installation Information
- 3 Conditions of Installation
- 4 Important Safety Information
- 5 Operating the Fire
- 6 Spillage Monitoring System
- 7 Cleaning the Fuel Bed
- 8 Re-Assembling the Ceramics and Fuel Bed (Coal Models)
- 9 Re-Assembling the Ceramics and Fuel Bed (Pebble Models)
- 10 Fitting the Trim
- 11 User-Replaceable Parts
- Download this manual
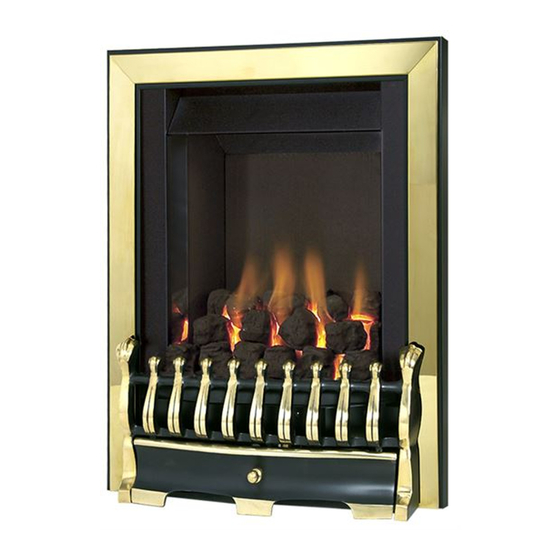
Nevada
DECORATIVE FUEL EFFECT GAS FIRE
User Instructions
These instructions should be read by the user before operating the
appliance and retained for future reference
Model No's KNVC**MN, KNVP**MN, KNVC**SN & KNVP**SN are only
for use on Natural Gas (G20) at a supply pressure of 20 mbar in G.B.
/ I.E.
Model No. KNVC**SP is only for use on Propane Gas (G31) at a
supply pressure of 37 mbar in G.B. / I.E.
** denotes trim & fret variant
Advertisement
Table of Contents

Related Manuals for Kinder Nevada


Summary of Contents for Kinder Nevada
-
Page 1: User Instructions
Nevada DECORATIVE FUEL EFFECT GAS FIRE User Instructions These instructions should be read by the user before operating the appliance and retained for future reference Model No’s KNVC**MN, KNVP**MN, KNVC**SN & KNVP**SN are only for use on Natural Gas (G20) at a supply pressure of 20 mbar in G.B. -
Page 2: Installation Information
INSTALLATION INFORMATION CONDITIONS OF INSTALLATION It is the law that all gas appliances are installed only by a competent (e.g. CORGI Registered) Installer, in accordance with the installation instructions and the Gas Safety (Installation and Use) Regulations 1998. Failure to install appliances cor- rectly could lead to prosecution. -
Page 3: Important Safety Information
ABOUT YOUR NEW NEVADA The Kinder Nevada coal effect gas fire incorporates a unique and highly developed fuel bed which gives the realism of a loose coal layout combined with realistic flames and glow. The use of durable hard ceramic material in the construction of the fuelbed components ensures long and trouble free operation. - Page 4 Always keep furniture and combustible materials well clear of the fire and never dry clothing or items either on or near to the fire. Never use aerosols or flamma- ble cleaning products near to the fire when it is in use. The hard ceramic fuel bed remains hot for a considerable period after use and sufficient time should be allowed for the fire to cool before cleaning etc.
-
Page 5: Operating The Fire
OPERATING THE FIRE (Manual Control Only – KNVC**MN &KNVP**MN) The controls are located behind the ashpan cover below the fender. The controls, comprise a control valve to adjust the gas flow and a push button piezo igniter. There is also a flame adjuster which slides from left to right on natural gas coal models only. - Page 6 OPERATING THE FIRE (Slide Control Only – KNVC**SN, KNVP**SN &KNVC**SP The controls comprise a control lever, to turn the fire on and off and adjust the gas rate, and a flame adjuster to alter the flame picture. ((natural gas coal models only) The control lever is located at the top right hand side of the fire.
-
Page 7: Spillage Monitoring System
only) to give the most pleasing flame effect or maximum glow. To turn the fire off, FULLY raise the control lever to the OFF position. WARNING If the fire goes out for any reason or is turned off and it is necessary to relight the fire it is important to allow the fire to cool for 3 minutes before attempting to re-light it. -
Page 8: Re-Assembling The Ceramics And Fuel Bed (Coal Models)
RE-ASSEMBLING THE CERAMICS AND FUEL BED (COAL MODELS) NOTE : The position of the fuel-bed components are critical to the performance of the product. Therefore please ensure that the fuel-bed components are positioned as described in the following section prior to requesting a service call due to soot build up, poor flame pattern etc. - Page 9 Place the right hand front coal rail moulding onto the front ceramic rail support as shown below in Fig. 3 Fig. 3 Fit four large coals behind the ceramic front rails as shown below in Fig. 4 Fig. 4...
- Page 10 Select three of the small coals and fit onto the ribs of the fuel-bed base. See fig. 5 below Fig. 5 Select the remaining four small coals and arrange along the rear of the fuelbed, directly behind the third row of coals. See fig. 6 below. Fig.
- Page 11 Ensure the coals sizes are correctly positioned as shown in Fig 19 below. “L” denotes “large” coals and “S” denotes small coals. If any coals are missing, please contact your retailer. Do not proceed with the installation. Fig. 7 Ensure the flame paths are un-interrupted as shown below in Fig. 8. If necessary, make minor adjustments to the coal positions to ensure the flame paths indicated by the arrows are available.
- Page 12 Warning : Use only the coals supplied with the fire. When replacing the coals remove the old coals and discard them. Fit a complete set of coals of the correct type. Do not fit additional coals or any coals other than a genuine replacement set. To ensure that the release of fibres from these R.C.F (Refractory Ceramic Fibre) articles is kept to a minimum, during installation and servicing we recommend that you use a HEPA filtered vacuum to remove any dust...
-
Page 13: Re-Assembling The Ceramics And Fuel Bed (Pebble Models)
RE-ASSEMBLING THE CERAMICS AND FUEL BED (PEBBLE MODELS) NOTE : The position of the fuel-bed components are critical to the performance of the product. Therefore please ensure that the fuel-bed components are positioned as described in the following section prior to requesting a service call due to soot build up, poor flame pattern etc. - Page 14 Place the right hand front pebble rail moulding onto the front ceramic rail support as shown below in Fig. 11 Fig. 11 Fit pebbles A, B, C, & D behind the ceramic front rails as shown below in Fig. 12 (Pebble markings stamped into bottom face) Fig.
- Page 15 Select pebbles E, F & G and fit onto the ribs of the fuel-bed base. See fig. 13 below. Fig. 13 Select pebbles H, I, J & K and arrange along the rear of the fuelbed, directly behind the third row of coals. See fig. 14 below. Fig.
- Page 16 Warning : Use only the pebbles supplied with the fire. When replacing the pebbles remove the old pebbles and discard them. Fit a complete set of pebbles of the correct type. Do not fit additional pebbles or any pebbles other than a genuine replacement set. To ensure that the release of fibres from these R.C.F (Refractory Ceramic Fibre) articles is kept to a minimum, during installation and servicing we recommend that you use a HEPA filtered vacuum to remove any dust...
-
Page 17: Fitting The Trim
FITTING THE TRIM Remove the protective tape from the trim and position onto the fixing flange. The trim is secured with magnets. USER REPLACEABLE PARTS The only user replaceable parts on this fire are the fuelbed components and coals which may be replaced as described in the above section. Replacement of any other parts must be carried out by a competent person such as a CORGI registered gas installer. - Page 20 Due to our policy of continual improvement and development the exact accuracy of descriptions and illustrations cannot be guarantee Part no. B-103580 Issue 4 BFM Europe Ltd Trentham Lakes Stoke-on-Trent Staffordshire ST4 4TJ www.bfm-europe.com Telephone - General Enquiries : (01782) 339000 Telephone - Service : (0844) 7700169...
Need help?
Do you have a question about the Nevada and is the answer not in the manual?
Questions and answers