Table of Contents

Subscribe to Our Youtube Channel
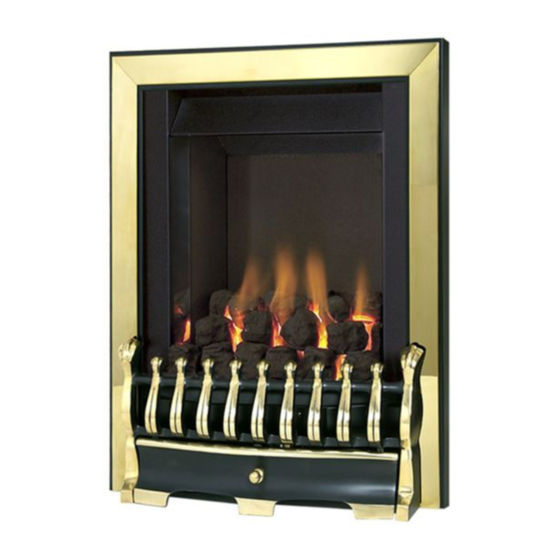
Related Manuals for Kinder Nevada Powerflue KCPC00MN


Summary of Contents for Kinder Nevada Powerflue KCPC00MN
- Page 1 Nevada Powerflue DECORATIVE FUEL EFFECT POWERFLUE GAS FIRE Installation & Maintenance Instructions Hand these instructions to the user Model No. KCPC00MN is for use on Natural Gas (G20) at a supply pressure of 20 mbar in G.B. / I.E.
-
Page 2: Table Of Contents
CONTENTS Section 1 Information and Requirements PAGE Appliance Information Conditions of Installation Flue Terminal Position Fireplace / surround suitability Fire place opening / catchment space Shelf Position Installation Types Hearths Spillage Monitoring System Section 2 Installation of Fire Unpacking the fire Marking the Flue Pipe Opening Marking the Fan Unit Recess on the Outer Wall 11-17... -
Page 3: Information And Requirements Page
SECTION 1 INFORMATION AND REQUIREMENTS APPLIANCE INFORMATION Model KCPC00MN Gas Type Main injectors (2 off) Size 235 Pilot Type S.I.T. Oxystop NG 9022 Max. Gross Heat Input : 6.5 kW Min. Gross Heat Input : 4.2 kW Cold Pressure : 20.0 +/-1.0 mbar Ignition : Push-button Piezo... -
Page 4: Conditions Of Installation
INSTALLATION REQUIREMENTS CONDITIONS OF INSTALLATION It is the law that all gas appliances are installed only by a CORGI Registered Installer, in accordance with these installation instructions and the Gas Safety (Installation and Use) Regulations 1998 as amended. Failure to install appliances correctly could lead to prosecution. -
Page 5: Flue Terminal Position
FLUE TERMINAL POSITION The minimum acceptable dimensions from the flue terminal to obstructions and ventilation openings are shown below in fig. 1 and listed in the table (fig. 2 below) IT IS IMPORTANT THAT THE POSITION OF THE FLUE ALLOWS THE FREE PASSAGE OF AIR ACROSS IT AT ALL TIMES. -
Page 7: Fireplace / Surround Suitability
FIREPLACE / SURROUND SUITABILITY The fire must only be installed on a hearth it must not be installed directly onto carpet or other combustible floor materials. The fire is suitable for fitting to non-combustible fire place surrounds and proprietary fire place surrounds with a temperature rating of at least 150 o c. -
Page 8: Installation Types
INSTALLATION TYPES This fire can be fitted against an outside facing facing flat wall surface or into a fireplace opening cut into the wall. When fitting the fire in front of the inner cavity wall, the distance between the mounting face of the fire and the rear face of the firebox must be a minimum of 170mm, a false chimney breast or fireplace surround should be constructed. - Page 9 Fig. 5 The Interactive Zone - Openings, beams or joists within this area need to be assessed. 400mm interactive area Load triangle - No beam or opening permissible within this 600mm load area triangle Lintel e.g. 750mm x 75mm Firebox recess in Opening Height wall 550mm Minimum...
-
Page 10: Hearths
Remove any combustible material from within the area of the opening. No combustible material can be allowed to come into contact with any area of the appliance. Fig. 7 Opening Sizes Width :- 330mm Minimum 430mm Maximum Opening sizes Height :- Lintel must project Minimum of 150mm 550mm Minimum... -
Page 11: Installation Of Fire
SECTION 2 INSTALLATION OF FIRE UNPACKING THE FIRE Carefully lift the fire out of the carton. Remove the loose item packaging carefully from the front of the appliance. Check the contents as listed :- Packing Check List - All Models 1off Fire box / burner assembly, 1off... -
Page 14: Marking The Fan Unit Recess On The Outer Wall
MARKING THE FAN UNIT RECESS ON THE OUTER WALL (ALL MODELS) Fig. 9 15mm 340mm 100mm / 4 inch 280mm Flue Pipe Hole 75mm 4 off holes to be drilled to 2 off cut outs accept the No. 10 x 40mm 230mm 75mm x 15mm about screws and rawlplugs... - Page 15 Mark the flue pipe in line with the flue spigot so that it can be cut to length. NOTE :- When cutting the flue pipe to length, allowance for the rebate on the fire surround used or false chimney breast constructed must be taken into account.
- Page 16 With the fan cover removed, disconnect the air pressure switch tubes from the outlet venturi as shown below in Fig. 13, ensuring that you make a note of their location for when you re-fit them. Fig. 13 Removing pipes from the air pressure switch NOTE : If you re-fit the air pressure switch tubes the wrong way around, the appliance will not operate as a positive flue pressure cannot be generated,...
- Page 17 Fig. 15 3 off Fan Mounting Plate Screws Remove the firebox and flue pipe assembly from the false chimney breast or fire surround as applicable. Run the gas supply in from the right hand side of the firebox as shown below in Fig. 16 Fig.
- Page 18 To fit using the preferred cable method proceed as follows- Mark out and drill 4 off No 14 (6mm) holes in the back face of the fire opening (inner face of the outer cavity wall in most instances) in the positions shown below in fig.
- Page 19 Fig. 19 Uncoil the two fire fixing cables and thread one end of each of the cables through one of the two holes on each side of the flue outlet shroud. Electrical Wiring Loom - Bring the 5 core cable from the fire box (with small 6 way plug attached) through the cable entry hole in the cast iron fan unit body, and secure to the wall plate with the strain relief bush, allowing at 150mm / 6 inches of wire to protrude into the wall...
- Page 20 Evenly tighten the tensioning nuts to tension both cables and pull the fire snugly against the wall. Do not overtighten, it is only necessary to pull the seal up against the sealing face of the wall, it does not need to be compressed.
-
Page 22: Making The Electrical Connections
MAKING THE ELECTRICAL CONNECTION. WARNING : THIS APPLIANCE MUST BE EARTHED AND MUST BE CONNECTED VIA A 3 AMP FIXED FUSED SPUR WITH A MINIMUM CONTACT SEPARATION OF 3MM - DO NOT UNDER ANY CIRCUMSTANCES CONNECT TO A 13AMP TYPE PLUG AND SOCKET Whilst feeding the 5 core cable through the cable entry hole in the fan unit, press the fan unit into the wall plate until it engages securely. -
Page 23: Gas Tightness And Inlet Pressure
GAS TIGHTNESS AND INLET PRESSURE Remove the pressure test point screw from the inlet elbow and fit a manometer. Turn on the main gas supply and carry out a gas tightness test. Depress and hold the green “on” button on the fan control panel, located at the right hand side of the fire (when viewed from the front). -
Page 24: Assembling Fuel Bed And Commissioning
SECTION 3 ASSEMBLING FUEL BED AND COMMISSIONING ASSEMBLING THE CERAMICS AND FUEL BED NOTE : The position of the fuel-bed components are critical to the performance of the product. Therefore please ensure that the fuel-bed components are positioned as described in the following section prior to requesting a service call due to soot build up, poor flame pattern etc. - Page 25 Position upper fuelbed component on to the locating pegs on the top of the fuelbed base, ensuring that it is correctly seated as shown below in fig. 25 Fig. 25 Fit the two parts of the ceramic front coal support on to the front support bracket, ensuring they are correctly located, as shown below in fig.
- Page 26 Select seven of the coals and arrange along the front ceramic coal support using the shallow depressions as guidance for the coal position. See fig. 27 below Fig. 27 Select the four coals and arrange along the front of the fuelbed, directly behind the front row of coals.
- Page 27 Select five of the coals and arrange along the fuelbed behind the second row of coals spacing them evenly and positioning them as shown below in fig. 29. Fig. 29 Select the remaining four coals and position to fill the gaps left at the top rear of the fuelbed.
- Page 28 The exact position and fit of the coals may be finely adjusted to give the most pleasing and random appearance. To ensure that the release of fibres from these R.C.F (Refractory Ceramic Fibre) articles is kept to a minimum, during installation and servicing we recommend that you use a HEPA filtered vacuum to remove any dust accumulated in and around the appliance before and after working on the appliance.
-
Page 29: Lighting The Appliance
LIGHTING THE APPLIANCE (ALL MODELS) Turn on the gas isolation tap. Depress and hold the green “on” button on the fan control panel, located at the right hand side of the fire (when viewed from the front). The fan unit will operate, and when the air pressure switch (located inside the fan unit) detects sufficient air flow within the flue, an audible click will be heard and the gas solenoid valve will open, this will be indicated by the green light illuminating . -
Page 30: Checking For Clearance Of Combustion
CHECKING FOR CLEARANCE OF COMBUSTION PRODUCTS (ALL MODELS) Close all doors and windows in the room. Light the fire and allow to run for approximately 5 minutes on high position. After approximately 5 minutes hold a smoke match just inside and below the centre of the lower front edge of the top of the fire. -
Page 31: Maintenance
SECTION 4 MAINTENANCE Servicing Notes Servicing should be carried out annually by a competent person such as a CORGI registered engineer. This is a condition of the CFM Europe Ltd. guarantee schemes. The service should include visually checking the chimney and fire opening for accumulations of debris and a smoke test to check for a positive up-draught in the chimney.
Need help?
Do you have a question about the Nevada Powerflue KCPC00MN and is the answer not in the manual?
Questions and answers