Table of Contents
Advertisement
Advertisement
Table of Contents

Related Manuals for Siemens OCM III


Summary of Contents for Siemens OCM III
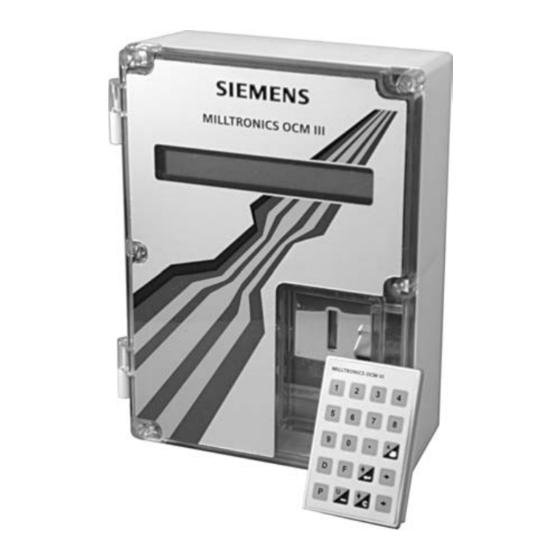
- Page 1 Instruction Manual November 2005 open channel OCM III...
- Page 2 The user is responsible for all changes and repairs made to the device by the user or the user’s agent. • All new components are to be provided by Siemens Milltronics Process Instruments Inc. • Restrict repair to faulty components only.
-
Page 3: Table Of Contents
Communication Software INSTALLATION Installing the OCM-3 Outline and Mounting OCM-3 Layout System Diagram Installing the Transducer Installing the Temperature Sensor mA Output Relays Synchronization Power Connections Installing the Memory Back-up Battery Communicating Via Computer Installing the Programmer 7ML19985AB01 OCM III... - Page 4 Fundamental Checks OPERATION Memory Security Units Flow Calculation Display Damping Relays mA Output Fail-Safe Flow rate and Totalizing Logging Blanking Temperature Time and Date Emulation Mode Reset Flow Velocity Input Auxiliary Head Input DC Output Diagnostic Aids 7ML19985AB01 OCM III...
- Page 5 U Channel Area x Velocity, P3 = 16 Circular Area x Velocity, P3 = 17 Gull-Wing Area x Velocity, P3 = 18 Egg-Shaped Area x Velocity, P3 =19 Universal Area x Velocity, P3 = 20 APPENDICES Maintenance Error Codes Communications 7ML19985AB01 OCM III...
- Page 6 7ML19985AB01 OCM III...
-
Page 7: About This
The pulses echo off the water surface and are then sensed by the transducer. The time for a pulse to echo back from the water surface is temperature compensated and converted into a measurement of head. 7ML19985AB01 OCM III... - Page 8 ✓ 0 or 4 to 20 mA output ✓ three multipurpose relays, including remote totalization ✓ 1 to 24 months data log, subject to logging rate ✓ extensive serial communication, including RS-232 ✓ removable infra-red programmer ✓ AC and DC (bi-current) operation. 7ML19985AB01 OCM III...
-
Page 9: Specifications
» transducer drive: » 44 Khz, 400 Vpp pulses of 0.1 msec typical duration at a 100 msec typical repetition rate. » instrumentation: » range: 0-20 or 4-20 mA » resolution: 5 uA » maximum loading: 1 KΩ 7ML19985AB01 OCM III... -
Page 10: Programmer
» general purpose » 67 mm W x 100 mm H x 25 mm D (2.6" W x 4" H x 1" D) » ABS plastic Operating Temperature: » –20 to 50 °C (–5 to 122 °F) 7ML19985AB01 OCM III... -
Page 11: Transducer
» Bipolar Current: » Belden 9552, 2 pair shielded/twisted, 18 AWG or equivalent » maximum separation 1,500 m (5,000 ft) *Note: The XRS-5 must be used with the TS-2 external temperature sensor when operating with the OCM-3. Velocity Input: » Belden 8760 or equivalent 7ML19985AB01 OCM III... -
Page 12: Communication Software
Auxiliary Input: » Belden 8760 or equivalent 24 V Output: » Belden 8760 COMMUNICATION SOFTWARE Milltronics Utilities Software on standard PC floppy disk for DOS 3.1 and up. 7ML19985AB01 OCM III... -
Page 13: Installation
Milltronics reccomends using a punch for making dia.,4 places customer mounting holes in enclosure. Use suitable cable glands to screw maintain ingress rating. Non metallic enclosure does not provide grounding between connections. Use grounding type bushings and jumpers. OCM III 7ML19985AB01... -
Page 14: Ocm-3 Layout
IEC 1010-1 Annex H. Relay contact terminals are for use with equipment having no accessible live parts and wiring having insulation suitable for at least 250 V. The maximum allowable working voltage between adjacent relay contacts shall be 250 V. OCM III 7ML19985AB01... -
Page 15: System Diagram
RS-232 customer device bi-polar current Milltronics CVCC (Milltronics communication) Maximum system capability. Not all components or their maximum quantity may be required. OCM III 7ML19985AB01 98/03/05... -
Page 16: Installing The Transducer
Maximum cable run 183 m (600 ft) of Beldon 8760, 1 pair shielded/twisted, 18 AWG or equivalent. Temperature sensor cable can be run with the transducer cable in a grounded metal conduit. Ground shield at OCM-3 only. Basic Wiring – Temperature Sensor OCM III 7ML19985AB01... -
Page 17: Ma Output
All relays are certified for use in equipment where the short circuit capacity of the circuits in which they are connected is limited by fuses having ratings not exceeding the rating of the relays. OCM III 7ML19985AB01... -
Page 18: Synchronization
OCM-3s should be synchronized. In order to synchronize OCM-3s: » remove jumper J1 on board A on all but one OCM-3 » interconnect the SYNC terminal (TB1-20) of all OCM-3s. Insure that all OCM-3s share a common ground (TB1-34). OCM III 7ML19985AB01... -
Page 19: Power Connections
DC POWER negative dc input (TB1-24) is tied to ground (TB1-34) 9 to 30 Volt dc input dc terminals shall be supplied from SELV source in accordance with IEC 1010-1 Annex H. OCM III 7ML19985AB01... -
Page 20: Installing The Memory Back-Up Battery
To program the OCM-3 via the Programmer, it must be placed into the front cover recess of the OCM-3. The back of the Programmer has a magnetic plate which will hold the programmer in place. It can be removed when programming is completed. OCM III 7ML19985AB01... -
Page 21: General
‘Flow and Total’ access to ‘D’, ‘F’, ‘P’ and ‘U’ scrolls through selected parameters parameter options scrolls Forward through the parameters / enters negative content of entry field scrolls Backward through the parameters / clears content of entry field 7ML19985AB01 OCM III... -
Page 22: Legend
Upon initial powering up, the unit momentarily displays: and then scrolls through the available languages: The OCM-3 is asking which language you prefer to communicate in! English language language selected English advance to ‘F0’ enter security code < - - - 7ML19985AB01 OCM III... - Page 23 For optimum calibration accuracy, an ‘F13’ should be performed prior to accessing ‘F2’, the normal operating mode. enter the current head. The F13 auto zero calibration OCM-3 calculates ‘P46’ and automatically enters the value. e.g. 1 6 0 F13 auto zero calibration F13 auto zero calibration completed 7ML19985AB01 OCM III...
- Page 24 The start up procedure is now complete. Enter ‘F2’ to place the OCM-3 in the normal operating mode. Note: To save parameter values, return to RUN mode (F2) after programming. The OCM-3 now displays the flow rate and total. Refer to Operation \ Display 7ML19985AB01 OCM III...
-
Page 25: Fundamental Checks
For accurate determination of flowrate, accurate head measurement is essential. Check the following and correct if necessary. » check D5 for correct temperature at transducer location. » check D9 for correct distance from transducer to head. » check D0 for accurate head measurement. 7ML19985AB01 OCM III... - Page 26 7ML19985AB01 OCM III...
-
Page 27: Operation
» P5 flow rate and volume If the units are changed during the course of operation, the change will be effected through all associated parameters and displays and will rescale flow and total data stored in the logs. 7ML19985AB01 OCM III... -
Page 28: Flow Calculation
The absolute method is not applicable to the following: Palmer Bowlus flume H flume DISPLAY The normal display during operation is the Flow and Total Display (F2). flow rate field relay / "no echo" field totalizer field status field 7ML19985AB01 OCM III... -
Page 29: Damping
P27, dampens the change in the mA output. The parameter entry is in seconds for spanning the 0 to 100% of the mA range selected (P26). Displays and relay functions associated with the mA output respond to its dampened value. 7ML19985AB01 OCM III... -
Page 30: Relays
If custom scaling is required, the 20 mA corresponding value (other than 0) can be entered into P25. The range (0 to 20 or 4 to 20 mA) and damping (see Damping) are set via P26 and P27 respectively. 7ML19985AB01 OCM III... -
Page 31: Fail-Safe
2/sec with a closure duration of 200 msec**. The totalizer count is set by the relay setpoint parameter (P16, 19 or 22 respectively). Typically the totalizer should be set for 300 to 3000 counts per day at maximum flow. 7ML19985AB01 OCM III... -
Page 32: Logging
The viewing tasks are: daily flow totals, flow rates and min-max flow data for flow or temperature. The viewing methods are: by first entry, by last entry and by specified date. The scrolling keys are used to maneuver through the tasks, methods and time of day. 7ML19985AB01 OCM III... - Page 33 Viewing the data log The day totalizer (F14) does not use the master totalizer multiplier (P32). It is possible that the daily total overflows. In such a case the display will show +++.++. 7ML19985AB01 OCM III...
-
Page 34: Blanking
The daily total will be reduced proportional to the amount of time the day was shortened. If the clock time is set back beyond the preceding logging time, the previously logged date will be written over with new data as the logging proceeds. 7ML19985AB01 OCM III... -
Page 35: Emulation Mode
If it is desired to reset the master totalizer (F2), this is done by parameter F11. Data Log If it is desired to reset the data log (F14), this is done by parameter F15. Min/Max Log If it is desired to reset the min/max log (F7), this is done by parameter F8. 7ML19985AB01 OCM III... -
Page 36: Flow Velocity Input
The method of head determination is set by P42. The OCM-3 simply substitutes the signal from the auxiliary device for the ultrasonic measurement provided by the transducer. The programming and consequent flow calculation are performed as normal. 7ML19985AB01 OCM III... -
Page 37: Dc Output
In such instances, the transducer should be checked for proper mounting and aiming or the transducer wiring checked for excessive noise. If the value is zero, shorted or opened transducer wiring may be suspect. 7ML19985AB01 OCM III... -
Page 38: D' Parameter Listing
DC volts ✧ velocity volts auxiliary input volts temperature sensor ohms self-test checksum restarts exceptions valid echos per 100 security access required ✧ applicable to flow calculations requiring velocity sensor 7ML19985AB01 OCM III... - Page 39 7ML19985AB01 OCM III...
-
Page 40: F' Parameter Listing
7ML19985AB01 OCM III... - Page 41 7ML19985AB01 OCM III...
-
Page 42: P' Parameter Listing
6 = BS-3680 Thin Plate Rectangular Weir 7 = BS-3680 Thin Plate V-notch Weir 8 = Rectangular Weir (contracted) 9 = Round Pipe 10 = Palmer Bowlus Flume 11 = H Flume 12 = Universal Head vs. Flow 7ML19985AB01 OCM III... - Page 43 6 = cubic metres per hour cubic metres 7 = cubic metres per day cubic metres flow at maximum head height of maximum head volts in at zero velocity velocity at 5 volts in velocity at maximum flow 7ML19985AB01 OCM III...
- Page 44 18 = energize on low analog 19 = de-energize on low D11 volts 20 = energize on low D11 volts 21 = de-energize on high D11 volts 22 = energize on high D11 volts 23 = de-energize on low Aux. volts 7ML19985AB01 OCM III...
- Page 45 0 = flow rate 1 = head 2 = velocity 3 = temperature If custom mA, 20 mA = ? 0 = normal 0 = custom mA span 0 = 4-20 mA 1 = 0-20 mA 7ML19985AB01 OCM III...
- Page 46 3 = x 1 4 = x 10 5 = x 100 6 = x 1000 flow rate display (decimal point) 0 = no decimal places 1 = 1 2 = 2 3 = 3 4 = 4 7ML19985AB01 OCM III...
- Page 47 2 = 30 sec 3 = 1 min 4 = 5 min serial data rate 0 = 300 baud 1 = 600 2 = 1200 3 = 2400 4 = 4800 5 = 9600 6 = 19200 site number 7ML19985AB01 OCM III...
- Page 48 % of maximum flow head % of maximum head log normal setpoint P39 variable logging condition units % flow / min % change of maximum flow per minute flow % of maximum flow head % of maximum head 7ML19985AB01 OCM III...
- Page 49 P42 head determination 0 = by OCM-3 1 = by auxiliary device P43 volts in for zero head P44 head at 5 volts in P45 low flow cut-off head P46 range at zero head P47 blanking distance 7ML19985AB01 OCM III...
-
Page 50: U' Parameters For P3 Primary Element
BS-3680 Thin Plate Rectangular Weir (ISO 1438/1) BS-3680 Thin Plate V Notch Weir (ISO 1438/1) Rectangular Weir (contracted) Round Pipe Palmer-Bowlus Flume H Flume Universal Head vs. Flow Rectangular Area Velocity Trapezoidal Area Velocity Modified Trapezoidal Area Velocity U-channel Area Velocity 7ML19985AB01 OCM III... - Page 51 Circular Area x Velocity Gull Wing Area x Velocity Egg-shaped Area x Velocity Universal Area x Velocity The primary element must be installed in accordance with the manufacturers recommendations and in accordance with all governing regulations. 7ML19985AB01 OCM III...
- Page 52 = q (h/h where q = flowrate = flowrate at maximum head h = head = maximum head x = exponent (U0) Refer to manufacturers specifications for the exponent value. ¤ Refer to Operation \ Flow Calculation. 7ML19985AB01 OCM III...
-
Page 53: Simple Exponential Devices, P3 = 0
3 times the maximum head (i.e. where the liquid surface is not affected by drawdown). * The transducer must be above the maximum head by at least the blanking value, P47. 7ML19985AB01 OCM III... - Page 54 For rated flows under free flow conditions, the head is measured 15 cm (6") upstream from the beginning of the converging section. * The transducer must be above the maximum head by at least the blanking value, P47. 7ML19985AB01 OCM III...
- Page 55 For rated flows under free flow conditions, the head is measured at 2/3 the length of the converging section upstream of the beginning of the throat section. * The transducer must be above the maximum head by at least the blanking value, P47. 7ML19985AB01 OCM III...
- Page 56 Refer to the following table. Flume Size Point of Measurement (pipe dia. in inches) inches 4 - 12 * The transducer must be above the maximum head by at least the blanking value, P47. 7ML19985AB01 OCM III...
-
Page 57: Bs-3680 Rectangular Flume, P3 = 1
= flow rate at maximum head h = head = maximum head Cv = velocity coefficient = velocity coefficient for maximum head Cd = discharge coefficient for head = discharge coefficient for maximum head ¤ Refer to Operation \ Flow Calculation. 7ML19985AB01 OCM III... - Page 58 BS-3680 RECTANGULAR FLUME 3 to 4 x h transducer * head * The transducer must be above the maximum head by at least the blanking value, P47. 7ML19985AB01 OCM III...
-
Page 59: Bs-3680 Round Nose Horizontal Crest Weir, P3 = 2
= flow rate at maximum head h = head = maximum head Cv = velocity coefficient = velocity coefficient for maximum head Cd = discharge coefficient for head = discharge coefficient for maximum head ¤ Refer to Operation \ Flow Calculation. 7ML19985AB01 OCM III... - Page 60 BS-3680 ROUND NOSE HORIZONTAL CREST WEIR transducer * 3 to 4 x h * The transducer must be above the maximum head by at least the blanking value, P47. 7ML19985AB01 OCM III...
-
Page 61: Bs-3680 Trapezoidal Flume, P3 = 3
= head = velocity coefficient for maximum head = maximum head Cd = discharge coefficient for head Cs = shape coefficient for head = discharge coefficient for maximum head ¤ Refer to Operation \ Flow Calculation. 7ML19985AB01 OCM III... - Page 62 BS-3680 TRAPEZOIDAL FLUME transducer * plan 3 to 4 x h side * The transducer must be above the maximum head by at least the blanking value, P47. 7ML19985AB01 OCM III...
-
Page 63: Bs-3680 U-Flume, P3 = 4
Cu = shape coefficient for head = shape coefficient for maximum head Cv = velocity coefficient = velocity coefficient for maximum head Cd = discharge coefficient for head = discharge coefficient for maximum head ¤ Refer to Operation \ Flow Calculation. 7ML19985AB01 OCM III... - Page 64 BS-3680 U-FLUME 3 to 4 x h transducer * head * The transducer must be above the maximum head by at least the blanking value, P47. 7ML19985AB01 OCM III...
-
Page 65: Bs-3680 Finite Crest Weir, P3 = 5
= flow rate at maximum head h = head = maximum head C = discharge coefficient for head = discharge coefficient for maximum head Cp = correction factor for C = correction factor for C ¤ Refer to Operation \ Flow Calculation. 7ML19985AB01 OCM III... - Page 66 BS-3680 FINITE CREST WEIR transducer * 3 to 4 x h * The transducer must be above the maximum head by at least the blanking value, P47. 7ML19985AB01 OCM III...
-
Page 67: Bs-3680 Thin Plate Rectangular Weir, P3 = 6
: q = flow rate = flow rate at maximum head h = head = maximum head Ce = discharge coefficient for head = discharge coefficient for maximum head ¤ Refer to Operation \ Flow Calculation. 7ML19985AB01 OCM III... - Page 68 BS-3680 THIN PLATE RECTANGULAR WEIR transducer * 4 to 5 x h * The transducer must be above the maximum head by at least the blanking value, P47. 7ML19985AB01 OCM III...
-
Page 69: Bs-3680 Thin Plate V-Notch Weir, P3 = 7
: q = flow rate = flow rate at maximum head h = head = maximum head Ce = discharge coefficient for head = discharge coefficient for maximum head ¤ Refer to Operation \ Flow Calculation. 7ML19985AB01 OCM III... - Page 70 BS-3680 THIN PLATE V-NOTCH WEIR transducer * 4 to 5 x h * The transducer must be above the maximum head by at least the blanking value, P47. 7ML19985AB01 OCM III...
-
Page 71: Rectangular Weir (Contracted), P3 = 8
= q x (b - 0.2h)/(b - 0.2h ) x (h/h where : q = flow rate = flow rate at maximum head h = head = maximum head ¤ Refer to Operation \ Flow Calculation. 7ML19985AB01 OCM III... - Page 72 RECTANGULAR WEIR - CONTRACTED transducer * 4 to 5 x h * The transducer must be above the maximum head by at least the blanking value, P47. 7ML19985AB01 OCM III...
-
Page 73: Round Pipe, P3 = 9
For flows that can be calculated by the equation: q = q x f(h)/f(h where : q = flow rate h = head = flow rate at maximum head = maximum head ¤ Refer to Operation \ Flow Calculation. 7ML19985AB01 OCM III... - Page 74 ROUND PIPE transducer * This dimension should be at least 15 cm (6") shorter than the blanking value, P47. ** The transducer must be above the maximum head by at least the blanking value, P47. 7ML19985AB01 OCM III...
-
Page 75: Palmer-Bowlus Flume *, P3 = 10
/ f(h max) where : q = flow rate = flow rate at maximum head h = head = maximum head f(h/h ) is determined by polynomial synthesis ¤ Refer to Operation \ Flow Calculation. 7ML19985AB01 OCM III... - Page 76 D / 2, point of measurement * transducer ** head D = pipe or sewer diameter * for rated flows under free flow conditions ** The transducer must be above the maximum head by at least the blanking value, P47. 7ML19985AB01 OCM III...
-
Page 77: H-Flume *, P3 = 11
For flows that can be calculated by the equation: q = q x f(h/h )/f(h where : q = flow rate = flow rate at maximum head f(h/h ) and f(h ) are determined by polynomial synthesis ¤ Refer to Operation \ Flow Calculation. 7ML19985AB01 OCM III... - Page 78 Flume Size Point of Measurement D (feet) inches 1.88 0.75 2.69 3.63 13.5 5.38 17.9 7.19 22.5 9.00 27.2 10.88 40.5 16.19 * The transducer must be above the maximum head by at least the blanking value, P47. 7ML19985AB01 OCM III...
-
Page 79: Universal Head Vs. Flow, P3 =12
RATIOMETRIC CALCULATION, P4 = 1 For flows that can be calculated by the equation: q = q x f(h)/f(h where : f(h) and f(h ) are polynomials based on interpolation of data points ¤ Refer to Operation \ Flow Calculation. 7ML19985AB01 OCM III... - Page 80 5 A21 = 11.8 flow, point 11 A10 = 1 head, point 6 A11 = 2.5 flow, point 6 Head even For best accuracy concentrate data points where changes in flow rate are the greatest. 7ML19985AB01 OCM III...
-
Page 81: Rectangular Area X Velocity, P3 = 13
A/A x v/v where : q = flow rate = flow rate at maximum head h = head = maximum head v = velocity = velocity at maximum head ¤ Refer to Operation \ Flow Calculation. 7ML19985AB01 OCM III... - Page 82 RECTANGULAR AREA X VELOCITY transducer * * The transducer must be above the maximum head by at least the blanking value, P47. 7ML19985AB01 OCM III...
-
Page 83: Trapezoidal Area X Velocity, P3 =14
= flow rate, l/sec B = channel top width, cm b = channel bottom width, cm d = depth of channel, cm h = head, cm v = flow velocity, cm/sec ¤ Refer to Operation \ Flow Calculation. 7ML19985AB01 OCM III... - Page 84 TRAPEZOIDAL AREA X VELOCITY transducer * * The transducer must be above the maximum head by at least the blanking value, P47. 7ML19985AB01 OCM III...
-
Page 85: Modified Trapezoidal Area X Velocity, P3 = 15
= depth of channel = flow rate at h h = head B = channel top width, cm v = flow velocity, cm/sec b = channel base width, cm ¤ Refer to Operation \ Flow Calculation. 7ML19985AB01 OCM III... - Page 86 MODIFIED TRAPEZOIDAL AREA X VELOCITY transducer * * The transducer must be above the maximum head by at least the blanking value, P47. 7ML19985AB01 OCM III...
-
Page 87: U-Channel Area X Velocity, P3 = 16
U-CHANNEL AREA X VELOCITY, P3 = 16 ‘U’ parameters required * ‘U’ parameters calculated ** U0 = base diameter D U1 = area (h) obtain from manufacturer’s specifications. calculated by OCM-3. May be viewed by accessing ‘U’ parameter. 7ML19985AB01 OCM III... - Page 88 U-CHANNEL AREA x VELOCITY transducer * * The transducer must be above the maximum head by at least the blanking value, P47. 7ML19985AB01 OCM III...
-
Page 89: Circular Area X Velocity, P3 = 17
CIRCULAR AREA X VELOCITY, P3 = 17 ‘U’ parameters listed * ‘U’ parameters calculated ** U0 = conduit diameter U1 = area (h) obtain from manufacturer’s specifications. calculated by OCM-3. May be viewed by accessing ‘U’ parameter. 7ML19985AB01 OCM III... - Page 90 CIRCULAR AREA X VELOCITY transducer * This dimension should be at least 15 cm (6") shorter than the blanking value, P47. ** The transducer must be above the maximum head by at least the blanking value, P47. 7ML19985AB01 OCM III...
-
Page 91: Gull-Wing Area X Velocity, P3 = 18
U0 = channel base width U4 = area (h) U1 = lower angle alpha (α) U2 = upper angle beta (β) U3 = transition height obtain from manufacturer’s specifications. calculated by OCM-3. May be viewed by accessing ‘U’ parameter. 7ML19985AB01 OCM III... - Page 92 GULL WING AREA X VELOCITY transducer * * The transducer must be above the maximum head by at least the blanking value, P47. 7ML19985AB01 OCM III...
-
Page 93: Egg-Shaped Area X Velocity, P3 =19
: q = flow rate = flow rate at h A = cross sectional area of flow = cross sectional area of flow at h v = flow velocity ¤ Refer to Operation \ Flow Calculation. 7ML19985AB01 OCM III... - Page 94 EGG-SHAPED AREA X VELOCITY transducer * standpipe ** * This dimension should be at least 15 cm (6") shorter than the blanking value, P47. ** The transducer must be above the maximum head by at least the blanking value, P47. 7ML19985AB01 OCM III...
-
Page 95: Universal Area X Velocity, P3 = 20
= area obtain from manufacturer’s specifications. calculated by OCM-3. May be viewed by accessing ‘U’ parameter. e.g. typical open channel transducer * * The transducer must be above the maximum head by at least the blanking value, P47. 7ML19985AB01 OCM III... - Page 96 A8 = 0.70 head, point 7 A9 = 0.59 area, point 7 A8 = 1.00 head, point 8 A9 = 0.89 area, point 8 For best accuracy concentrate data points where changes in flow are the greatest. 7ML19985AB01 OCM III...
- Page 97 7ML19985AB01 OCM III...
-
Page 98: Maintenance
A periodic inspection of the transducer is recommended, at which time any build-up of material on the face should be removed. The enclosure should be cleaned using a vacuum cleaner and a clean, dry brush. For battery replacement refer to Installation / Installing the Memory Back-up Battery. 7ML19985AB01 OCM III... -
Page 99: Error Codes
BS-3680 spec must use ratiometric invalid angle size invalid selection value is view-only characterizer in use feature not available need whole number invalid date invalid time can’t zero auxiliary device b must be greater than R-r 7ML19985AB01 OCM III... - Page 100 OCM - 3 site number (P39 ) bipolar current loop RS-232 CVCC ** customer’s customer’s computer * computer * optional parallel printer serial printer * Milltronics OCM -3 Utilities Software available ** provides conversion to RS -232 or 422 7ML19985AB01 OCM III...
-
Page 101: Communications
Similarly, when the OCM-3 receive buffer is near empty, the OCM-3 sends an XON signal to tell the sender that it is safe to resume sending. The communication baud rate of the OCM-3 and its correspondent must be the same. 7ML19985AB01 OCM III... - Page 102 6 7 8 9 10 refer to CVCC CVCC instruction 1 2 3 4 5 6 7 manual for connection to computer RS-232 IBM PC Computer Connection computer serial port computer serial port DB-9 connector DB-25 connector 7ML19985AB01 OCM III...
- Page 103 The Milltronics printer emulation program does this automatically. If the OCM-3 is connected to a computer programmed for printer emulation, the computer will receive the print out data and display it on the video terminal (refer to Milltronics Utilities Software). 7ML19985AB01 OCM III...
- Page 104 - remote OCM-3 display - local display - saving OCM-3 program parameters - retrieving log data - creating spread sheet data log file - creating ASCII text data log file - emulating serial printer - graphic flow rate display 7ML19985AB01 OCM III...
- Page 105 (see Start Up\Keypad). In addition, special functions are provided using the ’w’ and ’v’ keys found on keyboard. For additional information, refer to the ’README.DOC’ file provided on the disk. 7ML19985AB01 OCM III...
- Page 106 ASCII characters terminated by an ASCII carriage return (hex 0D) and an ASCII line feed (hex 0A). All system parameters and most other responses are floating point numbers with a maximum of 6 decimal places. e.g. typical OCM-3 response display value message 0.000000 99.123 99.123000 7ML19985AB01 OCM III...
- Page 107 24 hour time: hh:mm:ss /t3/ returns the current date: dd/mm/yy returns the current flow rate this is similar to the OCM-3 parameter F2 display, however it is not subject to truncation to less than 6 decimal places. 7ML19985AB01 OCM III...
- Page 108 /l/ start data log down load. /l1.dd.mm.yyyy/ data log down load - start date /l2.dd.mm.yyyy/ data log down load - end date /l3/ stop data log down load 7ML19985AB01 OCM III...
- Page 109 It should be noted that the modem responses listed in the following discussion serve only to typify what is presently common in current field of RS-232 communication. standard modem local modem cable computer telephone lines remote modem OCM - 3 RS 232 OCM-3 12 13 modem TB-1 DB-25 connector 7ML19985AB01 OCM III...
- Page 110 The OCM-3 is now on line and communication can be carried out. The user may escape to the main menu of the Utilities software and select another program if so desired. To close the communication, return to the Terminal Emulation program. 7ML19985AB01 OCM III...
- Page 111 This may result in the OCM-3 modem being unable to answer calls successfully; depending on the type of modem. OCM-3 software, 3.26 or later, averts this problem by automatically breaking communication between the OCM-3 and its modem after 15 minutes. ■ 7ML19985AB01 OCM III...
- Page 112 Siemens Milltronics Process Instruments Inc. Siemens Milltronics Process Instruments Inc. 2005 1954Technology Drive, P .O. Box 4225 Subject to change without prior notice Peterborough, ON, Canada K9J 7B1 Rev. 1.0 Tel: (705) 745-2431 Fax: (705) 741-0466 *7ml19985AB01* Email: techpubs.smpi@siemens.com...
Need help?
Do you have a question about the OCM III and is the answer not in the manual?
Questions and answers