
Related Manuals for Qvis EYE-4MP-FG/W


Summary of Contents for Qvis EYE-4MP-FG/W
- Page 1 4MP IP CAMERA CCTV SURVEILLANCE INSTALLATION & NETWORK CONNECTION GUIDE Camera models: EYE-4MP-FG/W MB-4MP-FW Updated: July 2016...
-
Page 2: Table Of Contents
3 Download and install ActiveX plugin 4 Login 5 Live Preview 6 Replay 7 Set System Parameters 7.1 Local config 7.2 Audio Setting 7.3 Video Settings 7.3.1 OSD Settings -Text Overlay 7.3.2 Video Coding 7.3.3 Video Mask 31 7.3.4 Video Parameters 7.3.5 Picture Parameters 7.4 Smart Settings (Intelligent Video Analysis 7.4.1 Smart Stream 7.4.2 Smart Detect 7.4.3 Smart Control © Copyright Qvis All software and documentation rights reserved. Ⓡ... - Page 3 7.6.3 Snap Settings 7.7 Alarm Settings 7.7.1 Motion Detection 7.7.2 Sensor Detection 7.7.3 Network Detection 7.8 COM Settings 7.9 System Settings 7.9.1 System Info 7.9.2 System Time 7.9.3 User Management 7.9.4 Upgrade 7.9.5 PTZ Upgrade 7.9.6 Restore 7.9.7 Reboot 7.9.8 System Log Appendix 1 Network Interface of IP Camera Appendix 2 Default Network Parameters Appendix 3 FAQs © Copyright Qvis All software and documentation rights reserved. Ⓡ...
-
Page 4: Introduction
Introduction Thank you for purchasing the Qvis 4 Mega Pixel IP Camera The main features of this camera include: • UP TO 4MP High Resolution Images • Full HD 1080P Video • Dual Video Streams • 3D Digital Noise Reduction • DC12V & PoE • Supports H.264 & H.265 • IP67 Weather-Proof Protection This installation and connection guide is designed to be a reference tool for initial setup and configuration of the camera. -
Page 5: Important Safeguards And Warnings
4. Qualified engineers needed • All the examination and repair work should be done by the qualified service engineers. We are not liable for any problems caused by unauthorised modifications or attempted repair. 5. Environment • This product should be installed in a cool, dry place away from direct sunlight, inflammable, explosive substances and etc. • Please keep it away from environments that contain electromagnetic radiation or objects that produce it. • Please provide sound ventilation around the device at all times. • Do not allow the water and other liquid to penetrate into the device if casing has been compromised. This series product complies with the IP67 standard specified in the Degrees of Protection Provided by Enclosure. • Ensure lightning surge protection is in place to make sure you fully protect camera circuitry from electrical overload. • Please make sure the CCD (CMOS) component is away from the radiation of a laser beam device. Otherwise it may result in CCD (CMOS) optical component damage. • It is recommended that the grounding studs of the product should be grounded, so to further enhance the reliability of the camera. © Copyright Qvis All software and documentation rights reserved. Ⓡ... -
Page 6: Ip Camera Information & Data
IP Camera Information & Data 105.5 1.1 EYE-4MP-FG/W (Eyeball Dome Camera) 1.1.1 Technical Diagram - Dimensions 105.5 © Copyright Qvis All software and documentation rights reserved. Ⓡ... -
Page 7: Specifications
TCP/IP, UDP, RTP, RTSP, RTCP, HTTP, DNS, Protocols DDNS, DHCP, FTP, NTP, PPPOE,SMTP, UPNP FTP, E-mail, Browser, CMS Alarm Data Transmission ONVIF 2.4 System Compatibility Compression Standard H.264 / H.265 & MJPEG Video Compression Main Profile H.265 code profile 32KB ~ 16Mbps, support VBR, CBR Video bit rate Dual-stream encoding Dual Stream Interface Communication Interface 1 RJ45 10M/100M Ethernet interface © Copyright Qvis All software and documentation rights reserved. Ⓡ... -
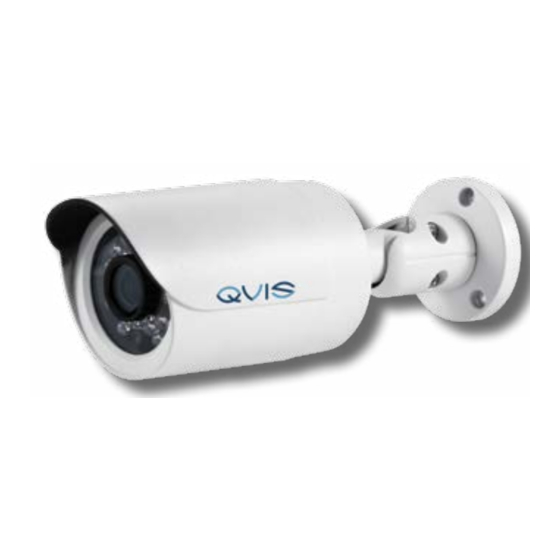
Page 8: Mb-4Mp-Fw (Mini Bullet Camera)
1.2 MB-4MP-FW (Mini Bullet Camera) 1.2.1 Technical Diagram - Dimensions 62.00 29.00 54.43 © Copyright Qvis All software and documentation rights reserved. Ⓡ... -
Page 9: Specifications
TCP/IP, UDP, RTP, RTSP, RTCP, HTTP, DNS, Protocols DDNS, DHCP, FTP, NTP, PPPOE,SMTP, UPNP FTP, E-mail, Browser, CMS Alarm Data Transmission ONVIF 2.4 System Compatibility Compression Standard H.264 / H.265 & MJPEG Video Compression Main Profile H.265 code profile 32KB ~ 16Mbps, support VBR, CBR Video bit rate Dual-stream encoding Dual Stream Interface Communication Interface 1 RJ45 10M/100M Ethernet interface © Copyright Qvis All software and documentation rights reserved. Ⓡ... -
Page 10: Camera To Nvr Connection Instructions
Camera to NVR connection instructions 2.1 Connecting to a Qvis Cortex NVR 2.1.1 Direct Connection The Qvis Cortex NVR has a plug and play camera setup as one of its key features. Connect the camera to one of the POE ports on the rear of the NVR and the device will automatically find the camera, display the live video feed from the camera, and also add it to the connected camera list. Automatic detection by the NVR will only work if the camera has had its DHCP function enabled (see Chapter 5.4.2 Lan Setting). 2.1.2 Connection over LAN network (with DHCP server) If you are connecting the camera to a network that has a DHCP server, and it is connected to the LAN port on the NVR via an external PoE switch, then please follow these steps to search for the cameras connected to the network: These instructions need to be followed only if you are connecting the camera to the NVR over a network that has a CPD server apart of it. -
Page 11: Connection Over Lan Network (Without Dhcp Server)
These instructions need to be followed only if you are connecting the camera to the NVR over a network that does not have a DHCP server apart of it. You will need to find out your CCTV’s network IP address range to start with. To do this you will need to connect a Windows PC, via an Ethernet cable, to the same router as the NVR is connected to. Search for the command prompt on Windows by typing in ‘CMD’ into the ‘Search for programs and files’ search bar found by clicking the Windows logo button at the bottom left hand corner of the desktop area. Once the command prompt has loaded up, type in ‘IPCONFIG’ and press enter. This should bring up the CCTV system’s network address details. The IP address will be found on the ‘IPv4’ line, please take note of it. © Copyright Qvis All software and documentation rights reserved. Ⓡ... - Page 12 Install the ‘Device Search’ software tool on to the PC or laptop (the software will be on the ‘Resource’ disc that comes with the camera). When the software tool has been installed, click the ‘Search’ button to find the camera on the network (see previous page). Select the camera on the list and then click on the ‘Set’ button to open up the ‘Network Parameters’ set up window (see image on next the page). Select the camera on the list and then click on the ‘Set’ button to open up the ‘Network Parameters’ set up window (see image on next the page). © Copyright Qvis All software and documentation rights reserved. Ⓡ...
- Page 13 Set the camera’s IP address, Gateway, and Subnet mask to match appropriate LAN range, and click ‘OK’ to set. On the ‘IP cameras: Setup, Add, Remove and Rename’ section to the NVR, add in the IP address of the CCTV’s network into the ‘Start IP’ field. Change the last digit to ‘1’. Add the same IP address into the ‘End IP’ field but this time change the last digit to ‘255’. Click the ‘Search’ button. The NVR will search for cameras within this IP address range and display them in the list below. Double click on the cameras found to connect them with the NVR. © Copyright Qvis All software and documentation rights reserved. Ⓡ...
-
Page 14: Connecting To A Dahua Nvr
These instructions are for an NVR that has inbuilt POE ports. Connect the camera to the POE port of the NVR. This will then assign the camera an IP address in the 10.1.1.X range, take note of the IP addresses. When all camera are connected to the NVR and have been assigned an IP address, connect an Ethernet cable from a PC or Laptop to a spare port on the POE of the NVR. Open Internet Explorer and enter one of the camera IP addresses in to the address bar. Log in with Username: admin Password: admin Select Config on the top of the web page. Select Network. Change the HTTP Port to 81 and the ONVIF Port to 80. Save these settings. 10. Repeat for each of the remaining cameras. 11. Restart the NVR when all cameras have been modified. 12. You will now see the video feed of the camera. © Copyright Qvis All software and documentation rights reserved. Ⓡ... -
Page 15: Connection Over Lan Network (With Dhcp Server)
These instructions need to be followed only if you are connecting the camera to the NVR over a network that has a DHCP server apart of it. Connect the camera to a POE switch connected to the same network the NVR is connected to. The network will automatically assign the camera an IP address in the same range as the rest of the network is set to. Connect an Ethernet cable from a PC or Laptop to an Ethernet port within the same network. Install the ‘Device Search’ software tool on to the PC or laptop (the software will be on the ‘Resource’ disc that comes with the camera). When the software tool has been installed, click the ‘Search’ button to find the camera on the network. Note down the IP address for that camera (see image below). © Copyright Qvis All software and documentation rights reserved. Ⓡ... -
Page 16: Connection Over Lan Network (Without Dhcp Server)
These instructions need to be followed only if you are connecting the camera to the NVR over a network that does not have a DHCP server involved with it. Connect the camera to a POE switch connected to the same network the NVR is connected to. Because the network has no DHCP server, the camera will not have an IP automatically assigned to it. You will need to know the network’s range and manually assign an IP address to the camera (the NVR will need to be in the same range as well). Install the ‘Device Search’ software tool on to the PC or laptop (the software will be on the ‘Resource’ disc that comes with the camera). When the software tool has been installed, click the ‘Search’ button to find the camera on the network (see previous page). Select the camera on the list and then click on the ‘Set’ button to open up the ‘Network Parameters’ set up window (see image on next the page). © Copyright Qvis All software and documentation rights reserved. Ⓡ... - Page 17 Set the camera’s IP address, Gateway, and Subnet mask to match appropriate LAN range, and click ‘OK’ to set. Connect an Ethernet cable from a PC or Laptop to an Ethernet port within the same network. Open Internet Explorer and enter one of the camera IP addresses in to the address bar. Log in with Username: admin Password: admin Select Config on the top of the web page. Select Network. 10. Change the HTTP Port to 81 and the ONVIF Port to 80. 11. Save these settings. 12. Restart the NVR when all cameras have been modified. © Copyright Qvis All software and documentation rights reserved. Ⓡ...
-
Page 18: Download And Install Activex Plugin
Download and install ActiveX You need to install ActiveX plugin control when you visit the IP camera for the first time through the Internet Explorer browser. Input the IP address of IP camera into the Internet Explorer’s address bar to enter into login page (see Figure 1), Click [File] to download the ActiveX Plugin: Figure 1 You can download the ActiveX manually or just input the password, then download the file as system prompt (see Figure 2). Figure 2 A file download dialogue box pops up, click [Run] or [Save] to down- load ActiveX, after downloading it, double-click the downloaded file “WebCMS.exe” and choose your desired language, then install it. © Copyright Qvis All software and documentation rights reserved. Ⓡ... - Page 19 Please Note: abnormal operational events may occur whilst installing ActiveX plugin. Follow these instructions to resolve two of the most likely abnormal operational events: 1: This window may appear when installing the Active X plugin (Figure 3): Figure 3 Please change the security level of Internet Explorer via selecting the “Cog” icon (top right hand corner of the IE window)-> Internet options-> Security->Custom level (see Figure 4), and change the parameters to the ones shown in Figures 5A & 5B and Figure 6. Figure 4 © Copyright Qvis All software and documentation rights reserved. Ⓡ...
- Page 20 Figure 5A Figure 5B Figure 6 © Copyright Qvis All software and documentation rights reserved. Ⓡ...
- Page 21 2: This window may appear when installing the Active X plugin (Figure 7): Figure 7 Please close Internet Explorer and CMS software, then click “retry”. © Copyright Qvis All software and documentation rights reserved. Ⓡ...
-
Page 22: Login
Login Reopen Internet Explorer after the ActiveX installation has been completed. Input the camera’s IP address to return to login page, enter user name and password (default setting is admin/admin) see Figure 8, click login to enter into main interface: Figure 8 Live View See Figure 9 for the interface of “Live Preview”: Figure 9 © Copyright Qvis All software and documentation rights reserved. Ⓡ... - Page 23 [Listen]: After switching on the monitoring function, the PC can monitor the audio from the camera. The displayed status after monitoring starts: [Zoom]: This feature allows the user to manually increase or decrease the image size of the video display area in order to inspect a specific element in the image in greater detail. [Full]: Displays images in full-screen, right click or click Esc to exit full screen mode. [W:H]: Click “W:H” to get the real W:H ratio of image; avoid image distortion when stretching to the size of the screen. [Replay]: Click “Replay”; the playback window will pop up to enable searching and playback of recorded files or snapped pictures. [Alarm]: When there is an alarm, the warning light will turn on, the status will be: Click [Alarm] to cancel the alarm message manually, and to pop up the log searching window. The maximum capacity is 512 message entries, when the number of entries exceeds 512, system will delete records of the earliest date automatically. [Images]: Click on Image, allows users to adjust Brightness, Contrast, Hue and Saturation of image. © Copyright Qvis All software and documentation rights reserved. Ⓡ...
-
Page 24: Replay
Replay Click ‘Replay’ to enter into the video playback page (see figure 10A). Figure 10A Users can search for recorded image files or snapped pictures within the local PC or storage device according to video record date (SD card feature available only on certain camera models). [PC]: Users can select a certain date to play recorded image file or search for snapshot pictures (stored in local PC) [SD Card]: Users can select certain dates to view recorded image file or search for snapped picture (stored in the device’s SD card). [File List]: Shows the recorded image files or snapshot pictures searched in the File List. To search for recorded video image files or snapped pictures of a specific period please see Figure 10B below: Select the storage media SD card or PC that has the recorded video and/ or images. Click on ‘Search’ The list of all recorded video and/ or images will be shown here after search been complete. Figure 10B © Copyright Qvis All software and documentation rights reserved. Ⓡ... - Page 25 [Play]: Choose the recorded image or snapshot picture in file list, right click the file or picture and click ‘Play’ button to play. The contents will be displayed within the window below. Users can view the video/picture play information and control the process (see Figure 11): Figure 11 [Down]: Select the recorded files or snapshot pictures searched from the camera’s SD card in the file list (SD card feature only available in certain camera models), click ‘Download’ button to download the files to PC. [Info]: Users can view the information downloaded after clicking ‘Download’ (see Figure 12): Figure 12 Click [Start] to start downloading recorded files or pictures from the SD card to PC, then manually click [Cancel] to stop the download action. If you close the Download information window and click ‘info’, you can continue to view the information © Copyright Qvis All software and documentation rights reserved. Ⓡ...
-
Page 26: Set System Parameters
See Figure 13 to view the ‘Local Config’ system settings interface: Figure 13 [Preview mode]: Users can select, according to their needs, ‘Real time’ priority for viewing video at the full frame rate allowed, or the ‘Fluency’ priority mode for viewing video at a lower frame rate if for when network conditions are bad. [Reset Mosaic]: Select this option to improve image quality. As a result of selecting this option the CPU usage rate will increase. [Record file packing time]: Set packing time of recorded files for saving to the local PC whilst it is recording the video image. [Record file path]: Set the storage directory for local records and snapshot files. After you have set these parameters, please click ‘Save’ to make them valid. © Copyright Qvis All software and documentation rights reserved. Ⓡ... -
Page 27: Audio Setting
See Figure 14 for the ‘Audio Setting’ interface (audio only available on certain camera models): Figure 14 [Enable]: To turn IP camera’s audio on or off. When there is no need for audio, un-tick this box to save DSP and network resources. Audio is disabled by default. [Audio Input]: Select either ‘MIC’ or ‘Line In’ input. [Compression Type]: Supports three types of audio compression format:G.726, G.711A, G.711U. [Sampling Rate]: Supports audio sample rates of 8k and 32k. [Input Volume]: Adjust the device’s input volume up or down using the slider. [Output Volume]: Adjust the device’s output volume up or down using the slider. After you set these parameters, please click ‘Save’ to make them valid. © Copyright Qvis All software and documentation rights reserved. Ⓡ... -
Page 28: Video Settings
7.3 Video Settings 7.3.1 OSD Settings - Text Overlay See Figure 15 for the ‘OSD Settings’ interface. Position controls OSD options Figure 15 [Title]: The name of video channel, which will be displayed at the bottom left of the video image (it is also movable), maximum characters allowed: 32. [Color]: You can choose different colors for the text. [OSD]: Display or not to display Title, Date, Time, Week, Date Format and Frame/Bitrate of channels. [Position]: Can adjust the display position of video title and Date, Time,Week. After you set these parameters, please click ‘Save’ to make them valid © Copyright Qvis All software and documentation rights reserved. Ⓡ... -
Page 29: Video Coding
Only Baseline and Main profiles are available for the H.264 compression format. Baseline is suitable for low video streaming delay, and the situation have requirement on real time. Main profile is suitable for better video quality. [Coding]: H.264 and MJPEG options are available. [Resolution]: To set the resolution of the video images. Preferred Stream:2592*1520/2048*1520/1920*1080; Alternate Stream: 720*576/640*480/640*352/320*240; [Quality]: You can choose the video quality according to your needs: Fine, Normal, and Basic are parameters that can also be user-defined by choosing [advanced]. [Rate control]: CBR and VBR are optional. CBR adopts a constant encoding bitrate, VBR adopts variable encoding bitrate. [Quality]: Under the CBR setting: set the bitrate range via “Image Quality”, where you can choose self-adaption. This means that the bitrate can be controlled by the software and you can also select between ±10% ~ ±50%. ±10% means that the bitrate range is from -10% to +10% of the value of bitrate. Under VBR setting: set the image quality via “Image Quality”, there are 6 levels available, going from best to worst. © Copyright Qvis All software and documentation rights reserved. Ⓡ... - Page 30 H.264 Coding: GOP: 50, frame rate: 25, bitrate: VBR, 512kbps, image quality: Bad; MJPGE Coding: GOP: 50, frame rate: 25, bitrate: VBR, 4096kbps, image quality: Bad; [WAN default H.264 Coding: GOP: 25, frame rate: 5, bitrate: CBR, value]: 384kbps, image quality:Bad; MJPEG Coding: GOP: 25, frame rate: 5, bitrate: CBR, 4096kbps, image quality: Bad; After you have set these parameters, please click ‘Save’ to make them valid (After changing the coding lever, resolution and coding, device will restart). Attention: Non-professional users please use ‘Advanced Settings’ with caution. Note: LAN settings depend on your local network. © Copyright Qvis All software and documentation rights reserved. Ⓡ...
-
Page 31: Video Mask
7.3.3 Video Mask See Figure 17 to view the ‘Video Mask’ interface: Figure 17 [Enable Mask]: Enable or disable video masking. [Mask area set]: Click and move cursor to set image masking area, an image can be entirely or partially masked, maximum of 4 areas supported. [All]: Mask the whole image. [Clear]: Clear masked areas. After you set these parameters, please click ‘Save’ to make them valid. 7.3.4 Video Parameters See Figure 18 for the interface of ‘Video Parameter’ © Copyright Qvis All software and documentation rights reserved. Ⓡ... - Page 32 Figure 18 © Copyright Qvis All software and documentation rights reserved. Ⓡ...
- Page 33 - Auto Iris Shading: please redress the iris in the light box if it is your first time using the auto iris function. [IR]: - IR Mode: This function is only for the camera’s infrared function. Supports three kinds of detection mode to suit different lighting situations. ~ Time Detection: set the times for when the camera will switch between day and B/W modes. The mode set will be priority setting. ~ Video Detection: the sensor will detect the LUX value, it will then decide whether to turn to B/W mode or not. The larger the value, the more sensitive the camera will be on switching to B/W mode. Digitally sharpen the video image © Copyright Qvis All software and documentation rights reserved. Ⓡ...
- Page 34 - IR Direction: Select either High Level or Low level. [Advanced]: - Rotation: supports 90 degree and 270 degree rotation. - Exposure Time: Set the shutter value to control exposure time. - WB: You can choose either Manual WB or AWB mode to adjust white balance. (AWB is the default). - AntiFogging: Set anti fogging function for when the density of environmental fog is high, the camera will change the brightness and contrast to improve the quality of image. - AntiFalseColor: Set anti false color function, which will correct the high color frequencies to true color. - Image Stabilizer: If camera is situated in a location where there is high vibration, you can set this option to ‘Open’. © Copyright Qvis All software and documentation rights reserved. Ⓡ...
-
Page 35: Picture Parameters
7.3.5 Picture Parameters See Figure 19 for the ‘Snap Picture’ interface: Figure 19 [Picture Format]: Supports only JPG format. Megapixel camera definition is the same as what is set in [Video Definition]. [Resolution]: Set the resolution you want the snapshot picture saved in. After you have set these parameters, please click ‘Save’ to make them valid. 7.4 Smart Settings (Intelligent Video Analysis) 7.4.1 Smart Stream See Figure 20 for the ‘Smart Stream’ Interface: Figure 20 © Copyright Qvis All software and documentation rights reserved. Ⓡ... - Page 36 Please see Chapter 7.6 Alarm Setting to find out how to setup camera to send alarm notification alerts to a designated email address. [ROI]: Region Of Interest; select this option and you will be able to create up to 4 regions of interest in the video window, which when movement is detected within, the camera’s alarm is triggered. [ROI Set]: To set up to 4 regions of interest; hold cursor over the video window, to the top right corner of the region of interest, hold down left mouse button and drag across video window to expand the blue box to the point where the region of interest ends, then release left mouse button (see figure 20 to see blue box region of interest example). Now whenever movement is detected within the box that has been created the camera’s alarm will be triggered. [Clear]: Delete the all regions of interest from the video window. After you have set these parameters, please click ‘Save’ to make them valid. © Copyright Qvis All software and documentation rights reserved. Ⓡ...
-
Page 37: Smart Detect
Select up to 3 reactionary operation by selecting these buttons: [Cover Switch]: Camera automatically switches to IR mode [OSD Output]: Camera’s OSD (On Screen Display) will appear on the video monitor as an visual alert. [Linkage Motion]: Camera’s alarm will be triggered and an alarm message will be sent to a designated email mailbox (please see Chapter 7.5.5 Email Settings for information on setting up a designated mailbox to send alarm alert emails to). Smart Focus Detect - Function not available for these camera models © Copyright Qvis All software and documentation rights reserved. Ⓡ... -
Page 38: Smart Control
[Preset - Alarm Close]: camera performs preset movement after alarm stops [Preset - Clear Fault]: camera performs preset movement if a movement fault occurs [Smart Low Light]: Select ‘Open’ to enable function or ‘Close’ to disable. 7.5 Network Settings 7.5.1 Basic Settings See Figure 23 for the “Basic setting” interface: Figure 23 © Copyright Qvis All software and documentation rights reserved. Ⓡ... -
Page 39: Lan Settings
After you set these parameters, please click ‘Save’ and the device will reboot to make the parameters valid. 7.5.2 LAN Setting See Figure 21 for the ‘LAN setting’ interface: Figure 24 [DHCP Enable]: If the DHCP function of the router is enabled, the IP camera will automatically seek an IP address from the router. [IP]: Set the camera’s IP address. [Subnet mask]: Default value is 255.255.255.0 (users are recommended not to change it). [Gateway]: Set the gateway IP of the camera, for example when the device is connected to public network via a router, the gateway IP is the router IP. [DNS]: Please use DDNS function to set the DNS address as the local DNS address. If you do not know the local DNS, you can use 8.8.8.8. [MAC]: The Physical address of the IP camera (users are recommended not to change it). © Copyright Qvis All software and documentation rights reserved. Ⓡ... -
Page 40: Pppoe Settings
Note: After revising and saving parameters, the device will restart. If it is applied within the LAN, please pay attention - to avoid IP address conflict. 7.5.3 PPPOE Settings See Figure 25 for the ‘PPPOE setting’ interface: Figure 25 [Enable]: Enable or disable PPPOE dial-up function. [IP]: After setting up the device dial-up successfully, it will display the public IP Address. [Username]: ADSL dial-up account, obtain from the IP service provider. [Password]: ADSL dial-up password, obtain from the IP service provider. [Online time]: Start the timer after dial-up to see the online duration after successful dial-up. After you set these parameters, please click to make them valid. © Copyright Qvis All software and documentation rights reserved. Ⓡ... -
Page 41: Upnp Settings
UPNP function enabled, the router will automatically map the port, using the UPNP settings, to the public network. Manual port mapping by the users will not be necessary. [Network Card]: Select the type of network input card that will connect to the UPNP router. [Mode]: Designate mode and auto mode. Designate mode means to specify the data mapping and web mapping ports to the router. Auto mode allows for the data mapping and web mapping ports to be set up by the router. [Server URL]: IP address of the router with UPNP function. [Data port map No.]: Data mapping port of user-specified device on the router (works only under specified mode). [Web port map No.]: Web mapping port of user-specified device on the router (works only under specified mode). © Copyright Qvis All software and documentation rights reserved. Ⓡ... -
Page 42: Email Settings
When the UPNP function runs successfully, the status bar will echo the data port mapped to the router by the device. [Web mapping status]: When UPNP function runs successfully, the status bar will echo the web port mapped to the router by the device. After you set these parameters, please click ‘Save’ to make them valid. 7.5.5 Email settings See Figure 27 for the “Email setting” interface: Figure 27 To set the mailbox addresses and parameters to receive alarm and public network IP emails. [SMTP server]: The address of servers that send the mails, the address format of mail servers varies from provider to provider, e.g. the SMTP server of 163 mailbox is smtp.163.com. [To]: Mailbox that receives mails. Tick the ‘Binding email’ box to input details of a mailbox to send alert emails from. [From]: Mailbox that sends mails. © Copyright Qvis All software and documentation rights reserved. Ⓡ... - Page 43 Commonly used mail server configuration: Gmail mail server: • SMTP server: smtp.gmail.com • SMTP user name: username@gmail.com • SMTP port: • SSL: enabled Yahoo mail server: • SMTP server: smtp.mail.yahoo.com • SMTP user name: username@yahoo.com or username@ yahoo.co.uk • SMTP port: • SSL: enabled © Copyright Qvis All software and documentation rights reserved. Ⓡ...
-
Page 44: Ftp Settings
See Figure 28 for the “FTP setting” interface: Figure 28 Use a specified FTP server to send and store recorded video files and snapped images generated after an alarm is triggered in FTP mode. Supports up to two FTP servers; when camera fails to connect to the main server, the system will switch to the secondary (sub) server. [Server URL]: The IP address or HTTP address of the FTP server. [Server Port]: The FTP server port. The default port is 21. [FTP Catalog]: Directory path on the remote FTP server. If the path does not exist or has not been filled in, the device will create a file folder under the root directory of FTP server. [User name] and [Password]: User name and password for the FTP server. [Start Port] and [End Port]: Provide start and end ports of the FTP server. © Copyright Qvis All software and documentation rights reserved. Ⓡ... -
Page 45: Ddns Settings
Figure 29 To bind the camera with a fixed domain name using a DDNS server. Using a fixed domain name will prevent the need to use an IP address (that may change repeatedly over time) to connect to the camera. (Refer to Appendix 3 for detailed steps) [Enable]: Enable or disable DDNS function. [Service Provider]: supports 3322.org and dyndns.org. [User Name]: User name registered within DDNS server. [Password]: User password registered within DDNS server. [Domain]: The domain name set up by users, e.g.: test1.3322.net. [Server URL]: DDNS server address. When the DDNS address is the domain name, please set the DNS address in [Basic Parameters] correctly. [Server port]: Default value is 30000, this is the DDNS server’s port number (users are recommended not to change it). © Copyright Qvis All software and documentation rights reserved. Ⓡ... -
Page 46: Vpn Settings
[Update Interval]: Choose the upgrade interval time, e.g. 30 minutes, so that the IP camera upgrades the WAN IP to the DDNS every 30 minutes. After you set these parameters, please click ‘Save’ to make them valid. 7.5.8 VPN settings See Figure 30 for the “VPN setting” interface: Figure 30 [Enable]: Enable or disable VPN function. [Server URL]: IP address or domain of VPN server. [User Name]: User registered in VPN server. [Password]: User password registered in VPN server. [IP]: Display IP after VPN dial-up success. [Status]: Display the status of dial-up. After you have set these parameters, please click ‘Save’ to make them valid. © Copyright Qvis All software and documentation rights reserved. Ⓡ... -
Page 47: Rtsp Settings
Figure 31 [Enable RTSP]: Check RTSP box to enable RTSP function, RTSP function is enabled as default. [Enable Authentication]: Check encryption box (disabled as default). When enabling encryption, you need the camera’s password when using VLC player to connect to the camera. RTSP port: Default port is 554. With RTSP function enabled, users can review the audio and video streams in real-time via players that support standard RTSP protocol [Communication]: Multicast function is enabled as default. [Multicast Server Address]: Camera supports multicasting. The camera will be the multicast server, and will have the multicast address (239.0.0.0 as default address). [Multicast port]: The main stream and sub stream video uses ports 5010 and 5020, main stream and sub stream audio uses ports 5012 and 5022. After you set these parameters, please click ‘Save’ to make them valid. © Copyright Qvis All software and documentation rights reserved. Ⓡ... -
Page 48: Public Ip Noticed By Email
7.5.10 Public IP noticed by email See Figure 32 for the “Public IP noticed by email” interface: Figure 32 [Enable Email]: Check this box to enable the public IP mail notification function. [Update Interval]: Select the interval time of public IP mail notifications. After enabling this function, when the device detects that the public IP address has changed, it will send an notification email to the mail address set up in [mail setting]. After you set these parameters, please click ‘Save’ to make them valid. © Copyright Qvis All software and documentation rights reserved. Ⓡ... -
Page 49: Connect Settings
7.5.11 Connect settings See Figure 33 for the “Connect Setting” interface: Figure 33 [Auto connect]: Enable or disable active connection of the device to the surveillance center. [Central URL]: The address of surveillance center (e.g. 192.168.55.99). [Central port No.]: The port of surveillance center (e.g. 6000). After setting all the network parameters, click ‘Save’ to make the parameters valid. Storage Settings Attention: This section to the camera’s interface is not relevant to 4MP IP cameras this particular guide is associated with. Please ignore this chapter. 7.6.1 Device Settings See Figure 34 for the “Storage Device” interface: © Copyright Qvis All software and documentation rights reserved. Ⓡ... - Page 50 Total Size, Free Size and Status. Users can also click the [Format] button to format SD card. During the formatting process please click the [Refresh] button to the display formatting completion progress percentage. [Code stream]: Set record stream for the SD card. Main stream and Sub stream are selectable. [Record file packet time]: Set packing time for recorded file. 10M means recording files will be packed every 10 minutes. Note: • Hot-plugging (removing SD card during backup is not recommended for SD cards, compulsory hot-plugging may damage the SD card, causing data loss and/or abnormal operation. • Do not cut off the power to the device during formatting process. • Ext2 file is used to format system by default. • IP Camera does not support the storage that is formatted into several partitions. So if you want to format it on PC before using it, please format it into one partition. After setting all the parameters, click ‘Save’ to make the parameters valid. © Copyright Qvis All software and documentation rights reserved. Ⓡ...
-
Page 51: Record Settings
7.6.2 Record Settings See Figure 35 for the “Schedule Record” interface: Figure 35 [Schedule Record]: Set the time period for scheduled recording - two periods are allowed only. [File storage mode]: Click either the ‘E-mail’ box or ‘Ftp’ box to choose what method to send and store recorded footage. Please see ‘Email Settings’ for instructions on setting up a connection between the camera and the an email account mailbox. Please see ‘FTP Settings’ for instructions on how to setup a connection to an FTP server. After setting all the parameters, click ‘Save’ to make them valid. © Copyright Qvis All software and documentation rights reserved. Ⓡ... -
Page 52: Snap Settings
7.6.3 Snap Settings See Figure 36 for the “Schedule Snap” interface: Figure 36 [Snap Interval]: Set the picture still image capture interval time, minimum interval is 1 second. [Schedule Snap]: Set the still video image capture schedule times, only two periods are allowed. [File save mode]: IP camera’s captured still images can be saved and stored either by sending via E-mail to a mailbox or by uploading them to an FTP server. E-Mail server can be set up in [Mail Settings], FTP server can be set up in [FTP Settings]. Attention: When uploading picture via E-mail, we recommend interval time of 30 seconds. If snapshots are sent too frequency the SMTP server will block the emails. After setting all the parameters, click to make the parameters valid. © Copyright Qvis All software and documentation rights reserved. Ⓡ... -
Page 53: Alarm Settings
[Motion Detection Area]: Left click and move the mouse to set the surveillance areas (4 areas max). [All]: Set the whole video frame as motion detection area. [Clear]: Clear all motion detection areas. [Sensitivity]: Sensitivity range is between 1~5. The greater the value the higher the sensitivity. [Enable]: Enable or disable motion detection. [Time]: Set the period of time for when the motion detection function is active, two periods max. [Linkage Alarm output]: Supports Email, IO output, snapshot and record. [E-mail]: Send motion detection alarm messages to users via E-mail, details about E-mail setting please refer to [Network Settings]. © Copyright Qvis All software and documentation rights reserved. Ⓡ... -
Page 54: Sensor Detection
Set the alarm duration after being triggered (in seconds). The duration range is between 0 - 86400s. 0 means that there is no limit for alarm output. [Snapshot]: When alarm is triggered, the pictures can be send via email or FTP. For snapping parameters; if the number of pictures snapped at one time is set as 10, and the snapping interval is 1 second, this means when there is an alarm, 10 pictures will be snapped and the interval between each picture is 1 second. [Record]: When the alarm is triggered, the video files can be sent to a recipient email or an FTP server (see 7.4.6 FTP settings). After setting all the parameters, click ‘Save’ to make the parameters valid. Attention: Recorded video/picture file packet time continues according to the duration of alarm. To set the recording time duration see [Record] within the ‘Linkage Alarm Output’ section. 7.7.2 Sensor Detection See Figure 38 for the “Sensor Detection” interface: Figure 38 © Copyright Qvis All software and documentation rights reserved. Ⓡ... -
Page 55: Network Detection
Enable or disable linkage alarm output [Alarm output duration]: Set the duration after being triggered (in seconds), the duration range can be set between 0~86400s. 0 means that there is no limit for alarm output. [Snapshot]: When alarm is triggered the pictures can be saved via E-mail to a mailbox or uploaded to an FTP server. In regards to the snapping parameters; if the number of pictures snapped at one time is set as 10, and the snapping interval is set to 1 second, when there is an alarm, 10 pictures will be snapped and the interval between each picture is 1 second. [Record]: When alarm is triggered, the record files will be saved to a specified FTP server. After setting all the parameters, click ‘Save’ to make the parameters valid. Attention: Record file packet time equals the alarm duration, to set the recording time duration see [Record] within the ‘Linkage Alarm Output’ section. 7.7.3 Network Detection See Figure 39 for the interface of “Network Failure”: © Copyright Qvis All software and documentation rights reserved. Ⓡ... -
Page 56: Alarm Output
[Linkage Alarm output]: Supports I/O output, snapshot, and record. [IO output]: Enable or disable linkage alarm output [Alarm output]: Set the duration of the linkage alarm output after being triggered (in seconds), the range of the duration is 0~86400s. 0 means that there is no limit for alarm output. [Type]: Two options available; either NO (Normally Open) or NC (Normally Closed). [Snapshot]: When alarm is triggered snapshot pictures can be sent via E-mail and save to a mailbox or to an FTP server uploading. For snapping parameters, if the number of pictures snapped at one time is set as 10, and the snapping interval is 1 second, that means when there is an alarm, 10 pictures will be snapped and the interval between each picture is 1 second. [Record]: When alarm is triggered, the record files can be saved to a specified FTP. © Copyright Qvis All software and documentation rights reserved. Ⓡ... -
Page 57: Com Settings
After setting all the parameters, click ‘Save’ to make the parameters valid. Attention: Record file packet time equals the alarm duration, to set the recording time duration see [Record] within the ‘Linkage Alarm Output’ section. When network failure occurs, recorded video and pictures cannot be sent to be stored to a mailbox via email or uploaded to the FTP server. E-mail sending and FTP uploading will resume after network is recovered. COM Settings See Figure 40 for the “COM Setting” interface: Figure 40 Attention: Not available on these camera models (COM Settings only relate to PTZ type cameras). © Copyright Qvis All software and documentation rights reserved. Ⓡ... -
Page 58: System Settings
System Settings 7.9.1 System Info See Figure 41 for the “System Info” interface: Figure 41 [System]: Display device name, VO standard, Language device ID, version, or you can define the device name. [Language]: Supports Chinese and English. After changing the language, please reopen the Internet Explorer browser to login the camera again. After setting all the parameters, click ‘Save’ to make the parameters valid. © Copyright Qvis All software and documentation rights reserved. Ⓡ... -
Page 59: System Time
System Time See Figure 42 for the “System Time” interface: Figure 42 [System time]: Supports three different methods to update the device’s time. [NTP Server]: After selecting the function, select time zone, and click save. The camera will send the query to NTP server, after receiving a reply message from NTP server, the camera will upgrade the system time. The system time will be displayed in live view. [Synchronize with Local Computer]: After selecting this function, the date and time of IP camera will be synchronized within the local PC. [Set the Time Manually]: If you select this option,y ou can modify the time manually. After setting all the parameters, click ‘Save’ to make the parameters valid. © Copyright Qvis All software and documentation rights reserved. Ⓡ... -
Page 60: User Management
You can set three users for every camera, one is Administrator, the other two are general users. Administrator authority: can operate and set all functions and parameters of IP camera General user authority: Able to perform operations like image snapshot, recording, playback, talkback, monitoring, alarm clearing, log searching, zooming and full- screen reviewing; Able perform operations like view setup/config, image lightness & color adjustment, PTZ & lens control, etc. Default user name of administrator: admin Password: admin Default user name of general user: user 1 \user 2 Password: user 1 \user 2 Note: user name and password are case sensitive Attention: User name and password must be between 1-16-characters in length consisting of letters, numbers, underlines or dots. The characters are case sensitive. © Copyright Qvis All software and documentation rights reserved. Ⓡ... -
Page 61: Upgrade
7.9.4 Upgrade See Figure 44 for the “Upgrade” interface: Figure 44 Click the “Browse” button, and select correct upgrade file (kernel file, suffix.uot), click [Upgrade], then you can upgrade your system. The upgrade progress rate will be displayed during this process. When the upgrade has been completed, the IP camera will restart automatically. Re-log back into the device, enter into system settings page, and check to see whether the kernel edition is the upgraded edition. Attention: Do not cut off the power and Internet connection during the upgrade process. 7.9.5 PTZ Upgrade See Figure 45 for the “Protocol Upgrade” interface: Figure 45 © Copyright Qvis All software and documentation rights reserved. Ⓡ... -
Page 62: Restore
Attention: Not available on these camera models 7.9.6 Restore See Figure 46 for the “Restore” interface: Figure 46 All device parameters (including network parameters, excluding physical address) will be recovered as factory setting values. 7.9.7 Reboot/Restart See Figure 47 for the “Reboot” interface: Figure 47 You can set a regularly scheduled camera system restart to ensure the camera operates without system runtime errors accumulating. Set which day of the week and the time during the day you wish the restart to occur. Click [Reboot]; a pop up box will appear, enter the password, and the IP camera will restart. © Copyright Qvis All software and documentation rights reserved. Ⓡ... -
Page 63: System Log
7.9.8 System log See Figure 48 for the “System log” interface: Figure 48 [Log search]: Performs an operation and alarm log search. The maximum capacity is 512 message entries. When the number of entries exceeds 512, the system will delete the earliest records by date automatically. © Copyright Qvis All software and documentation rights reserved. Ⓡ... -
Page 64: Appendix 1 Network Interface Of Ip Camera
IP Address: 192.168.1.160 Frequency: Auto Gateway: 192.168.1.1 Mode: Auto Subnet mask: 255.255.255.0 Appendix 3 FAQs 1. Failed to connect to the IP camera via Internet Explorer browser Possible Reason 1: Network is currently disconnected. Solution: Check the connection between your PC and the network router/ switch/modem, checking whether it is correctly connected. Also run virus checking software on your PC to check to see if any malicious software is preventing your system from running normally. Also check the connection between the camera and the network router/switch/modem. © Copyright Qvis All software and documentation rights reserved. Ⓡ... - Page 65 Possible reason: ActiveX plugin is not installed Solution: ActiveX must be installed when connecting to the IP camera for the first time via Internet Explorer. How to install: Connect to the IP camera via its IP address, click [file], file download dialog will pop up, select [Run] or [Save] to download. Please reference the ActiveX install path on PC to install the ActiveX. 3. Failed to upgrade the IP camera via Internet Explorer Possible reason: security level of IE is set to High Solution: Change IE Browser Setting Steps: Open IE, IE tools->Internet options->Security->Custom level see Figure 46, and change the ”Other” parameters as shown in Figure 47. © Copyright Qvis All software and documentation rights reserved. Ⓡ...
- Page 66 Steps: Open Internet Explorer, click “Tools”, select “Internet Options”, click “delete files” button within “Internet temporary files”, select “delete all offline contents”, then click “OK” and re-log in to IP camera 5. The IP camera’s frame rate is very disjointed or low Possible reason 1: The frame rate of IP camera is set too low. Solution: Increase the video frame rate Possible reason 2: Too many users are viewing the images. Solution: Block some clients or reduce the video frame rate. Possible reason 3: The bandwidth is low. Solution: Reduce video frame rate or video compression bitrate. © Copyright Qvis All software and documentation rights reserved. Ⓡ...
- Page 67 6. Device search software cannot find device Possible reason: Device search software adopts multicast protocol to perform searching. But the firewall forbids multicast data packets through. Solution: disable the firewall. 7. Image processing does not work properly Possible Reason 1: system issue, DirectX function is disabled, which will cause slow display of images and abnormal color levels. Solution: install or enable DirectX image driver. If they can not be enabled, that means DirectX installation fails or hardware not supportive. Possible Reason 2: hardware issue, graphics card does not support image acceleration and hardware zooming functions.(For hardware issue, the only solution is to replace graphics card)
- Page 68 IS HERE 8/16/24CHN CORTEX NVR with built in PoE NVR KEY FEATURES: • Supports up to 5MP recording • Plug & Play • 8/16/24 port PoE • ADC Mode (Auto Detection of IP Camera) • Supports 2 Sata (12TB) • Intelligent Self Maintenance •...
Need help?
Do you have a question about the EYE-4MP-FG/W and is the answer not in the manual?
Questions and answers