
Related Manuals for Qvis IPTZ-IR20A


Summary of Contents for Qvis IPTZ-IR20A
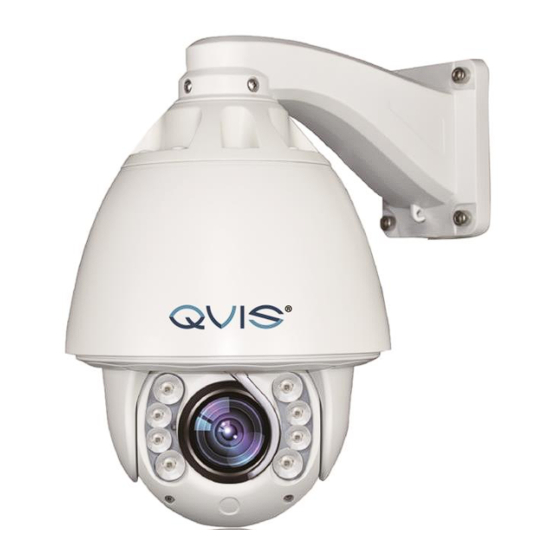
- Page 1 USER MANUAL 2MP IR PRO PTZ DOME IPTZ-IR20A / IPTZ-IR30A © Copyright Qvis ®. All documentation rights reserved. V 1.0 08.2015...
- Page 2 © Copyright Qvis ®. All documentation rights reserved.
- Page 3 Here you can find information about the corresponding IP camera’s features and functions, as well as a detailed installation method. Before installation and operation please read the following safeguards and warnings carefully! © Copyright Qvis ®. All documentation rights reserved.
- Page 4 Please keep it away from environments that contain electromagnetic radiation or objects that produce it. Please keep sound ventilation around the device at all times. © Copyright Qvis ®. All documentation rights reserved.
- Page 5 Accessories Always use all the accessories recommended by manufacturer. Before installation, please open the package and check that all the components are included. Contact your local retailer/vendor ASAP if something is missing. © Copyright Qvis ®. All documentation rights reserved.
-
Page 6: Table Of Contents
2.2.3 Playback ........................12 2.2.4 Log ..........................13 2.2.5 Configuration ......................14 2.2.5.1 Parameter Configuration ..................14 2.2.5.2 System........................15 2.2.5.3 Network ......................... 17 2.2.5.4 Audio/Video ......................23 2.2.5.5 Image........................25 2.2.5.6 Safety ........................29 © Copyright Qvis ®. All documentation rights reserved. - Page 7 3.11 Tilt Angle........................3.12 Others ..........................3.13 Preset ..........................3.14 Auto Scan ........................3.15 Auto Cruise (Sequence) ....................3.16 Pattern Tour ........................3.17 Auto Tracking ........................ 3.19 Restart ........................... 3.20 Factory Defaults ......................© Copyright Qvis ®. All documentation rights reserved.
-
Page 8: General And Technical Features
Region of Interest (ROI) Stream concentration makes the drawing region clearer. OSD function Setup the camera with its onboard setup user interface, via a connected monitor. © Copyright Qvis ®. All documentation rights reserved. -
Page 9: Function Introduction
Step-less speed change with auto zoom & speed matching 360° Pan and 90° Tilt range (auto-flip) without blind spot. Near/far IR light auto adjusts to match when camera zooms in/out © Copyright Qvis ®. All documentation rights reserved. -
Page 10: All-Weather Outdoor Design
Camera can memorize 600 second running paths or 500 programmable instructions. When starting a pattern tour, the camera will move automatically according recorded action path. It supports 4 groups of pattern tours. © Copyright Qvis ®. All documentation rights reserved. -
Page 11: Technical Parameters
Operating Temp: C +60 1.10 OSD Menu Operation Call up OSD menu Call Preset 95 to enter the main OSD menu; call Preset 96 to close the OSD menu or Select ‘Exit’ © Copyright Qvis ®. All documentation rights reserved. - Page 12 ‘Focus Far’ for confirmation. Cancel The ‘up’ and ‘down’ button controlled by PTZ carry out the request for Further action; meanwhile, it carries out the ‘Cancel’ order for last operation. © Copyright Qvis ®. All documentation rights reserved.
-
Page 13: Web Browser Operation Guide
PC’s NET port, and then provide power to the camera using the power adapter. To test whether it has been successfully connected, use the PING order within the ‘cmd’ console. © Copyright Qvis ®. All documentation rights reserved. - Page 14 If the hardware is correctly connected together If computer TCP/IP is within the same segment as the camera If network forbids the ping order, please contact the network administrator to gain permission. © Copyright Qvis ®. All documentation rights reserved.
-
Page 15: Web Login
You need to return to the web browser screen and refresh the display (press F5 key) if you want to run this plug-in after installation, then you will be able to watch the ‘preview’ video stream from the camera. © Copyright Qvis ®. All documentation rights reserved. - Page 16 After you have installed the plug-in; input user name, code, and then click the ‘login ‘button to enter the ‘preview ‘screen. See 2.2.2-2 Picture 2.2.2-2 Preview screen Sheet 2.2.2-3 Preview screen information © Copyright Qvis ®. All documentation rights reserved.
- Page 17 5. Delete preset position: click ‘delete’ can clear the information of preset position. 6. Special function preset position; this kind of preset position can be called, but it cannot be modified or deleted. © Copyright Qvis ®. All documentation rights reserved.
- Page 18 Enter the IR LED setting screen to set the power of the low beam lights between 1~10 amounts, the power of high beam lights, low beam lights compensation, enable illumination, and IR status setting. See 2.2.2-7 Picture 2.2.2-7 IR LED Setting Screen © Copyright Qvis ®. All documentation rights reserved.
-
Page 19: Playback
Select the inquiry type, start & end time, then click the ‘Search’ key, and the eligible video files will be displayed in the right box. Select it and double-click to open, and then the video files will start to playback. See 2.2.3-1. © Copyright Qvis ®. All documentation rights reserved. -
Page 20: Log
Click the search key, and all the eligible log information will be displayed in the list. See 2.2.4-1. Click the ‘Save’ key, you can save the log information to your local computer. Picture 2.2.4-1 log record screen © Copyright Qvis ®. All documentation rights reserved. -
Page 21: Configuration
‘Local Configuration from the options list on the right side of the screen, as shown in picture 2.2.5-1, each item instruction as shown in picture 2.2.5-2 Picture 2.2.5-1 Picture 2.2.5-2 configuration information © Copyright Qvis ®. All documentation rights reserved. -
Page 22: System
PC. After changing some parameters you need to click ‘Save’ to save the corresponding settings. See picture 2.2.5-4 Note:You cannot change the NTP port number © Copyright Qvis ®. All documentation rights reserved. - Page 23 Note: The upgrading process will take around 1 to 10 minutes; please do not disconnect power to the device during the process. The device reboots automatically after the device has been upgraded. © Copyright Qvis ®. All documentation rights reserved.
-
Page 24: Network
When ticking ‘Auto’, the device will obtain the IP address automatically. After changing some parameters you need to click ‘Save’ to save the corresponding settings. See picture 2.2.5-6 Picture 2.2.5-6 TCP/IP interface © Copyright Qvis ®. All documentation rights reserved. - Page 25 ‘Domain’ is the name set by the user. The port can be set according to the configuration. User name and password are will need to be created and confirmed. After modifying related parameters, click ‘Save’ to save settings. Picture 2.2.5-8 DDNS configuration screen © Copyright Qvis ®. All documentation rights reserved.
- Page 26 ‘Use device name’, ‘Use device number’ ‘Use device IP address’. Child directory includes ‘Use camera name’, ‘Use camera number’. After modifying related parameters, need to click ‘Save’ to save settings. © Copyright Qvis ®. All documentation rights reserved.
- Page 27 Internet. Users don't need to do port mapping/forwarding within the router’s settings The precondition is that the router supports UPnP, and then opens this function. See picture 2.2.5-11 Picture 2.2.5-11 UPnP configuration © Copyright Qvis ®. All documentation rights reserved.
- Page 28 Image quality Lowest/low/lower/medium/highest/higher Frame Rate According to user’s needs Max Bitrate Depending on resolution Video Encoding According to user’s needs I Frame Interval Frame between former and back(1-100) Sheet 2.2.5-13 Video configuration instruction © Copyright Qvis ®. All documentation rights reserved.
- Page 29 Network → WIFI To enable WIFI connection you need to input WIFI connection parameters in to the relevant input fields. Click ‘Save’ to save setup. See picture 2.2.5-15 Picture 2.2.5-15 WIFI settings © Copyright Qvis ®. All documentation rights reserved.
-
Page 30: Audio/Video
‘Mic in’. ‘Input volume’ is the input source gain control value, the default value is 50. The user can adjust the level in between 1-100 according to the actual volume requirements. © Copyright Qvis ®. All documentation rights reserved. - Page 31 Picture 2.2.6-19 audio parameter instruction Audio/Video → ROI The video stream concentration makes the video camera’s video preview image clearer. Use the sliders to adjust the ‘Region Number’ and ‘ROI Level’. © Copyright Qvis ®. All documentation rights reserved.
-
Page 32: Image
Picture 2.2.5-20 ROI 2.2.5.5 Image Image → Display Settings Enter the image configuration interface, see picture 2.2.5-21, image configuration illustration see sheet 2.2.5-22 Picture 2.2.5-21 Display settings © Copyright Qvis ®. All documentation rights reserved. - Page 33 After modifying, device needs to reboot. When the user chooses 50Hz, the real-time frame rate is 25frame/sec. When 60Hz is set, real-time frame rate is 30frame/sec. © Copyright Qvis ®. All documentation rights reserved.
- Page 34 Time format: 24-hour time system/12-hour time system. Date Format: ‘XX-XX-XXXX( month-day-year )’; ‘XXXX-XX-XX( year-month-day )’; ‘XX-XX-XXXX(day-month-year)’; After modifying parameters, click ‘Save’ to save settings. See picture 2.2.5-23 Picture 2.2.5-23 OSD Settings © Copyright Qvis ®. All documentation rights reserved.
- Page 35 Picture 2.2.5-24 Text Overlay Image → Privacy mask User can enable and set up to 4 privacy mask areas depending on their needs. See picture 2.2.5-25 Picture 2.2.5-25 Privacy Mask © Copyright Qvis ®. All documentation rights reserved.
-
Page 36: Safety
In this box the user needs to modify ‘user name’ and ‘password’, see picture 2.2.5-28 Delete user: choose the user name you wish to delete, a dialog box will appear, click confirm to delete the user. 2.2.5.26 User Settings Picture 2.2.5-27 Addition © Copyright Qvis ®. All documentation rights reserved. - Page 37 RTSP Setting screen Security → Anonymous Visit You will be able to choose either ‘enable’ and ’disable’ from the drop down list, choosing enable will allow a user to login to the anonymous © Copyright Qvis ®. All documentation rights reserved.
- Page 38 ‘IP Address Filter Type’ drop down options. Click ‘Addition’ to add new IP address, after the addition is complete, the user can click either [modify], [delete] and [clear] to manage IP address. See picture 2.2.5-31 © Copyright Qvis ®. All documentation rights reserved.
- Page 39 Tick the ‘enable motion detection’ box will start the IP camera motion detection function. See picture 2.2.5-32. Sensitivity: 0-100 settable. Picture 2.2.5-32 Motion Detection ‘Arming schedule’ will show the current motion detection arming time. © Copyright Qvis ®. All documentation rights reserved.
- Page 40 This means the camera will log an alarm trigger if the camera lens is covered either mistakenly or maliciously, See picture 2.2.5-34. Area setting default is set to whole screen. © Copyright Qvis ®. All documentation rights reserved.
- Page 41 Disconnected’, and ‘IP address conflict’. See Picture 2.2.5.35 ‘Normal Linkage’ includes ‘Notify surveillance Center’ and ‘Capture’ ‘Other Linkage’ includes corresponding alarm output channel. After modifying related parameters, click [save] to save settings. Picture 2.2.5-35 Exception © Copyright Qvis ®. All documentation rights reserved.
- Page 42 (optional). After modifying related parameters, click ‘Confirm’ to save settings. Note: Overwrite is measured according to 2Mbps, the bigger stream you choose, the shorter the pre-record time is. Picture 2.2.5-36 Record schedule © Copyright Qvis ®. All documentation rights reserved.
- Page 43 ‘Free space’, shows remaining space of a storage medium. ’Status’ shows the current status of the storage medium. ‘Format’ formats operation of the storage medium. Picture 2.2.5-38 Storage management © Copyright Qvis ®. All documentation rights reserved.
- Page 44 ‘Interval’ will allow the user to set interval time length. Units available to choose from: ‘millisecond’, ‘second’, ‘minute’, ‘hour’, ‘day’. Interval can range from 1 to 604800 milliseconds. After modifying the related parameters, click [save] to save settings. Picture 2.2.5–39 Capture © Copyright Qvis ®. All documentation rights reserved.
-
Page 45: Osd Menu Function
2. Click IRIS + to enter, the INFORMATION INFORMATION screen opens. 3. Click up or town to select the item. VERSION: 4. Click IRIS + to confirm the setup of each item. TEMPERATURE: 32 VOLTAGE: BACK EXIT © Copyright Qvis ®. All documentation rights reserved. -
Page 46: Language
Click IRIS + to enter and click up or down button to MOTION select. RESTART FACTORY DEFAULT All on-screen menus will be changed to the selected EXIT language. LANGUAGE LANGUAGE [CHINESE] BACK EXIT © Copyright Qvis ®. All documentation rights reserved. -
Page 47: Ir Leds
IR LEDs. And under this mode, when objects AUTO CONTROL appear in the screen, the IR LED will turn its power consumption back to the normal STANDBY POWER: status. DELAY: 10SEC SENSITIVITY: BACK EXIT © Copyright Qvis ®. All documentation rights reserved. -
Page 48: Wiper
Move the cursor to “ACTIVATE” and AUX ON: AUX1 click IRIS + to ACTIVATE wiper preset. RESET The wiper will be activated. ACTIVATE Note: Calling the preset number 71 can also enable the wiper. © Copyright Qvis ®. All documentation rights reserved. -
Page 49: Idle
ADVANCED click left/right key to operate time OTHERS choice—1min, 5min,10min. Click up/down BACK EXIT key for the next step. IDLE ACTION TIME: 30 SEC ACTION: NONE BACK EXIT © Copyright Qvis ®. All documentation rights reserved. -
Page 50: Alarm
“10SEC” “30SEC” “1MIN” “5MIN” “10MIN”. This settings dictates the length of time that the speed dome has from alarm signals detection to alarm reset and return back to normal. The setting is valid under AUTO ALARM MODE. © Copyright Qvis ®. All documentation rights reserved. -
Page 51: Aux
RESTART FACTORY DEFAULT EXIT DOME SETTINGS IR LED WIPER IDLE ALARM [ADVANCED] OTHERS BACK EXIT ADVANCED [AUX] SOFT LIMIT DOME SPEED POWER ON ACTION TILT ANGLE BACK EXIT AUX1: OFF AUX2: OFF © Copyright Qvis ®. All documentation rights reserved. -
Page 52: Soft Limit
IRIS + to delete all the settings ADVANCED [SOFT LIMIT] DOME SPEED POWER ON ACTION TILT ANGLE BACK EXIT LIMIT SETTING SOFT LIMIT: ON <LEFT LIMIT> <RIGHT LIMIT> LIMIT DELETE © Copyright Qvis ®. All documentation rights reserved. -
Page 53: Dome Speed
DOME SETTINGS IR LED WIPER IDLE ALARM [ADVANCED] OTHERS BACK EXIT ADVANCED SOFT LIMIT [DOME SPEED] POWER ON ACTION TILT ANGLE BACK EXIT DOME SPEED SETTING ° DOME SPEED: 180 BACK EXIT © Copyright Qvis ®. All documentation rights reserved. -
Page 54: Power On Action
Pattern 1) IR LED WIPER IDLE ALARM [ADVANCED] OTHERS BACK EXIT ADVANCED SOFT LIMIT DOME SPEED [POWER ON ACTION] TILT ANGLE BACK EXIT POWER ON ACTION POWER ON ACTION: NONE BACK EXIT © Copyright Qvis ®. All documentation rights reserved. -
Page 55: Tilt Angle
EXIT DOME SETTINGS IR LED WIPER IDLE ALARM [ADVANCED] OTHERS BACK EXIT ADVANCED SOFT LIMIT DOME SPEED POWER ON ACTION [TILT ANGLE] BACK EXIT TILT ANGLE SETTING TILT ANGLE: 0 BACK EXIT © Copyright Qvis ®. All documentation rights reserved. -
Page 56: Others
0º and click IRIS + to confirm. TEMP MODE: AUTO AUTO FLIP: ON STOP TIME: 30 SEC MENU OFF TIME: 5 MIN <DISPLAY> <AZIMUTH ZERO> © Copyright Qvis ®. All documentation rights reserved. -
Page 57: Preset
7. SCAN SPEED: Move the cursor here and START click IRIS + to set up the preset call up speed <LEFT LIMIT> of LOW, MID and HIGH. <RIGHT LIMIT> CALL DELETE SCAN SPEED: 20 BACK EXIT © Copyright Qvis ®. All documentation rights reserved. -
Page 58: Auto Scan
SCAN NO. : 1 6. SCAN SPEED: Move the cursor here and TITLE click IRIS + to set up the scan speed ranging START 1-30. <LEFT LIMIT> <RIGHT LIMIT> SCAN SPEED: 20 BACK EXIT © Copyright Qvis ®. All documentation rights reserved. -
Page 59: Auto Cruise (Sequence)
Click IRIS + to save all the setting and click IRIS - - - ----- - ------- CLOSE to exit. ADD:01 1. DELETE/START: Move the cursor here and click BACK EXIT IRIS + to delete/start the current sequence. © Copyright Qvis ®. All documentation rights reserved. -
Page 60: Pattern Tour
IRIS + to start the current pattern tour. 5) DELETE: Move the cursor here and click PATTERN IRIS + to delete the current pattern tour. PATTERN NO. : 1 TITLE: PATTERN 1 START < SET> DELETE BACK EXIT © Copyright Qvis ®. All documentation rights reserved. -
Page 61: Auto Tracking
<TRACKING SCENE SET> select the optical zoom. DELETE RETURN 5. ENABLE: Move the cursor here and DELAY: 10SEC click IRIS + to enter to select “ON” or “OFF” to enable or disable this function. © Copyright Qvis ®. All documentation rights reserved. -
Page 62: Restart
Move the cursor here and click IRIS + to enter. LANGUAGE: ENGLISH Select “OK” or “CANCEL” to continue the reset INFORMATION or cancel the reset. DOME SETTINGS MOTION [RESTART] FACTORY DEFAULT EXIT WARNING ARE YOU SURE? CANCEL © Copyright Qvis ®. All documentation rights reserved. -
Page 63: Factory Defaults
Move the cursor here and click IRIS + to enter. Select “OK” or “CANCEL” to continue the DOME SETTINGS MOTION reset or cancel the reset. RESTART [FACTORY DEFAULT] EXIT WARNING ARE YOU SURE? CANCEL © Copyright Qvis ®. All documentation rights reserved. - Page 64 For more information about our IP Cameras and other available cameras, NVRs & accessories, please visit our website: www.adata.co.uk Alternatively scan this QR code with your smart phone to be directed instantly to our website: © Copyright Qvis ®. All documentation rights reserved.
Need help?
Do you have a question about the IPTZ-IR20A and is the answer not in the manual?
Questions and answers