Table of Contents
Advertisement
Quick Links
Advertisement
Table of Contents

Related Manuals for AEG 47132MM-MN


Summary of Contents for AEG 47132MM-MN
- Page 1 User Manual 47132MM-MN Cooker...
-
Page 2: Table Of Contents
13. INSTALLATION......................25 FOR PERFECT RESULTS Thank you for choosing this AEG product. We have created it to give you impeccable performance for many years, with innovative technologies that help make life simpler features you might not find on ordinary appliances. Please spend a few minutes reading to get the very best from it. -
Page 3: Safety Information
ENGLISH SAFETY INFORMATION Before the installation and use of the appliance, carefully read the supplied instructions. The manufacturer is not responsible if an incorrect installation and use causes injuries and damages. Always keep the instructions with the appliance for future reference. -
Page 4: Safety Instructions
Do not use a steam cleaner to clean the appliance. • Metallic objects such as knives, forks, spoons and lids • should not be placed on the hob surface since they can get hot. Remove any spillage from the lid before opening. Let •... - Page 5 ENGLISH prevent touching the dangerous • The electrical installation must have parts. an isolation device which lets you • The sides of the appliance must stay disconnect the appliance from the adjacent to appliances or to units with mains at all poles. The isolation the same height.
- Page 6 • Do not put aluminium foil on the WARNING! appliance or directly on the bottom of Risk of fire and explosion the appliance. • Cookware made of cast iron, • Fats and oil when heated can release aluminium or with a damaged bottom flammable vapours.
-
Page 7: Product Description
ENGLISH • If you use an oven spray, obey the for household appliances. Do not use safety instructions on the packaging. it for house lighting. • Do not clean the catalytic enamel (if WARNING! applicable) with any kind of Risk of electrical shock. detergent. -
Page 8: Before First Use
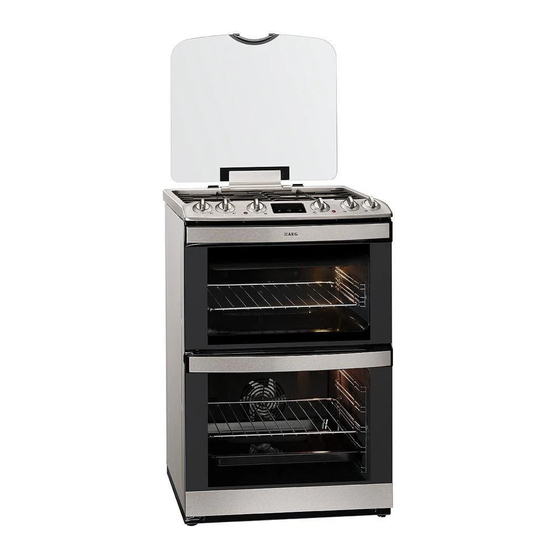
3.2 Cooking surface layout Steam outlet - number and position depend on the model Semi-rapid burner Auxiliary burner Triple Crown burner Semi-rapid burner 3.3 Control panel Knobs for the hob Knob for the main oven functions Electronic programmer Knob for the top oven functions... -
Page 9: Hob - Daily Use
ENGLISH The indicator for the Time of day To set a new time, refer to "Setting the function flashes when you connect the time". appliance to the electrical supply, when 4.4 Preheating there was a power cut or when the timer is not set. - Page 10 5.2 Ignition of the hob burners If the burner accidentally goes out, turn the knob to Always light the burner the off position and try to before you put on the light the burner again after cookware. minimum 1 minute.
-
Page 11: Hob - Hints And Tips
ENGLISH 6. HOB - HINTS AND TIPS 6.2 Diameters of cookware WARNING! Refer to Safety chapters. WARNING! Use cookware with 6.1 Cookware diameters applicable to the size of burners. WARNING! Do not put the same pan on Burner Diameter of cook- two burners. -
Page 12: Oven - Daily Use
7.3 Cleaning the hob 7.4 Cleaning the spark plug • Remove immediately: melted plastic, This feature is obtained through a plastic foil, and food with sugar. If not, ceramic ignition candle with a metal the dirt can cause damage to the hob. -
Page 13: Cooling Fan
ENGLISH Symbol Oven function Application Dual Circuit Grill To grill food items in medium quantities in the mid- dle of the shelf. To make toasts. Full Grill To grill flat food and to toast bread. 8.3 Main oven functions Symbol Oven function Application Off position... -
Page 14: Telescopic Runners
8.6 Trivet and Grill- / Roasting 8.7 Telescopic runners - inserting the oven accessories WARNING! Keep the installation Be careful when you remove instructions for the the accessories from a hot telescopic runners for future appliance. There is a risk of use. -
Page 15: Oven - Clock Functions
ENGLISH Put the wire shelf on the deep pan. Put the wire shelf and the deep pan on the telescopic runners. 9. OVEN - CLOCK FUNCTIONS 9.1 Display A) Function indicators B) Time display The electronic programmer C) Function indicator works only with the main oven. -
Page 16: Oven - Hints And Tips
For the Minute Minder You can use the functions function the display shows Duration and End the time left. the same time to set the 3. When the time ends the indicator of time for how long the the clock function flashes and an appliance should operate acoustic signal sounds. -
Page 17: Tips On Baking
ENGLISH • With longer baking times, you can the trays become cold again, the deactivate the oven approximately 10 distortions are gone. minutes before the end of the baking time and then use the residual heat. When you cook frozen food, the trays in the oven can twist during baking. - Page 18 Food Temperature (°C) Time (min) Shelf posi- tion Cakes: Sponges 160 - 175 20 - 30 Cakes: Victoria Sandwich 160 - 170 18 - 25 Cakes: Madeira 140 - 150 75 - 90 Cakes: Rich Fruit 140 - 150...
- Page 19 ENGLISH Food Temperature (°C) Time (min) Shelf posi- tion Yorkshire Pudding Individual 210 - 220 15 - 25 Roasting Meat, Poultry Refer to the Roasting table. 10.6 Thermaflow® Baking - Main Oven Shelf positions are not critical but ensure that the oven accessories are evenly spaced when more than one is used.
- Page 20 Food Temperature (°C) Time (min) Shelf posi- tion Scones 210 - 230 8 - 12 1 – 3 Roasting: Meat, Poultry 160 - 180 Refer to the Roasting table. 10.7 Roasting • To prevent the meat juices or fat from burning onto the pan, put some liquid •...
-
Page 21: Oven - Care And Cleaning
ENGLISH 10.9 Grilling in general • Grill only flat pieces of meat or fish. • Always preheat an empty oven with WARNING! the grill functions for 5 minutes. Always grill with the oven door closed. • Always grill with the maximum temperature setting. - Page 22 11.1 Notes on cleaning WARNING! Keep children away when • Clean the front of the appliance with a you clean the oven at a high soft cloth with warm water and a temperature. The oven cleaning agent. surface becomes very hot •...
- Page 23 ENGLISH To install the panels, do the same steps in reverse. 11.6 Removing and cleaning the door glasses - main oven The door glass in your product can be different in type and shape from the example you see in the image.
-
Page 24: Troubleshooting
Use the same oven lamp type. WARNING! 4. Install the glass cover. Danger of electrocution! Disconnect the fuse before you replace the lamp. The lamp and the lamp glass cover can be hot. 1. Deactivate the appliance. 2. Remove the fuses from the fuse box or deactivate the circuit breaker. -
Page 25: Installation
ENGLISH Problem Possible cause Remedy The flame ring is uneven. Burner crown is blocked with Make sure that the injector is food residues. not blocked and the burner crown is clean. The oven does not heat up. The oven is deactivated. Activate the oven. - Page 26 Minimum distances Dimension 1. Install the anti-tilt protection (A) on the wall. Make sure that the wall is made of a solid material. If not, you need to make the wall sufficiently strong to 13.3 Levelling of the appliance...
- Page 27 ENGLISH Gas cate- Gas sup- G20 (2H) 20 mbar gory: 13.6 Gas burners BURNER NORMAL POWER Natural Gas INJECTOR MARK 1/100 Btu/h Auxiliary 3412 Semi-rapid 6483 Triple Crown 11600 13.7 Gas Connection WARNING! Only liquid sealants can be Use a flexible pipe in compliance with used when the inlet gas pipe the regulation in force.
-
Page 28: Electrical Installation
To light the hob burner refer to the "Ignition of the hob burners". Dimension 3. Close the lid. There should be no gas supply to the hob burners. The burner goes out. 4. Turn the knob to the off position and lift the lid. - Page 29 ENGLISH 14. ENVIRONMENTAL CONCERNS Recycle the materials with the symbol Put the packaging in applicable containers to recycle it. Help protect the environment and human health and to recycle waste of electrical and electronic appliances. Do not dispose appliances marked with the symbol with the household waste.
- Page 30 www.aeg.com...
- Page 31 ENGLISH...
- Page 32 www.aeg.com/shop...
Need help?
Do you have a question about the 47132MM-MN and is the answer not in the manual?
Questions and answers