Table of Contents
Advertisement
TM
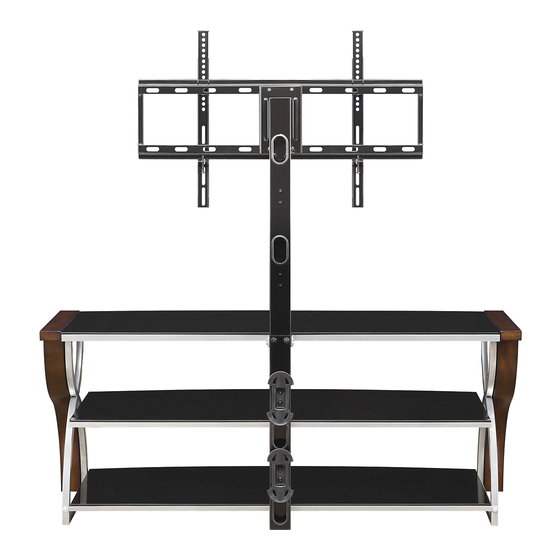
3-IN-1
TV Console
Model # BBXL54NV
U.S. Patent 8,561,551
This item is designed to be a 3-in-1 configuration. Please choose the option that best suits your
needs. DO NOT discard any of the hardware or parts that you will not use on your chosen option.
This will allow you to use this TV Console in different configurations at a later date, if desired.
ADULT ASSEMBLY REQUIRED
If you have any questions regarding assembly or if parts are missing, DO NOT return this item to
the store where it was purchased. Please call our toll-free customer service number and have
your instructions and parts list ready to provide the model name, part name or factory number:
www.whalenfurniture.com
ONLINE:
THIS INSTRUCTION BOOKLET CONTAINS IMPORTANT SAFETY INFORMATION.
PLEASE READ AND KEEP FOR FUTURE REFERENCE.
Whalen Furniture Manufacturing
8:30 a.m. - 4:30 p.m
On-line Video Instruction Guides
Go to http://vig.sellpoints.com to view step-by-step instructional
videos for assembling and installing your product. Enter the
following product number on the website under Whalen brand.
BBXL54NV
Date 2014-09-17 Rev. 1 Factory: DOSHFU
LOT NUMBER:
DATE PURCHASED:
PST, Monday - Friday
.,
parts@whalenfurniture.com
EMAIL:
Page 1
/
/
Factory No. 16434
Advertisement
Table of Contents

Related Manuals for Whalen BBXL54NV


Summary of Contents for Whalen BBXL54NV
- Page 1 On-line Video Instruction Guides Go to http://vig.sellpoints.com to view step-by-step instructional videos for assembling and installing your product. Enter the following product number on the website under Whalen brand. BBXL54NV THIS INSTRUCTION BOOKLET CONTAINS IMPORTANT SAFETY INFORMATION. PLEASE READ AND KEEP FOR FUTURE REFERENCE.
- Page 2 Model # BBXL54NV M A X I M U M R E C O M M E N D E D W E I G H T L O A D S MANUFACTURER: Whalen Furniture Manufacturing CATALOG: 3-IN-1 TV Console (BBXL54NV)
- Page 3 Model # BBXL54NV Parts and Hardware List Please read completely through the instructions and verify that all listed parts and hardware are present before beginning assembly. A-Top Shelf Frame (1) B- Middle Shelf Frame (1) C- Bottom Shelf Frame (1)
-
Page 4: Table Of Contents
Model # BBXL54NV Parts and Hardware List Please read completely through the instructions and verify that all listed parts and hardware are present before beginning assembly. (9) 1-3/4” Wood Screw (4+1 extra) (10) Concrete Anchor (4) (11) 2-1/2” Lag Bolt (4) -
Page 5: Factory
Model # BBXL54NV Assembly Instructions 5/8” Bolt (2 used in this step) ③ 1” Bolt Flat Washer Lock Washer (4 used in this step) (2 used in this step) (2 used in this step) ④ ⑥ ⑦ NOTE: Please do not fully tighten all bolts until you finish assembling all parts. Once assembled, go back and fully tighten all bolts. - Page 6 Model # BBXL54NV Assembly Instructions 1” Bolt (4 used in this step) 5/8” Bolt ④ (2 used in this step) ③ Flat Washer 1-3/4” Wood Screw Lock Washer (2 used in this step) (4 used in this step) (2 used in this step) ⑦...
- Page 7 Model # BBXL54NV Assembly Instructions Flat Washer 5/8” Bolt Lock Washer (4 used in this step) (4 used in this step) (4 used in this step) ⑦ ③ ⑥ 8. Secure the Top Shelf Frame (A) to the inner metal legs (E and F), using two 5/8” Bolts (3) with the Washers (6 and 7) through the top metal plate of each leg and securely screw into the Top Shelf Frame (A).
- Page 8 Model # BBXL54NV Assembly Instructions 9. Go back and tighten all bolts with the enclosed Allen Wrench. 10. If necessary, adjust the pre-attached Floor Levelers at the bottom of both Legs (E and F) to level the unit. If you choose the Table-top configuration, continue to the next step.
- Page 9 Model # BBXL54NV Assembly Instructions for Table-top Console 11. Unscrew the four bolts and the washers to remove the Upper Spine from the Spine Assembly (D), as shown above. So that you can use the table top console configuration, NOTE: Keep the Upper Spine and the fasteners at a proper place in case you will use the floating swivel mount.
-
Page 10: Spine End
Model # BBXL54NV Assembly Instructions for Table-top Console Flat Washer 2-1/2” Bolt Lock Washer ⑤ (1 used in this step) (1 used in this step) (1 used in this step) ⑦ ⑥ Spine End Cap Flange Nut (1 used in this step) (1 used in this step) ⑧... - Page 11 Model # BBXL54NV Assembly Instructions for Table-top Console 5/8” Bolt (4 used in this step) ③ 14. Attach 2 Cable Wheels (L) to the backside of the Lower Spine (D) with the 5/8” Bolts (3). Tighten the bolts with the enclosed Allen Wrench.
- Page 12 Model # BBXL54NV Assembly Instructions for Table-top Console Suction Cup (24 used in this step) ① 15. Put the Suction Cups (1) firmly into the top holes and the inside metal tabs on three Shelf Frames (A, B and C).
-
Page 13: Acrylic
Model # BBXL54NV Assembly Instructions for Table-top Console Acrylic Stopper (1 used in this step) ⑭ NOTE: You must install the Acrylic TV Stopper to prevent the TV from tipping when placing your flat panel television directly on the console. - Page 14 Model # BBXL54NV Assembly Instructions for Table-top Console Tools required: Allen Wrench (provided), Phillips Screwdriver, Mallet, Power Drill, and 3/8” Drill Bit. 19. Position the assembled console at the desired location against a wall. Now, follow the instructions printed on the plastic bag containing the Tipping Restraint Hardware to attach the tip-over restraint to the spine and the wall.
-
Page 15: M4 Allen
Model # BBXL54NV Assembly Instructions for Floating Swivel Mount 5/8” Bolt Lock Washer Flat Washer (4 used in this step) (4 used in this step) (4 used in this step) ⑥ ③ ⑦ 21. Fasten the Swiveling Bracket (I) to the top of the Spine Assembly (D) with four 5/8” Bolts (3) and four Washers (6 and 7). - Page 16 Model # BBXL54NV Assembly Instructions for Floating Swivel Mount 1/2” Bolt Lock Washer Flat Washer (4 used in this step) (4 used in this step) (4 used in this step) ⑥ ② ⑦ 22. Hold and attach the flat side of the Mounting Frame (J) onto the Swiveling Bracket (I) using four 1/2”...
- Page 17 Model # BBXL54NV Mounting the Monitor Brackets to a Television with a Flat Back NOTE: For televisions with a curved or recessed back, proceed directly to next page. 23. Determine the correct diameter of the bolt the TV requires by hand threading them into the threaded insert on the back of the TV.
- Page 18 Model # BBXL54NV Mounting the Monitor Brackets to a Television with a Curved/Recess Back 25. Determine the correct diameter of the bolt the TV requires by hand threading them into the threaded insert on the back of the TV. If you encounter any resistance, stop immediately. If you are unable to find the correct bolt consult a local hardware store.
- Page 19 Model # BBXL54NV Assembly Instructions for Floating Swivel Mount MAKE SURE ALL BOLTS ARE TIGHT AND THE SPINE IS AT A 90 DEGREE ANGLE AND VERIFY THE MOUNTING FRAME IS LEVEL, USING A QUALITY LEVEL, PRIOR TO INSTALLATION OF TV.
- Page 20 Model # BBXL54NV Assembly Instructions for Floating Swivel Mount Tools required: Allen Wrench (provided), Phillips screwdriver, Mallet, Power Drill, and 3/8” Drill Bit. 29. Repeat steps 14 through 16 to attach the Cable Wheels (L) to the Spine and install the Glass Shelves (G and H) into place.
- Page 21 Model # BBXL54NV The following steps are only for those who wish to mount their TV directly to the wall. If you have already mounted your TV to the Swinging Floater or plan to display your TV on the top surface of the Console, disregard the following steps.
- Page 22 Model # BBXL54NV Assembly Instruction for installing the Mounting Frame onto BRICK, SOLID CONCRETE OR CONCRETE BLOCK WALLS 2.50" (63 mm) Maximum weight 135 lb. (61.2 kg) Concrete Anchors should only be used for masonry mounting. NEVER use the wall anchors to mount the unit to drywall.
- Page 23 Model # BBXL54NV Assembly Instructions 38. Attach the Monitor Brackets (K) to the back of the television following steps 23 & 24, or 25 & 26, depending on the type of TV that you own. 39. Once the Monitor Brackets (K) are attached onto the back of television, ask for assistance to lift the television up to attach the Monitor Brackets onto the Mounting Frame (J).
-
Page 24: Care And Maintenance
Should this product be defective in workmanship or materials or fail under normal use, we will repair or replace it for up to one (1) year from the date of purchase. Every Whalen Furniture product is designed to meet your highest expectations. We guarantee that you will immediately see the value of our fine furniture.
Need help?
Do you have a question about the BBXL54NV and is the answer not in the manual?
Questions and answers
Can I order a replacement swiveling bracket?