Table of Contents
Advertisement
Advertisement
Table of Contents
Troubleshooting

Subscribe to Our Youtube Channel
Related Manuals for Blackmagicdesign HDLink Pro DVI Digital


Summary of Contents for Blackmagicdesign HDLink Pro DVI Digital
- Page 1 Operation Manual HDLink Mac OS X ™ Windows ™ July 2010...
-
Page 2: Table Of Contents
Contents Installation HDLink Operation Manual HDLink Pro DVI Digital HDLink Pro 3D DisplayPort How to Install Helpful Information Installation Troubleshooting Installing and Uninstalling on Mac OS X Support Installing and Uninstalling on Windows Developer Information Software Blackmagic 2K Format Using HDLink Utility... - Page 3 Welcome Welcome to HDLink. We hope you share our dream for the television industry to become a truly creative industry by allowing everyone access to the highest quality video. Previously SDI monitoring required small and very expensive CRT displays which were unable to show the full detail of the video image.
-
Page 4: How To Install
How to Install... -
Page 5: Installation
Installation HDLink Utility enables you to update your HDLink with the latest firmware. Firmware updates may add new features, support new formats and standards, or provide increased compatibility with other video and audio hardware. It is always best to use the latest version of HDLink Utility so you receive all the latest updates for your HDLink. The latest version of HDLink Utility can always be downloaded from www.blackmagic-design.com/support/software/. - Page 6 Software...
-
Page 7: Using Hdlink Utility
Installation Using HDLink Utility After running the HDLink software installer, a USB driver will be installed on your system and the HDLink Utility will be added to the Applications or Programs folder. To use the HDLink Utility, you will need to connect HDLink as follows. -
Page 8: Lookup Tables (Luts)
Installation Lookup Tables (LUTs) HDLink supports the use of LUTs to adjust the appearance of video on your monitor and optionally on the loop- through SDI output. Lookup tables can be used for standard definition and high definition video as well as 2K film. All current models of HDLink are capable of enabling LUTs on the monitor output when working with the demanding 1080p50/60 video formats. -
Page 9: Importing And Exporting 3D Luts
The 1D LUT text file format is fully compatible with the following Blackmagic Design products which share the same LUT format: HDLink Pro 3D, HDLink Optical Fiber, HDLink Pro DVI Digital, HDLink 2, HDLink, Multibridge Eclipse, Multibridge Pro (October 2007 model), Multibridge Extreme (DVI output), DeckLink HD Extreme 2 and... -
Page 10: Settings
Welcome Settings Settings HDLink Utility provides several settings for current HDLink models. Scale video to fill larger display. Most HDMI displays automatically scale video to fill the screen so a PAL or NTSC image would automatically scale to fill the high definition display. By contrast, DVI and DisplayPort displays rarely provide scaling. This option enables current HDLink models to scale smaller video formats to fill larger DVI and DisplayPort displays and avoid thick black borders around the video. - Page 11 Welcome Settings When a lookup table is used, Send to all video outputs. This option sends the effect of any lookup tables to all HDLink outputs. It is useful for inline color correction of an SDI signal as the effect of the LUTs will be seen on all SDI, optical fiber SDI, DVI/HDMI and DisplayPort outputs of your HDLink model.
-
Page 12: Hdlink Models
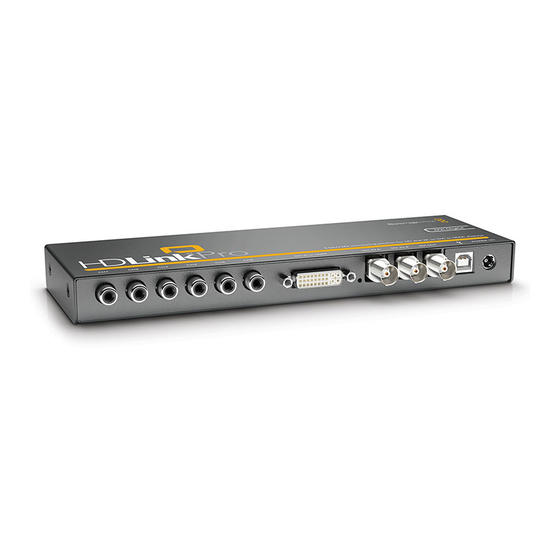
HDLink Models... - Page 13 Input 12V HDLink Pro DVI Digital is easy to use because any valid video signal received by the SDI input is sent to all outputs, i.e. DVI/HDMI and SDI outputs. HDLink Pro DVI Digital automatically detects the format of the incoming signal and displays the video on any supported DVI or HDMI-based monitor.
- Page 14 3D LUTs. 3D and 1D lookup tables can be applied to the DVI/HDMI output of HDLink Pro DVI Digital. If HDLink Pro DVI Digital is configured to send lookup tables to all video outputs, the lookup tables will be applied to the SDI output in addition to the DVI/HDMI output.
-
Page 15: Hdlink Pro Dvi Digital Connection Diagrams
Installation HDLink Pro DVI Digital – Connection Diagrams 3 Gb/s HD-SDI Dual Link HD-SDI 4:4:4 HD-SDI SD-SDI 30 inch 24 inch 24 inch DVI-D connection DVI-D connection Dual link DVI-D direct to LCD direct to LCD connection direct to monitor... -
Page 16: Hdlink Pro 3D Displayport
Installation HDLink Pro DVI Digital HDLink Pro 3D DisplayPort 6 Channel Analog Audio Output DisplayPort USB 2.0 Power In A In B Input Input 12V HDLink Pro 3D is easy to use because any valid video signal received by the SDI input is sent to all outputs, i.e. - Page 17 Installation HDLink Pro DVI Digital HDLink Pro 3D DisplayPort Valid video signals supported by HDLink Pro 3D include 2K, HD1080, HD720, NTSC and PAL. Computer video formats are generally not supported unless they coincidentally match a TV format. HDLink can be used to monitor the output of a Blackmagic Design DVI Extender in either Video or Extender (computer resolution) modes.
-
Page 18: Connection Diagrams
Installation HDLink Pro DVI Digital – Connection Diagrams HDLink Pro 3D DisplayPort – Connection Diagrams 3 Gb/s HD-SDI Dual Link HD-SDI 4:4:4 HD-SDI SD-SDI 24 inch 24 inch DisplayPort DisplayPort DisplayPort DisplayPort connection direct to connection direct to LCD monitor... -
Page 19: Connection Diagrams
Installation HDLink Pro DVI Digital – Connection Diagrams HDLink Pro 3D DisplayPort – 3D Connection Diagrams Dual Stream 3D Monitoring of a 3D camera rig This example shows HDLink Pro 3D monitoring the dual stream 3D HD-SDI signals from a beam splitter camera rig, sometimes referred to as a “mirror camera rig”. - Page 20 Installation HDLink Pro DVI Digital – Connection Diagrams HDLink Pro 3D DisplayPort – 3D Connection Diagrams Dual Stream 3D Monitoring of a HDCAM SR deck This example shows HDLink Pro 3D monitoring the dual stream 3D HD-SDI signals from a Sony HDCAM SR deck.
-
Page 21: Hdlink Optical Fiber
Installation HDLink Optical Fiber 3 Gb/s SDI monitoring for DVI/HDMI displays DVI-D or HDMI SDI IN SDI OUT OPTICAL OUT/IN POWER 12V 6 Channel Analog Audio Output DVI-D Optical USB 2.0 Power or HDMI Fiber SDI Input Input 12V Out/In HDLink Optical Fiber is easy to use because any valid video signal received by the SDI or optical fiber SDI inputs is sent to all outputs, i.e. - Page 22 Installation HDLink Optical Fiber HDLink Optical Fiber features an indicator lamp to show the operational status of the unit: ‚ Off HDLink Optical Fiber is powered off. ‚ Dim HDLink Optical Fiber is powered on but is not receiving a valid SDI video signal via either SDI or Optical Fiber SDI inputs.
- Page 23 Installation HDLink Optical Fiber – Connection Diagrams 3 Gb/s HD-SDI 3 Gb/s HD-SDI HD-SDI HD-SDI SD-SDI SD-SDI 30 inch HDMI 24 inch HDMI connection Dual link DVI-D DVI-D connection direct to HDMI connection direct to direct to LCD display LCD monitor monitor 3 Gb/s SDI monitoring for DVI/HDMI displays 3 Gb/s SDI monitoring for DVI/HDMI displays...
-
Page 24: Helpful Information
Helpful Information... -
Page 25: Troubleshooting
Troubleshooting Why are there thick black borders around my video? Most HDMI displays automatically scale video to fill the screen enabling PAL or NTSC video to automatically scale and fill a high definition display so you should not encounter thick black borders around your video. By contrast, DVI and DisplayPort displays rarely provide scaling. - Page 26 Troubleshooting Why doesn’t my monitor display video with HDLink? If your monitor specifications are nominally adequate for the video formats with which you work, but your monitor does not display video from HDLink, try the preference to override the monitor’s preferred EDID settings.
- Page 27 Troubleshooting Why does my HDLink Pro 3D output show lots of green color with 3D Stereoscopic video? If you are working with 3D Stereoscopic video, and your left and right eye cameras are out of sync, you will often see half of your video image replaced with green color. This green image will appear on both the monitor attached to the DisplayPort output of your HDLink and also to the 3D Muxed Video on the loop- through SDI output.
-
Page 28: Support
Support If things go wrong There are four steps to getting help. Step 1. Check out the Blackmagic Design web site www.blackmagic-design.com and click on the “Support” page for the latest support information. Step 2. Call your dealer. Your dealer will have the latest technical updates from Blackmagic Design and should be able to give you immediate assistance. -
Page 29: Developer Information
Developer Information... -
Page 30: Blackmagic 2K Format Overview
Developer Information Blackmagic 2K Format – Overview Frame Structure ‚ Transmitted at 23.98, 24 or 25 frames per second as a Progressive Segmented Frame. The latest Blackmagic Design products use the new ‚ Active video is 2048 pixels wide by 1556 lines deep. 3 Gb/s SDI video, which allows twice the data rate of ‚... -
Page 31: Vertical Timing Reference
Developer Information Blackmagic 2K Format – Vertical Timing Reference FIELD 1 ACTIVE LINE # 1650 … … … FIELD 2 ACTIVE LINE # … … 1617 1618 … 1650... -
Page 32: Data Stream Format
Developer Information Blackmagic 2K Format – Data Stream Format DATA ANC/AUDIO STREAM DATA DATA ANC/AUDIO STREAM DATA DATA STREAM DATA STREAM WORD# 23.98/24 WORD# 25 PsF... -
Page 33: Previous Hdlink Models
Previous HDLink Models... -
Page 34: Using Hdlink Utility
Installation Using HDLink Utility After running the HDLink software installer, a USB driver will be installed on your system and the HDLink Utility will be added to the your Applications or Programs folder. To use the HDLink Utility you will need to connect HDLink as follows. -
Page 35: Lookup Tables (Luts)
The 1D LUT text file format is fully compatible with the following Blackmagic Design products which share the same LUT format: HDLink Pro 3D, HDLink Optical Fiber, HDLink Pro DVI Digital, HDLink 2, HDLink, Multibridge Eclipse, Multibridge Pro (October 2007 model), Multibridge Extreme (DVI output), DeckLink HD Extreme 2 and... -
Page 36: Settings
Installation Settings HDLink Utility provides several settings for the HDLink and HDLink 2 models. Scale SD video to fill larger DVI display. HDLink and HDLink 2 models can scale standard definition video to fill larger DVI displays and avoid thick black borders around the video. - Page 37 Installation HDLink and HDLink 2 Left Lamp USB 2.0 Input DVI-D Right Lamp or HDMI In A In B 2 Channel Analog Audio Output Power Input 5V HDLink is easy to use because any valid video signal received by the SDI input is sent to the DVI output. HDLink automatically detects the format of the incoming signal and displays the video on any supported DVI or HDMI-based monitor.
- Page 38 Installation HDLink and HDLink 2 HDLink is preconfigured for you, requiring no initial setup to connect. Your HDLink will simply run without changing any settings, however, if you would like to update the firmware, modify settings or load custom gamma tables, then use the HDLink Utility software. This can be downloaded from the Blackmagic Design web site support page.
-
Page 39: Connection Diagrams
Installation HDLink and HDLink 2 – Connection Diagrams HD-SDI Dual Link HD-SDI 4:4:4 SD-SDI 24 inch 24 inch DVI-D connection DVI-D connection direct to LCD direct to LCD monitor monitor HD-SDI video input Dual-rate SDI 4:2:2 4:4:4 CH A SDI input (BNC) video input. -
Page 40: Troubleshooting
Troubleshooting Troubleshooting Why can’t I see standard definition on my HDMI-based TV? The HDLink and HDLink 2 models were originally designed for use with DVI displays before HDMI was widely available. HDMI support was subsequently added with a HDLink software update which upgraded the firmware in both the HDLink and HDLink 2 models. - Page 41 Troubleshooting Troubleshooting Some or all video formats fail to work with a DVI display The following information relates to the use of DVI-D displays with HDLink and HDLink 2. It does not apply to HDMI displays used with HDLink. 1. Check the DVI-D cable DVI-D cables are usually reliable but there are many different brands and lengths and it is wise to test with another cable if you have poor video or no video output.
- Page 42 Troubleshooting Troubleshooting 3. Try the EDID Manual Override settings If you have verified that your display specifications are nominally adequate for the video formats with which you work, then the next step is to try the EDID Manual Override settings in HDLink and HDLink 2. Every DVI-D display should include an EDID chip which provides information about the attributes of the display and which video formats it should support.
- Page 43 Troubleshooting Troubleshooting Do I have a HDLink or HDLink 2 model? To check if you have a HDLink 2, connect the HDLink unit via USB and then launch the HDLink utility. The title bar of the HDLink Utility will report either HDLink 2 or HDLink. There are some minor internal differences between the two models and HDLink 2 can also adjust for the difference between rectangular standard definition pixels and square pixels used on LCD computer monitors.
- Page 44 Warranty...
-
Page 45: Year Limited Warranty
Warranty 3 Year Limited Warranty Blackmagic Design warrants that this product will be free from defects in materials and workmanship for a period of 36 months from the date of purchase excluding user-servicable fiber optic modules which will be free from defects in materials and workmanship for a period of 12 months from the date of purchase. If a product proves to be defective during this warranty period, Blackmagic Design, at its option, either will repair the defective product without charge for parts and labor, or will provide a replacement in exchange for the defective product.
Need help?
Do you have a question about the HDLink Pro DVI Digital and is the answer not in the manual?
Questions and answers