Table of Contents
Advertisement
Advertisement
Table of Contents

Related Manuals for Raven Cruizer

Summary of Contents for Raven Cruizer
- Page 1 Operation Guide Cruizer™ (Software Version 2.2)
- Page 2 Raven Industries shall not be held responsible for any modifications or repairs made outside our...
-
Page 3: Table Of Contents
AND EITHER: Powering Down the Cruizer ... . 13 Tools Menu ......14 Quick Access Bar. -
Page 4: Overview
Power Port Warning: Cruizer consoles are NOT weather resistant. This manual is designed for use with Cruizer software version 2.2. Updates for Raven manuals are available at the Applied Technology Division website: www.ravenprecision.com/Support/index2.jsp Sign up for e-mail alerts to receive notification when updates for Raven products are available on the Raven website. -
Page 5: Installation
(supplied with helix style antenna) to mount the antenna. 2. Route the antenna cable to the back of the Cruizer console and connect it to the antenna port. 3. Connect the power cable to the power port on the Cruizer and plug the adaptor into the vehicle accessory port or cigarette lighter socket. -
Page 6: Initial Startup
The first time that the console is powered up, a Setup Wizard will step through the initial setup and calibration. The Setup Wizard helps with the configuration process and is only required the first time the Cruizer is started. Any settings selected or calibration values entered in the Setup Wizard may be adjusted... -
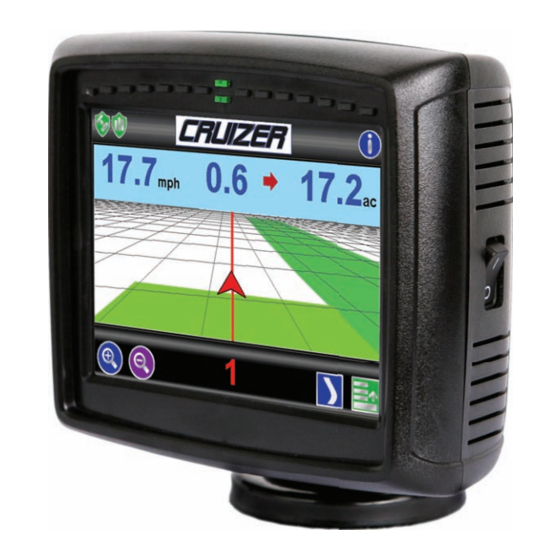
Page 7: Home Screen
Cruizer console. 3. Touch Home to complete the Initial Setup Wizard and view the Home screen. Home Screen The version of firmware currently loaded on the Cruizer console is displayed in the upper, right corner of the Home Screen. x.x.x... -
Page 8: Starting Guidance
) within the following sections indicate a series of icons that must be selected to complete the procedure. Starting Guidance After completing the initial setup, Cruizer may be used to provide Guidance. Note: Settings may need to be adjusted within the Tools Menu before proceeding with an actual guidance application. - Page 9 (implement history must be turned on). Note: An applied area must be present from a previous swath before Cruizer will display the next guidance path in Lass Pass mode. Straight (A-B) Mode - Allows the operator to select a starting (A) point and an ending (B) point or heading angle through which Cruizer draws a straight line as the guidance path.
-
Page 10: Resume A Saved Job
3. The Resume Job screen displays a list of jobs saved on the Cruizer console or a USB flash drive connected to the USB ports on the console. To help identify saved jobs, the Resume Job screen displays the age and coverage area of each job as well as the distance from the current vehicle location to the saved job. -
Page 11: Guidance Screen
Zoom- Zooms in each time it is pressed until maximum zoom is reached then zooms out. Menu - Touch to access other guidance views, available path tools, or return to the Cruizer Home Screen. Field Markers - Touch the icon to place a field marker at the current vehicle location. -
Page 12: To Start A-B Guidance
Cruizer Home Screen. Home Screen - Touch to return to the Cruizer Home Screen. Guidance Screen Modes 3-D - Displays a down field view of the vehicle position. -
Page 13: A-B Tools
Recording a Field Boundary Recording a field boundary allows the operator to define the field area. Once a field boundary is completed, the Cruizer displays the shape of the field and will also calculate the total acreage within the field boundary. -
Page 14: Field Area Display
6. Begin driving along the desired field boundary. Cruizer will record the field boundary path according to the vehicle position. 7. While recording, touch Boundary Mapping Menu to access the Pause , Stop and Reset boundary icons. 8. While recording a field boundary, touch Pause to pause recording of a field boundary. -
Page 15: Field Markers
2. To save a report for the job, see the Coverage Maps section on page 18. Powering Down the Cruizer Use the following steps to power down and shut off the Cruizer. From the Home Screen: 1. Touch the End Job icon if a job is in progress. -
Page 16: Tools Menu
Note: The Tilt option only appears if a TM-1 Tilt Module is connected. The baud rate for Port B must be set to 19200 to allow Cruizer to communicate with the TM-1. See the Baud Rate Settings section on page 19 for information on other configurations with SmarTrax. -
Page 17: Vehicle
Vehicle Width - Set the guidance width (width of boom or implement). Cruizer uses this setting, along with the selected guidance pattern, to determine the displayed guidance path. Offsets - Select the Offsets icon to set the position of the GPS antenna with respect to the center of the boom or implement. -
Page 18: Gps
Cruizer. Differential - Select the differential satellite PRN for GPS guidance. If an e-Dif or L-Dif authorization code has been entered, the operator may select the desired correction source for use with the Cruizer guidance system. Favorites Menu... -
Page 19: Display
Display During a job, the built-in light bar indicates the distance and direction to the current guidance path. 1. From the Home Screen, select: Tools Menu Computer Display 2. Select the Day or Night mode for the Guidance Screen display. 3. -
Page 20: Coverage Maps
PC. When output of Coverage map files is enabled, maps are saved to a flash drive inserted in the USB port on the back of the Cruizer console. Enabling Coverage Map Output To setup output of coverage map files: 1. -
Page 21: Baud Rate Settings
Baud Rate Settings Baud rate settings allow the Cruizer console to communicate with other equipment such as steering, section control or DGPS systems or components. 1. From the Home Screen, select: Tools Menu Output 2. When connecting the products listed below, ensure that the appropriate port is selected and all messages are set to zero. -
Page 22: Updates
To download the latest version of Cruizer software, unzip or extract the download to a flash drive. Note: Cruizer will not locate the update files if the files are moved on the flash drive. Un-zip the files to the root directory (X:\ where X represents the letter of your flash drive), making sure to preserve the directory structure of the zipped archive. -
Page 23: Troubleshooting
• Check the antenna cable connection on the Cruizer console and antenna. Tighten any loose connections. • Check the antenna port on the back of the Cruizer console for a 5V signal (use the metal surround of the antenna port as ground). If a... -
Page 24: System Cable Drawings
System Cable Drawings Additional diagrams are available on the Raven Applied Technology Division website: http://www.ravenprecision.com/Support/ApplicationDrawings FIGURE 2. Cruizer Kit and Cable Options... - Page 25 FIGURE 3. Cruizer Cable Options with SmarTrax, TM-1 Tilt Module and SCS Console...
- Page 26 FIGURE 4. Cruizer with SmartSteer 3D...
-
Page 27: Limited Warranty
How Can I Get Service? Bring the defective part and proof of purchase to your Raven dealer. If your dealer agrees with the warranty claim, the dealer will send the part and proof of purchase to their distributor or to Raven Industries for final approval. - Page 28 P.O. Box 5107 Fax: 605-331-0426 Sioux Falls, SD 57117-5107 www.ravenprecision.com Notice: This document and the information provided are the property of Raven Industries, Inc. and may only be used as authorized by Raven Industries, Inc. All rights reserved under copyright laws.
Need help?
Do you have a question about the Cruizer and is the answer not in the manual?
Questions and answers