Table of Contents
Advertisement
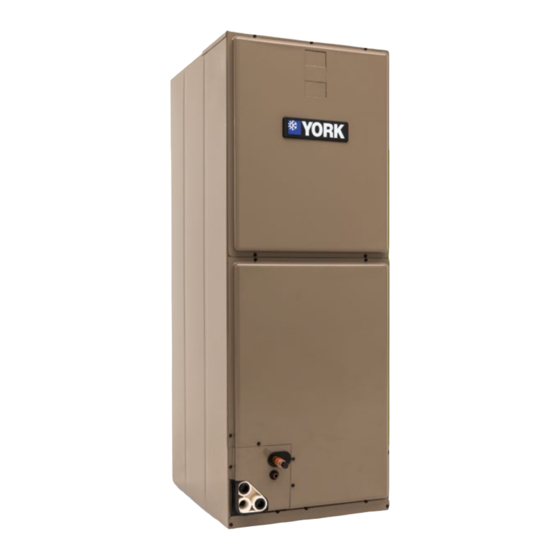
INSTALLATION MANUAL
STANDARD ECM SINGLE PIECE
MULTI-POSITION AIR HANDLERS
MODELS: AE SERIES
GENERAL . . . . . . . . . . . . . . . . . . . . . . . . . . . . . . . . . . . . . . . . . . . . . .1
SAFETY . . . . . . . . . . . . . . . . . . . . . . . . . . . . . . . . . . . . . . . . . . . . . . . .1
UNIT INSTALLATION . . . . . . . . . . . . . . . . . . . . . . . . . . . . . . . . . . . . .4
DUCT WORK AND CONNECTIONS . . . . . . . . . . . . . . . . . . . . . . . . .5
COIL METERING DEVICES . . . . . . . . . . . . . . . . . . . . . . . . . . . . . . . .7
REFRIGERANT LINE CONNECTION . . . . . . . . . . . . . . . . . . . . . . . . .9
CONDENSATE DRAIN CONNECTIONS . . . . . . . . . . . . . . . . . . . . . .9
ELECTRIC HEATER INSTALLATION . . . . . . . . . . . . . . . . . . . . . . .10
LINE POWER CONNECTIONS . . . . . . . . . . . . . . . . . . . . . . . . . . . . .10
Return Air Duct Attachment & Component Location . . . . . . . . . . . . . .2
Pressure Check . . . . . . . . . . . . . . . . . . . . . . . . . . . . . . . . . . . . . . . . . .3
Typical Installation . . . . . . . . . . . . . . . . . . . . . . . . . . . . . . . . . . . . . . . .4
Coil Blow Off Wing Installation . . . . . . . . . . . . . . . . . . . . . . . . . . . . . . .5
Horizontal Suspension . . . . . . . . . . . . . . . . . . . . . . . . . . . . . . . . . . . . .6
Duct Attachment . . . . . . . . . . . . . . . . . . . . . . . . . . . . . . . . . . . . . . . . . .6
Duct Work Transition . . . . . . . . . . . . . . . . . . . . . . . . . . . . . . . . . . . . . .6
Recommended Distributor Adjustment . . . . . . . . . . . . . . . . . . . . . . . .7
Piston Installation . . . . . . . . . . . . . . . . . . . . . . . . . . . . . . . . . . . . . . . . .7
TXV Installation . . . . . . . . . . . . . . . . . . . . . . . . . . . . . . . . . . . . . . . . . .8
TXV Bulb and Equalizer line Installations . . . . . . . . . . . . . . . . . . . . . .8
Dimensions . . . . . . . . . . . . . . . . . . . . . . . . . . . . . . . . . . . . . . . . . . . . .3
Physical and Electrical Data - Cooling Only . . . . . . . . . . . . . . . . . . . .11
Electrical Data - Cooling Only . . . . . . . . . . . . . . . . . . . . . . . . . . . . . .11
Electrical Heat: Minimum Fan Speed . . . . . . . . . . . . . . . . . . . . . . . . .12
SECTION I: GENERAL
The single piece air handler series provides the flexibility for installation
in any position. This unit may be used for upflow, downflow, horizontal
right, or horizontal left applications.
These units may be located in a closet, utility room, attic, crawl space,
or basement. These versatile models may be used for cooling or heat
pump operation with or without electric heat.
Top or side power and control wiring, color coded leads for control
wiring, and electric heaters all combine to make the installation easy
and minimize installation cost.
Electric heat kits are available as field installed accessories. Single
phase kits are available from 2.5 kW to 25 kW. 208-230 volt three
phase kits are available from 10kW to 25kW.
SECTION II: SAFETY
This is a safety alert symbol. When you see this symbol on
labels or in manuals, be alert to the potential for personal
injury.
Understand and pay particular attention to the signal words DANGER,
WARNING, or CAUTION.
DANGER indicates an imminently hazardous situation, which, if not
avoided, will result in death or serious injury.
WARNING indicates a potentially hazardous situation, which, if not
avoided, could result in death or serious injury.
LIST OF SECTIONS
LOW VOLTAGE CONTROL CONNECTIONS . . . . . . . . . . . . . . . . . 11
BLOWER SPEED CONNECTIONS . . . . . . . . . . . . . . . . . . . . . . . . . 11
UNIT DATA . . . . . . . . . . . . . . . . . . . . . . . . . . . . . . . . . . . . . . . . . . . 11
MAINTENANCE . . . . . . . . . . . . . . . . . . . . . . . . . . . . . . . . . . . . . . . . 18
AIR SYSTEM ADJUSTMENT . . . . . . . . . . . . . . . . . . . . . . . . . . . . . 18
INSTALLATION VERIFICATION . . . . . . . . . . . . . . . . . . . . . . . . . . . 19
WIRING DIAGRAM . . . . . . . . . . . . . . . . . . . . . . . . . . . . . . . . . . . . . 20
TYPICAL THERMOSTAT CONNECTIONS . . . . . . . . . . . . . . . . . . . 22
START UP SHEET . . . . . . . . . . . . . . . . . . . . . . . . . . . . . . . . . . . . . . 23
LIST OF FIGURES
Proper Bulb Location . . . . . . . . . . . . . . . . . . . . . . . . . . . . . . . . . . . . . 8
Vertical Temperature Bulb Orientation . . . . . . . . . . . . . . . . . . . . . . . . 8
Vapor Line Grommet . . . . . . . . . . . . . . . . . . . . . . . . . . . . . . . . . . . . . . 9
Line Power Connections . . . . . . . . . . . . . . . . . . . . . . . . . . . . . . . . . . 10
Blower Speed Connections . . . . . . . . . . . . . . . . . . . . . . . . . . . . . . . 11
Duct Static Measurements . . . . . . . . . . . . . . . . . . . . . . . . . . . . . . . . 19
Drain Traps . . . . . . . . . . . . . . . . . . . . . . . . . . . . . . . . . . . . . . . . . . . . 19
Location of Coil Trapped and Plugged Drain Connections . . . . . . . . 19
Wiring Diagram - Standard ECM - Single Phase Heat Kits . . . . . . . 20
Wiring Diagram - Three Phase Heat Kits 208-230V . . . . . . . . . . . . . 21
Typical Thermostat Wiring Diagram - ECM . . . . . . . . . . . . . . . . . . . 22
LIST OF TABLES
Air Flow Data (CFM) . . . . . . . . . . . . . . . . . . . . . . . . . . . . . . . . . . . . . 17
CAUTION indicates a potentially hazardous situation, which, if not
avoided may result in minor or moderate injury. It is also used to
alert against unsafe practices and hazards involving only property
damage.
FIRE OR ELECTRICAL HAZARD
Failure to follow the safety warnings exactly could result in serious
injury, death or property damage. A fire or electrical hazard may result
causing property damage, personal injury or loss of life.
The air handler area must not be used as a broom closet or for any other
storage purposes, as a fire hazard may be created. Never store items
such as the following on, near or in contact with the furnace.
1. Spray or aerosol cans, rags, brooms, dust mops, vacuum clean-
ers or other cleaning tools.
2. Soap powders, bleaches, waxes or other Cleaning compounds;
plastic items or containers; gasoline, kerosene, cigarette lighter
fluid, dry cleaning fluids or other volatile fluid.
3. Paint thinners and other painting compounds.
4. Paper bags, boxes or other paper products
Never operate the air handler with the blower door removed. To do so
could result in serious personal injury and/or equipment damage.
WARNING
!
WARNING
!
5169032-UIM-C-0416
ISO 9001
Certified Quality
Management System
Advertisement
Table of Contents

Related Manuals for York AE SERIES


Summary of Contents for York AE SERIES
-
Page 1: Table Of Contents
INSTALLATION MANUAL STANDARD ECM SINGLE PIECE MULTI-POSITION AIR HANDLERS MODELS: AE SERIES ISO 9001 Certified Quality Management System LIST OF SECTIONS GENERAL ..........1 LOW VOLTAGE CONTROL CONNECTIONS . -
Page 2: Return Air Duct Attachment & Component Location
5169032-UIM-C-0416 WARNING CAUTION Improper installation, adjustment, alteration, or maintenance may cre- DO NOT lift air handler by the cabinet braces. The cabinet braces are ate a condition where the operation of the product could cause per- held in place by the coil channels. The cabinet braces could become sonal injury or property damage. -
Page 3: Pressure Check
5169032-UIM-C-0416 INSPECTION As soon as a coil is received, it should be checked to insure it is still DEPRESS SCHRADER CORE TO CHECK FOR under pressure per Figure 2. The coil should be inspected for possible PRESSURE ONE TIME. damage during transit. If damage is evident, the extent of the damage should be noted on the carrier’s freight bill. -
Page 4: Unit Installation
5169032-UIM-C-0416 SECTION III: UNIT INSTALLATION NOTICE NOTICE The primary and secondary drain line must be trapped to allow proper drainage of condensate water. The secondary drain line should be Avoid handling aluminum coil components after handling the copper piped to a location that will give the occupant a visual warning that the line set or other tubing without first cleaning hands. -
Page 5: Duct Work And Connections
5169032-UIM-C-0416 SECTION IV: DUCT WORK AND NOTICE CONNECTIONS The position identifier for the coil slide rail is embossed into the back Air supply and return may be handled in one of several ways best corner vertical angle of the cabinet structure. There are four position suited to the installation. -
Page 6: Horizontal Suspension
5169032-UIM-C-0416 HORIZONTAL SUSPENSION DUCT FLANGES These air handlers may be suspended in horizontal applications. It is (Shipped in bag with unit) recommended to use angle steel support brackets with minimum 3/8” threaded rods, supporting the unit from the bottom. Attach the threaded rods at the locations shown in the Figure 6, leaving enough clearance between door and rod so that doors maybe easily removed for service. -
Page 7: Coil Metering Devices
5169032-UIM-C-0416 SECTION V: COIL METERING DEVICES A piston or a TXV is to be installed in the field. There is an installation manual that comes with the TXV kit. It is recommended to install the piston or TXV kit prior to installation of coil and brazing of line set. Until brazing is completed and cooled, the TXV sensing bulb must not be installed. -
Page 8: Txv Installation
5169032-UIM-C-0416 3. Place a backup wrench on distributor, loosen and remove brass distributor nut. Retain brass nut for use on liquid line. Keep Teflon washer in place and discard clear disk. 4. Install the thermal expansion valve to the distributor assembly with supplied fittings. -
Page 9: Refrigerant Line Connection
5169032-UIM-C-0416 SECTION VI: REFRIGERANT LINE 11. Secure sensing bulb and equalizer line capillary tubes with nylon CONNECTION cable ties to prevent leaks from tubes rubbing. 12. If piston is used, install Schrader core into suction header, and rein- CAUTION stall cap. 13. -
Page 10: Electric Heater Installation
5169032-UIM-C-0416 SECTION IX: LINE POWER CONNECTIONS Coils should be installed level or pitched slightly toward the drain end. Suggested pitch should not exceed 1/4 inch per foot of coil. Power may be brought into the unit through the supply air end of the The drain pan connections are designed to ASTM Standard D 2466 unit (top left when unit is vertical) or the left side panel. -
Page 11: Physical And Electrical Data - Cooling Only
5169032-UIM-C-0416 SECTION X: LOW VOLTAGE CONTROL The standard ECM motor operates when a 24 VAC signal is sent to any CONNECTIONS of its 5-speed taps. If simultaneous 24 VAC inputs are present, the motor operates at the highest speed tap that is energized. The lowest The 24 volt power supply is provided by an internally wired low voltage speed is 1, and the highest speed is 5. -
Page 12: Electrical Heat: Minimum Fan Speed
5169032-UIM-C-0416 TABLE 4: Electrical Heat: Minimum Fan Speed Heater Kit Air Handler Models Nom. kW 1,2,3 @240V Models 6HK(0,1)6500206 2.4kW Med Lo (#2)Med Lo (#2)Med Lo (#2)Med Lo (#2)Med Lo (#2)Med Lo (#2)Med Lo (#2)Med Lo (#2)Med Lo (#2)Med Lo (#2) 6HK(0,1)6500506 4.8kW Med Lo (#2) Med (#3) -
Page 13: Electrical Data For Single Source Power Supply: 208/230-1-60
5169032-UIM-C-0416 TABLE 7: Electrical Data For Single Source Power Supply: 208/230-1-60 Field Wiring Heater Air Handler Models Amps Min. Circuit Ampacity Heater Models MOP. @240V 208V 230V 208V 230V 6HK(0,1)6500206 14.9 16.1 6HK(0,1)6500506 25.8 28.0 6HK(0,1)6500806 39.0 42.7 6HK(0,1)6501006 47.4 52.0 6HK(0,1)6500206 14.9... - Page 14 5169032-UIM-C-0416 TABLE 7: Electrical Data For Single Source Power Supply: 208/230-1-60 (Continued) Field Wiring Heater Air Handler Models Amps Min. Circuit Ampacity Heater Models MOP. @240V 208V 230V 208V 230V 6HK(0,1)6500206 19.3 20.5 6HK(0,1)6500506 30.1 32.4 6HK(0,1)6500806 43.4 47.1 6HK(0,1)6501006 51.8 56.3 6HK(1,2)6501306...
-
Page 15: Electrical Data For Multi-Source Power Supply: 208/230-1-60
5169032-UIM-C-0416 TABLE 8: Electrical Data For Multi-source Power Supply: 208/230-1-60 Min. Circuit Ampacity Heater 208V 230V 208V 230V Heater Handlers Amps Models Circuit Circuit Models @240V 6HK16501306 22.9 37.6 – 24.9 41.5 – – – 6HK16501306 22.9 37.6 – 24.9 41.5 –... -
Page 16: Electrical Data For Single Source Power Supply: 208/230-3-60
5169032-UIM-C-0416 TABLE 9: Electrical Data For Single Source Power Supply: 208/230-3-60 Field Wiring Heater Air Handler Models Amps Min. Circuit Ampacity Heater Models MOP. @240V 208V 230V 208V 230V 6HK36501025 23.1 28.3 30.9 6HK36501025 23.1 28.3 30.9 6HK36501025 23.1 28.3 30.9 6HK36501525 34.6... -
Page 17: Electrical Data For Multi-Source Power Supply: 208/230-3-60
5169032-UIM-C-0416 TABLE 10: Electrical Data For Multi-source Power Supply: 208/230-3-60 Min. Circuit Ampacity 208V 230V 208V 230V Heater Air Handlers Heater Amps Models @240V Models Circuit Circuit 6HK46502025 46.2 29.8 25.0 32.4 27.6 6HK46502025 46.2 29.8 25.0 32.4 27.6 6HK46502025 46.2 29.8 25.0... -
Page 18: Maintenance
5169032-UIM-C-0416 TABLE 11: Air Flow Data (CFM) External Static Pressure (in. wc.) Blower Models Motor Speed 0.10 0.20 0.30 0.40 0.50 0.60 0.70 #5 HI 1759 1719 1685 1644 1611 1578 1540 #4 MED-HI 1684 1639 1606 1569 1536 1489 1452 #3 MED 1511... -
Page 19: Installation Verification
5169032-UIM-C-0416 THERMAL EXPANSION VALVE (TXV) CHECK LIST Is coil metering device installed correctly? Was the correct TXV installed per the outdoor unit Technical Guide? Is the TXV bulb positioned correctly? Is temperature bulb insulated? Is equalizer line connected? Take measurements here if using a filter rack. -
Page 20: Wiring Diagram
5169032-UIM-C-0416 SECTION XVI: WIRING DIAGRAM WHEN INSTALLING HEATER KIT, BE SURE THE BLOWER SPEED IS SEE INSTALLATION INSTRUCTIONS FOR PROPER SET TO THE SPEED SPECIFIED FOR THE AIR HANDLER/HEATER KIT LOW VOLTAGE FIELD WIRING CONNECTIONS. COMBINATION ON THIS UNIT'S INSTALLATION INSTRUCTIONS. HEATER KITS: 6HK*6500206 6HK*6500506... -
Page 21: Wiring Diagram - Three Phase Heat Kits 208-230V
5169032-UIM-C-0416 3 PHASE ELECTRIC HEAT KITS BLUE RLY 3 BLACK HEATER KITS: BLUE 6HK36501025C RLY 2 HEATER KIT: 6HK36501525C 6HK36501825C RLY 6 RLY 3 RLY 1 RLY 5 RLY 2 BLUE BLUE WHITE YELLOW BLUE YELLOW RED / WHITE PURPLE RLY 4 RLY 1 RED / WHITE... -
Page 22: Typical Thermostat Connections
5169032-UIM-C-0416 SECTION XVII: TYPICAL THERMOSTAT CONNECTIONS FIELD INSTALLED JUMPER IF SINGLE STAGE THERMOSTAT IS USED. A0370-002 FIGURE 23: Typical Thermostat Wiring Diagram - ECM Johnson Controls Unitary Products... -
Page 23: Start Up Sheet
5169032-UIM-C-0416 SECTION XVIII: START UP SHEET Residential Air Handler Print Form Reset Form with Electric Heat Start-Up Sheet Proper start-up is critical to customer comfort and equipment longevity Start-Up Date Company Name Start-Up Technician Owner Information Name Address Daytime Phone City State or Province Zip or Postal Code... - Page 24 Explain the importance of regular filter replacement and equipment maintenance Comments and Additional Job Details Subject to change without notice. Published in U.S.A 5169032-UIM-C-0416 Copyright © 2016 by Johnson Controls, Inc. All rights reserved. Supersedes: 5169032-UIM-B-0216 York International Corp. 5005 York Drive Norman, OK 73069...
Need help?
Do you have a question about the AE SERIES and is the answer not in the manual?
Questions and answers