Table of Contents
Advertisement
Advertisement
Table of Contents

Subscribe to Our Youtube Channel
Related Manuals for Catler ES 8010


Summary of Contents for Catler ES 8010
- Page 1 E S P R E S S O M A C H I N E Instructions for use ES 8010...
-
Page 3: Table Of Contents
CONTENTS Congratulations About your espresso machine Catler recommends safety fi rst Know your Espresso Machine ES 8010 Assembling your Espresso Machine ES 8010 Operating your Espresso Machine ES 8010 How to froth milk for a cappuccino or Latté Using the hot water function... -
Page 4: Congratulations
Congratulations on the purchase of your new Espresso Machine ES 8010 CONGRATULATIONS... - Page 5 From its heavy-duty housing and professional-grade functionality through to its superior and easy operation, Espresso Machine ES 8010 was designed for the true coff ee connoisseur. In developing this booklet, our goal was to provide you with the fundamental point from which you can start to discover the incredible versatility of your Espresso Machine;...
-
Page 6: Catler Recommends Safety First
CATLER RECOMMENDS SAFETY FIRST We at Catler are very safety conscious. We design and manufacture consumer products with the safety of you, our valued customer foremost in mind. In addition we ask that you exercise a degree of care when using any electrical appliance and adhere to the following precautions: IMPORTANT SAFEGUARDS FOR YOUR ESPRESSO MACHINE ES 8010 AND FOR ALL ELECTRICAL APPLIANCES •... -
Page 8: Know Your Espresso Machine Es 8010
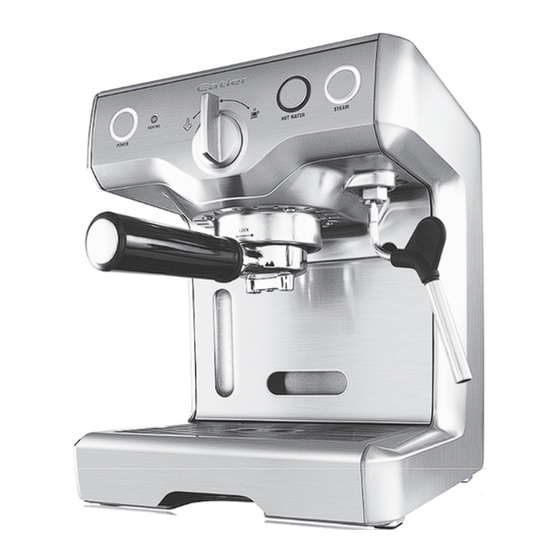
KNOW YOUR ESPRESSO MACHINE ES 8010 Hot water button Extra large cup warming plate press while the Selector Control is turned to ‘Steam’ to utilise hot water function ( 15 bar pump Steam button Italian designed and made will illuminate to indicate that the... - Page 9 Drip tray full indicator Accessories (not shown in picture) Custom designed stainless steel frothing jug Storage tray – located behind Custom designed measuring/ the drip tray for storage tamping spoon of accessories Custom designed cleaning tool KNOW YOUR ESPRESSO MACHINE ES 8010...
-
Page 10: Assembling Your Espresso Machine Es 8010
ASSEMBLING YOUR ESPRESSO MACHINE ES 8010 Your Espresso Machine will have the Drip Tray, Storage Tray and Water Tank in place when you unpack it from the box. The Storage Tray is located at the base of the machine against the back wall. The Drip Tray is located in the base of the machine in front of the Storage Tray. - Page 11 Slide the Drip Tray into the base of the position above the Storage Tray. Ensure the machine in front of the Storage Tray. Water Tank aligns fl ush with the sides of the machine. 11 11 ASSEMBLING YOUR ESPRESSO MACHINE ES 8010...
- Page 12 Operating 12 12 SESTAVENÍ VAŠEHO ESPRESSA ES 8010...
-
Page 13: Operating Your Espresso Machine Es 8010
OPERATING YOUR ESPRESSO MACHINE ES 8010 • When the Water Tank is removed, a black tube slides and extends out from the Water Tank storage area. Do not touch or try to remove this tube, it will automatically slide back into position when the Water Tank is reinserted. - Page 14 When using a 1 cup fi lter holder, for optimum fl avour, you should only extract approximately 30ml. When using a 2 cup fi lter holder, for optimum fl avour, you should only extract approximately 60ml. OPERATING YOUR ESPRESSO MACHINE ES 8010...
- Page 15 Insert the Filter Holder up into the Brew Head and rotate the handle to the right until resistance is felt, this will be at an approximate 90° angle to the machine. 15 15 OPERATING YOUR ESPRESSO MACHINE ES 8010...
- Page 16 Power On/off button is in the ‘On’ position. If the temperature lowers, the heating light will illuminate and the Thermoblock Heating System will automatically reheat to the correct brewing temperature OPERATING YOUR ESPRESSO MACHINE ES 8010...
-
Page 17: How To Froth Milk For A Cappuccino Or Latté
HOW TO FROTH MILK FOR A CAPPUCCINO OR LATTÉ The Espresso Machine comes complete with • Turn the power button ‘On’ a Commercial Swivel Steam Wand and Stainless • The fi rst step in making a cappuccino or Steel Frothing Attachment. When using the latté... - Page 18 • When the milk starts to increase in volume, immerse the Frothing Attachment deeper NOTE: into the jug to heat the milk. When the Espresso Machine is creating • Hold the jug at an angle with one hand and steam a pumping noise can be heard. place your other hand on the outer base of This is the normal operation of the the stainless frothing jug.
- Page 19 STEAM BUTTON/HOT WATER BUTTON • The Steam button surround will NOTE: NOTE: automatically illuminate after the machine Always ensure that the Frothing For brewing more coff ee immediately has fi rst reached the correct temperature. Attachment has been fi rmly pushed after using the steam function, •...
-
Page 20: Using The Hot Water Function
USING THE HOT WATER FUNCTION The Espresso Machine features a separate Hot Water function that can be used for making tea, NOTE: hot chocolate and other warm drinks. The hot If the machine remains switched water is dispensed from the Steam Wand. ‘On’... -
Page 21: Coffee Making Tips
COFFEE MAKING TIPS Making a good cup of coff ee is an art that is WATER FLOW THE GRIND simple to achieve. Here are some tips to help When brewing coff ee, make sure the water If using a pre-ground coff ee, ensure an espresso you make the perfect coff ee. - Page 22 TAMPING THE COFFEE NOTE: After measuring the ground coff ee into the The taste of your coff ee will, of course, Filter it must be tamped (pressed down) using depend on personal preference and the fl at end of the measuring spoon. The on many other factors such as the type ground coff ee should be tamped quite fi rmly.
- Page 24 Cleaning...
-
Page 25: Care And Cleaning
CARE AND CLEANING • Ensure the Selector Control is in the • Soak the tip in hot water before using CLEANING THE STEAM WAND AND ‘Standby’ position. Press the „on/off “ the pin on the Cleaning Tool to unblock. FROTHING ATTACHMENT button to off , switch off at the power Replace the tip back onto the Steam Wand •... - Page 26 CLEANING THE OUTER HOUSING / CUP CLEANING THE STORAGE TRAY WARMING PLATE • The Storage Tray can be removed after the • The outer housing and cup warming plate Drip Tray is removed then cleaned with can be cleaned with a soft, damp cloth (do a soft, damp cloth (do not use abrasive not use abrasive cleansers, pads or cloths cleansers, pads or cloths which can scratch...
- Page 27 DECALCIFYING DECALCIFYING THE MACHINE • Set the Selector Control to the ‘Steam’ • After regular use, hard water can cause • Ensure the Selector Control is in the position and allow the remaining liquid mineral build up in and on many of the ‘Standby’...
-
Page 28: Trouble Shooting Guide
TROUBLE SHOOTING GUIDE PROBLEM POSSIBLE CAUSES WHAT TO DO Ensure the machine is plugged in, switched on at the power Coff ee does not run through Machine is not turned on or plugged in outlet and the ‘on/off ’ button is in the ‘on’ position. Water tank is empty Refer to step 1 –... - Page 29 PROBLEM POSSIBLE CAUSES WHAT TO DO Coff ee runs out around the edge of Filter holder is not inserted in Refer to ‘Inserting the fi lter holder’ on page 15. the fi lter holder the the brew head brew head properly There are coff ee grounds around Clean any excess coff ee from the rim of the fi lter holder to ensure...
- Page 30 PROBLEM POSSIBLE CAUSES WHAT TO DO Coff ee is too cold Machine not preheated Ensure the red ‘Heating’ light cycles off as this is when the machine has reached the correct temperature. Cups not preheated The cup warming plate starts to warm up as the machine warms up.
- Page 31 PROBLEM POSSIBLE CAUSES WHAT TO DO No steam/hot water is generated Machine is not turned on Ensure the machine is plugged in, switched on at the power outlet and the ‘on/off ’ button is in the ‘on’ position. Water tank is empty Refer to step 1 –...
-
Page 32: Coffees To Try
COFFEES TO TRY ESPRESSO LONG BLACK FLAT WHITE Intense and aromatic, an espresso or short A long black is generally served as a standard A single dose of espresso in a cup topped with black as it’s also known uses about 7g of espresso with hot water added to taste. - Page 33 CLASSIC CAFE LATTÉ CAPPUCCINO MACCHIATO Traditionally the morning coff ee of Italy and The real thing is served very light and luke A shot of espresso served short in a 70ml France, taken with pain au chocolate or sweet warm with 1/3 espresso to 1/3 steamed milk demitasse and stained with a dash of fi nely biscotti.
- Page 34 MOCHA FRAPPE (serves two) ESPRESSO AFFOGATO CON PANNA Ready in minutes this impressive refresher Totally irresistible, this sweet temptation is Meaning ‘with cream’ this heart warmer is will delight chocolate and coff ee drinkers simply a single scoop of premium vanilla bean a chic variation on old-fashioned Vienna Coff ee.
- Page 36 Recipes...
- Page 37 DESSERTS BAKED CUSTARDS WITH FRESH RASPBERRY TIRAMISU AND COFFEE FLOAT Makes 4 Serves 6 11/2 cups mascarpone 750ml cream 11/4 cups cream 3/4 cup caster sugar 21/2 tablespoons icing sugar 2 vanilla beans, cut lengthways 1/2 cup strong espresso coff ee, cooled 1 tablespoon gelatine 1/2 cup Tia Maria or coff ee liqueur 3/4 cup strong espresso coff ee, cooled...
- Page 38 COFFEE, CINNAMON AND WALNUT MUFFINS RICH COFFEE ICING Makes 12 2 cups icing sugar, sifted 21/2 cups plain fl our 1 tablespoon butter, softened 2 teaspoons baking powder 1/4 cup strong espresso coff ee, warm 1 teaspoon ground cinnamon 1. Combine icing sugar, butter and half the 3/4 cup caster sugar coff ee in a bowl, stir well and gradually 1 cup sour cream...
- Page 39 NOTE:...
- Page 40 E S P R E S S O M A C H I N E Due to continued product improvement, the products illustrated/photographed in this brochure may vary slight- ly from the actual product. W W W . C A T L E R . E U C U S T O M E R S E R V I C E I N F O @ C A T L E R .
Need help?
Do you have a question about the ES 8010 and is the answer not in the manual?
Questions and answers