Table of Contents
Advertisement
Advertisement
Table of Contents

Related Manuals for Catler ES 8011


Summary of Contents for Catler ES 8011
- Page 1 E S P R E S S O M A C H I N E Instructions for use ES 8011...
- Page 2 E S P R E S S O M A C H I N E...
-
Page 3: Table Of Contents
CONTENTS Congratulations Catler recommends safety first Key features of your Espresso Machine ES 8011 Know your Espresso Machine ES 8011 Before first use Assembling your Espresso Machine ES 8011 Operating your Espresso Machine ES 8011 Programming your Espresso Machine ES 8011 How to froth milk for a Cappuccino or Latté... -
Page 4: Congratulations
Congratulations on the purchase of your new Espresso Machine ES 8011. CONGRATULATIONS... - Page 5 At Catler, we know that coffee lovers will go to great lengths to refine the art of making coffee. They will experiment with different types of coffee, the tamp and grind of the beans in search for the perfect espresso. The Espresso Machine ES 8011 has been designed for the novice through to the experi- enced barista.
-
Page 6: Catler Recommends Safety First
CATLER RECOMMENDS SAFETY FIRST We at Catler are very safety conscious. We design and manufacture consumer products with the safety of you, our valued customer foremost in mind. In addition we ask that you exercise a degree of care when using any electrical appliance and adhere to the following precautions: IMPORTANT SAFEGUARDS FOR YOUR ESPRESSO MACHINE ES 8011 AND FOR ALL ELECTRICAL APPLIANCES •... - Page 7 IMPORTANT SAFEGUARDS FOR ALL ELECTRICAL APPLIANCES • Unwind the cord before use. • Any maintenance other than cleaning should be performed at an authorised Catler Ser- • To protect against electric shock, do not im- vice Centre. merse cord, plug or appliance in water or any other liquid.
-
Page 8: Key Features Of Your Espresso Machine Es 8011
KEY FEATURES OF YOUR ESPRESSO MACHINE ES 8011 Programmable Function White Zone – Ideal Espresso This espresso machine off ers a convenient The gauge needle when positioned within the NOTE: choice between the Manual Operation or the recommended White Zone during pouring indi-... - Page 9 To switch off the espresso machine whilst it is perature of the water. This helps ensure the user in „Power Save Mode“, simply press the POWER gets the best possible extraction each time an button once. espresso is made. KEY FEATURES OF YOUR ESPRESSO MACHINE ES 8011...
-
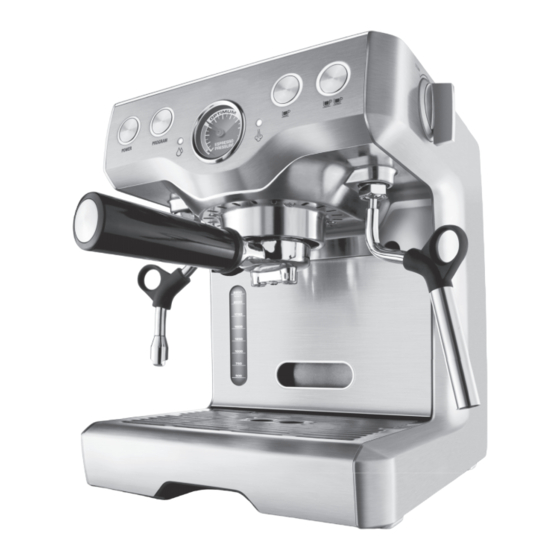
Page 10: Know Your Espresso Machine Es 8011
KNOW YOUR ESPRESSO MACHINE ES 8011 Power button Extra large cup warming plate surround illuminates when the button is pressed to „On“ „Power Save Mode“ 15 bar pump Italian-designed and made Hot water light Steam light illuminates to indicate hot... - Page 11 Removable 2.2 litre water tank filled from the front of the machine Selector control for steam or hot water Other accessories (not shown) Cord storage Storage tray located behind the drip tray for storage of accessories KNOW YOUR ESPRESSO MACHINE ES 8011...
-
Page 12: Before First Use
BEFORE FIRST USE Your Espresso Machine will be almost set up Remove the drip tray, water tank and storage when you unpack it from the box. The drip tray, tray. Disassemble the drip tray by removing the NOTE: water tank and storage tray will be in place. stainless steel grid and „Empty Me!“... -
Page 13: Assembling Your Espresso Machine Es 8011
ASSEMBLING YOUR ESPRESSO MACHINE ES 8011 STEP 1 STEP 2 STEP 3 Insert the „Empty Me!“ full indicator into position Slide the water tank over the drip tray and into Insert the storage tray into the base of the ma-... - Page 14 Operating...
-
Page 15: Operating Your Espresso Machine Es 8011
OPERATING YOUR ESPRESSO MACHINE ES 8011 • As the water tank is removed, a black tube STEP 2 – PRE-WARMING THE CUPS slides and extends out from the water tank • The Cup Warming Plate will start to warm as storage area. - Page 16 Dry the filter and filter holder thoroughly before use. OPERATING YOUR ESPRESSO MACHINE ES 8011...
- Page 17 90° angle to the machine. seconds, aromatic coffee will begin to pour into the cup. A pumping noise will be heard in this operation. The machine will automatically stop once the preset pour has been delivered. 17 17 OPERATING YOUR ESPRESSO MACHINE ES 8011...
-
Page 18: Programming Your Espresso Machine Es 8011
PROGRAMMING YOUR ESPRESSO MACHINE ES 8011 PROGRAMMED ESPRESSO PROGRAMMING SINGLE ESPRESSO 3. To begin programming, press the „PRO- GRAM“ button once. The machine will beep – DOUBLE CUP 1. Prepare to make a single cup of espresso by once and the program button will begin to following steps 2 to 6 in „Operating your Es-... - Page 19 19 19 PROGRAMMING YOUR ESPRESSO MACHINE ES 8011...
-
Page 20: How To Froth Milk For A Cappuccino Or Latté
HOW TO FROTH MILK FOR A CAPPUCCINO OR LATTÉ it, from either opening, onto the steam wand and pushing firmly upwards onto the rubber sur- NOTE: round. Ensure the fine steam holes on either end When the espresso machine creates of the frothing attachment are clean to achieve steam, a pumping noise can be heard. - Page 21 • When the milk starts to increase in volume, immerse the steam wand and/ or frothing NOTE: attachment deeper into the jug to heat the After 5 minutes of continuous steaming, milk. the machine will automatically disable • Hold the jug at an angle with one hand and the steam function.
-
Page 22: Using The Hot Water Function
USING THE HOT WATER FUNCTION The espresso machine features a separate hot water function that can be used for making tea, hot chocolate and other warm drinks. The hot water is dispensed from the dedicated Hot Wa- ter Wand. Place a jug or cup underneath the Hot Water Wand to collect the hot water. -
Page 23: Coffee Making Tips
COFFEE MAKING TIPS WARMING YOUR CUP OR GLASS If the grind is too fine (looks like powder and feels PURGE THE GROUP HEAD like flour when rubbed between fingers), the wa- A warm cup will help maintain the coffee’s opti- Before inserting the filter holder, run some water ter will not flow through the coffee even when mal temperature. - Page 24 Cleaning...
-
Page 25: Care And Cleaning
CARE AND CLEANING CLEANING THE FILTERS, FILTER HOLDER CLEANING THE STEAM WAND AND • Ensure the Selector Control is in the „Stand- FROTHING ATTACHMENT by“ position. Press the POWER button to off, AND GROUP HEAD switch off at the power outlet, unplug the •... - Page 26 CLEANING THE STORAGE TRAY CLEANING THE DRIP TRAY CLEANING THE OUTER HOUSING/ CUP WARMING PLATE • The storage tray can be removed after the • The drip tray should be removed, emptied drip tray is removed then cleaned with and cleaned at regular intervals, particularly •...
- Page 27 DECALCIFYING DECALCIFYING THE MACHINE to commence manual pour. Release the but- ton once half the mixture of white vinegar • After regular use, hard water can cause • Ensure the Selector Control is in the „Stand- and water has run through the group head. mineral build up in and on many of the in- by“...
-
Page 28: Troubleshooting Guide
TROUBLESHOOTING GUIDE PROBLEM POSSIBLE CAUSES WHAT TO DO When the machine is switched Selector Control is not in Turn the Selector Control to „Standby“ position. Machine will commence on, the steam and hot water „Standby“position. normal heat up procedure. lights are flashing. Coffee does not run through. - Page 29 PROBLEM POSSIBLE CAUSES WHAT TO DO No créma Coffee is not tamped firmly Refer to „Tamping The Coffee“, page 16. enough. Coffee grind is too coarse. Ensure you use a suitable espresso grind. Refer to „The Grind“ on page 23. Ground coffee is not fresh.
- Page 30 PROBLEM POSSIBLE CAUSES WHAT TO DO Machine is making a loud and Water tank is empty. Refer to step 1 – „Filling The Water Tank“, page 15. continuous pumping noise. Water tank is not securely in place. Refer to step 1 – „Filling The Water Tank“, page 15. Coffee is too weak or watery.
-
Page 31: Coffees To Try
COFFEES TO TRY LONG BLACK FLAT WHITE ESPRESSO A long black is generally served as a standard es- A single dose of espresso in a cup topped with Intense and aromatic, an espresso or short black presso with hot water added to taste. steamed milk, 1⁄3 coffee and 1⁄3 milk. - Page 32 CLASSIC CAFE LATTÉ CAPPUCCINO MACCHIATO Traditionally the morning coffee of Italy and The real thing is served very light and luke A shot of espresso served short in a 70ml demi- France, taken with pain au chocolate or sweet warm with 1⁄3 espresso to 1⁄3 steamed milk and tasse and stained with a dash of finely frothed biscotti.
- Page 33 MOCHA FRAPE (serves two) ESPRESSO AFFOGATO CON PANNA Ready in minutes this impressive refresher will Totally irresistible, this sweet temptation is sim- Meaning „with cream“ this heart warmer is delight chocolate and coffee drinkers alike. Melt ply a single scoop of premium vanilla bean ice a chic variation on old-fashioned Vienna Cof- two heaped teaspoons of quality chocolate bits cream, drenched in espresso and if desired, your...
- Page 34 Recipes...
- Page 35 DESSERTS BAKED CUSTARDS WITH FRESH TIRAMISU RASPBERRY AND COFFEE FLOAT Makes 4 Serves 6 1½ cups mascarpone 1¼ cups cream 750 ml cream 2½ tablespoons icing sugar ¾ cup caster sugar ½ cup strong espresso coffee, cooled 2 vanilla beans, cut lengthways ½...
- Page 36 COFFEE, CINAMON AND WALNUT RICH COFFEE ICING MUFFINS 2 cups icing sugar, sifted Makes 12 1 tablespoon butter, softened ¼ cup strong espresso coffee, warm 2½ cups/375 g plain flour 2 teaspoons baking powder 1 teaspoon ground cinnamon 1. Combine icing sugar, butter and half the ¾...
- Page 37 Changes in text and technical parameters reserved. Disposal of Used Electrical & Electronic Equipment The meaning of the symbol on the product, its accessory or packaging indicates that this product shall not be treated as household waste. Please, dispose of this equipment at your applicable collection point for the recycling of electrical & electronic equipments waste. In the European Union and Other European countries which there are separate collection systems for used electrical and electronic product.
- Page 38 NOTE:...
- Page 39 NOTE:...
- Page 40 E S P R E S S O M A C H I N E Due to continued product improvement, the products illustrated/photographed in this brochure may vary slight- ly from the actual product. W W W . C A T L E R . E U C U S T O M E R S E R V I C E I N F O @ C A T L E R .
Need help?
Do you have a question about the ES 8011 and is the answer not in the manual?
Questions and answers