
Related Manuals for Catler ES 8014


Summary of Contents for Catler ES 8014
- Page 1 ESPRESSO MACHINE Instruction Manual ESPRESSO MACHINE Návod k obsluze ESPRESSO Návod na obsluhu ESPRESSO ES 8014...
- Page 2 ESPRESSO...
-
Page 3: Table Of Contents
CONTENT Catler recommends safety fi rst Know your Espresso ES 8014 Features of your Espresso ES 8014 Operating your Espresso ES 8014 Before fi rst use Basic operation Programming Restoring factory defaults Milk texturing Hot water spout Coff ee making tips... - Page 4 Congratulations for buying your new Espresso ES 8014. CONGRATULATIONS...
-
Page 5: Catler Recommends Safety First
CATLER RECOMMENDS SAFETY FIRST We understand the importance of safety and that’s why we put your safety first from the initial design concept to the production itself. Nevertheless, please be careful and follow the instructions below when using this appliance. • This appliance may be used by children 8 years... - Page 6 • The appliance is designed for making filtered coffee only. Use the appliance only for the purpose for which it has been designed. • Before connecting the appliance to a power CATLER RECOMMENDS SAFETY FIRST...
- Page 7 Allow the appliance to fully cool down before cleaning or moving. • Keep the appliance and its accessories in clean condition. CATLER RECOMMENDS SAFETY FIRST...
- Page 8 • Do not place other items on the top surface of the appliance which is intended for heating up cups. • Before connecting this appliance to a power socket, make sure the voltage stated on the product's rating label corresponds to the voltage in your power socket. CATLER RECOMMENDS SAFETY FIRST...
- Page 9 • We recommend that you inspect the appliance regularly. Do not use the appliance if it is damaged in any way or if the power cord or CATLER RECOMMENDS SAFETY FIRST...
- Page 10 All repairs or adjustments must be performed at the nearest Catler authorised service centre. • Any maintenance other than standard cleaning must be performed at authorised Catler service centre. • We recommend to install a residual current device (standard safety switches in your power outlet) to provide a higher level of protection...
-
Page 11: Know Your Espresso Es 8014
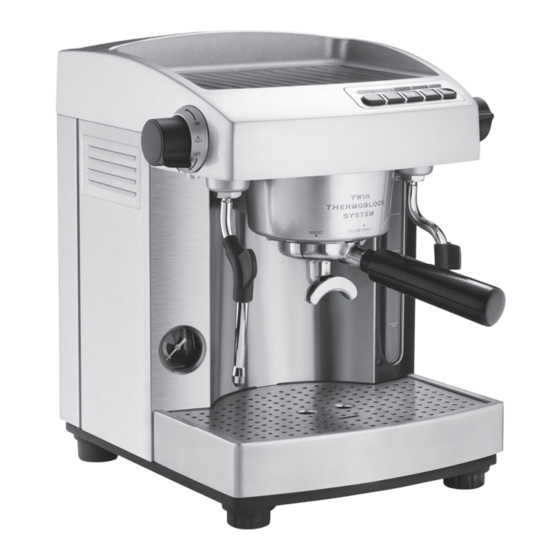
KNOW YOUR ESPRESSO ES 8014 MACHINE DESCRIPTION KNOW YOUR ESPRESSO ES 8014... - Page 12 The front feet are height adjustable, allowing the appliance to be levelled and facilitating cleaning the area below the appliance. The rear feet are equipped with embedded travelling mechanism to facilitate moving the appliance on the desktop. KNOW YOUR ESPRESSO ES 8014...
- Page 13 2. MANUAL button coffee dispensing time. This is used for manual coffee dispensing. 6. Button light indicators button This is used for brewing 1 cup of coffee. button This is used for brewing 2 cups of coffee. KNOW YOUR ESPRESSO ES 8014...
-
Page 14: Features Of Your Espresso Es 8014
FEATURES OF YOUR ESPRESSO ES 8014 Two pumps and two thermoblocks coffee tamping force should be correctly The appliance is equipped with two Italian combined. pumps: A 15-bar pump to brew coffee and Tip: We recommend to use only fresh ground a 4-bar pump to dispense steam. - Page 15 12 months under normal household use. However, if you use the appliance more frequently, for example in a commercial operation, we recommend to replace the filter every 3 months. FEATURES OF YOUR ESPRESSO ES 8014...
-
Page 16: Operating Your Espresso Es 8014
OPERATING YOUR ESPRESSO ES 8014 BEFORE FIRST USE ATTENTION: Only add clean and cold water in the Remove all packaging from the appliance tank. Do not use any other liquids. and dispose of it in a proper manner. Before We do not recommend using highly a proper disposal, make sure you have... - Page 17 AFTER Strainer selection fi nal coff ee tamping. Your Catler ES 8014 Espresso is supplied with both single and double bottom strainers. Single bottom strainers (for 1 and 2 cups) are Inserting the handle in the brew head...
-
Page 18: Basic Operation
When a sufficient amount of coffee has been Making 2 cups of coffee – button poured into the cup, press the MANUAL The button is used to make 2 cups of button to stop the coffee dispensing. coffee. OPERATING YOUR ESPRESSO ES 8014... -
Page 19: Programming
4. When the required coffee amount has been poured into the cup, i.e. your desired time has passed, press the button briefly. An acoustic signal will OPERATING YOUR ESPRESSO ES 8014... -
Page 20: Restoring Factory Defaults
It’s important to note that espresso coffee is strainer and the the base of all coffee drinks while the milk is a supplement. handle. Risk of burns. 1. Pour freshly cooled milk into the stainless kettle. OPERATING YOUR ESPRESSO ES 8014... - Page 21 10. Remove the steam jet from the kettle and it’s important that the milk should not boil wipe the steam jet with a clean, lightly or burn. moistened sponge. We recommend Please always start and stop the steam OPERATING YOUR ESPRESSO ES 8014...
-
Page 22: Hot Water Spout
Wait until the appliance is heated to When the handle and the strainer are heated operating temperature. The POWER indicator enough, press the MANUAL button again to light will stop flashing and lights in red. OPERATING YOUR ESPRESSO ES 8014... - Page 23 When the coffee drink brewing has been selected, the machine will pump water into the strainer in 3 short impulses, making the coffee moisten and swell. Then, coffee extraction will start at full pressure. OPERATING YOUR ESPRESSO ES 8014...
-
Page 24: Care And Cleaning
CARE AND CLEANING Before cleaning, turn the appliance off with the brew head. Hot water will start to the POWER button, disconnect the plug of discharge from the brew head. This the power cord from the mains socket and let remove the ground coffee and dirt it cool down completely. -
Page 25: Cleaning The Steam Jet
10 seconds. Have the steam act for about dispensing. In such case, please contact 5 minutes, then remove the sponge and wipe Catler authorized service centre. off dry milk residues. Repeat the procedure if needed. Cleaning the hot water discharge spout If the steam jet gets blocked and the above Wipe hot water discharge spout with a clean... -
Page 26: Thorough Cleaning Of The Brew Head
the rear cover. Starting the cleaning cycle If the steam jet is still blocked, unscrew the 1. Insert the mains cord plug into a power steam jet end and clean it again using the socket. cleaning aid needle. Wash the steam jet end 2. - Page 27 affecting the coffee quality. dissolution process may take about We recommend to descale the coffee 5–7 minutes), insert the tank in the machine regularly - once in 4–6 months. The appliance. descaling need depends on the frequency of B. Liquid agent to remove the use and the hardness of water being used.
-
Page 28: Storage
in the tank flow through the brew head. thoroughly in warm water with a small Press the MANUAL button again to stop amount of washing-up liquid. Rinse it the water dispensing. under warm running water and wipe dry. Fill the tank with clean water up to the maximum level line. - Page 29 INSTRUCTIONS AND INFORMATION REGARDING THE DISPOSAL OF USED PACKAGING MATERIALS Dispose of packaging material at a public waste disposal site. DISPOSAL OF USED ELECTRICAL AND ELECTRONIC APPLIANCES The meaning of the symbol on the product, its accessory or packaging indicates that this product shall not be treated as household waste.
Need help?
Do you have a question about the ES 8014 and is the answer not in the manual?
Questions and answers