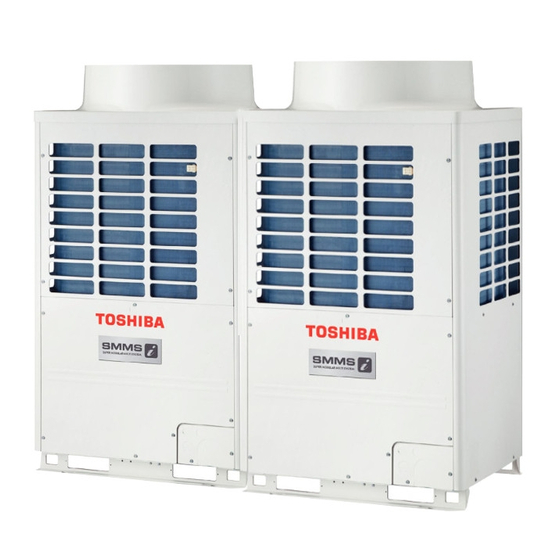
Toshiba MMY-MAP1006FT8(J)P-E Service Manual

Toshiba MMY-MAP1006FT8(J)P-E Service Manual

Super heat recovery multi-e (multi type) outdoor unit
Hide thumbs Also See for MMY-MAP1006FT8(J)P-E:
Table of Contents

Advertisement

SERVICE MANUAL

AIR-CONDITIONER (MULTI TYPE)
<SUPER HEAT RECOVERY MULTI-e>
Outdoor Unit
Model name:
MMY-MAP0806FT8(J)P-E
MMY-MAP1006FT8(J)P-E
MMY-MAP1206FT8(J)P-E
MMY-MAP1406FT8(J)P-E
MMY-MAP1606FT8(J)P-E
MMY-MAP1806FT8(J)P-E
MMY-MAP2006FT8(J)P-E
MMY-MAP0806FT8(J)P
MMY-MAP1006FT8(J)P
MMY-MAP1206FT8(J)P
MMY-MAP1406FT8(J)P
MMY-MAP1606FT8(J)P
MMY-MAP1806FT8(J)P
MMY-MAP2006FT8(J)P
MMY-MAP0806FT8P-A
MMY-MAP1006FT8P-A
MMY-MAP1206FT8P-A
MMY-MAP1406FT8P-A
MMY-MAP1606FT8P-A
MMY-MAP1806FT8P-A
MMY-MAP2006FT8P-A
FILE NO. SVM-16024-2
MMY-MAP0806FT8(J)P-TR
MMY-MAP1006FT8(J)P-TR
MMY-MAP1206FT8(J)P-TR
MMY-MAP1406FT8(J)P-TR
MMY-MAP1606FT8(J)P-TR
MMY-MAP1806FT8(J)P-TR
MMY-MAP2006FT8(J)P-TR
MMY-MAP0806FT7(J)P
MMY-MAP1006FT7(J)P
MMY-MAP1206FT7(J)P
MMY-MAP1406FT7(J)P
MMY-MAP1606FT7(J)P
MMY-MAP1806FT7(J)P
MMY-MAP2006FT7(J)P
AIRTREND Ltd - KOVENT DOO
Kumanovska 14
11000 Beograd
Tel: 011 3836886, 3085740
Faks: 011 3444113
e-mail: gobrid@eunet.rs, office@kovent.rs
www.airtrend.rs, www.kovent.rs
www.toshiba-klima.rs
www.toshiba-estia.rs

Advertisement

Table of Contents
loading

Summary of Contents for Toshiba MMY-MAP1006FT8(J)P-E

  • Page 1: Service Manual

    FILE NO. SVM-16024-2 SERVICE MANUAL AIR-CONDITIONER (MULTI TYPE) <SUPER HEAT RECOVERY MULTI-e> Outdoor Unit Model name: MMY-MAP0806FT8(J)P-TR MMY-MAP0806FT8(J)P-E MMY-MAP1006FT8(J)P-TR MMY-MAP1006FT8(J)P-E MMY-MAP1206FT8(J)P-TR MMY-MAP1206FT8(J)P-E MMY-MAP1406FT8(J)P-TR MMY-MAP1406FT8(J)P-E MMY-MAP1606FT8(J)P-TR MMY-MAP1606FT8(J)P-E MMY-MAP1806FT8(J)P-TR MMY-MAP1806FT8(J)P-E MMY-MAP2006FT8(J)P-TR MMY-MAP2006FT8(J)P-E MMY-MAP0806FT7(J)P MMY-MAP0806FT8(J)P MMY-MAP1006FT7(J)P MMY-MAP1006FT8(J)P MMY-MAP1206FT7(J)P MMY-MAP1206FT8(J)P MMY-MAP1406FT7(J)P MMY-MAP1406FT8(J)P MMY-MAP1606FT7(J)P MMY-MAP1606FT8(J)P...
  • Page 2: Table Of Contents

    Contents SAFETY CAUTION ........... . 5 Refrigerant (R410A) .
  • Page 3 6-2. Applied Control of Outdoor Unit ..........85 6-2-1.
  • Page 4 TROUBLESHOOTING ..........151 8-1.
  • Page 5 This service manual provides relevant explanations about new outdoor unit (SHRM-e). Please refer to the following service manuals for each indoor units. Indoor unit SVM FILE NO. 4-way Cassette Type SVM-13011 (MMU-AP∗∗∗∗4HP-E) (Made in Thailand model) 2-way Cassette Type A10-007 (MMU-AP∗∗∗∗WH ) Concealed Duct Standard Type SVM-14069...
  • Page 6: Safety Caution

    • The qualified service person is a person who installs, repairs, maintains, relocates and removes the air conditioners made by Toshiba Carrier Corporation. He or she has been trained to install, repair, maintain, relocate and remove the air conditioners made by Toshiba Carrier Corporation...
  • Page 7 Definition of Protective Gear When the air conditioner is to be transported, installed, maintained, repaired or removed, wear protective gloves and ‘safety’ work clothing. In addition to such normal protective gear, wear the protective gear described below when undertaking the special work detailed in the table below.
  • Page 8: Warning Indications On The Air Conditioner Unit

    Warning Indications on the Air Conditioner Unit [Confirmation of warning label on the main unit] Confirm that labels are indicated on the specified positions If removing the label during parts replace, stick it as the original. WARNING WARNING ELECTRICAL SHOCK HAZARD ELECTRICAL SHOCK HAZARD Disconnect all remote electric power supplies Disconnect all remote electric...
  • Page 9: Precautions For Safety

    PRECAUTIONS FOR SAFETY The manufacturer shall not assume any liability for the damage caused by not observing the description of this manual. DANGER Before carrying out the installation, maintenance, repair or removal work, be sure to set the circuit breaker for both the indoor and outdoor units to the OFF position. Otherwise, electric shocks may result.
  • Page 10 WARNING Before starting to repair the air conditioner, read carefully through the Service Manual, and repair the air conditioner by following its instructions. Only qualified service person (*1) is allowed to repair the air conditioner. Repair of the air conditioner by unqualified person may give rise to a fire, electric shocks, injury, water leaks and / or other problems.
  • Page 11 If, in the course of carrying out repairs, it becomes absolutely necessary to check out the electrical parts with the electrical parts box cover of one or more of the indoor units and the service panel of the outdoor unit removed in order to find out exactly where the trouble lies, put a sign in place so that no- Do not bring one will approach the work location before proceeding with the work.
  • Page 12 When the refrigerant gas leaks during work, execute ventilation. If the refrigerant gas touches to a fire, poisonous gas generates. A case of leakage of the refrigerant and the closed room full with gas is dangerous because a shortage of oxygen occurs. Be sure to execute ventilation.
  • Page 13 Only a qualified installer (*1) or qualified service person (*1) is allowed to install the air conditioner. If the air conditioner is installed by an unqualified individual, a fire, electric shocks, injury, water leakage, noise and/or vibration may result. Before starting to install the air conditioner, read carefully through the Installation Manual, and follow its instructions to install the air conditioner.
  • Page 14: Declaration Of Conformity

    Declaration of Conformity Manufacturer: TOSHIBA CARRIER (THAILAND) CO., LTD. 144 / 9 Moo 5, Bangkadi Industrial Park, Tivanon Road, Tambol Bangkadi, Amphur Muang, Pathumthani 12000, Thailand TCF holder: TOSHIBA CARRIER EUROPE S.A.S Route de Thil 01122 Montluel Cedex France Hereby declares that the machinery described below:...
  • Page 15: Specifications

    Specifications Sound power level (dBA) Model Weight (kg) Cooling Heating MMY-MAP0806FT8P-E MMY-MAP0806FT8JP-E MMY-MAP0806FT8P-TR MMY-MAP0806FT8JPTR MMY-MAP1006FT8P-E MMY-MAP1006FT8JP-E MMY-MAP1006FT8P-TR MMY-MAP1006FT8JPTR MMY-MAP1206FT8P-E MMY-MAP1206FT8JP-E MMY-MAP1206FT8P-TR MMY-MAP1206FT8JPTR MMY-MAP1406FT8P-E MMY-MAP1406FT8JP-E MMY-MAP1406FT8P-TR MMY-MAP1406FT8JPTR MMY-MAP1606FT8P-E MMY-MAP1606FT8JP-E MMY-MAP1606FT8P-TR MMY-MAP1606FT8JPTR MMY-MAP1806FT8P-E MMY-MAP1806FT8JP-E MMY-MAP1806FT8P-TR MMY-MAP1806FT8JPTR MMY-MAP2006FT8P-E MMY-MAP2006FT8JP-E MMY-MAP2006FT8P-TR MMY-MAP2006FT8JPTR − 14 −...
  • Page 16 Specifications Sound power level (dBA) Model Weight (kg) Cooling Heating MMY-MAP0806FT8P MMY-MAP0806FT8JP MMY-MAP0806FT7P MMY-MAP0806FT7JP MMY-MAP0806FT8P-A MMY-MAP1006FT8P MMY-MAP1006FT8JP MMY-MAP1006FT7P MMY-MAP1006FT7JP MMY-MAP1006FT8P-A MMY-MAP1206FT8P MMY-MAP1206FT8JP MMY-MAP1206FT7P MMY-MAP1206FT7JP MMY-MAP1206FT8P-A MMY-MAP1406FT8P MMY-MAP1406FT8JP MMY-MAP1406FT7P MMY-MAP1406FT7JP MMY-MAP1406FT8P-A MMY-MAP1606FT8P MMY-MAP1606FT8JP MMY-MAP1606FT7P MMY-MAP1606FT7JP MMY-MAP1606FT8P-A MMY-MAP1806FT8P MMY-MAP1806FT8JP MMY-MAP1806FT7P MMY-MAP1806FT7JP MMY-MAP1806FT8P-A MMY-MAP2006FT8P MMY-MAP2006FT8JP MMY-MAP2006FT7P...
  • Page 17: Carrying In The Outdoor Unit

    CARRYING IN THE OUTDOOR UNIT CAUTION Handle the outdoor unit carefully, observing the following items. • When using a forklift or other machinery for loading/unloading in transportation, insert the fork of the forklift into the rectangular holes for handling as shown below. •...
  • Page 18 MULTI PORT FS UNIT INSTALLATION SPACE /PE2 R /PE2 • − 17 −...
  • Page 19 Weight center Outdoor unit Anchor bolt position Anchor bolt position Anchor bolt position 1310 (Unit : mm) Model type X (mm) Y (mm) Z (mm) MMY-MAP0806*T**P* MMY-MAP1006*T**P* MMY-MAP1206*T**P* MMY-MAP1406*T**P* MMY-MAP1606*T**P* MMY-MAP1806*T**P* MMY-MAP2006*T**P* − 18 −...
  • Page 20 Multi port FS unit (Unit external dimension) (Hanging bolt pitch) A (mm) B (mm) X (mm) Y (mm) Z (mm) Weight (kg) RBM-Y1801*** F4PE/F4PE2 1,050 1,122 F6PE/F6PE2 − 19 −...
  • Page 21 SELECTION OF PIPE SIZE Coupling size of brazed pipe Connected section External size Internal size (Unit: mm) Connected section External size Internal size Standard outer dia. Min. depth of Min. thickness of connected Standard outer dia. insertion of coupling Oval value copper pipe (Allowable difference) 6.35...
  • Page 22: Adding Refrigerant

    Adding refrigerant After finishing vacuuming, exchange the vacuum pump with a refrigerant canister and start additional charging of refrigerant. Calculation of additional refrigerant charge amount Refrigerant charge amount at shipment from the factory does not include the refrigerant for pipes at the local site. For refrigerant to be charged in pipes at the local site, calculate the amount and charge it additionally.
  • Page 23 Table 2 Combination of outdoor unit Model name of Corrective of Equivalent MMY- outdoor unit refrigerant MMY- (kg) Unit 1 Unit 2 Unit 3 MAP0806* MAP0806* 10HP MAP1006* MAP1006* 12HP MAP1206* MAP1206* 14HP MAP1406* MAP1406* 16HP MAP1606* MAP1606* 18HP MAP1806* MAP1806* 20HP MAP2006*...
  • Page 24: Refrigerant (R410A)

    Refrigerant (R410A) This air conditioner adopts a HFC type refrigerant (R410A) which does not deplete the ozone layer. 1. Safety Caution Concerned to refrigerant (R410A) The pressure of R410A is high 1.6 times of that of the former refrigerant (R22). Accompanied with change of refrigerant, the refrigerating oil has been also changed.
  • Page 25 4. Tools (1) Required Tools for R410A Mixing of different types of oil may cause a trouble such as generation of sludge, clogging of capillary, etc. Accordingly, the tools to be used are classified into the following three types. 1) Tools exclusive for R410A (Those which cannot be used for conventional refrigerant (R22)) 2) Tools exclusive for R410A, but can be also used for conventional refrigerant (R22) 3) Tools commonly used for R410A and for conventional refrigerant (R22) The table below shows the tools exclusive for R410A and their interchangeability.
  • Page 26: Wiring Diagrams

    Wiring Diagrams 1-1. Outdoor Unit Models: MMY-MAP0806 * and MAP1006 * − 25 −...
  • Page 27 Models: MMY-MAP1206 * and MAP1406 * − 26 −...
  • Page 28 Models: MMY-MAP1606 ∗ , MAP1806 ∗ , and MAP2006 ∗ − 27 −...
  • Page 29 Models: MMY-MAP0806FT8P-A and MAP1006FT8P-A − 28 −...
  • Page 30 Models: MMY-MAP1206FT8P-A and MAP1406FT8P-A − 29 −...
  • Page 31 Models: MMY-MAP1606FT8P-A, MAP1806FT8P-A and MAP2006FT8P-A − 30 −...
  • Page 32: Single Port Fs Unit

    1-2. Single port FS Unit RBM-Y1123FE/FE2, RBM-Y1803FE/FE2 − 31 −...
  • Page 33 RBM-Y2803FE/FE2 − 32 −...
  • Page 34: Multi Port Fs Unit

    Multi port FS unit /PE2 /PE2 − 33 −...
  • Page 35: Parts Rating

    Parts Rating 2-1. Outdoor Unit (50Hz model: MMY-MAP***6FT8*P∗ ) Name Model Specification ○ Compressor RA421A3TB-20MD Output:2.1kW x2 ○ Compressor RA421A3TB-20MD Output:3.1kW x2 ○ Compressor RA641A3TB-20M Output:3.9kW x2 ○ Compressor RA641A3TB-20M Output:4.8kW x2 ○ Compressor RA641A3TB-20M Output:5.8kW x2 ○ Compressor RA641A3TB-20M Output:6.5kW x2 ○...
  • Page 36: Outdoor Unit (60Hz Model: Mmy-Map***6Ft7*P)

    2-2. Outdoor Unit (60Hz model: MMY-MAP *** 6FT7 * P) Name Model Specification ○ Compressor RA421A3TB-20MD Output:2.1kW x2 ○ Compressor RA421A3TB-20MD Output:3.1kW x2 ○ Compressor RA641A3TB-20M Output:3.9kW x2 ○ Compressor RA641A3TB-20M Output:4.8kW x2 ○ Compressor RA641A3TB-20M Output:5.8kW x2 ○ Compressor RA641A3TB-20M Output:6.5kW x2 ○...
  • Page 37: Outdoor Inverter (50/60Hz Model: Mmy-Map***6Ft8/7*P*)

    2-3. Outdoor Inverter (50/60Hz model: MMY-MAP *** 6FT8/7*P*)∗ Name Model Specification Power supply terminal block JXO-6004 AC600V/75A,4P ○ ○ ○ ○ ○ ○ ○ Relay terminal block for reactor JXO-3004 AC600V/30A,4P ○ ○ ○ ○ ○ Communication terminal block JXO-B2J AC30V(or no more than DC42V)/1A,8P ○...
  • Page 38: Multi Port Fs Unit (50/60Hz Model: Rbm-Y1801F4Pe/Pe2, Rbm-Y1801F6Pe/Pe2)

    2-4. Multi port FS Unit (Model: RBM-Y1801F4PE/PE2 , RBM-Y1801F6PE/PE2) RBM-Y1801 Parts Name Model Specification F4PE F6PE ○ ○ ○ ○ SVSS 2-way valve coil VPV-MOAJ510B0 AC220-240V 50Hz ○ ○ ○ ○ SVDD ○ ○ - 2-way valve VPV-1204DQ55 ○ ○ ○...
  • Page 39: Parts Layout In Outdoor Unit

    2-5. Parts Layout in Outdoor Unit 8, 10HP ∗ ∗ Model: MMY-MAP0806 , MAP1006 − 38 −...
  • Page 40 12, 14HP ∗ ∗ , MAP1406 Model: MMY-MAP1206 − 39 −...
  • Page 41 16, 18, 20HP ∗ ∗ ∗ Model: MMY-MAP1606 , MAP1806 , MAP2006 − 40 −...
  • Page 42: Parts Layout In Inverter Assembly

    2-6. Parts Layout in Inverter Assembly Outdoor Unit (8, 10HP) ∗ ∗ Model: MMY-MAP0806 , MAP1006 Inverter P.C. board for fan Interface P.C. board [FAN IPDU] [Outdoor control P.C. board] (MCC-1659) (MCC-1673) Noise Filter P.C. board (MCC-1608) Power supply terminal block Relay connector for central control...
  • Page 43 Outdoor Unit (12, 14HP) ∗ ∗ Model: MMY-MAP1206 , MAP1406 Inverter P.C. board for fan Interface P.C. board [FAN IPDU] [Outdoor control P.C. board] (MCC-1659) (MCC-1673) Noise Filter P.C. board (MCC-1608) Power supply terminal block Relay connector for central control Communication terminal block Thermistor...
  • Page 44 Outdoor Unit (16, 18, 20HP) ∗ ∗ ∗ Model: MMY-MAP1606 , MAP1806 , MAP2006 Inverter P.C. board for fan 1 Interface P.C. board Noise Filter [FAN IPDU] [Outdoor control P.C. board] P.C. board (MCC-1659) (MCC-1673) (MCC-1608) Power supply terminal block Relay connector for central control...
  • Page 45: Outdoor (Inverter) Print Circuit Board

    2-7. Outdoor (Inverter) Print Circuit Board 2-7-1. Interface P.C. board (MCC-1673) Sensor input PMV1 output PMV4output TO CN507 CN300 CN303 TD2 CN503 TK2 CN532 TK5 CN535 TE2 CN521 TS2 CN506 Option input/output TD1 CN502 TK1 CN531 TK4 CN534 TE1 CN520 TS1 CN505 CN511 CN508 CN510 CN513 TL1 CN523 CN514 CN509 CN512...
  • Page 46: Inverter P.c. Board For Compressor (Mcc-1660) A3-Ipdu

    2-7-2. Inverter P.C. board for compressor (MCC-1660) A3-IPDU Power supply Reactor connecting Power supply terminal input L3 output to FAN CN03 CN09 CN21 Power supply input L2 CN02 Power supply input L1 CN01 Power supply output to FAN CN23 Reactor connecting terminal CN10 Compressor...
  • Page 47: Inverter P.c. Board For Compressor (Mcc-1669) A3-Ipdu

    2-7-3. Inverter P.C. board for compressor (MCC-1669) A3-IPDU Power supply Reactor connecting Power supply input L3 terminal output to FAN CN03 CN09 CN21 Power supply input L2 CN02 Power supply input L1 CN01 Compressor output W-phase CN201 Compressor output V-phase CN202 Reactor connecting terminal...
  • Page 48: Inverter P.c. Board For Fan Motor (Mcc-1659) Fan-Ipdu

    2-7-4. Inverter P.C. board for fan motor (MCC-1659) FAN-IPDU UART communication UART communication For inverter between interfaces between A3-IPDU address setting SW800 CN851 CN852 Power supply Input from A3-IPDU CN12 Fan motor Output U-phase CN303 Fan motor Output V-phase CN302 Fan motor Output W-phase CN301...
  • Page 49: Noise Filer Pc Board (Mcc-1608 -A, -B)

    2-7-5. Noise Filter PC board (MCC-1608 -A, -B) Power supply Power supply Power supply Power supply Power supply Power supply input L1 input L2 input L3 output to I/F output to FAN output to FAN CN31 CN32 CN33 CN22 CN24 CN23 MCC-1608-B MCC-1608-A...
  • Page 50: Refrigerant Piping Systematic Drawing

    Refrigerant Piping Systematic Drawing Outdoor Unit (8, 10HP) Model: MMY-MAP0806*-E/TR, MMY-MAP1006*-E/TR Fan motor (SV52) Right side (TO) Main heat exchanger Right side Sub heat exchanger (PMV1) (PMV4) Left side Main heat exchanger (TE1) (TE2) Left side Sub heat exchanger (SV11) 4-way valve (SV5)...
  • Page 51 Outdoor Unit (12, 14HP) Model: MMY-MAP1206*-E/TR, MMY-MAP1406*-E/TR Fan motor (SV52) Right side (TO) Main heat exchanger Right side Sub heat exchanger (PMV1) (PMV4) Left side Main heat exchanger (TE1) Left side Sub heat exchanger (TE2) 4-way (SV11) valve (SV5) (TS1) Low-pressure sensor (TL1)
  • Page 52 Outdoor Unit (16, 18, 20HP) Model: MMY-MAP1606*-E/TR, MMY-MAP1806*-E/TR, MMY-MAP2006*-E/TR (SV52) Fan motor Fan motor Right side Main heat exchanger (TO) Right side Sub heat exchanger 2 (PMV1) Right side Sub heat exchanger 1 (SV12) Left side Main heat exchanger (TE1) (PMV4) Left side Sub heat exchanger 2 (TE2)
  • Page 53 Outdoor Unit (8, 10HP) Model: MMY-MAP0806 * , MAP1006 * Fan motor Right side (TO) Main heat exchanger Right side Sub heat exchanger (PMV1) (PMV4) Left side Main heat exchanger (TE1) (TE2) Left side Sub heat exchanger (SV11) 4-way valve (SV5)...
  • Page 54 Outdoor Unit (12, 14HP) Model: MMY-MAP1206 * , MAP1406 * Fan motor Right side (TO) Main heat exchanger Right side Sub heat exchanger (PMV1) (PMV4) Left side Main heat exchanger (TE1) Left side Sub heat exchanger (TE2) 4-way (SV11) valve (SV5)...
  • Page 55 Outdoor Unit (16, 18, 20HP) Model: MMY-MAP1606 * , MAP1806*, MAP2006 * Fan motor Fan motor Right side Main heat exchanger (TO) Right side Sub heat exchanger 2 Right side Sub heat exchanger 1 (PMV1) (SV12) Left side Main heat exchanger (TE1) (PMV4) Left side Sub heat exchanger 2...
  • Page 56 Configuration of outdoor unit heat exchanger ○ ○ ○ ○ ○ ○ ○ ○ ○ ○ ○ ○ ○ ○ ○ ○ ○ ○ ○ ○ ○ ○ ○ ○ ○ ○ ○ ○ ○ ○ ○ ○ ○ ○ ○...
  • Page 57 Flow Selector unit Single port FS unit RBM-Y1123FE/FE2 RBM-Y1803FE/FE2 Suction Suction Liquid Discharge Liquid Discharge gas pipe gas pipe pipe gas pipe gas pipe pipe Check valve Check valve Strainer Strainer Strainer Strainer Capillary Capillary Capillary Capillary Capillary Capillary Check Check (SVS) (SVS)
  • Page 58 Indoor Unit Liquid Gas side side Strainer Capillary tube Heat exchanger at indoor side Pulse Motor Valve (PMV) Sensor (TCJ) Sensor (TC2) Sensor (TC1) Sensor Fan motor (TA) CAUTION MMU-AP007YH, AP012YH type air conditioners have no TC2 sensor. Explanation of functional parts in indoor unit Pulse Motor Valve (Connector CN082 (6P): Blue) 1) Controls super heat in cooling operation...
  • Page 59: Combined Refrigerant Piping System Schematic Diagrams

    Combined Refrigerant Piping System Schematic Diagrams 4-1. Single Cooling mode (Operation of cooling only) when outside temperature is high (Standard: 10°C or higher) / Defrost mode Outdoor header unit (MMY-MAP1806FT*) Outdoor follower unit (MMY-MAP1406FT*) Fan motor Fan motor SV52 Fan motor SV52 Right side Right side...
  • Page 60: (Standard: 10°C Or Lower)

    4-2. Single Cooling mode (Operation of cooling only) when outside temperature is low (Standard: 10°C or lower) Outdoor header unit (MMY-MAP1806FT*) Outdoor follower unit (MMY-MAP1406FT*) Fan motor Fan motor SV52 Fan motor SV52 Right side Right side Main heat exchanger Main heat exchanger Right side sub heat exchanger Right side sub heat exchanger 2...
  • Page 61: Single Heating Mode (Operation Of Heating Only)

    4-3. Single Heating mode (Operation of heating only) Outdoor header unit (MMY-MAP1806FT*) Outdoor follower unit (MMY-MAP1406FT*) Fan motor Fan motor SV52 Fan motor SV52 Right side Right side Main heat exchanger Main heat exchanger Right side sub heat exchanger Right side sub heat exchanger 2 PMV1 PMV1 Right side sub heat exchanger 1...
  • Page 62: Hot Gas Defrost Mode (Operation Of Single Heating Only)

    4-4. Hot gas defrost mode (Operation of single heating only) Outdoor hrader unit (MMY-MAP1806FT*) Outdoor follower unit (MMY-MAP1406FT*) Fan motor Fan motor SV52 Fan motor SV52 Right side Right side Main heat exchanger Main heat exchanger Right side sub heat exchanger Right side sub heat exchanger 2 PMV1 PMV1...
  • Page 63: Collective Cooling Mode

    4-5. Collective cooling mode (Operating cooling function mainly, collective operation of cooling and heating operation) Outdoor header unit (MMY-MAP1806FT*) Outdoor follower unit (MMY-MAP1406FT*) SV52 Fan motor Fan motor Fan motor SV52 Right side Right side Main heat exchanger Main heat exchanger Right side sub heat exchanger Right side sub heat exchanger 2 PMV1...
  • Page 64: Collective Heating Mode

    4-6. Collective heating mode (Operating heating function mainly, collective operation of cooling and heating operation) Outdoor header unit (MMY-MAP1806FT*) Outdoor follower unit (MMY-MAP1406FT*) SV52 Fan motor Fan motor Fan motor SV52 Right side Right side Main heat exchanger Main heat exchanger Right side sub heat exchanger Right side sub heat exchanger 2 PMV1...
  • Page 65: Emergency Operation (Single Cooling Operation At Backup Of The Header Unit)

    4-7. Emergency operation (Single cooling operation at backup of the header unit) Outdoor header unit (MMY-MAP1806FT*) Out door follower unit (MMY-MAP1406FT*) Temporal set center unit in Trouble When PMV leaked, service emergency operation valve at liquid side = Close fully SV52 Fan motor Fan motor...
  • Page 66: Emergency Operation (Single Heating Operation At Backup Of The Header Unit)

    4-8. Emergency operation (Single heating operation at backup of the header unit) Outdoor header unit (MMY-MAP1806FT*) Outdoor follower unit (MMY-MAP1406FT*) Trouble Temporal set center unit in When PMV leaked, service emergency operation valve at liquid side = Close fully SV52 Fan motor Fan motor SV52...
  • Page 67: Refrigerant Recovery (During Pump-Down Operation) Of The Troubled Outdoor Unit

    4-9. Refrigerant recovery (during pump-down operation) of the troubled outdoor unit) (In case of trouble of follower unit) Outdoor header unit (MMY-MAP1806FT*) Outdoor follower unit (MMY-MAP1406FT*) Trouble Fan motor Fan motor SV52 Fan motor SV52 Right side Right side Main heat exchanger Main heat exchanger Right side sub heat exchanger Right side sub heat exchanger 2...
  • Page 68: Control Outline

    5. CONTROL OUTLINE 5-1. Indoor Unit Control Specifications Item Specification outline Remarks Upon power 1. Identification of outdoor unit supply reset When the power supply is reset, the outdoor unit is identified, and control is redirected according to the identification result. 2.
  • Page 69 Item Specification outline Remarks Automatic 1. The outdoor unit determines the operational capacities of indoor units according to TS: Temperature capacity the difference between TA and TS. setting control TA: Room Cooling Heating temperature (°C) (°C) Fan speed 1. The fan operates in one of the four speed modes of “HIGH (HH)”, “MED (H)”, “LOW HH >...
  • Page 70 Item Specification outline Remarks Cold air 1. In heating operation, the upper limit of the fan tap is set according to the lower of TCJ: Indoor heat discharge whichever is the higher between TC2 sensor and TCJ sensor temperatures, on the exchanger sensor prevention one hand, and TC1 sensor temperature, on the other.
  • Page 71 Item Specification outline Remarks Cooling oil While the outdoor unit is recovering cooling oil (refrigerant), the indoor units perform • Recovery operation (refrigerant) the following control tasks: normally takes recovery place roughly every [common for operational (cooling thermostat ON / thermostat OFF / FAN), as well control 2 hours.
  • Page 72 Item Specification outline Remarks 14 Filter sign 1. The indoor fan’s cumulative hours of operation are counted, and when these “FILTER ” displayed display exceed the prescribed value (150H/2500H), a filter replacement signal is sent to (not applicable the remote controller to display a filter sign on it. to wireless type) 2.
  • Page 73 Item Specification outline Remarks 17 Louver control 1. Louver position setting • When the louver position is changed, the louver turns all the way down before settling in the set position. • Louver position is adjustable in the range shown in the diagrams below. During cooling/drying During heating/fan-only operation •...
  • Page 74: Outdoor Unit

    5-2. Outdoor Unit Item Description of operation, numerical data, and other information Remarks 1. Pulse 1. PMV1 control (PMV1) motor valve 1) During air conditioner operation, the pulse count of a PMV1 (pulse motor valve 1) (PMV) During air conditioner operation. is controlled between 100pls and 3000pls.
  • Page 75 Item Description of operation, numerical data, and other information Remarks 2. Outdoor 1. Cooling fan control fan control 1) Outdoor fan speed (mode) is controlled on the basis of measurements provided by the PD pressure sensor. 2) For a specified period after the start of cooling operation, the header outdoor unit controls outdoor fan speed (mode) on the basis of measurements provided by the PD pressure sensor.
  • Page 76 Item Description of operation, numerical data, and other information Remarks 4. Oil level 1) Judgment as to whether an optimum amount of oil is present in the compressor • Oil level detection takes place regardless of the detection cases is made on the basis of the temperature readings of sensors TK1 to TK5. number of compressors, control This control function is performed by the header unit and each follower unit...
  • Page 77 Item Description of operation, numerical data, and other information Remarks 5. Oil This control function is aimed at preventing compressors from running out of oil by equation evening out the oil supply to outdoor units, and is basically performed by opening/ control closing solenoid valves SV3A, SV3B, SV3C, SV3D.
  • Page 78 Item Description of operation, numerical data, and other information Remarks 7. Defrosting 1. Defrosting commencement conditions • Frost formation temperature is -1.5 °C. control • During heating operation, the cumulative duration of operation in which TE1 and • If the outdoor units are a (reverse TE2 sensor temperature falls below frost formation temperature is measured, and combination of different...
  • Page 79 Item Description of operation, numerical data, and other information Remarks 9. Release 1. SV2 gas balance control valve control This control function is aimed at achieving gas balance by opening SV2 while compressors are turned off so as to reduce their startup load the next time they are turned on.
  • Page 80 Item Description of operation, numerical data, and other information Remarks 9. Release SV41, 42 low pressure release control valve control This control function is aimed at providing low pressure protection, and is individually (cont’d) performed by the header unit and each follower unit. The control takes place during defrost operation, heating startup pattern control operation, and cooling operation.
  • Page 81 Item Description of operation, numerical data, and other information Remarks 12. A3-IPDU IPDU controls inverter compressors by issuing commands relating to compressor control speeds, speed increases/decreases, and current release control values via the interface P.C. board. The main control functions of the IPDU P.C. board are described below. 1.
  • Page 82 <Other points to note> Cooling operation under low outside temperature conditions 1) If pressure falls to extremely low levels, indoor units may be shut down via freeze prevention control based on the indoor TC sensor. 2) If pressure falls to extremely low levels, frequency may be reduced via cooling capacity control. 3) When the discharge temperature sensor reading falls below 60°C, the frequency may be increased above the level called for by the command received from the indoor unit.
  • Page 83: Applied Control For Outdoor Unit

    Applied control for Outdoor Unit 6-1. Applied Control for Outdoor Unit The outdoor fan high static pressure support and priority operation mode setting (cooling / heating / number of units / or priority indoor unit) functions are available by setting relevant switches provided on the interface P.C. board of the outdoor unit.
  • Page 84: Priority Operation Mode Setting

    6-1-2. Priority Operation Mode Setting Purpose/characteristics This function allows switching between priority cooling and priority heating. Four patterns of priority operation mode setting are available as shown in the table below. Select a suitable priority mode according to the needs of the customer. Setup CAUTION In the case of the priority indoor unit mode, it is necessary to set up the specific indoor unit chosen for priority operation...
  • Page 85 (2) Indoor unit setup method for priority indoor unit mode The setting can be changed only when the system is at rest. (Be sure to turn off the system prior to this operation.) Push the buttons simultaneously and hold for at least 4 seconds.
  • Page 86: Applied Control Of Outdoor Unit

    6-2. Applied Control of Outdoor Unit Optional control P.C. boards provide access to a range of functions as listed below. Outdoor unit Control P.C. board to be used Outdoor unit interface P.C. board setting* for control Function Jumper to be P.C.
  • Page 87: Power Peak-Cut Control (Standard)

    6-2-1. Power peak-cut Control (Standard) Model name : TCB-PCDM4E (1) Four-core cable support L1: Display lamp ensuring power peak cut control Header outdoor unit Locally procured Optional PCB Power supply Display Outdoor unit relay interface PCB [OPERATION] Shield wire PJ17 CN513 SW07 [ON]...
  • Page 88: Power Peak-Cut Control (Extended)

    <SW07 Bit 2 OFF (two-step control)> Power peak-cut control is enabled as long as SW1, as shown on the wiring diagram, is ON (continuously). Jumper wire Input 100% (normal operation) 100% (normal operation) 0% (forced stop) Approx. 60% (upper limit regulated) Note 1: Specifications of display relay contact •...
  • Page 89: Snowfall Fan Control

    6-2-3. Snowfall Fan Control Model name : TCB-PCMO4E Header outdoor unit Locally procured Connection Outdoor unit Optional PCB cable Snowfall sensor interface PCB COOL HEAT Shield wire SW1: Snowfall detection switch (snowfall sensor) Operation An external snowfall signal turns on the outdoor unit fan. Terminal Input signal Operation...
  • Page 90: Night Operation (Sound Reduction) Control

    6-2-5. Night operation (sound reduction) Control Model name : TCB-PCMO4E Header outdoor unit Locally procured Connection Optional PCB Outdoor unit cable interface PCB COOL HEAT Shield wire SW1: Night time signal switch Operation This function decreases noise at night or other times as necessary. Terminal Input signal Operation...
  • Page 91: Operation Mode Selection Control

    6-2-6. Operation Mode Selection Control Model name : TCB-PCMO4E Header outdoor unit Locally procured Connection Outdoor unit Optional PCB cable interface PCB COOL HEAT Shield wire SW1: Cooling mode specified input switch SW2: Heating mode specified input switch NOTE SW1: COOL mode selection switch SW2: HEAT mode selection switch Input signal Operation...
  • Page 92: Trouble/Operation Output

    6-2-7. Trouble/Operation Output Model name : TCB-PCIN4E Locally procured Header outdoor unit (See “NOTE”) Optional PCB Outdoor unit interface PCB OUTPUT1 SW16 CN511 PJ20 OUTPUT2 1 2 3 4 Shield OUTPUT3 wire Operation In-operation output: An in-operation indication signal is output as long as at least one indoor unit is in operation in the line.
  • Page 93: Compressor Operation Output

    6-2-8. Compressor Operation Output Model name : TCB-PCIN4E Locally procured Outdoor unit (See “NOTE”) Optional PCB Outdoor unit interface PCB CTR1 OUTPUT1 SW16 CTR2 CN514 PJ20 OUTPUT2 1 2 3 4 Shield wire Operation When a compressor is in operation, a relay connected to the output terminal assigned to it is turned on (closed). When it is at rest, the relay is turned off (open).
  • Page 94: Operating Rate Output

    6-2-9. Operating Rate Output Model name : TCB-PCIN4E Locally procured Header outdoor unit (See “NOTE”) Optional PCB Outdoor unit interface PCB OUTPUT1 SW16 PJ20 MONITOR CN514 OUTPUT2 1 2 3 4 OUTPUT3 Shield wire Operation At the output terminals, a signal is present (relay closed) or absent (relay open) in various combinations according to the system operation factor, as shown in the diagram.
  • Page 95: Test Operation

    TEST OPERATION 7-1. Procedure and Summary of Test Operation A test operation is executed with the following procedure. When a problem occurs at any step, remove the causes of the problem referring to “8 TROUBLESHOOTING.” Check basic items, mainly the installation work. Checks before test operation Be sure to enter the check results in checklist 1 and 2.
  • Page 96: Check Items Before Test Operation (Before Powering-On)

    7-2. Check Items before Test Operation (before powering-on) Prior to the test operation, check the following items to verify there are no problems with the installation work. Main check items for electric wiring The communication system differs from that of R22 or R407 refrigerant “Modular Multi System” air conditioners. Check wiring points again carefully.
  • Page 97 (2) In the case that a central control system is connected (before address setup) (1) (4) Central remote controller To other refrigerant line Other refrigerant line o l l o l l Outdoor unit To indoor unit Indoor unit Remote Remote Remote controller...
  • Page 98 Checklist 1 • Using Checklist 1, check that there are no problems with the installation work. Is the capacity of the Outdoor total capacity Header unit (A) Indoor unit circuit breaker (Earth Follower unit (B) leakage breaker) Follower unit (C) appropriate? Is the gauge of the Header unit (A)
  • Page 99 Checklist 2 • Check the additional amount of refrigerant. Calculate the additional amount of refrigerant from the additional amount of refrigerant (A) by the pipe diameter on the liquid side, the pipe length to be connected, and the corrective amount of refrigerant (C) according to system horsepower.
  • Page 100: Check At Main Power-On

    7-3. Check at Main Power-on After turning on the main power of the indoor units and outdoor unit in the refrigerant line to conduct a test operation, check the following items in each outdoor and indoor unit. (After turning on the main power, be sure to check in order: indoor unit outdoor unit.) <Check on the outdoor unit>...
  • Page 101: Address Setup

    7-4. Address Setup This product requires address setup before operation. Follow this procedure for address setup. 7-4-1. Precautions (1) Address setup is not performed simply by turning on the power supply. (2) For indoor units, address setup can be done either by manual address setup or by automatic address setup: Automatic address setup: Setup from SW15 on the interface PC board of the header unit Manual address setup: Setup from the wired remote controller.
  • Page 102: Address Setup Procedure

    7-4-3. Address Setup Procedure Central control of 2 or more refrigerant lines: go to Address setting procedure 2 When controlling a single refrigerant line When controlling 2 or more refrigerant lines (Example) centrally centrally Address setting procedure Outdoor Central Central Central Outdoor Outdoor...
  • Page 103 (Example) Controlling 2 or more refrigerant lines as a group Outdoor Outdoor System wiring Indoor Indoor Indoor Indoor diagram (Group control) Remote controller (Note: The group control of more than two refrigerant systems is possible only when all the FS units are single port type.) Address setting procedure 2 Set a system address for each system using SW 13 and 14 on the interface P.C.
  • Page 104 Be sure to disconnect the relay connectors between the [U1U2] and [U3U4] terminals on all the header outdoor units that will be connected to the central control. (Factory default: disconnected) Turn on indoor units first, and then turn on outdoor units. About 1 minute after turning the power on, confirm that the 7-segment display on the interface U.
  • Page 105 Set the central control address. (For the setting of the central control address, refer to the installation manuals of the central control devices.) Header unit interface P.C. board SW15 SW04 SW05 4, 6 7-segment D600 D601 D602 D603 D604 display SW13 SW14 SW01 SW02 SW03...
  • Page 106 Switch setting (setting example when controlling 2 or more refrigerant lines centrally) Outdoor units (setting manually) *The items in bold font must be set manually. Outdoor unit’s interface Header unit Follower unit Header unit Follower unit Header unit Factory default P.C.
  • Page 107 Manual address setup from the remote controller With indoor wiring work completed and outdoor wiring work not done—in cases where indoor unit addresses are decided in advance from the wired remote controller, or in cases where addresses are change after address setup. (Wiring example for 2 refrigerant lines) Arrange one indoor unit and one remote controller (Note: The group control of more than two refrigerant...
  • Page 108 NOTE (1) When setting the line address from the remote controller, do not use addresses 29 and 30. Addresses 29 and 30 cannot be set up on the outdoor unit. If they are incorrectly used, the code “E04” (indoor/outdoor communication circuit trouble) is output. (2) When manual address setup has been done from a remote controller, and central control over refrigerant lines is to be done, setup the header unit of each line as follows: •...
  • Page 109 To find an indoor unit’s position from its address When checking unit numbers controlled as a group CODE No. DATA SETTING UNIT No. R.C. TEMP. ON / OFF TIMER SET TIME FILTER Stop RESET TEST SET CL (Execute it while the units are stopped.) The indoor unit numbers in a group are indicated one after another.
  • Page 110 Push and hold the TIME buttons at the same time for more than 4 seconds. At first, the line 1 and CODE No. (Address Change) are indicated on the LCD display. (Select an outdoor unit.) UNIT LOUVER SWING/FIX Push the (left side of the button) and buttons repeatedly to select a system address.
  • Page 111 Push the TIME buttons repeatedly to change the value indicated in the SET DATA section to that you want. Push the button. UNIT LOUVER Push the button (left side of the button) repeatedly to select another indoor UNIT No. to change.
  • Page 112 Push the button. • The address of one of the indoor units connected to the selected refrigerant line is indicated on the LCD display and the fan and louvers of the unit are activated. SET DATA At first, the current indoor unit address is displayed in (No system address is indicated.) CODE No.
  • Page 113 2) Turn on DIP switch 2 of SW30 on the interface P.C. board of the header outdoor unit if the switch is OFF. (Leave it as it is if it has already been set to ON.) Central remote controller Header Header Header Follower unit...
  • Page 114 In the case of an increase in address-undefined indoor units (extension, etc.) To set up the indoor address of a unit with an address that is undefined due to the extension of indoor units or replacement of PC board, etc., follow the methods below. Method 1 Set up an address individually from a wired remote controller.
  • Page 115: Check After Address Setup When Central Control System Is Connected

    7-4-4. Check after Address Setup when Central Control System Is Connected When the central control system is connected, check that the following setup has finished after address setup. Central remote controller To other refrigerant line Line address = 2 Line address = 1 Other refrigerant line Follower unit (B) Follower unit (C)
  • Page 116: Setting When Connecting Multiple Indoor Units To A Fs (Flow Selector) Unit

    7-4-5. Setting when connecting multiple indoor undoor units to a FS (Flow Selector) unit ¿ Cautions to connection of indoor ¿ How to set up CODE No. [ 0E ] unit It is necessary to set up in case of the group connection.
  • Page 117 q In case of FE/FD without setting q In case of FE/FD with setting Single port type FS unit Single port type FS unit Piping Piping Indoor unit Indoor unit Control wiring Control wiring Remote controller between indoor between indoor Remote controller unit and FS unit unit and FS unit...
  • Page 118: How To Set Up The Cooling Only Indoor Unit

    7-4-6. How to set up the cooling only indoor unit When setting the specific indoor unit to Cooling Only Select an indoor unit of which setting is to be unit without connecting to the flow selector unit, setup changed. to the indoor unit to become the Cooling Only unit is CODE No.
  • Page 119: Troubleshooting In Test Operation

    7-5. Troubleshooting in Test Operation If there are phenomena such as the output of a check code or the remote controller is not accepted when powered- on after wiring work or during address setup operation, the following causes are considered. 7-5-1.
  • Page 120: Operation From The Indoor Remote Controller Is Not Accepted, And A Check Code Is Displayed On The 7-Segment Display Of The Interface Pc Board Of The Header Unit

    7-5-2. Operation from the indoor remote controller is not accepted, and a check code is displayed on the 7-segment display of the interface PC board of the header unit. Indoor remote Header unit controller 7-segment status display Line addresses and indoor addresses of all the connected Set up addresses.
  • Page 121: In Checking The Number Of Connected Outdoor Units And Connected Indoor Units

    7-5-4. In checking the number of connected outdoor units and connected indoor units after address setup, a lower number of connected units is displayed. (There are outdoor/indoor units that do not operate in a test operation.) Miswiring of communication lines between outdoor units After improvement of wiring, set up the addresses again The number of or an unconnected wire ( Fig.
  • Page 122 Miswiring example Remote Header unit Figure controller 7-segment Miswiring example status display Header unit Header unit U3 U4 U5 U6 Fig. 1 E19-00 response U1 U2 U1 U2 U1 U2 U1 U2 Header unit Follower unit U1 U2 U5 U6 U1 U2 U5 U6 Fig.
  • Page 123: Test Operation Check

    7-6. Test Operation Check 7-6-1. Fan Check START Check code appears When a check code has been Push the Start/Stop button on the remote controller. displayed on the remote controller, remove the cause of the trouble, referring to "Check code and check Check code position displayed on remote appears...
  • Page 124: Single Cooling/Single Heating Test Operation Check

    7-6-2. Cooling/heating Test Operation Check The cooling/heating test operation check can be performed on both the indoor remote controller and the outdoor header unit interface PC board. (1) Test operation start/stop operation Test operation from the indoor remote controller • Wired remote controller: Refer to the items below in “Test operation” of the wired remote controller. •...
  • Page 125 Wireless remote controller Wireless remote controller (4-way Cassette type) (Ceiling type) Test run (Forced cooling operation) Test run (Forced cooling operation) Requirement: Requirement: • Finish the forced cooling operation in a short • Finish the forced cooling operation in a short time because it applies excessive strength to the time because it applies excessive strength to the air conditioner.
  • Page 126 (2) Test operation START Refer to "Test operation procedure" Test operation for one indoor unit of the indoor remote controller. The operation does not start for approximately 3 minutes after Operation starts powering-on or stopping operation. Note: After powering-on, it may require up to 10 minutes to start the operation due to the initial communications of the system.
  • Page 127: Service Support Function

    7-7. Service Support Function 7-7-1. Check Function for Connecting of Refrigerant and Control Lines This function is provided to check misconnection of the refrigerant pipes and the control transmission line (Wiring over lines) between indoor unit and outdoor unit by using the switch on the interface P.C. board of the header unit. However, be sure to check the following items prior to executing this check function.
  • Page 128 Note 1: Criteria for the difference between suction and discharge temperatures (1) Cooling operation After operating for a minimum of 30 minutes in “COOL” mode, if the T dry bulb temperature difference between suction and discharge air of the indoor unit is 8°C or more, it is normal. (2) Heating operation After operating for a minimum of 30 minutes in “HEAT”...
  • Page 129 Operation start (7-segment display) Press the push-switch SW04 on the interface P.C. board of the header unit for 2 seconds or more. The Cooling [ CC ] Operation operation starts. Heating [ HH ] Check that 7-segment display [B] shows [ CC] for cooling and [ HH] for heating.
  • Page 130: Function To Start/Stop (On/Off) Indoor Unit From Outdoor Unit

    7-7-2. Function to Start/Stop (ON/OFF) Indoor Unit from Outdoor Unit The following functions of the indoor unit can start or stop by the switches on the interface P.C. board of the header unit. p/Release 7-segment display Cooling test Changes the mode of all the [Setup] Section A Section B...
  • Page 131 (1) Cooling test operation function This function is provided to change collectively the mode of all the indoor units connected to the same system for the cooling test operation mode, by using switches on the interface board of the header unit. <Operation procedure>...
  • Page 132 (2) Heating test operation function This function is provided to change collectively the mode of all the indoor units connected to the same system for the heating test operation mode, by using switches on the interface board of the header unit. <Operation procedure>...
  • Page 133: Operation Procedure

    (3) Fan test operation function This function is provided to change collectively the mode of all the indoor units connected to the same system for the fan test operation mode by using switches on the interface P.C. board of the header unit. <Operation procedure>...
  • Page 134 (4) Batch start/stop (ON/OFF) function This function is provided to start/stop collectively all the indoor units connected to the same system by using switches on the interface board of the header unit. <Operation procedure> Be sure to turn on power at the indoor side Power ON before power-ON of outdoor unit.
  • Page 135 (5) Individual start/stop (ON/OFF) individual test operation function This function is provided to start/stop (ON/OFF) individually each indoor unit connected to the same system by using switches on the interface board of the header unit. Set SW01 [16] and set SW02, SW03 to indoor address No. (1 to 64) to be started (Refer to the following table*) - only the setup indoor unit starts operation.
  • Page 136: Check Code Clearing Function

    7-7-3. Check code Clearing Function (1)Clearing from the main remote controller Check code clearing in outdoor unit Check code of the outdoor unit currently detected is cleared by the unit of one refrigerant circuit system to which the indoor units operated by the remote controller is connected. (Check code of the indoor unit is not cleared.) For clearing check codes, the service monitor function of the remote controller is used.
  • Page 137 (2)Clearing check code by using switches on the interface board of the header unit Using the switches on the interface P.C. board of the header unit, this function is to clear the currently detected check code for each refrigerant circuit system without resetting the power supply. Check codes in both outdoor and indoor units are once cleared, and check code detection is performed again.
  • Page 138: Remote Controller Distinction Function

    7-7-4. Remote Controller Distinction Function This function is provided to distinguish the remote controller connected to the indoor unit from the outdoor unit for a refrigerant circuit system by using switches on the interface P.C. board of the header unit. <Distinction procedure>...
  • Page 139: Pulse Motor Valve (Pmv) Forced Open/Close Function In Indoor Unit

    7-7-5. Pulse Motor Valve (PMV) Forced Open/Close Function in Indoor Unit This function is provided to open or close forcedly PMV for 2 minutes in all the indoor units by the switch operation on the interface P.C. board of the header unit. This function is also used to open PMV fully when turning off the power and executing an operation.
  • Page 140: Solenoid Valve Forced Open/Close Function In Outdoor Unit

    7-7-7. Solenoid Valve Forced Open/Close Function in Outdoor Unit This function is provided to forcedly open each solenoid valve mounted in the outdoor unit by the switch operation on the interface P.C. board in the outdoor unit. Use this function to check there is no refrigerant clogging with ON/ OFF operation of the solenoid valve.
  • Page 141: Fan Operation Check In Outdoor Unit

    7-7-8. Fan Operation Check in Outdoor Unit This function is provided to check the fan operation of the outdoor unit by using switches on the interface P.C. board in the outdoor unit. The frequency of the fan speed can be controlled by setting of the switches. Use this function to check the operation or abnormal sound in the fan system.
  • Page 142: Abnormal Outdoor Unit Discrimination Method By Fan Operating Function

    7-7-9. Abnormal Outdoor Unit Discrimination Method By Fan Operating Function This function is provided to forcedly operate the fan of the outdoor unit in which a check code occurred or the fan of the normal outdoor unit by the switch operation on the interface P.C. board in the header unit. To specify which one of the follower units connected to the system had problem, use this function for the system stop due to a follower unit problem (Check code [E28]).
  • Page 143: Manual Adjustment Function Of Outside Temperature (To) Sensor

    7-7-10. Manual Adjustment Function of Outside Temperature (TO) Sensor This function is provided to fix TO sensor value manually by the switch operation on the interface P.C. board in the outdoor unit. When the unit stops abnormally due to TO sensor failure, etc, an emergent operation is available by setting up the value manually to position near the current outside temperature.
  • Page 144 <Service support function list> Refrigerant circuit and control communication line check function (Cooling [J . C] operation) Refrigerant circuit and control communication line check function (Heating operation) l l u l l o n i l e l l v i t [F .
  • Page 145: Refrigerant Leakage Detection

    7-7-11. Refrigerant leakage detection The refrigerant leakage can be confirmed by using the switches on Interface PCB of the outdoor unit. If there is a leak, the location must be found in order to recover the refrigerant. After that, implement appropriate countermeasure and refill the refrigerant to its standard volume.
  • Page 146: Monitor Function Of Remote Controller Switch

    7-7-12. Monitor Function of Remote Controller Switch When using a remote controller with the model name RBC-AMT32E, the following monitor functions can be used. Switching to the service monitor mode <Content> The sensor temperature or operation status of the remote controller, indoor unit, or the outdoor unit can be known by switching to the service monitor mode from the remote controller.
  • Page 147 Unit Remote controller display example Room temperature (Use to control) ×1 °C Room temperature (Remote controller) ×1 °C Indoor suction air temperature (TA) × ° l i o × ° [0024]=24°C l i o × ° l i o × °...
  • Page 148: Smms Wave Tool For Smartphone

    NFC TAG DEVICE SMARTPHONE QR code URL:http://www.toshiba-carrier.co.jp/global/appli/smms_wave_tool/ 7-8-1. Prohibition/Permission of the NFC Setting ・This Application enables the functions of the auto-address setup and the test operation of the outdoor unit with Smartphone within 48 hours from the power input to the outdoor unit.
  • Page 149: Confirmation For The Generation Of The Trouble Of The Nfc

    How to set the NFC operation all time permission Follow the below procedure. Rotaly switch Push switch 7-segment display NFC operation Step setting SW01 SW02 SW03 SW04 [ A ] [ B ] (Default setting) After the power input, :below 48 hours [ nF] [ c.00 ] [NFC operation permit] :more than 48 hours...
  • Page 150: Dred (Demand Response Enabling Device)

    7-9. DRED (Demand response enabling device) (MMY-MAP***6FT8P-A) This model supports only DRM1. ■ Safety precautions • Read these “Safety precautions” carefully before installation. • Install in accordance with the wiring rules (AS/NZS 3000). • The precautions described below include important items regarding safety. Observe them without fail.
  • Page 151: Wiring Procedure

    ■ Wiring procedure • Bind securely together the communication wires and the demand connecting wires with the cord clamp to be not affected by external forces. • If the demand connecting wires contain DRED terminal block connections, conf rm to f x it so that DRED terminal block connections comes to the left side from the cord clamp.
  • Page 152: Troubleshooting

    TROUBLESHOOTING 8-1. Overview (1) Before engaging in troubleshooting (a) Applicable models All Super Heat Recovery Multi (SHRM-e) models. (Indoor units: MM*-AP***, Outdoor units: MMY-MAP*** 6* ) (b) Tools and measuring devices required  Screwdrivers (Philips, flat head), spanners, long-nose pliers, nipper, pin to push reset switch, etc. ...
  • Page 153: Troubleshooting Method

    8-2. Troubleshooting Method The remote controllers (main remote controller and central control remote controller) and the interface P.C. board of an outdoor unit are provided with an LCD display (remote controller) or a 7-segment display (outdoor interface P.C. board) to display operational status. Using this self-diagnosis feature, the problem site/problem part may be identified in the event of a problem by following the method described below.
  • Page 154 List of Check Codes (Indoor Unit) (Check code detected by indoor unit) Check code Display of receiving unit Outdoor 7-segment display Indicator light block TCC-LINK central Typical problem site Description of Check code control or main Operation Timer Ready remote controller Flash Sub-code display...
  • Page 155 List of Check Codes (Outdoor Unit) (Check code detected by SHRM-e outdoor interface - typical examples) If "HELLO" is displayed on the oudoor 7-segment for 1 minute or more, turn off the power supply once and then turn on the power IPDU: Intelligent Power Drive Unit (Inverter P.C.
  • Page 156 Check code Display of receiving unit TCC-LINK Outdoor 7-segment display Indicator light block Typical problem site Description of check code central control or main remote Operation Timer Ready Flash controller Sub-code display Outdoor suction 01: TS1 Outdoor suction temperature sensor temperature 03: TS2 (TS1,TS2) has been open/short-circuited.
  • Page 157 Check code Display of receiving unit TCC-LINK Outdoor 7-segment display Indicator light block Typical problem site Description of check code central control or main remote Operation Timer Ready Flash controller Sub-code display A3-IPDU Fan-IPDU A3-IPDU Fan-IPDU ○ ○ ○ ○ ○...
  • Page 158 (Check code detected by IPDU featuring in SHRM-e standard outdoor unit - typical examples) Check code Display of receiving unit TCC-LINK Outdoor 7-segment display Indicator light block Typical problem site Description of check code central control or main remote Operation Timer Ready Flash controller Sub-code...
  • Page 159: Troubleshooting Based On Information Displayed On Remote Controller

    8-3. Troubleshooting Based on Information Displayed on Remote Controller Using main remote controller (RBC-AMT32E) (1) Checking and testing When a problem occurs to an air conditioner, a check code and indoor unit No. are displayed on the display window of the remote controller. Check codes are only displayed while the air conditioner is in operation.
  • Page 160 Using TCC-LINK central remote controller (TCB-SC642TLE2) (1) Checking and testing When a problem occurs to an air conditioner, a Display of Unit No. Display of check code check code and indoor unit No. are displayed UNIT No. on the display window of the remote controller. TEST Check codes are only displayed while the air Alternate blinking...
  • Page 161 Using indoor unit indicators (receiving unit light block) (wireless type) To identify the check code, check the 7-segment display on the header unit. To check for check codes not displayed on the 7-segment display, consult the “List of Check Codes (Indoor Unit)” in “8-2. Troubleshooting Method”.
  • Page 162 Cause of check code Heat exchanger temperature sensor (TCJ) trouble Operation Timer Ready Heat exchanger temperature sensor (TC2) trouble Indoor unit temperature sensor Heat exchanger temperature sensor (TC1) trouble troubles Ambient temperature sensor (TA/TSA) trouble Alternate blinking Discharge temperature sensor (TF) trouble Discharge temperature sensor (TD1) trouble Operation Timer Ready...
  • Page 163 Cause of check code Duplicated FS units FS unit overflow trouble FS unit temperature sensor(TCS) trouble Operation Timer Ready Outdoor EEPROM trouble Synchronized blinking Other (indications not involving check code) Cause of check code Operation Timer Ready – Test run in progress Synchronized blinking Operation Timer Ready...
  • Page 164: Check Codes Displayed On Remote Controller And Shrm-E Outdoor Unit (7-Segment Display On I/F Board) And Locations To Be Checked

    8-4. Check Codes Displayed on Remote Controller and SHRM-e Outdoor Unit (7-Segment Display on I/F Board) and Locations to Be Checked For other types of outdoor units, refer to their own service manuals. Check code Location Check code detection Outdoor 7-segment display Description System status Check items (locations)
  • Page 165 Check code Location Check code detection Outdoor 7-segment display Description System status Check items (locations) Main condition(s) remote detection Check Sub-code controller code More than one indoor unit Duplicated indoor address Indoor Duplicated All stop • Check indoor addresses. unit indoor address are assigned same address.
  • Page 166 Check code Location Check code detection Outdoor 7-segment display Description System status Check items (locations) Main condition(s) remote detection Check Sub-code controller code Indoor Trouble in Stop of Periodic communication • Check remote controller unit communication corresponding between indoor header and wiring.
  • Page 167 Check code Location Check code detection System Outdoor 7-segment display Description Check items (locations) Main condition(s) status remote detection Check Sub-code controller code IPDU All stop Communication is disrupted • Check wiring and A3-IPDU Fan-IPDU A3-IPDU Fan-IPDU communication between IPDUs (P.C. connectors involved in trouble boards) in inverter box.
  • Page 168 Check code Location Check code detection System Outdoor 7-segment display Description Check items (locations) Main status condition(s) remote detection Check Sub-code controller code TO sensor All stop Sensor resistance is infinity • Check connection of TO trouble or zero (open/short circuit). sensor connector.
  • Page 169 Check code Location Check code detection System Outdoor 7-segment display Description Check items (locations) Main status condition(s) remote detection Check Sub-code controller code Indoor Other indoor Stop of Indoor P.C. board does not • Check for defect in indoor P.C. –...
  • Page 170 Check code Location Check code detection Outdoor 7-segment display Description System status Check items (locations) Main condition(s) remote detection Check Sub-code controller code Low oil level All stop Operating compressor <All outdoor units in protection detects continuous state of corresponding line to be low oil level for about 2 hours.
  • Page 171 Check code Location System Check code detection Outdoor 7-segment display Description Check items (locations) Main status condition(s) remote detection Check Sub-code controller code • Check for disconnection of TK1 sensor. 01: TK1 oil circuit trouble Oil level All stop detection •...
  • Page 172 Check code Location Check code detection Outdoor 7-segment display Description System status Check items (locations) Main condition(s) remote detection Check Sub-code controller code Duplicated All stop • Check display on priority More than one indoor units priority indoor have been set up as priority indoor unit.
  • Page 173 Check code Location Check code detection Outdoor 7-segment display Description System status Check items (locations) Main condition(s) remote detection Check Sub-code controller code Trouble in No. All stop Insufficient number of IPDUs • Check model setting of A3-IPDU Fan-IPDU A3-IPDU Fan-IPDU are detected when power is P.C.
  • Page 174 Check code Check code Location Outdoor 7-segment display System detection Description Check items (locations) Main status remote detection condition(s) Check Sub-code controller code 01: Compressor 1 side IPDU Activation of high- All stop High-pressure SW is • Check connection of high- pressure SW activated.
  • Page 175 Check code Location Check code detection Outdoor 7-segment display Description System status Check items (locations) Main condition(s) remote detection Check Sub-code controller code • Check full-close Outdoor liquid All stop <During cooling operation> operation of outdoor PMV backflow When system is in cooling (1, 4).
  • Page 176 Check code Location Check code detection Outdoor 7-segment display Description System status Check items (locations) Main condition(s) remote detection Check Sub-code controller code Detected outdoor unit No. 4-way valve All stop Abnormal refrigerating cycle • Check for trouble in main reversing data is collected during body of 4-way valve.
  • Page 177 Check code Location Check code detection Outdoor 7-segment display Description System status Check items (locations) Main condition(s) remote detection Check Sub-code controller code (Sub code: #0) • Check fan motor. Fan IPDU over current • Check for trouble in fan IPDU protection circuit P.C.
  • Page 178 Check codes Detected by TCC-LINK Central Control Device Check code Location Check code detection Outdoor 7-segment display Main Description System status Check items (locations) condition(s) remote detection Sub-code controller TCC-LINK TCC-LINK Continued Central control device is • Check for trouble in central control device.
  • Page 179 Points to Note When Servicing Compressor (1) When checking the outputs of inverters, remove the wiring from all the compressors. How to Check Inverter Output (1) Turn off the power supply. (2) Remove compressor leads from the IPDU P.C. board (A3-IPDU). (Be sure to remove all the leads.) (3) Turn on the power supply and start cooling or heating operation.
  • Page 180: Diagnosis Procedure For Each Check Code

    8-5. Diagnosis procedure for each check code − 179 −...
  • Page 181 − 180 −...
  • Page 182 − 181 −...
  • Page 183 − 182 −...
  • Page 184 − 183 −...
  • Page 185 − 184 −...
  • Page 186 − 185 −...
  • Page 187 − 186 −...
  • Page 188 − 187 −...
  • Page 189 − 188 −...
  • Page 190 − 189 −...
  • Page 191 − 190 −...
  • Page 192 − 191 −...
  • Page 193 − 192 −...
  • Page 194 − 193 −...
  • Page 195 − 194 −...
  • Page 196 − 195 −...
  • Page 197 − 196 −...
  • Page 198 − 197 −...
  • Page 199 − 198 −...
  • Page 200 − 199 −...
  • Page 201 − 200 −...
  • Page 202 − 201 −...
  • Page 203 − 202 −...
  • Page 204 • Check fan motor. • Check for trouble in fan IPDU P.C. board − 203 −...
  • Page 205 − 204 −...
  • Page 206 − 205 −...
  • Page 207 − 206 −...
  • Page 208 − 207 −...
  • Page 209 − 208 −...
  • Page 210 − 209 −...
  • Page 211 − 210 −...
  • Page 212: 7-Segment Display Function

    8-6. 7-Segment Display Function 7-segment display on outdoor unit (interface P.C. board) The interface control P.C. board features a 7-segment LED display designed to check operational status. Display items can be changed by changing the combination of the number settings of rotary switches provided on the P.C. board (SW01, SW02 and SW03).
  • Page 213 (1)Display of System Information (Displayed on Header Outdoor Unit Only) − − System capacity A […8]~[54]:8 to 54 HP B [HP] No. of outdoor units A […1]~[…3]:1 to 3 B […P] No. of indoor units connected / No. A […0.]~[64.]:0 to 64 (No. of units connected) of units with cooling thermostat ON B [C…0]~[C64]:0 to 64 (No.
  • Page 214 (2)Display of Outdoor Unit Information (Displayed on Each Outdoor Unit) Check code data Outdoor unit No.: [U1] to [U3] B Check code (only latest one displayed) If there is no check code, [– – –] is displayed. If there is sub-code, check code [ ] and sub-code [–...
  • Page 215 (3) Display of Outdoor Cycle Data (Displayed at Each Outdoor Unit) SW01 SW02 SW03 Display detail PD pressure data PD pressure (MPaG) is displayed in decimal format. (MPaG: Approx. 10 times magnitude of kg/cm ∗ ∗ ∗ P d. ∗ ∗...
  • Page 216 (4)Display of Outdoor Cycle Data (Displayed at Header Unit) * This method is used when displaying follower unit information on the 7-segment display of the header unit. Check code data [U. ], : SW03 setting No. + 1 (Outdoor unit No. U2 to U3) B Check code is displayed (latest one only).
  • Page 217 (5) Display of Indoor Unit Information (Displayed on Header Unit Only) SW01 SW02 SW03 Display detail Indoor BUS communication signal Upon receiving signal: [..1], Other times: [..] receiving status Indoor check code No check code: [– – –] Indoor HP capacity 0.
  • Page 218: Oil Level Judgment Display

    8-7. Oil Level Judgment Display The current compressor oil level judgment results can be accessed by setting the switches provided on the interface P.C. board of an outdoor unit. Perform the checks in accordance with the procedure described below. Operation Procedure (1) Start the operation.
  • Page 219: Shrm-E Outdoor Interface P.c. Board Function Setting Exchange Table

    8-8. SHRM-e Outdoor Interface P.C. Board Function Setting Exchange Table 1. Switch/Function Setting Exchange Initial setting Part type Exchange contents at shipment bit 1 Compressor 1 backup OFF: Normal, ON: Backup when compressor 1 was in trouble bit 2 Compressor 2 backup OFF: Normal, ON: Backup when compressor 2 SW06 DIP SW 4 bit...
  • Page 220 2. Switching of Jumper Wire/Function Function switching setup Setup × : With jumper, : Without jumper (Cut) Initial setting jumper Part type Exchange contents at shipment Optional function Indoor unit at not selected side is kept with waiting status. Operation mode selection The mode is changed a mode which selected the operation mode of the ×...
  • Page 221 Interface Board Switches and jumper wire positions to be used in the Function setup switching table CN30 CN31 CN32 Interface P.C.board SW30 SW06 SW07 SW09 SW10 SW11 SW12 SW13 SW14 SW16 SW17 − 220 −...
  • Page 222: Leakage/Clogging Of Refrigerating Cycle Circuit

    8-9. Leakage/Clogging of Refrigerating Cycle Circuit List of Check Codes Generated upon Occurrence of Leakage/Clogging in Outdoor Cycle or Oil Circuit Part (MMY-MAP0806 , 1006 ) Clogging Site of fault Part Check target unit Detected fault and check code Symptom (see next page) Outdoor PMV1, 4 Corresponding unit...
  • Page 223 Fan motor SV52 Right side Main heat exchanger Right side sub heat exchanger PMV1 Left side PMV4 Main heat exchanger Left side sub heat exchanger SV11 Low-pressure sensor Check joint (Low-pressure) Check joint (High-pressure) High-pressure sensor Fusible plug Accumlator SV3D Liquid tank SV41 SV42...
  • Page 224 List of Check Codes Generated upon Occurrence of Leakage/Clogging in Outdoor Cycle or Oil Circuit Part (MMY-MAP1206 , 1406 ) Clogging Site of fault Part Check target unit Detected fault and check code Symptom (see next page) Outdoor PMV1, 4 Corresponding unit Activation of high-pressure protection Rise of abnormal pressure...
  • Page 225 Fan motor SV52 Right side Main heat exchanger Right side sub heat exchanger PMV1 Left side PMV4 Main heat exchanger Left side sub heat exchanger SV11 Low-pressure sensor Check joint (Low-pressure) Check joint (High-pressure) High-pressure sensor Fusible plug Accumlator SV3D Liquid tank SV41 SV42...
  • Page 226 List of Check Codes Generated upon Occurrence of Leakage/Clogging in Outdoor Cycle or Oil Circuit Part (MMY-MAP1606 , MAP1806∗ and MAP2006∗) Clogging Site of fault Part Check target unit Detected fault and check code Symptom (see next page) Outdoor PMV1,4 Corresponding unit Activation of high-pressure protection Rise of abnormal pressure...
  • Page 227 SV52 Fan motor Fan motor Right side Main heat exchanger Right side sub heat exchanger 2 PMV1 Right side sub heat exchanger 1 SV12 Left side Main heat exchanger PMV4 Left side sub heat exchanger 2 Left side sub heat exchanger 1 4-way SV11 valve...
  • Page 228 − 227 −...
  • Page 229 − 228 −...
  • Page 230 <REFERENCE> An Example of Refrigerant Flow in FS Unit When Trouble Occurred Indoor unit Cool/Heat FS unit − 229 −...
  • Page 231: Sensor Characteristics

    8-10. Sensor Characteristics Outdoor Unit Temperature sensor characteristics Outdoor TS1, TS2, TE1, TE2, TL1 and TO sensors Temperature [°C] Resistance [kΩ] 102.9 76.6 57.8 44.0 33.8 Resistance 26.1 [kΩ] 20.4 (10 °C or below) Resistance 16.0 [kΩ] (10 °C or above) 13.0 10.0kΩ...
  • Page 232 Outdoor Unit Pressure sensor characteristics • Input/output wiring summary High pressure side (PD) Low pressure side (PS) Pin No. Input/output name Lead wire color Input/output name Lead wire color OUTPUT White — — — — OUTPUT White Black Black • Output voltage vs. pressure High pressure side (PD) Low pressure side (PS) 4.5V...
  • Page 233 Indoor TC1 sensor Temperature [°C] Resistance [kΩ] 98.3 73.7 55.8 42.6 32.8 Resistance Resistance [kΩ] [kΩ] 25.5 (10°C or beiow) (10°C or above) 20.0 15.7 12.5 10.0 Temperature [°C] Indoor TC2 and TCJ, TOA sensor FS unit TCS sensor Temperature [°C] Resistance [kΩ] 102.9 76.6 57.7...
  • Page 234: Pressure Sensor Output Check

    8-11. Pressure Sensor Output Check Outdoor Unit PD sensor characteristics 0 to 4.41 MPa (0.5 to 4.73V output for 0 to 4.15 MPa) Voltage readings across pins 2 and 3 of CN501 on indoor unit main P.C. board (with negative-side probe of multimeter placed on pin 3) VOLT VOLT...
  • Page 235 Outdoor Unit PS sensor characteristics 0 to 1.47 MPa (0.5 to 5V output for 0 to 1.47 MPa) Voltage readings across pins 2 and 3 of CN500 on indoor unit main P.C. board (with negative-side probe of multimeter placed on pin 3) VOLT VOLT VOLT...
  • Page 236: Backup Operation

    BACKUP OPERATION (EMERGENCY OPERATION) This product offers backup modes of operation to tide over certain emergency situations. If a fault occurs in one of the compressors, it is possible to operate the system on an emergency basis by operating only the remaining compressor, (compressor backup operation).
  • Page 237: Compressor Backup Operation Setting

    9-2. Compressor Backup Operation Setting <Outline> If a fault occurs to one of the compressors installed in outdoor unit, follow the procedure described below to back up the faulty compressor by using the remaining, normal compressor. <Work Procedure> (1) Turn off the power supply to all the outdoor units connected to the system. (2) Set the DIP switches of SW06, provided on the interface P.C.
  • Page 238 (3) Change the connection of wiring between Comp-IPDU and Fan-IPDU, as shown in the below. Outdoor Unit (8, 10, 12, 14HP) Model: MMY-MAP0806FT*, MAP1006FT*, MAP1206FT*, MAP1406FT* 1.When compressor No.1 (front left) is faulty:No change the connection of wiring 2.When compressor No.2 (front right) is faulty: Change the connection of wiring between Comp-IPDU and Fan-IPDU as shown in the below.
  • Page 239 Outdoor Unit (16, 18, 20HP) Model: MMY-MAP1606FT*, MAP1806FT*, MAP2006FT* 1.When compressor No.1 (front left) is faulty: Change the connection of wiring between Comp-IPDU and Fan-IPDU as shown in the below. CN22 CN21 CN23 CN23 Change the connection of wiring which is connected to the CN21, 23 of Comp-IPDU1 ・Change to CN22 of Comp-IPDU2 from CN21 of Comp-IPDU1 ・Change to CN23 of Comp-IPDU2 from CN23 of Comp-IPDU1 (Tighten two wirings together with screw terminal)
  • Page 240: Outdoor Unit Backup Operation Setting

    9-3. Outdoor Unit Backup Operation Setting <Outline> This product allows outdoor unit backup operation setting to be performed either at the header unit or a follower unit. If any of the fault modes specified below occurs to one of the outdoor units in a multi-outdoor unit system, proceed with outdoor unit backup operation.
  • Page 241 [Setup of header unit] Interface P.C. board of header unit (5) Turn on Bit 2 of SW09 on the interface P.C. board of the header unit. SW06 SW07 SW09 SW10 (Setting to prevent connected indoor units capacity over trouble. (E16)) SW11 SW12 SW13...
  • Page 242: Header Outdoor Unit Backup Operation Setting (Failure Of Header Outdoor Unit)

    9-3-2. Header outdoor unit backup operation setting (failure of header outdoor unit) <Work procedure> (1) Turn off the power supply to all the units connected to the system at the source. [Setup of failed header outdoor unit] (2) Fully close the discharge gas pipe and suction gas pipe service valve of the failed outdoor unit. (3) Leave the service valves of the liquid and balance pipes fully open (to prevent refrigerant stagnation in the failed outdoor unit).
  • Page 243 [Selection of new header unit] (5) Select a new header unit from the follower units on the basis of the following criteria: • If only one follower unit is connected, select it as the header unit. • If two follower units are connected, select the follower unit that is nearest to the failed header unit. [Setup of new header unit] (6) Set SW13 and SW14 on the interface P.C.
  • Page 244 (11)Turn on the power supply to all the units connected to the system other than the failed unit. Determine what to do with the power supply to the failed unit in the following manner. <In case of fault in compressor, electrical part, I/F P.C. board, or IPDU P.C. board> Leave the power supply off.
  • Page 245: Outdoor Unit Refrigerant Recovery Method

    OUTDOOR UNIT REFRIGERANT RECOVERY METHOD 10-1. Refrigerant Recovery from Failed Outdoor Unit (Pump-Down) This product supports refrigerant pump-down, a function which allows refrigerant to be recovered from an outdoor unit in need of repair using a normal outdoor unit in a system featuring multiple outdoor units. 10-1-1.
  • Page 246 (5) [rd] [… FF] will be displayed on the 7-segment display, and pump-down operation will start. * To put the operation on hold midway, turn off the power supply to all the outdoor units, or press SW05 on the interface P.C. board. Header unit Failed outdoor unit Connect liquid pipe check joint and low...
  • Page 247 [Setup of failed outdoor unit] (13)When the low-pressure sensor output of the failed outdoor unit falls below 0.10MPa, fully close the balance pipe packed valve, and press SW05 on the interface P.C. board to finish the pump-down operation. (14)Turn off the power supply to all the outdoor units, and recover the residual refrigerant in the outdoor unit using a refrigerant recovery device.
  • Page 248: Refrigerant Recovery Procedure B (Case Of Outdoor Unit Backup Operation Setting)

    10-1-3. Refrigerant recovery procedure B (Case of outdoor unit backup operation setting) <Outline> If outdoor unit backup operation setting is performed, use an alternative refrigerant recovery procedure as described below, provided that the power cannot be turned on for the failed outdoor unit. (Refrigerant will be recovered from the failed outdoor unit using the test cooling operation function.) Note 1: If cooling-season outdoor unit backup operation or outdoor unit backup operation is in progress with the power supply to the failed outdoor unit turned on, follow the procedure described in “10-1-2.
  • Page 249 [Setup of outdoor units other than header unit and failed unit] (8) Leaving the balance pipes of the unit for pressure adjustment and the failed unit fully open, fully close the balance pipe packed valves of all other outdoor units. [Setup of header unit] (9) While monitoring the low-pressure sensor output, adjust the pressure to around 0.12 MPa by slowly closing the gas pipe service valve.
  • Page 250: How To Operate System While Failed Outdoor Unit Being Repaired

    10-2. How to Operate System While Failed Outdoor Unit Being Repaired <Outline> After refrigerant is recovered from the failed outdoor unit through a pump-down operation, the overall amount of refrigerant held by the system becomes excessive, and this makes it impossible to operate the remaining outdoor units even though they are not troubled.
  • Page 251: Work Procedure After Repair

    10-3. Work procedure after Repair When vacuuming in the repaired outdoor unit, follow the procedure described below. <Work procedure> (1) Fully open PMV1 and PMV4 in accordance with the table below. Note: PMV full-opening operation via short-circuiting of the CN30 pins is automatically undone after 2 minutes, causing the valves to fully close.
  • Page 252: Replacing Compressors

    REPLACING COMPRESSORS 11-1. Compressor Replacement Procedure (Outline) START WARNING In situations such as indoor unit relocation and repairs, Is the outdoor unit the only one in the system? it is not possible to recover all the refrigerant held by the system in the outdoor units.
  • Page 253: Replacement Of Compressors

    11-2. Replacement of Compressors <Checking color of oil in troubled compressor> • Lay the faulty compressor down, draw a small amount of oil via the oil equalization pipe, and check its color against color samples. • Determine the number of compressors to be replaced according to the color checking result. ASTM grade: Below 4 Replace the troubled compressor only.
  • Page 254 Amount of oil in troubled compressor A [cc]: 1000 ≤ A < 1900 (1) Adjust the amount of oil in the new compressor to A cc. (Lay the new compressor down and draw (1900 - A) [cc] of oil via the oil equalization pipe.) Compressor Amount of oil in troubled compressor A [cc]: 1900 ≤...
  • Page 255 [When replacing normal as well as troubled compressor] - applicable to MMY-MMP0806* 1006 <Remove the normal compressor> • Remove the normal compressor in the same way as the troubled compressor. Note: • Be sure to insulate the removed compressor leads using insulation tape, etc. WARNING When detaching a pipe by heating with a burner at brazed joint, take care as any oil left in the piping may burn in a momentary flash of fire when the brazing filler metal melts.
  • Page 256 [When replacing normal as well as faulty compressor] - applicable to MMY-MAP1206∗, 1406∗, 1606∗, 1806∗ and 2006∗ <Remove the normal compressor> • Remove the normal compressor in the same way as the troubled compressor. Note: • Be sure to insulate the removed compressor leads using insulation tape, etc. WARNING When detaching a pipe by heating with a burner at brazed joint, take care as any oil left in the piping may burn in a momentary flash of fire when the brazing filler metal melts.
  • Page 257 <Installing compressor> • Install a compressor by following the dismantling procedure in reverse. • The dismantling process may have loosened compressor leads and quick connectors. Prior to installation, therefore, tighten them a little with a pair of pliers, and verify that they are tight after reconnection. Notes: •...
  • Page 258: Check Procedure To Search Cause Of Compressor Oil Shortage

    11-3. Check Procedure to Search Cause of Compressor Oil Shortage Are the balance pipes of all outdoor units connected to the Open the balance pipe valves fully. same refrigerant line fully open? Are there any miswiring or incorrect Correct the miswiring or connection. connection of TK1, TK2, TK4 and TK1: CN531 TK2: CN532 TK5 sensor in the unit that has...
  • Page 259 <MMY-MAP0806 and MAP1006 > Check items and procedures to follow when checking oil circuit with compressor(s) disconnected Check item Location Procedure 1) Pressure nitrogen from check joint of the liquid pipe under condition that PMV1 and 4 are fully closed, confirm the pressure using high-pressure check joint.
  • Page 260 <MMY-MAP1206 and MAP1406 > Check items and procedures to follow when checking oil circuit with compressor(s) disconnected Check item Location Procedure 1) Pressure nitrogen from check joint of the liquid pipe under condition that PMV1 and 4 are fully closed, confirm the pressure using high-pressure check joint.
  • Page 261 <MMY-MAP1606 , MAP1806 and MAP2006 > Check items and procedures to follow when checking oil circuit with compressor(s) disconnected Check item Location Procedure 1) Pressure nitrogen from check joint of the liquid pipe under condition that PMV1 and 4 are fully closed, confirm the pressure using high-pressure check joint.
  • Page 262: Outdoor Unit Parts Replacement Methods

    OUTDOOR UNIT PARTS REPLACEMENT METHODS Cabinet 2) Discharge cabinet Screws (4 corners) WARNING Wear a pair of gloves. Otherwise, you will risk an injury involving a replacement part or some other object. 1. Detachment 1) Stop the air conditioner operation, and turn off the circuit breaker.
  • Page 263 Propeller fan 2) Screws (4 corners) Fan motor WARNING Wear a pair of gloves. Otherwise, you will risk an injury involving a replacement part or some other object. 1. Detachment 1) Stop the air conditioner operation, and turn off the Discharge cabinet side cover circuit breaker.
  • Page 264 Propeller fan 2. CAUTION for replacement or attachment D-cut surface of fan Fan motor 1) Insert the propeller fan while aligning the D-cut motor shaft (continued) surface of the fan motor shaft with the arrow mark ) on the fan. (If the propeller fan is tightly mounted on the shaft without securing alignment between the D-cut surface and the arrow mark (...
  • Page 265 Heat exchanger 2) Motor base 3) Discharge cabinet anchor plate WARNING Wear a pair of gloves. Otherwise, you will risk an injury involving a replacement part or some other object. Before the work, be sure to recover the refrigerant of outdoor unit into cylinders or another unit connected to the same system.
  • Page 266 Inverter assembly 4) Screw (with arrow mark) WARNING Wear a pair of gloves. Removable design Otherwise, you will risk an injury involving a replacement part or some other object. 4) Screw 1. Detachment 4) Reactor (with arrow 1) Stop the air conditioner operation, and turn off lead cover mark) the circuit breaker.
  • Page 267 Reactor assembly • 12 to 20HP case WARNING 3) Screw Fixing claw (slide stopper to right) Wear a pair of gloves. Otherwise, you will risk an injury involving a replacement part or some other object. 1. Detachment 1) Stop the operation, and turn off the circuit breaker. 2) Remove the inverter assembly.
  • Page 268 (For FT8(J)P-E, FT8(J)P-TR model) Work procedure Remarks No. Part to be replaced 6 2-way valve coils Rear SV3B SV3E Liquid tank SV3D SV3A SV14 Pressure sensors SV3C locations MAP0806* MAP1006* Accumulator Oil separator SV41 SV11 SV42 PS sensor PD sensor SV52 Front Compressor 2...
  • Page 269 (For FT8(J)P, FT7(J)P, FT8P-A model) Work procedure Remarks No. Part to be replaced 2-way valve coils Pressure sensors Rear Liquid tank SV3D SV3B SV3E SV3A SV14 locations SV3C MAP0806* MAP1006* Accumulator Oil separator SV11 SV41 SV42 PS sensor PD sensor Front Inverter assembly Compressor 1...
  • Page 270 Work procedure Remarks No. Part to be replaced Temperature Product front view sensors - locations and idenfication colors MAP0806* MAP1006* TO sensor (black) TE1 sensor (blue) TD1 sensor (yellow) TD2 sensor (red) TE2 sensor (red) TL1 sensor (white) Product rear view TK4 sensor (white) TS1 sensor (gray) TK2 sensor (blue)
  • Page 271 Work procedure Remarks No. Part to be replaced 7 Temperature Product front view sensors - locations and TL1 sensor (white) idenfication colors MAP1206* MAP1406* TO sensor (black) TE1 sensor (blue) TE2 sensor (red) TD1 sensor (yellow) TD2 sensor (red) Product rear view TK4 sensor (white) TK1 sensor (black) TK2 sensor (blue)
  • Page 272 Work procedure Remarks Part to be replaced Temperature Product front view sensors - locations and idenfication colors TO sensor (black) MAP1606* MAP1806* MAP2006* TS2 sensor (black) TS1 sensor (gray) TL1 sensor (white) TE1 sensor (blue) TE2 sensor (red) TD1 sensor (yellow) TD2 sensor (red) Product rear view TK4 sensor (white)
  • Page 273 Work procedure Remarks No. Part to be replaced 8 Pipe fixing rubber - detachment/ Oil header<=>Liquid pipe SV2 valve<=>Discharge pipe attachment φ 25.4<=>φ 12.7 φ 6.35<=>φ 15.88 MAP0806* MAP1006* Suction pipe<=>Distributor φ 19.05<=>φ 22.22 SV6 valve<=>Discharge pipe φ 6.35<=>φ 19.05 Suction pipe<=>SV41 valve φ...
  • Page 274 Pipe fixing rubber - detachment/ WARNING attachment (common) Wear a pair of gloves. Otherwise, you will risk an injury involving a replacement part or some other object. 1. Detachment 1) Hold the pipe fixing rubber in such a manner that your fingers and thumb are in contact with the two Squeeze rubber to create small gap.
  • Page 275 4-way valve For FT8(J)P-E, FT8(J)P-TR model - detachment/ WARNING attachment MAP0806 Wear a pair of gloves. MAP1006 Otherwise, you will risk an injury involving a SV52 valve replacement part or some other object. Before starting the work, be sure to recover the PMV1 refrigerant of outdoor unit by removing it with a refrigerant recovery device.
  • Page 276 4-way valve For FT8(J)P-E, FT8(J)P-TR model - detachment/ WARNING attachment (continued) Wear a pair of gloves. SV52 valve MAP1206 Otherwise, you will risk an injury involving a MAP1406 replacement part or some other object. PMV1 Before starting the work, be sure to recover the refrigerant of outdoor unit by removing it with a refrigerant recovery device.
  • Page 277 4-way valve - detachment/ WARNING attachment (continued) Wear a pair of gloves. 6)End section of pipes (3 locations) MAP1606 Otherwise, you will risk an injury involving a MAP1806 replacement part or some other object. MAP2006 Before starting the work, be sure to recover the refrigerant of outdoor unit by removing it with a 4)Cutting line refrigerant recovery device.
  • Page 278: C. Board Exchange Procedures

    P.C. BOARD EXCHANGE PROCEDURES ■ Outdoor Unit 13-1. Replacement of outdoor P.C. board 13-1-1 List of service P.C. boards Parts code Description Applicable model P.C. board type code Product code 43T6V663 Interface P.C. board MCC-1673 ASM-PCB(I/F) 43T6V628 Inverter P.C. board for compressor MCC-1669 ASM-PCB(A3IPDU) 43T6V627...
  • Page 279 MMY-MAP1206FT* Inverter P.C. board for fan Interface P.C. board [FAN IPDU] [Outdoor control P.C. board] MMY-MAP1406FT* (MCC-1659) (MCC-1673) Noise Filter P.C. board (MCC-1608) Power supply terminal block Communication terminal block Thermistor For MMY-MAP****FT8P-A Transformer Relay terminal block Inverter P.C. board Inverter P.C.
  • Page 280: Interface P.c. Board (Mcc-1673) Replacement Procedure

    If t he model is not specified, check code "L10" is displayed and the equipment will not operate. Model name Model size Service P.C. Board MMY-MAP0806FT8(J)P-E/-TR - - - 990W MMY-MAP1006FT8(J)P-E/-TR - - - - MMY-MAP1206FT8(J)P-E/-TR - - - -...
  • Page 281: Comp-Ipdu P.c. Board (Mcc-1669) Replacement Procedure

    13-1-4.Comp-IPDU P.C. Board (MCC-1669) Replacement Procedure <8 to 10HP outdoor unit case> This board is commonly installed in different models before shipment. Set the DIP switch (SW800) setting of the service board to the switch setting before replacement. Replacement Steps: (1) Turn off the power supply of the outdoor unit and allow at least 3 minutes for the capacitor to discharge.
  • Page 282 (5) Set the DIP switch (SW800) setting of the service board to match the switch setting from the original PCB. -Set the DIP switch (SW800) depending on the position of the IPDU within the electrical box, as shown in the following diagram.
  • Page 283: Comp-Ipdu P.c. Board (Mcc-1669) Replacement Procedure

    13-1-5.Comp-IPDU P.C. Board (MCC-1669) Replacement Procedure <12 to 14HP outdoor unit case> This board is commonly installed in different models before shipment. Set the DIP switch (SW800) setting of the service board to the switch setting before replacement. Replacement Steps: (1) Turn off the power supply of the outdoor unit and allow at least 3 minutes for the capacitor to discharge.
  • Page 284 (5) Set the DIP switch (SW800) setting of the service board to match the switch setting from the original PCB. -Set the DIP switch (SW800) depending on the position of the IPDU within the electrical box, as shown in the following diagram.
  • Page 285: Comp-Ipdu P.c. Board (Mcc-1660) Replacement Procedure

    13-1-6.Comp-IPDU P.C. Board (MCC-1660) Replacement Procedure <16 to 20HP outdoor unit case> This board is commonly installed in different models before shipment. Set the DIP switch (SW800) setting of the service board to the switch setting before replacement. Replacement Steps: (1) Turn off the power supply of the outdoor unit and allow at least 3 minutes for the capacitor to discharge.
  • Page 286 (5) Set the DIP switch (SW800) setting of the service board to match the switch setting from the original PCB. -Set the DIP switch (SW800) depending on the position of the IPDU within the electrical box, as shown in the following diagram.
  • Page 287: Fan-Ipdu P.c. Board (Mcc-1659) Replacement Procedure

    13-1-7.Fan-IPDU P.C. Board (MCC-1659) Replacement Procedure This board is commonly installed in different models before shipment. Set the DIP switch (SW800) setting of the service board to the switch setting before replacement. Replacement steps: (1) Turn off the power supply of the outdoor unit and allow at least 3 minutes for the capacitor to discharge. (2) Remove all the connectors and the Faston and screw terminals(①) connected to the FAN IPDU.
  • Page 288 (6) Set the DIP switch (SW800) setting of the service board to match the switch setting from the original PCB. -Set the DIP switch (SW800) depending on the position of the IPDU within the electrical box, as shown in the following diagram.
  • Page 289: Noise Filter P.c. Board (Mcc-1608A, B) Replacement Procedure

    13-1-8.Noise Filter P.C. Board (MCC-1608A, B) Replacement Procedure <8 to 14HP outdoor unit case> Replacement steps: (1) Turn off the power supply of the outdoor unit and allow at least 3 minutes for the capacitor to discharge. (2) Remove the terminal block sub-assembly ①. Remove the screws ②...
  • Page 290 (4) Remove the earth screws ⑤, ⑥ and the three PCB mount ⑩. • The removed earth screws ⑤, ⑥ and the PCB mount ⑩ will be reused during the installation of the service P.C. board, so keep them in a safe place. (5) Remove the noise filter P.C.
  • Page 291: Noise Filter P.c. Board (Mcc-1608A, B) Replacement Procedure

    13-1-9.Noise Filter P.C. Board (MCC-1608A, B) Replacement Procedure <16 to 20HP outdoor unit case (Left side of Noise Filter Box)> Replacement steps: (1) Turn off the power supply of the outdoor unit and allow at least 3 minutes for the capacitor to discharge. (2) Remove the terminal block sub-assembly ①.
  • Page 292 (4) Remove the earth screws ⑤, ⑥ and the three PCB mount ⑩. • The removed earth screws ⑤, ⑥ and the PCB mount ⑩ will be reused during the installation of the service P.C. board, so keep them in a safe place. (5) Remove the noise filter P.C.
  • Page 293: Noise Filter P.c. Board (Mcc-1608A, B) Replacement Procedure

    13-1-10.Noise Filter P.C. Board (MCC-1608A, B) Replacement Procedure <16 to 20HP outdoor unit case (Right side of Noise Filter Box)> Replacement steps: (1) Turn off the power supply of the outdoor unit and allow at least 3 minutes for the capacitor to discharge. (2) Remove the filter cover ①.
  • Page 294 (5) Remove the noise filter P.C. board assembly by unlocking the four PCB mounts used to secure the P.C. board ⑦. (6) Remove the line filter ⑨ and its leads, both connected to the screw-on terminals ⑧ of the just-removed noise filter P.C.
  • Page 295: Multi Port Fs Unit Parts Replacement Methods

    MULTI PORT FS UNIT PARTS REPLACEMENT WARNING ・Wear a pair of gloves. Otherwise, you will risk an injury involving a replacement part or some other object. ・Stop the power supply of the air conditioner and turn off switch of the power supply breaker. 1.
  • Page 296 3. . TERMINAL-PW (TB03) 1 Detachment 1) Perform work of procedure 1. of 1 Detachment . (Electoric parts cover) 2) Remove the wires from the TERMINAL-PW (TB03). Remove 3) Take off screws fixing the TERMINAL-PW (TB03). (φ4 x 14, 2 pcs) from the terminal.
  • Page 297 5. . Top plate 1 Detachment 1) Take off the fixing screws (φ4 x 8, 6 pcs) 2) Remove the top plate. Position of the screw holes (Top plate) E-BOX 2 Attachment 1) Fix the Top plate as before. Fit the non-thermal insulation material side to the E-Box side. 2) Fit the screws.
  • Page 298: Heat Sink

    Heat sink 1 Detachment Upper side 1) Take off the fixing screws. (M4 x 8, 2 pcs) 2) Remove the heat sink from the coil. (SVSS or SVD) Screws 2 Attachment 1) Fix the heat sink as before. Fix the heatsink to the direction indicated in the figure. 2) Fit the screws of the heatsink (M4 x 8, 2 pcs) SVSS or SVD at a torque of 1.47 ±...
  • Page 299 7. Coil-PMV, TCS-sensor 1 Detachment 1) Perform work of procedure 1. -1) (Electric parts cover) and 5. -1) (Top plate). 2) Cut the binding band (1 pc) which fix the Clamp filter to the wires of the Coil-PMV and the TCS-Sensor. CN720 Wire Clamp 3) Remove the Clamp filter from the wires of the Coil-PMV and...
  • Page 300: Drain Hose

    8. Drain hose 1 Detachment 1) Drain the drain water accumulated in the Drain pan. Claws 2) Remove the Drain hose while picking the claws Picking of the hose band. 2 Attachment 1) Pinch the claw of the horse band and make it loosen, Picking then insert the drain horse.
  • Page 301: Exploded Diagram/Parts List

    EXPLODED DIAGRAM/PARTS LIST 15-1. OUTDOOR UNIT MMY-MAP0806FT8(J)P-E, MAP1006FT8(J)P-E, MMY-MAP0806FT8(J)P-TR, MAP1006FT8(J)P-TR, MMY-MAP0806FT8(J)P, MAP1006FT8(J)P, MMY-MAP0806FT7(J)P, MAP1006FT7(J)P, MMY-MAP0806FT8P-A, MAP1006FT8P-A − 300 −...
  • Page 302 MMY-MAP0806FT8(J)P-E, MAP1006FT8(J)P-E, MMY-MAP0806FT8(J)P-TR, MAP1006FT8(J)P-TR − 301 −...
  • Page 303 MMY-MAP0806FT8(J)P, MAP1006FT8(J)P, MMY-MAP0806FT7(J)P, MAP1006FT7(J)P, MMY-MAP0806FT8P-A, MAP1006FT8P-A − 302 −...
  • Page 304 REFRIGERATION CIRCUIT DIAGRAM MMY-MAP0806FT8(J)P-E, MAP1006FT8(J)P-E, MMY-MAP0806FT8(J)P-TR, MAP1006FT8(J)P-TR Fan motor (SV52) Right side (TO) Main heat exchanger Right side Sub heat exchanger (PMV1) (PMV4) Left side Main heat exchanger (TE1) (TE2) Left side Sub heat exchanger (SV11) 4-way valve (SV5) (TS1) Low-pressure sensor (TL1)
  • Page 305 REFRIGERATION CIRCUIT DIAGRAM MMY-MAP0806FT8(J)P, MAP1006FT8(J)P, MMY-MAP0806FT7(J)P, MAP1006FT7(J)P, MMY-MAP0806FT8P-A, MAP1006FT8P-A Fan motor Right side (TO) Main heat exchanger Right side Sub heat exchanger (PMV1) (PMV4) Left side Main heat exchanger (TE1) (TE2) Left side Sub heat exchanger (SV11) 4-way valve (SV5) (TS1) Low-pressure sensor...
  • Page 306 MMY-MAP1206FT8(J)P-E, MAP1406FT8(J)P-E, MMY-MAP1206FT8(J)P-TR, MAP1406FT8(J)P-TR, MMY-MAP1206FT8(J)P, MAP1406FT8(J)P, MMY-MAP1206FT7(J)P, MAP1406FT7(J)P, MMY-MAP1206FT8P-A, MAP1406FT8P-A − 305 −...
  • Page 307 MMY-MAP1206FT8(J)P-E, MAP1406FT8(J)P-E, MMY-MAP1206FT8(J)P-TR, MAP1406FT8(J)P-TR – 306 –...
  • Page 308 MMY-MAP1206FT8(J)P, MAP1406FT8(J)P, MMY-MAP1206FT7(J)P, MAP1406FT7(J)P, MMY-MAP1206FT8P-A, MAP1406FT8P-A – 307 –...
  • Page 309 REFRIGERATION CIRCUIT DIAGRAM MMY-MAP1206FT8(J)P-E, MAP1406FT8(J)P-E, MMY-MAP1206FT8(J)P-TR, MAP1406FT8(J)P-TR Fan motor (SV52) Right side (TO) Main heat exchanger Right side Sub heat exchanger (PMV1) (PMV4) Left side Main heat exchanger (TE1) Left side Sub heat exchanger (TE2) 4-way (SV11) valve (SV5) (TS1) Low-pressure sensor (TL1)
  • Page 310 REFRIGERATION CIRCUIT DIAGRAM MMY-MAP1206FT8(J)P, MAP1406FT8(J)P, MMY-MAP1206FT7(J)P, MAP1406FT7(J)P, MMY-MAP1206FT8P-A, MAP1406FT8P-A Fan motor Right side (TO) Main heat exchanger Right side Sub heat exchanger (PMV1) (PMV4) Left side Main heat exchanger (TE1) Left side Sub heat exchanger (TE2) 4-way (SV11) valve (SV5) (TS1) Low-pressure sensor...
  • Page 311 MMY-MAP1606FT8(J)P-E, MAP1806FT8(J)P-E, MAP2006FT8(J)P-E, MMY-MAP1606FT8(J)P-TR, MAP1806FT8(J)P-TR, MAP2006FT8(J)P-TR, MMY-MAP1606FT8(J)P, MAP1806FT8(J)P, MAP2006FT8(J)P, MMY-MAP1606FT7(J)P, MAP1806FT7(J)P, MAP2006FT7(J)P, MMY-MAP1606FT8P-A, MAP1806FT8P-A, MAP2006FT8P-A − 310 −...
  • Page 312 MMY-MAP1606FT8(J)P-E, MAP1806FT8(J)P-E, MAP2006FT8(J)P-E, MMY-MAP1606FT8(J)P-TR, MAP1806FT8(J)P-TR, MAP2006FT8(J)P-TR – 311 –...
  • Page 313 MMY-MAP1606FT8(J)P, MAP1806FT8(J)P, MAP2006FT8(J)P, MMY-MAP1606FT7(J)P, MAP1806FT7(J)P, MAP2006FT7(J)P, MMY-MAP1606FT8P-A, MAP1806FT8P-A, MAP2006FT8P-A – 312 –...
  • Page 314 REFRIGERATION CIRCUIT DIAGRAM MMY-MAP1606FT8(J)P-E, MAP1806FT8(J)P-E, MAP2006FT8(J)P-E, MMY-MAP1606FT8(J)P-TR, MAP1806FT8(J)P-TR, MAP2006FT8(J)P-TR (SV52) Fan motor Fan motor Right side Main heat exchanger (TO) Right side Sub heat exchanger 2 Right side Sub heat exchanger 1 (PMV1) (SV12) Left side Main heat exchanger (TE1) (PMV4) Left side Sub heat exchanger 2 (TE2)
  • Page 315 REFRIGERATION CIRCUIT DIAGRAM MMY-MAP1606FT8(J)P, MAP1806FT8(J)P, MAP2006FT8(J)P, MMY-MAP1606FT7(J)P, MAP1806FT7(J)P, MAP2006FT7(J)P, MMY-MAP1606FT8P-A, MAP1806FT8P-A, MAP2006FT8P-A Fan motor Fan motor Right side Main heat exchanger (TO) Right side Sub heat exchanger 2 (PMV1) Right side Sub heat exchanger 1 (SV12) Left side Main heat exchanger (TE1) (PMV4) Left side Sub heat exchanger 2...
  • Page 316 For FT8(J)P-E, FT8(J)P-TR model Q'ty/Set t MMY- Ref. No. Part No Description MAP0806 MAP1006 MAP1206 MAP1406 FAN, PROPELLER 43T20341 MOTOR, FAN, DC530-620V, 2300L 43T20342 CABINET, AIR OUTLET 43T19354 CABINET, SIDE, UP 43T19355 GUARD, FAN 43T19359 CABINET ASSY, SIDE, LEFT 43T00613 CABINET ASSY, SIDE, RIGHT 43T00614 CABINET, AIR INLET, FRONT...
  • Page 317 RUBBER, SUPPORTER, PIPE 43T49354 RUBBER, SUPPORTER, PIPE 43T49355 RUBBER, SUPPORTER, PIPE 43T49347 RUBBER, SUPPORTER, PIPE 43T49360 BAND, FIX 43T49358 HOLDER, SENSOR 43T19333 MARK, TOSHIBA 43T01311 HOLDER, NFC 43T63358 NUT, FLANGE 43T39351 WASHER 43T39350 BOLT, COMPRESSOR 43T47385 RUBBER, CUSHION 43T49357 BONNET, 3/8 IN...
  • Page 318 Q'ty/Set MMY- Ref. No. Part No Description MAP1606 MAP1806 MAP2006 FAN, PROPELLER 43T20341 MOTOR, FAN, DC530-620V, 3500L 43T20343 CABINET, AIR OUTLET 43T19361 GUARD, FAN 43T19359 CABINET ASSY, SIDE, LEFT 43T00663 CABINET ASSY, SIDE, RIGHT 43T00664 CABINET, AIR INLET, FRONT 43T00665 CABINET, AIR INLET, BACK 43T00666 CABINET, AIR INLET, BACK...
  • Page 319 RUBBER, SUPPORTER, PIPE 43T49353 RUBBER, SUPPORTER, PIPE 43T49354 RUBBER, SUPPORTER, PIPE 43T49355 RUBBER, SUPPORTER, PIPE 43T49347 BAND, FIX 43T49358 HOLDER, SENSOR 43T19333 MARK, TOSHIBA 43T01311 HOLDER, NFC 43T63358 NUT, FLANGE 43T39351 WASHER 43T39350 BOLT, COMPRESSOR 43T47385 RUBBER, CUSHION 43T49357 BONNET, 3/8 IN...
  • Page 320 For FT8(J)P, FT7(J)P, FT8P-A model Q'ty/Set MMY- Ref. No. Part No. Description MAP0806 MAP1006 MAP1206 MAP1406 FAN, PROPELLER 43T20341 MOTOR, FAN, DC530-620V, 2300L 43T20342 CABINET, AIR OUTLET 43T19354 CABINET, SIDE, UP 43T19355 GUARD, FAN 43T19353 CABINET ASSY, SIDE, LEFT 43T00613 CABINET ASSY, SIDE, RIGHT 43T00614 CABINET, AIR INLET, FRONT...
  • Page 321 RUBBER, SUPPORTER, PIPE 43T49354 RUBBER, SUPPORTER, PIPE 43T49355 RUBBER, SUPPORTER, PIPE 43T49347 RUBBER, SUPPORTER, PIPE 43T49360 BAND, FIX 43T49358 HOLDER, SENSOR 43T19333 MARK, TOSHIBA 43T01311 HOLDER, NFC 43T63358 NUT, FLANGE 43T39351 WASHER 43T39350 BOLT, COMPRESSOR 43T47385 RUBBER, CUSHION 43T49357 BONNET, 3/8 IN...
  • Page 322 Q'ty/Set MMY- Ref. No. Part No. Description MAP1606 MAP1806 MAP2006 FAN, PROPELLER 43T20341 MOTOR, FAN, DC530-620V, 3500L 43T20343 CABINET, AIR OUTLET 43T19361 GUARD, FAN 43T19353 CABINET ASSY, SIDE, LEFT 43T00663 CABINET ASSY, SIDE, RIGHT 43T00664 CABINET, AIR INLET, FRONT 43T00665 CABINET, AIR INLET, BACK 43T00666 CABINET, AIR INLET, BACK...
  • Page 323 RUBBER, SUPPORTER, PIPE 43T49353 RUBBER, SUPPORTER, PIPE 43T49354 RUBBER, SUPPORTER, PIPE 43T49355 RUBBER, SUPPORTER, PIPE 43T49347 BAND, FIX 43T49358 HOLDER, SENSOR 43T19333 MARK, TOSHIBA 43T01311 HOLDER, NFC 43T63358 NUT, FLANGE 43T39351 WASHER 43T39350 BOLT, COMPRESSOR 43T47385 RUBBER, CUSHION 43T49357 BONNET, 3/8 IN...
  • Page 324 15-2. Inverter Assembly MMY-MAP0806FT8(J)P-E, MAP1006FT8(J)P-E, MMY-MAP0806FT8(J)P-TR, MAP1006FT8(J)P-TR, MMY-MAP0806FT8(J)P, MAP1006FT8(J)P, − 323 −...
  • Page 325 MMY-MAP1206FT8(J)P-E, MAP1406FT8(J)P-E, MMY-MAP1206FT8(J)P-TR, MAP1406FT8(J)P-TR, MMY-MAP1206FT8(J)P, MAP1406FT8(J)P, MMY-MAP1206FT7(J)P, MAP1406FT7(J)P, MMY-MAP1206FT8P-A, MAP1406FT8P-A − 324 −...
  • Page 326 MMY-MAP1606FT8(J)P-E, MAP1806FT8(J)P-E, MAP2006FT8(J)P-E MMY-MAP1606FT8(J)P-TR, MAP1806FT8(J)P-TR, MAP2006FT8(J)P-TR MMY-MAP1606FT8(J)P, MAP1806FT8(J)P, MAP2006FT8(J)P, MMY-MAP1606FT7(J)P,MAP1806FT7(J)P, MAP2006FT7(J)P MMY-MAP1606FT8P-A, MAP1806FT8P-A, MAP2006FT8P-A − 325 −...
  • Page 327 Q'ty/Set t MMY- Ref. No. Part No Description MAP0806 MAP1006 MAP1206 MAP1406 SENSOR ASSY, SERVICE 43T50347 SUPPORTER, ASSY 43T95303 SENSOR,TD(F6) 43T50348 TERMINAL, 4P 43T60437 REACTOR, CH-79 43T58317 REACTOR, CH-90 43T58330 43T60453 TERMINAL, 4P CONTACTOR, MAGNETIC 43T52320 TERMINAL, 8P 43T60457 SUPORT, SPACER 43T95301 SPACER(EDGE) 43T95302...
  • Page 328 Q'ty/Set t MMY- Ref. No. Part No Description MAP1606 MAP1806 MAP2006 SENSOR ASSY, SERVICE 43T50347 SUPPORTER, ASSY 43T95303 SENSOR,TD(F6) 43T50348 TERMINAL, 4P 43T60437 REACTOR, CH-65 43T58331 43T60453 TERMINAL, 4P CONTACTOR, MAGNETIC 43T52320 TERMINAL, 8P 43T60457 SUPORT, SPACER 43T95301 SPACER(EDGE) 43T95302 PC BOARD ASSY, NOISE FILTER, MCC-1608 43T6V624 PC BOARD ASSY, NOISE FILTER, MCC-1608...
  • Page 329 15-3. Multi port FS unit Models: RBM-Y1801F4PE/PE2 , RBM-Y1801F6PE/PE2 − 328 −...
  • Page 330 RBM-Y1801 Location No. Part No. Description F4PE F6PE F4PE2 F6PE2 43T6V691 PC BOARD ASSY, MCC-1681 43T46403 COIL, SOLENOID, VPV-MOAJ510B0 43T46404 COIL, SOLENOID, VPV-MOAQ1843A0 43T46492 COIL, VALVE, 2WAY 43T46493 COIL, VALVE, 2WAY 43T46476 MOTOR, PMV 43T50347 SENSOR, TCS 43T19333 FIX-P-SENSOR 43T70317 ASM-HOSE 43T83313 HOSE-BAND...
  • Page 331 15-4. Flow Selector unit RBM-Y1123FE/FE2, RBM-Y1803FE/FE2 Y1803 only RBM-Y1123 RBM-Y1803 Location No. Part No. Description 43149414 BODY ASSY, SERVICE 43149413 BODY ASSY, SERVICE 4316V238 PC BOARD ASSY, MCC-1431 37546847 COIL, SOLENOID, VPV-MOAJ510B0 43146716 COIL, SOLENOID, VPV-MOAQ1843A0 4314N089 COIL, VALVE, 2WAY, SR53 AC240L1500 4314N088 COIL, VALVE, 2WAY, SR53 AC200L1500 43F60029...
  • Page 332 RBM-Y2803FE/FE2 RBM-Y2803 Location No. Part No. Description 43149415 BODY ASSY, SERVICE 4316V238 PC BOARD ASSY, MCC-1431 37546847 COIL, SOLENOID, VPV-MOAJ510B0 43146716 COIL, SOLENOID, VPV-MOAQ1843A0 4314N089 COIL, VALVE, 2WAY, SR53 AC240L1500 4314N088 COIL, VALVE, 2WAY, SR53 AC200L1500 43F60029 FILTER, NOISE 43160563 FILTER, NOISE 43135013 CABLE ASSY, POWER...
  • Page 333 WARNINGS ON REFRIGERANT LEAKAGE Check of Concentration Limit Important The room in which the air conditioner is to be installed requires a design that in the event of refrigerant gas NOTE 2 : leaking out, its concentration will not exceed a set limit. The standards for minimum room volume are as follows.
  • Page 334 AIRTREND Ltd - KOVENT DOO Kumanovska 14 11000 Beograd Tel: 011 3836886, 3085740 Faks: 011 3444113 e-mail: gobrid@eunet.rs, office@kovent.rs www.airtrend.rs, www.kovent.rs www.toshiba-klima.rs www.toshiba-estia.rs...

Table of Contents