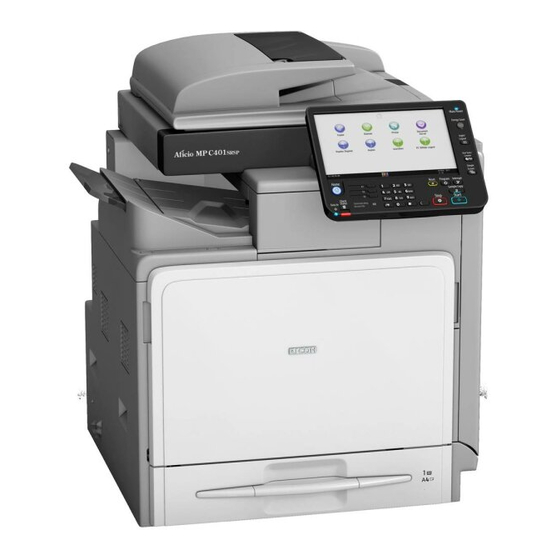
Ricoh MP C401 SERIES User Manual
Hide thumbs
Also See for MP C401 SERIES:
- Brochure & specs (11 pages) ,
- User manual (36 pages) ,
- User manual
Table of Contents
Advertisement
User Guide
What You Can Do with This Machine
Getting Started
Copy
Fax
Print
Scan
Document Server
Web Image Monitor
Adding Paper and Toner
Troubleshooting
Information for This Machine
For information not found in paper manu-
als, see the online manuals available on our
web site
(http://www.ricoh.com/downloads/).
For safe and correct use, be sure to read the Safety Information in
"Read This First" before using the machine.
Advertisement
Table of Contents

Related Manuals for Ricoh MP C401 SERIES


Summary of Contents for Ricoh MP C401 SERIES
- Page 1 Information for This Machine For information not found in paper manu- als, see the online manuals available on our web site (http://www.ricoh.com/downloads/). For safe and correct use, be sure to read the Safety Information in "Read This First" before using the machine.
-
Page 3: Table Of Contents
TABLE OF CONTENTS How to Read the Manuals..........................7 Symbols Used in the Manuals........................7 Model-Specific Information..........................8 Names of Major Features..........................9 1. What You Can Do with This Machine Searching by What You Want to Do......................11 Reducing my Costs............................11 Using Scanned Files on the Computer....................... - Page 4 Changing the Display Language (When Using the Smart Operation Panel)......... 36 How to Use the [Home] Screen (When Using the Standard Operation Panel)......... 37 Adding Icons to the [Home] Screen (When Using the Standard Operation Panel)......38 How to Use the [Home] Screen (When Using the Smart Operation Panel)..........42 Adding Icons to the [Home] Screen (When Using the Smart Operation Panel)........
- Page 5 Changing the Number of Sets........................77 Storing Data in the Document Server......................78 4. Fax Basic Procedure for Transmissions (Memory Transmission)................79 Sending Originals Using the Exposure Glass (Memory Transmission)........... 81 Registering a Fax Destination........................82 Deleting a Fax Destination.......................... 83 Transmitting while Checking Connection to Destination (Immediate Transmission)........85 Sending Originals Using the Exposure Glass (Immediate Transmission)..........
- Page 6 6. Scan Basic Procedure When Using Scan to Folder..................... 105 Creating a Shared Folder on a Computer Running Windows/Confirming a Computer's Information..................................106 Registering an SMB Folder........................108 Deleting an SMB Registered Folder......................112 Entering the Path to the Destination Manually..................113 Basic Procedure for Sending Scan Files by E-mail..................114 Registering an E-mail Destination......................115 Deleting an E-mail Destination.........................
- Page 7 10. Troubleshooting When a Status Icon Is Displayed........................155 When the Indicator Lamp for the [Check Status] Key Is Lit or Flashing............. 156 When the Machine Makes a Beeping Sound.....................158 When You Have Problems Operating the Machine...................159 When Multiple Functions Cannot Be Executed Simultaneously............164 Messages Displayed When You Use the Copy/Document Server Function...........
- Page 8 INDEX ................................219...
-
Page 9: How To Read The Manuals
How to Read the Manuals Symbols Used in the Manuals This manual uses the following symbols: Indicates points to pay attention to when using the machine, and explanations of likely causes of paper misfeeds, damage to originals, or loss of data. Be sure to read these explanations. Indicates supplementary explanations of the machine's functions, and instructions on resolving user errors. -
Page 10: Model-Specific Information
Model-Specific Information This section explains how you can identify the region your machine belongs to. There is a label on the rear of the machine, located in the position shown below. The label contains details that identify the region your machine belongs to. Read the label. DBG001 The following information is region-specific. -
Page 11: Names Of Major Features
Names of Major Features In this manual, major features of the machine are referred to as follows: • Auto Document Feeder... -
Page 13: What You Can Do With This Machine
1. What You Can Do with This Machine You can search for a description by what you want to do. Searching by What You Want to Do You can search for a procedure by what you want to do. Reducing my Costs BRL059S Printing multi-page documents on both sides of sheets (Duplex Copy) See "Duplex Copying", Copy/ Document Server. -
Page 14: Using Scanned Files On The Computer
1. What You Can Do with This Machine Checking how much paper is saved ([Information] screen) See "How to Use the [Information] Screen", Getting Started. Reducing electricity consumption See "Saving Energy", Getting Started. See "Timer Settings", Connecting the Machine/ System Settings. Using Scanned Files on the Computer BQX138S Sending scan files... -
Page 15: Registering Destinations
Searching by What You Want to Do Managing and using documents converted to electronic formats (Document Server) See "Relationship between Document Server and Other Functions", Copy/ Document Server. Registering Destinations BRL060S Using the control panel to register destinations in the Address Book See "Registering Entered Destinations to the Address Book", Fax. -
Page 16: Operating The Machine More Effectively
1. What You Can Do with This Machine Operating the Machine More Effectively BQX139S Registering and using frequently-used settings (Program) See "Registering Functions in a Program", Convenient Functions. Registering frequently-used settings as initial settings (Program as Defaults (Copier/Document Server/FAX/Scanner)) See "Changing the Default Functions of the Initial Screen", Convenient Functions. Registering frequently-used printing settings to the printer driver See "Using One Click Presets", Print. -
Page 17: What You Can Do With This Machine
What You Can Do with This Machine What You Can Do with This Machine This section describes the features of this machine. Customizing the [Home] Screen The icons of each function are displayed on the [Home] screen. CUM001 • You can add shortcuts to often used programs or Web pages to the [Home] screen. The programs or Web pages can be recalled easily by pressing the shortcut icons. -
Page 18: Making Copies Using Various Functions
1. What You Can Do with This Machine Making Copies Using Various Functions CJQ601 • You can make copies in full color. You can switch the color copy mode depending on the type of originals used and the desired finish. See "Copying in Color", Copy/ Document Server. -
Page 19: Printing Data Using Various Functions
What You Can Do with This Machine See "Finishing", Copy/ Document Server. Printing Data Using Various Functions CJQ602 • This machine supports network and local connections. • You can print or delete print jobs stored on the machine's hard disk, which have been previously sent from computers using the printer driver. -
Page 20: Sending And Receiving Faxes Without Paper
1. What You Can Do with This Machine CJQ603 • You can retrieve stored documents scanned in scanner mode to your computer. • Using the file format converter, you can download documents stored in copier, Document Server, or printer mode to your computer. •... - Page 21 What You Can Do with This Machine CJQ604 You can use Web Image Monitor to check, print, delete, retrieve, or download documents using your computer (Storing received documents). • See "Confirming/Printing/Deleting Received and Stored Documents", Fax. Transmission You can send a fax from your computer over the network (Ethernet or wireless LAN) to this machine, which then forwards the fax via its telephone connection (LAN-Fax).
-
Page 22: Sending And Receiving Faxes Via The Internet
1. What You Can Do with This Machine • For details about the machine's settings, see "Network Settings Requirements", Connecting the Machine/ System Settings. • For details about how to use the function, see "Sending Fax Documents from Computers", Fax. Sending and Receiving Faxes via the Internet xxx@xxx.com xxx@xxx.com... -
Page 23: Sending And Receiving Faxes By Using The Machine Without Fax Unit Installed
What You Can Do with This Machine • This machine can receive documents sent via Internet Fax (IP-Fax Reception). See "Types of Reception", Fax. • Using a VoIP gateway, this machine can send to G3 facsimiles connected to the public switched telephone network (PSTN). -
Page 24: Using The Facsimile And The Scanner In A Network Environment
1. What You Can Do with This Machine Using the Facsimile and the Scanner in a Network Environment CJQ607 • You can send scan files to a specified destination using e-mail (Sending scan files by e-mail). See "Overview of E-mail Transmission Function", Fax. See "Basic Procedure for Sending Scan Files by E-mail", Scan. -
Page 25: Preventing Information Leakage (Security Functions)
What You Can Do with This Machine CUL003 • To use this function, the OCR unit is required. • You can select a file type from [PDF], [High Compression PDF], or [PDF/A]. • This function can optically recognize characters in various languages and up to approximately 40,000 characters a page. -
Page 26: Centrally Controlling Scan Conditions And Distribution
1. What You Can Do with This Machine • You can limit the usage of functions for each user. • See Security Guide. Centrally Controlling Scan Conditions and Distribution You can use the distributed scan management (DSM) system in Windows Server 2008 R2/2012 to manage the destinations and scan settings for each individual user in a group and to use the information when distributing scanned data. -
Page 27: Preventing Unauthorized Copying
What You Can Do with This Machine CJQ609 You can check which tray is running out of paper, register information in the Address Book, specify the network settings, configure and change the system settings, manage jobs, print the job history, and configure the authentication settings. - Page 28 1. What You Can Do with This Machine • Using the printer driver, you can embed a pattern in the printed document. If the document is copied on a machine with the Copy Data Security unit, protected pages are grayed out in the copy.
-
Page 29: Getting Started
2. Getting Started This chapter describes how to start using this machine. Guide to Names and Functions of Components This section introduces the names and functions of the components. • Do not obstruct the machine's vents. Doing so risks fire caused by overheated internal components. - Page 30 2. Getting Started 5. Control panel See page 31 "Guide to the Names and Functions of the Machine's Control Panel (When Using the Standard Operation Panel)" or page 34 "Guide to the Names and Functions of the Machine's Control Panel (When Using the Smart Operation Panel)".
- Page 31 Guide to Names and Functions of Components 3. Upper right cover Open this cover when a paper jam occurs. 4. Duplex unit Open this cover when a paper jam occurs. 5. Tray 2 right cover Open this cover when a paper jam occurs. 6.
-
Page 32: Guide To Functions Of The Machine's Options
2. Getting Started Guide to Functions of the Machine's Options Guide to Functions of the Machine's External Options DBG004 1. Internal tray 2 (Type 1 only) If you select this as the output tray, copied/printed paper or fax messages are delivered here. 2. -
Page 33: Guide To The Names And Functions Of The Machine's Control Panel (When Using The Standard Operation Panel)
Guide to the Names and Functions of the Machine's Control Panel (When Using the Standard Operation Panel) Guide to the Names and Functions of the Machine's Control Panel (When Using the Standard Operation Panel) This illustration shows the control panel of the machine with options fully installed. DBG005 1. - Page 34 2. Getting Started 2. Main power indicator The main power indicator goes on when you turn on the main power switch. 3. [Energy Saver] key Press to switch to and from Low Power mode or Sleep mode. See "Saving Energy", Getting Started. When the machine is in Low Power mode, the [Energy Saver] key is lit.
- Page 35 Guide to the Names and Functions of the Machine's Control Panel (When Using the Standard Operation Panel) 14. [ ] key (Enter key) Press to confirm values entered or items specified. 15. Communicating indicator, Fax Received indicator, Confidential File indicator •...
-
Page 36: Guide To The Names And Functions Of The Machine's Control Panel (When Using The Smart Operation Panel)
2. Getting Started Guide to the Names and Functions of the Machine's Control Panel (When Using the Smart Operation Panel) CXV208 1. [Home] key Press to display the [Home] screen. For details, see page 42 "How to Use the [Home] Screen (When Using the Smart Operation Panel)". - Page 37 Guide to the Names and Functions of the Machine's Control Panel (When Using the Smart Operation Panel) 5. [Check Status] key Press to check the machine's system status, operational status of each function, and current jobs. You can also display the job history and the machine's maintenance information. 6.
-
Page 38: Changing The Display Language
2. Getting Started Changing the Display Language You can change the language used on the display. English is set as default. Display the initial settings screen. • When using the standard operation panel Press the [User Tools/Counter] key. DBG032 • When using the Smart Operation Panel Press the [Home] key on the top left of the control panel. -
Page 39: How To Use The [Home] Screen (When Using The Standard Operation Panel)
How to Use the [Home] Screen (When Using the Standard Operation Panel) How to Use the [Home] Screen (When Using the Standard Operation Panel) The icons of each function are displayed on the [Home] screen. You can add shortcuts to frequently used programs or Web pages to the [Home] screen. The icons of added shortcuts appear on the [Home] screen. -
Page 40: Adding Icons To The [Home] Screen (When Using The Standard Operation Panel)
2. Getting Started Press to switch pages when the icons are not displayed on 1 page. 7. Shortcut icon You can add shortcuts to programs or Web pages to the [Home] screen. For details about how to register shortcuts, see page 38 "Adding Icons to the [Home] Screen (When Using the Standard Operation Panel)". The program number appears on the bottom of the shortcut icon. -
Page 41: Operation Panel
How to Use the [Home] Screen (When Using the Standard Operation Panel) • For details about the procedure for registering a shortcut using the [Program] screen, see "Registering a Shortcut to a Program to the [Home] Screen", Convenient Functions. • You can register up to 72 function and shortcut icons. Delete unused icons if the limit is reached. For details see "Deleting an Icon on the [Home] Screen (When Using the Standard Operation Panel)", Convenient Functions. - Page 42 2. Getting Started Press [Edit Home]. Press [Add Icon]. Press the [Program] tab.
- Page 43 How to Use the [Home] Screen (When Using the Standard Operation Panel) Make sure that [Copier Program] is selected. Select the program you want to add. Specify the position where [Blank] is displayed. Press [OK]. Press the [User Tools/Counter] key. •...
-
Page 44: How To Use The [Home] Screen (When Using The Smart Operation Panel)
2. Getting Started How to Use the [Home] Screen (When Using the Smart Operation Panel) To display the [Home] screen, press the [Home] key on the control panel. One icon is assigned to each function, and these icons are displayed on the [Home] screen. You can add shortcuts to frequently used functions or Web pages to the [Home] screen. -
Page 45: Adding Icons To The [Home] Screen (When Using The Smart Operation Panel)
How to Use the [Home] Screen (When Using the Smart Operation Panel) 4. Icon display area Displays the function or application icons and widgets. Displayed icons differ between the five home screens. For details about icons on each screen, see "Main Icons on the [Home] Screen (When Using the Smart Operation Panel)", Getting Started. - Page 46 2. Getting Started Press [Application] or [Machine Application]. Press [Application] to select widgets, quick applications, or other Smart Operation Panel applications. Press [Machine Application] to select copier mode, fax mode, or some other of the machine's applications. Select the application you want to add from the list. Adding shortcuts to bookmarks on the [Home] screen (when using the Smart Operation Panel) You can add shortcuts to bookmarks that have been registered in favorites in the Web Browser to the...
- Page 47 How to Use the [Home] Screen (When Using the Smart Operation Panel) Press the [Home] key. CZP155 Select the screen to which you want to add a shortcut. Press and hold down an area on the screen where no icons are displayed. Press [Icon] on the [Add to Home] screen.
- Page 48 2. Getting Started Adding widgets to the [Home] screen (when using the Smart Operation Panel) You can add widgets to the [Home] screen to show the remaining amount of toner or change the display language. Press the [Home] key. CZP155 Select the screen to which you want to add a widget.
-
Page 49: Registering Functions In A Program
Registering Functions in a Program Registering Functions in a Program Depending on the functions, the number of programs that can be registered is different. • Copier: 25 programs • Document Server: 25 programs • Facsimile: 100 programs • Scanner: 25 programs The following settings can be registered to programs: Copier: Color mode, original type, density, Original Settng, paper tray, Store File (except for User Name,... - Page 50 2. Getting Started DBG031 • When using the Smart Operation Panel Press the [Home] key on the top left of the control panel. Flick the screen to the left, and then press the [Copier] icon on the Home screen 4. Edit the copy settings so all functions you want to store in a program are selected.
- Page 51 Registering Functions in a Program Press the program number you want to register. Enter the program name. Press [OK]. Press [Exit]. • The number of characters you can enter for a program name varies depending on the functions as follows: •...
-
Page 52: Example Of Programs
2. Getting Started • Program numbers with next to them already have settings made for them. • Programs can be registered to the [Home] screen, and can be recalled easily. For details, see "Registering a Shortcut to a Program to the [Home] Screen", Convenient Functions and page 38 "Adding Icons to the [Home] Screen (When Using the Standard Operation Panel)". - Page 53 Registering Functions in a Program Scanner mode Program name Program description Effect Easy PDF scan Select [Full Color: Text / Photo] in You can scan documents efficiently. [Scan Settings]. In [Send File Type / Name], select [PDF] under [File Type] and enter the business details such as "London branch: daily report"...
- Page 54 2. Getting Started Program name Program description Effect Storage scan: Specify a folder in [Target Folder to You can use folders to organize XXXX Store] in [Store File]. stored files by user name or intended use. (replace XXXX by a folder name) Facsimile mode Program name...
-
Page 55: Turning On/Off The Power
Turning On/Off the Power Turning On/Off the Power The main power switch is on the left side of the machine. When this switch is turned on, the main power turns on and the main power indicator on the right side of the control panel lights up. When this switch is turned off, the main power turns off and the main power indicator on the right side of the control panel goes out. -
Page 56: Logging In The Machine
2. Getting Started Logging In the Machine When the Authentication Screen is Displayed If Basic Authentication, Windows Authentication, LDAP Authentication, or Integration Server Authentication is active, the authentication screen appears on the display. The machine only becomes operable after entering your own Login User Name and Login Password. If User Code Authentication is active, you cannot use the machine until you enter the User Code. -
Page 57: Logging In Using The Control Panel (When Using The Smart Operation Panel)
Logging In the Machine Press [Login]. Enter a Login User Name, and then press [OK]. Enter a Login Password, and then press [OK]. When the user is authenticated, the screen for the function you are using appears. Logging In Using the Control Panel (When Using the Smart Operation Panel) This section explains the procedure for logging in to the machine when Basic Authentication, Windows Authentication, LDAP Authentication, or Integration Server Authentication is set. -
Page 58: Logging Out Using The Control Panel (When Using The Standard Operation Panel)
2. Getting Started Logging Out Using the Control Panel (When Using the Standard Operation Panel) This section explains the procedure for logging out the machine when Basic Authentication, Windows Authentication, LDAP Authentication, or Integration Server Authentication is set. • To prevent use of the machine by unauthorized persons, always log out when you have finished using the machine. -
Page 59: Placing Originals
Placing Originals Placing Originals Placing Originals on the Exposure Glass • Keep your hands away from the hinges and exposure glass when lowering the ADF. Not doing so may result in an injury if your hands or fingers are pinched. •... - Page 60 2. Getting Started Open the cover of the ADF. DBG017 Place the aligned original face up into the ADF, and then adjust the document guides to the original size. Do not stack originals beyond the limit mark. The first page should be on the top. DBG018 1.
-
Page 61: Copy
3. Copy This chapter describes frequently used copier functions and operations. For information not included in this chapter, see Copy/ Document Server available on our website. Basic Procedure To make copies of originals, place them on the exposure glass or in the ADF. When placing the original on the exposure glass, start with the first page to be copied. - Page 62 3. Copy Select the paper tray containing the paper that is the same size and orientation as the originals. Make sure that [Use Paper Tray Settg] is selected. When [Use Paper Tray Settg] is selected, the paper size and orientation of the tray you have selected will appear in Original Settng.
-
Page 63: Auto Reduce / Enlarge
Auto Reduce / Enlarge Auto Reduce / Enlarge The machine automatically calculates the reproduction ratio based on the sizes of the originals and the paper you have specified. The machine will rotate, enlarge, or reduce the image of the originals to fit them to the paper. - Page 64 3. Copy Select original orientation. Press [OK]. Press [Auto Reduce / Enlarge]. Select the paper tray. Place the originals, and then press the [Start] key.
-
Page 65: Duplex Copying
Duplex Copying Duplex Copying Copies two 1-sided pages or one 2-sided page onto a 2-sided page. During copying, the image is shifted to allow for the binding margin. CKN009 • You cannot use the bypass tray with this function. There are two types of Duplex. 1 Sided 2 Sided Copies two 1-sided pages on one 2-sided page. - Page 66 3. Copy Original Original Placing originals Orientation Copy Orientation Top to Top Top to Bottom Press [Dup./Combine/Series]. Make sure that [Duplex] is selected. If [Duplex] is not selected, press [Duplex]. Select [1 Sided 2 Sided] or [2 Sided 2 Sided] according to how you want the document to be output.
-
Page 67: Specifying The Original And Copy Orientation
Duplex Copying Select the original orientation, and then press [OK]. Select the paper tray. Press the [Start] key. Specifying the Original and Copy Orientation Select the orientation of the originals and copies if the original is two-sided or if you want to copy onto both sides of the paper. - Page 68 3. Copy Select [Top to Top] or [Top to Bottom] for [Original:] if the original is two-sided. Select [Top to Top] or [Top to Bottom] for [Copy:]. Press [OK].
-
Page 69: Combined Copying
Combined Copying Combined Copying This mode can be used to select a reproduction ratio automatically and copy the originals onto a single sheet of copy paper. The machine selects a reproduction ratio between 25 and 400%. If the orientation of the original is different from that of the copy paper, the machine will automatically rotate the image by 90 degrees to make copies properly. -
Page 70: One-Sided Combine
3. Copy CKN010 • Originals read from right to left CKN017 One-Sided Combine Combine several pages onto one side of a sheet. CKN014 • You cannot use the bypass tray with this function. There are six types of One-Sided Combine. 1 Sided 2 Originals Combine 1 Side Copies two 1-sided originals to one side of a sheet. - Page 71 Combined Copying 2 Sided 2 Pages Combine 1 Side Copies one 2-sided original to one side of a sheet. 2 Sided 4 Pages Combine 1 Side Copies two 2-sided originals to one side of a sheet. 2 Sided 8 Pages Combine 1 Side Copies four 2-sided originals to one side of a sheet.
-
Page 72: Two-Sided Combine
3. Copy Press [Combine 1 Side]. Select the number of originals to combine. Press [OK]. Select the paper tray. Place the originals, and then press the [Start] key. Two-Sided Combine Combines various pages of originals onto two sides of one sheet. CKN074 •... - Page 73 Combined Copying 2 Sided 4 Pages Combine 2 Sides Copies two 2-sided originals to one sheet with 2 pages per side. 2 Sided 8 Pages Combine 2 Sides Copies four 2-sided originals to one sheet with 4 pages per side. 2 Sided 16 Pages Combine 2 Sides Copies eight 2-sided originals to one sheet with 8 pages per side.
- Page 74 3. Copy Select [1 Sided] or [2 Sided] for [Original:]. Press [Combine 2 Sides]. Press [Orientation]. Select [Top to Top] or [Top to Bottom] for [Original:] and/or [Copy:], and then press [OK]. Select the number of originals to combine. Press [OK]. Select the paper tray.
-
Page 75: Copying Onto Custom Size Paper From The Bypass Tray
Copying onto Custom Size Paper from the Bypass Tray Copying onto Custom Size Paper from the Bypass Tray Paper that has a horizontal length of 127.0–355.6 mm (5.00–14.00 inches) and a vertical length of 70.0–216.0 mm (2.76–8.50 inches) can be fed in from the bypass tray. Note however that the limitation on the horizontal and vertical length range will vary depending on which options are installed. -
Page 76: Copying Onto Envelopes
3. Copy Copying onto Envelopes This section describes how to copy onto regular size and custom size envelopes. Place the original on the exposure glass and place the envelope in the bypass tray or paper tray. Specify the thickness of the paper according to the weight of the envelopes you are printing on. For details about the relationship between paper weight and paper thickness and the sizes of envelopes that can be used, see page 141 "Recommended Paper Sizes and Types". -
Page 77: Copying Onto Envelopes From The Paper Tray
Copying onto Envelopes Press the [ ] key. Press [Paper Size]. Specify the envelope size, and then press [OK] twice. Place the originals, and then press the [Start] key. Copying onto Envelopes from the Paper Tray Before using this function, specify the paper size and type under [Tray Paper Settings] in User Tools. For the paper type, select [Envelope]. -
Page 78: Sort
3. Copy Sort The machine assembles copies as sets in sequential order. Sort Copies are assembled as sets in sequential order. CKN018 Shift Sort (Type 2 only) Sets of copies are stacked offset from one another. This function allows you to easily distinguish each set of copies. -
Page 79: Changing The Number Of Sets
Sort Select [Sort], and then press [OK]. Enter the number of copy sets using the number keys. Select the paper tray. Place the originals. To confirm the type of finishing, press the [Sample Copy] key. Press the [Start] key. Changing the Number of Sets You can change the number of copy sets during copying. -
Page 80: Storing Data In The Document Server
3. Copy Storing Data in the Document Server The Document Server enables you to store documents being read with the copy feature on the hard disk of this machine. Thus you can print them later applying necessary conditions. You can check the stored documents on the Document Server screen. For details about the Document Server, see page 125 "Storing Data". -
Page 81: Fax
4. Fax This chapter describes frequently used facsimile functions and operations. For information not included in this chapter, see Fax available on our website. Basic Procedure for Transmissions (Memory Transmission) This section describes the basic procedure for transmitting documents using Memory Transmission. You can specify the fax, IP-Fax, Internet Fax, e-mail, or folder destinations. - Page 82 4. Fax Make sure [Immed. TX] is not highlighted. Place the original into the ADF. Make the scan settings such as scan size and resolution. Configure the transmission settings such as [TX Mode] as necessary. Specify a destination. You can enter the destination's number or address directly or select from the Address Book by pressing the destination key.
-
Page 83: Sending Originals Using The Exposure Glass (Memory Transmission)
Basic Procedure for Transmissions (Memory Transmission) If you send documents to Internet Fax or e-mail destinations or enable the Email TX Results function, specify a sender. Press the [Start] key. Sending Originals Using the Exposure Glass (Memory Transmission) Make sure [Immed. TX] is not highlighted. Place the first page of the original face down on the exposure glass. -
Page 84: Registering A Fax Destination
4. Fax Registering a Fax Destination Display the Address Book screen. • When using the standard operation panel Press the [Home] key on the bottom left of the control panel, and press the [Address Book Management] icon on the [Home] screen. •... -
Page 85: Deleting A Fax Destination
Basic Procedure for Transmissions (Memory Transmission) Enter the fax number using the number keys, and then press [OK]. Specify optional settings such as "SUB Code", "SEP Code", and "International TX Mode". Press [OK]. Close the Address Book screen. • When using the standard operation panel Press the [User Tools/Counter] key. - Page 86 4. Fax Press [Fax Dest.]. Press [Change] under "Fax Destination". Press [Delete All], and then press [OK] under "Fax Destination". Press [OK]. Close the Address Book screen. • When using the standard operation panel Press the [User Tools/Counter] key. • When using the Smart Operation Panel Press [User Tools/Counter] ( ) on the top right of the screen.
-
Page 87: Transmitting While Checking Connection To Destination (Immediate Transmission)
Transmitting while Checking Connection to Destination (Immediate Transmission) Transmitting while Checking Connection to Destination (Immediate Transmission) Using Immediate Transmission, you can send documents while checking the connection to the destination. You can specify fax or IP-Fax destinations. If you specify Internet Fax, e-mail, folder destinations, and group or multiple destinations, the transmission mode is automatically switched to Memory Transmission. -
Page 88: Sending Originals Using The Exposure Glass (Immediate Transmission)
4. Fax Press [Immed. TX]. Place the original into the ADF. Select the scan settings you require. Specify a destination. If you make a mistake, press the [Clear] key, and then enter again. Press the [Start] key. Sending Originals Using the Exposure Glass (Immediate Transmission) Press [Immed. - Page 89 Transmitting while Checking Connection to Destination (Immediate Transmission) Press the [ ] key.
-
Page 90: Canceling A Transmission
4. Fax Canceling a Transmission This section explains how to cancel a fax transmission. Canceling a Transmission Before the Original Is Scanned Use this procedure to cancel a transmission before pressing the [Start] key. Cancel sending. • When using the standard operation panel Press the [Reset] key. -
Page 91: Canceling A Transmission After The Original Is Scanned
Canceling a Transmission Press the [Stop] key. DBJ002 Press [Cancel Scanning] or [Cancel TX]. Depending on the transmission mode and function you use, either [Cancel Scanning] or [Cancel TX] is displayed. Canceling a Transmission After the Original Is Scanned Use this procedure to cancel a transmission after the original is scanned. You can cancel transmission of a file while the file is being sent, stored in memory, or if it fails to transmit. - Page 92 4. Fax Press [OK]. To cancel another file, repeat Steps 3 through 5. Press [Exit]. After pressing [Check / Stop Transmission File] under [TX/RX Status / Print] in Step 1, press [Exit] twice.
-
Page 93: Storing A Document
Storing a Document Storing a Document You can store and send a document at the same time. You can also just store a document. The following information can be set for the stored documents as necessary: User Name You can set this function if necessary to know who and what departments stored documents in the machine. -
Page 94: Sending Stored Documents
4. Fax Set the user name, file name, and password as necessary. • User Name Press [User Name], and then select a user name. To specify an unregistered user name, press [Manual Entry], and then enter the name. After specifying a user name, press [OK]. •... - Page 95 Storing a Document Press [Select Stored File]. Select the documents to be sent. When multiple documents are selected, they are sent in the order of selection. • Press [User Name] to place the documents in order by programmed user name. •...
-
Page 96: Printing The Journal Manually
4. Fax Printing the Journal Manually To print the Journal manually, select the printing method: [All], [Print per File No.], or [Print per User]. Prints the results of communications in the order made. Print per File No. Prints only the results of communications specified by file number. Print per User Prints the results of communications by individual senders. -
Page 97: Print
5. Print This chapter describes frequently used printer functions and operations. For information not included in this chapter, see Print available on our website. Quick Install You can install the printer drivers easily from the CD-ROM provided with this machine. Using Quick Install, the PCL 6 printer driver is installed under network environment, and the Standard TCP/IP port will be set. -
Page 98: Displaying The Printer Driver Properties
5. Print Displaying the Printer Driver Properties This section explains how to open the printer driver properties from [Devices and Printers]. • Manage Printers permission is required to change the printer settings. Log on as an Administrators group member. • You cannot change the machine default settings for individual users. Settings made in the printer properties dialog box are applied to all users. -
Page 99: Standard Printing
Standard Printing Standard Printing • The default setting is 2 sided printing. If you want to print on only one side, select [Off] for the 2 sided printing setting. • If you send a print job via USB 2.0 while the machine is in Low Power mode or Sleep mode, an error message might appear when the print job is complete. -
Page 100: Printing On Both Sides Of Sheets
5. Print Printing on Both Sides of Sheets This section explains how to print on both sides of each page using the printer driver. • The types of paper that can be printed on both sides are as follows: • Plain (61 to 90 g/m2), Recycled, Special 1, Special 2, Special 3, Middle Thick (91 to 105 g/m2), Thick 1(106 to 130 g/m2), Thick 2(131 to 163 g/m2), Color, Letterhead, Thick 1 (Back Side), Thick 2 (Back Side), Coated (Glossy), Coated (Matted) •... -
Page 101: Combining Multiple Pages Into Single Page
Combining Multiple Pages into Single Page Combining Multiple Pages into Single Page This section explains how to print multiple pages onto a single sheet. The combine printing function allows you to economize on paper by printing multiple sheets at reduced size onto a single sheet. When Using the PCL 6 Printer Driver Click the WordPad menu button in the upper left corner of the window, and then click [Print]. - Page 102 5. Print 4 Pages per Sheet Right, then Down Down, then Right Left, then Down Down, then Left...
-
Page 103: Printing On Envelopes
Printing on Envelopes Printing on Envelopes Configure the paper settings appropriately using both the printer driver and the control panel. Configuring Envelope Settings Using the Control Panel Load envelopes in the paper tray. Display the initial settings screen. • When using the standard operation panel Press the [User Tools/Counter] key. -
Page 104: Printing On Envelopes Using The Printer Driver
5. Print Printing on Envelopes Using the Printer Driver When using the PCL 6 printer driver Click the WordPad menu button in the upper left corner of the window, and then click [Print]. In the [Select Printer] list, select the printer you want to use. Click [Preferences]. -
Page 105: Saving And Printing Using The Document Server
Saving and Printing Using the Document Server Saving and Printing Using the Document Server The Document Server enables you to store documents on the machine's hard disk, and allows you to edit and print them as necessary. • Applications with their own drivers, such as PageMaker, do not support this function. •... -
Page 106: Managing Documents Stored In Document Server
5. Print If the folder is protected by a password, enter the password in the "Folder Password:" box. Click [OK]. Change any other print settings if necessary. Click [OK]. Start printing from the application's [Print] dialog box. • You can print the documents stored in the Document Server using the control panel. For details, see page 127 "Printing Stored Documents". -
Page 107: Basic Procedure When Using Scan To Folder
6. Scan This chapter describes frequently used scanner functions and operations. For information not included in this chapter, see Scan available on our website. Basic Procedure When Using Scan to Folder • Before performing this procedure, see "Preparation for Sending by Scan to Folder", Scan and confirm the details of the destination computer. -
Page 108: Creating A Shared Folder On A Computer Running Windows/Confirming A Computer's Information
6. Scan Press the [Folder] tab. Place originals. If necessary, specify the scan settings according to the original to be scanned. Example: Scanning the document in color/duplex mode, and saving as a PDF file. • Press [Scan Settings], and then press [Full Color: Text / Photo] in the [Original Type] tab. •... - Page 109 Basic Procedure When Using Scan to Folder Step 1: Confirming the user name and computer name Confirm the user name and the name of the computer you will send scanned documents to. On the [Start] menu, point to [All Programs], then [Accessories], and then click on [Command Prompt].
-
Page 110: Registering An Smb Folder
6. Scan Specify one or more object types, select a location, and then click [Find Now]. When using Windows XP, click [Find Now]. From the list of results, select the groups and users you want to grant access to, and then click [OK]. - Page 111 Basic Procedure When Using Scan to Folder Press the [Home] key on the top left of the control panel. Flick the screen to the left, and then press the [Address Book Management] icon on the Home screen 4. Check that [Program / Change] is selected. Press [New Program].
- Page 112 6. Scan Enter the login user name of the destination computer, and then press [OK]. Press [Change] under "Login Password". Enter the password of the destination computer, and then press [OK]. Enter the password again to confirm, and then press [OK]. Press [Folder].
- Page 113 Basic Procedure When Using Scan to Folder If the network does not allow automatic obtaining of IP addresses, include the destination computer's IP address in the path. For example: if the IP address of the destination computer is "192.168.0.191", and the folder name is "Share", the path will be \\192.168.0.191\Share. Press [OK].
-
Page 114: Deleting An Smb Registered Folder
6. Scan Deleting an SMB Registered Folder Display the Address Book screen. • When using the standard operation panel Press the [Home] key on the bottom left of the control panel, and press the [Address Book Management] icon on the [Home] screen. •... -
Page 115: Entering The Path To The Destination Manually
Basic Procedure When Using Scan to Folder Entering the Path to the Destination Manually Press [Manual Entry]. Press [SMB]. Press [Manual Entry] on the right side of the path field. Enter the path for the folder. In the following example path, the shared folder name is "user" and the computer name is "desk01": \\desk01\user Press [OK]. -
Page 116: Basic Procedure For Sending Scan Files By E-Mail
6. Scan Basic Procedure for Sending Scan Files by E- mail Display the initial scanner screen. • When using the standard operation panel Press the [Home] key on the bottom left of the control panel, and press the [Scanner] icon on the [Home] screen. -
Page 117: Registering An E-Mail Destination
Basic Procedure for Sending Scan Files by E-mail If necessary, specify the scan settings according to the original to be scanned. Example: Scanning the document in color/duplex mode, and saving as a PDF file. • Press [Scan Settings], and then press [Full Color: Text / Photo] in the [Original Type] tab. •... - Page 118 6. Scan Press [ Next]. Press the key for the classification you want to use under "Select Title". The keys you can select are as follows: • [Frequent]: Added to the page that is displayed first. • [AB], [CD], [EF], [GH], [IJK], [LMN], [OPQ], [RST], [UVW], [XYZ], [1] to [10]: Added to the list of items in the selected title.
-
Page 119: Deleting An E-Mail Destination
Basic Procedure for Sending Scan Files by E-mail Select [Email / Internet Fax Destination] or [Internet Fax Destination Only]. If [Email / Internet Fax Destination] is specified, registered e-mail addresses appear in both Internet fax address display and e-mail address display on the fax function screen, and in the address display on the scanner function screen. -
Page 120: Entering An E-Mail Address Manually
6. Scan Press [User Tools/Counter] ( ) on the top right of the screen. Entering an E-mail Address Manually Press [Manual Entry]. Enter the e-mail address. Press [OK]. -
Page 121: Basic Procedure For Storing Scan Files
Basic Procedure for Storing Scan Files Basic Procedure for Storing Scan Files • You can specify a password for each stored file. We recommend that you protect stored files from unauthorized access by specifying passwords. • Scan file stored in the machine may be lost if some kind of failure occurs. We advise against using the hard disk to store important files. -
Page 122: Checking A Stored File Selected From The List
6. Scan Press [Store File]. Press [Store to HDD]. If necessary, specify the stored file's information, such as [User Name], [File Name], [Password], and [Select Folder]. • User Name Press [User Name], and then select a user name. To specify an unregistered user name, press [Manual Entry], and then enter the name. - Page 123 Basic Procedure for Storing Scan Files Press [Select Stored File]. Specify the folder where the file is stored. From the list of stored files, select the file you want to check. You can select more than one file. Press [Preview].
-
Page 124: Specifying The File Type
6. Scan Specifying the File Type This section explains the procedure for specifying the file type of a file you want to send. File types can be specified when sending files by e-mail or Scan to Folder, sending stored files by e-mail or Scan to Folder, and saving files on a memory storage device. -
Page 125: Specifying Scan Settings
Specifying Scan Settings Specifying Scan Settings Press [Scan Settings]. Specify resolution, scan size, and other settings, as required. Press [OK]. - Page 126 6. Scan...
-
Page 127: Document Server
7. Document Server This chapter describes frequently used Document Server functions and operations. For information not included in this chapter, see Copy/ Document Server available on our website. Storing Data This section describes the procedure for storing documents on the Document Server. •... - Page 128 7. Document Server DBG031 • When using the Smart Operation Panel Press the [Home] key on the top left of the control panel. Flick the screen to the left, and then press the [Document Server] icon on the Home screen 3. Press [To Scanning Screen].
-
Page 129: Printing Stored Documents
Printing Stored Documents Printing Stored Documents Prints stored documents on the Document Server. The items you can specify on the printing screen are as follows: • Paper tray • The number of prints • [Finishing] ([Sort], [Stack], [Staple]) • [Cover/Slip Sheet] ([Front Cover], [Front/Back Cover], [Designate/Chapter], [Slip Sheet]) •... - Page 130 7. Document Server...
-
Page 131: Web Image Monitor
8. Web Image Monitor This chapter describes frequently used Web Image Monitor functions and operations. For information not included in this chapter, see Connecting the Machine/ System Settings available on our website or Web Image Monitor Help. Displaying Top Page This section explains the Top Page and how to display Web Image Monitor. - Page 132 8. Web Image Monitor (Help): Use Help to view or download Help file contents. 4. Basic Information area Displays the basic information of the machine. 5. Work area Displays the contents of the item selected in the menu area.
-
Page 133: Adding Paper And Toner
9. Adding Paper and Toner This chapter describes how to load paper into the paper tray and recommended paper sizes and types. Loading Paper Precautions for Loading Paper • When loading paper, take care not to trap or injure your fingers. •... -
Page 134: Loading Paper Into The Bypass Tray
9. Adding Paper and Toner Check that paper in the paper tray is not being used, and then pull the tray carefully out until it stops. DBG019 Square the paper and load it print side up. Do not stack paper over the limit mark. DBG020 Carefully push the paper tray fully in. - Page 135 Loading Paper • The maximum number of sheets you can load at the same time depends on paper type. Do not stack paper over the limit mark. For the maximum number of sheets you can load, see page 141 "Recommended Paper Sizes and Types". Open the bypass tray.
-
Page 136: Printing From The Bypass Tray Using The Printer Function
9. Adding Paper and Toner • You can load envelopes into the bypass tray. Envelopes must be loaded in a specific orientation. For details, see page 147 "Envelopes". • Specify the sizes of paper that are not automatically detected. For details about the sizes that can be detected automatically, see page 141 "Recommended Paper Sizes and Types". - Page 137 Loading Paper DBG032 • When using the Smart Operation Panel Press the [Home] key on the top left of the control panel. Flick the screen to the left, and then press the [User Tools] icon ( ) on the Home screen 4. Press [Tray Paper Settings].
- Page 138 9. Adding Paper and Toner DBG032 • When using the Smart Operation Panel Press the [Home] key on the top left of the control panel. Flick the screen to the left, and then press the [User Tools] icon ( ) on the Home screen 4. Press [Tray Paper Settings].
- Page 139 Loading Paper Specifying thick paper, thin paper, or OHP transparencies for paper type using the control panel • Use A4 size OHP transparencies, and specify their size. • Usually only one side of OHP transparencies can be used for printing. Be sure to load them with the print side down.
-
Page 140: Loading Orientation-Fixed Paper Or Two-Sided Paper
9. Adding Paper and Toner Press [OK]. Close the initial settings screen. • When using the standard operation panel Press the [User Tools/Counter] key. • When using the Smart Operation Panel Press [User Tools/Counter] ( ) on the top right of the screen. •... - Page 141 Loading Paper Icon Meaning Place or load paper scanned or printed side face up. Place or load paper scanned or printed side face down. • Original orientation Original orientation Exposure glass Readable orientation Unreadable • Copy orientation • Scanner • Paper orientation Print side Paper trays Bypass tray...
- Page 142 9. Adding Paper and Toner • In copier mode: • For details about how to make two-sided copies, see page 63 "Duplex Copying". • In printer mode: • To print on letterhead paper when [Auto Detect] is specified for [Letterhead Setting], you must specify [Letterhead] as the paper type in the printer driver's settings.
-
Page 143: Recommended Paper
Recommended Paper Recommended Paper Recommended Paper Sizes and Types This section describes recommended paper sizes and types. • If you use paper that curls, either because it is too dry or too damp, a staple clogging or paper jam may occur. •... - Page 144 9. Adding Paper and Toner Paper type and weight Paper size Paper capacity 52–220 g/m (14 lb. Custom size: 550 sheets Bond–80 lb. Cover) Thin Paper–Thick Paper 3 Vertical: 98.0–216.0 mm Horizontal: 148.0–297.0 mm Vertical: 3.86–8.50 inches Horizontal: 5.83–11.69 inches Envelopes Select the paper size using the Tray Paper Settings menu:...
- Page 145 Recommended Paper Paper type and weight Paper size Paper capacity 52–220 g/m (14 lb. Custom size: 550 sheets Bond–80 lb. Cover) Thin Paper–Thick Paper 3 Vertical: 98.0–216.0 mm Horizontal: 148.0–355.6 mm Vertical: 3.86–8.50 inches Horizontal: 5.83–14.00 inches Envelopes Select the paper size using the Tray Paper Settings menu: ×...
- Page 146 9. Adding Paper and Toner Paper type and weight Paper size Paper capacity 52–256 g/m (14 lb. Custom size 100 sheets Bond–140 lb. Index) Thin Paper–Thick Paper 4 Vertical: 70.0–216.0 mm *3*4 Horizontal: 127.0–600.0 mm Vertical: 2.76–8.50 inches *3*4 Horizontal: 5.00–23.62 inches OHP transparencies Label paper 1 sheet...
- Page 147 Recommended Paper Paper Thickness Paper weight Thick Paper 1 106–130 g/m (28–35 lb. Bond) Thick Paper 2 131–163 g/m (35 lb. Bond–90 lb. Index) Thick Paper 3 164–220 g/m (90 lb. Index–80 lb. Cover) Thick Paper 4 221–256 g/m (80 lb. Cover–140 lb. Index) *1 Print quality will decrease if the paper you are using is close to the minimum or maximum weight.
-
Page 148: Thick Paper
9. Adding Paper and Toner • Specify [Label Paper] for paper type and select an appropriate paper thickness in [Tray Paper Settings]. • When loading OHP transparencies: • We recommend that you use specified OHP transparencies. • When copying onto OHP transparencies, see "Copying onto OHP Transparencies", Copy/ Document Server. - Page 149 Recommended Paper Direction of paper grain Paper trays Bypass tray • Select [Thick Paper 1], [Thick Paper 2], [Thick Paper 3], or [Thick Paper 4] as the paper thickness in [Tray Paper Settings]. • Even if thick paper is loaded as described above, normal operations and print quality might still not be possible, depending on the paper type.
- Page 150 9. Adding Paper and Toner How to load envelopes Orientation of Exposure glass Paper trays Bypass tray envelopes Side-opening envelopes • Flaps: closed • Flaps: closed • Flaps: closed • Bottom side of • Bottom side of • Bottom side of envelopes: envelopes: envelopes:...
- Page 151 Recommended Paper To print on envelopes that are loaded with their short edges against the machine body, rotate the print image by 180 degrees using the printer driver. Recommended envelopes For information about recommended envelopes, contact your local dealer. For details about the sizes of envelopes you can load, see page 141 "Recommended Paper Sizes and Types".
-
Page 152: Adding Toner
9. Adding Paper and Toner Adding Toner This section explains precautions when adding toner, how to send faxes or scanned documents when the toner has run out, and how to dispose of used toner. • Do not incinerate toner (new or used) or toner containers. Doing so risks burns. Toner will ignite on contact with naked flame. - Page 153 Adding Toner • If toner or used toner is swallowed, dilute by drinking a large amount of water. Consult a doctor if necessary. • When removing jammed paper or replacing toner, avoid getting toner (new or used) on your clothing. If toner comes into contact with your clothing, wash the stained area with cold water. Hot water will set the toner into the fabric and make removing the stain impossible.
-
Page 154: Sending Faxes Or Scanned Documents When Toner Has Run Out
9. Adding Paper and Toner • For details about how to check contact number where you can order supplies, see "Inquiry", Maintenance and Specifications. Sending Faxes or Scanned Documents When Toner Has Run Out When the machine has run out of toner, the indicator on the display lights. Note that even if there is no toner left, you can still send faxes or scanned documents. - Page 155 Adding Toner If you want to discard your used toner container, please contact your local sales office. If you discard it by yourself, treat it as general plastic waste material. (mainly North America) Please see our local company website for information on the recycling of supply products, or you can recycle items according to the requirements of your local municipalities or private recyclers.
- Page 156 9. Adding Paper and Toner...
-
Page 157: 10. Troubleshooting
10. Troubleshooting This chapter describes basic troubleshooting procedures. When a Status Icon Is Displayed This section describes the status icons displayed when the machine requires the user to remove misfed paper, to add paper, or to perform other procedures. Status Icon Status : Paper Misfeed icon Appears when a paper misfeed occurs. -
Page 158: When The Indicator Lamp For The [Check Status] Key Is Lit Or Flashing
10. Troubleshooting When the Indicator Lamp for the [Check Status] Key Is Lit or Flashing If the indicator lamp for the [Check Status] key lights up or flashes, press the [Check Status] key to display the [Check Status] screen. Check the status of each function in the [Check Status] screen. [Check Status] screen DBP003 1. - Page 159 When the Indicator Lamp for the [Check Status] Key Is Lit or Flashing Problem Causes Solutions Documents and reports do The paper output tray is full. Remove the prints from the tray. not print out. Documents and reports do There is no paper left. Load paper.
-
Page 160: When The Machine Makes A Beeping Sound
10. Troubleshooting When the Machine Makes a Beeping Sound The following table describes the meaning of the various beep patterns that the machine produces to alert users about left originals and other machine conditions. Beep pattern Meaning Causes Single short beep Panel/screen input A control panel or screen key was accepted. -
Page 161: When You Have Problems Operating The Machine
When You Have Problems Operating the Machine When You Have Problems Operating the Machine Problem Causes Solutions When the machine is turned Functions other than the Wait a little longer. on, the only icon that copier function are not yet appears on the home screen ready. - Page 162 10. Troubleshooting Problem Causes Solutions Nothing happens when the The power is turned off. Make sure the main power indicator is [Check Status] key or the off, and then turn on the power. [Energy Saver] key is pressed. The power turns off The Weekly Timer setting is Change the Weekly Timer setting.
- Page 163 When You Have Problems Operating the Machine Problem Causes Solutions An error message is still Misfed paper in the finisher Open the front cover of the finisher, displayed, even if misfed has not been removed. turn the knob clockwise or paper is removed.
- Page 164 10. Troubleshooting Problem Causes Solutions Misfeeds occur frequently. The tray's side or end fences • Remove misfed paper. For details may not be set properly. about removing jammed paper, see "Removing Jammed Paper", Troubleshooting. • Check that the side or end fences are set properly.
- Page 165 When You Have Problems Operating the Machine Problem Causes Solutions Cannot print in duplex You have selected a paper In [Tray Paper Settings], select a paper mode. type that cannot be used for type that can be used for duplex duplex printing.
-
Page 166: When Multiple Functions Cannot Be Executed Simultaneously
10. Troubleshooting • If you cannot make copies as you want because of paper type, paper size, or paper capacity problems, use the recommended paper. For details about recommended paper, see page 141 "Recommended Paper Sizes and Types". When Multiple Functions Cannot Be Executed Simultaneously If you cannot carry out your job, it may be that the machine is being used by another function. -
Page 167: Messages Displayed When You Use The Copy/Document Server Function
Messages Displayed When You Use the Copy/Document Server Function Messages Displayed When You Use the Copy/ Document Server Function • If you cannot make copies as you want because of the paper type, paper size or paper capacity problems, use recommended paper. For details about recommended paper, see page 141 "Recommended Paper Sizes and Types". - Page 168 10. Troubleshooting Message Causes Solutions "File being stored exceeded The scanned originals have Press [Exit], and then store again with max. number of pages per too many pages to store as an appropriate number of pages. file. Copying will be one document.
- Page 169 Messages Displayed When You Use the Copy/Document Server Function Message Causes Solutions "Stapling capacity The number of sheets per set Check the stapler capacity. For details exceeded." is over the staple capacity. about the stapler capacity, see "Specifications for Finisher", Maintenance and Specifications.
-
Page 170: Messages Displayed When You Use The Facsimile Function
10. Troubleshooting Messages Displayed When You Use the Facsimile Function Message Causes Solutions "Cannot find the specified The name of the computer or Check that the computer name and the path. Please check the folder entered as the folder name for the destination are settings."... -
Page 171: When Network Setting Problems Occur
Messages Displayed When You Use the Facsimile Function Message Causes Solutions "Some page(s) are near The first page of the The original's blank side might have blank." document is almost blank. been scanned. Be sure to place your originals correctly. For details about determining the cause of blank pages, see "Detecting Blank Pages", Fax. - Page 172 10. Troubleshooting Message Causes Solutions "Check whether there are User name registration is • Correct that the correct SIP Server any network problems." refused by SIP server. IP Address and SIP User Name are listed in [SIP Settings] of [13-17] [Facsimile Features].
- Page 173 Messages Displayed When You Use the Facsimile Function Message Causes Solutions "Check whether there are The "Effective Protocol" and • Check that the correct IP address any network problems." "SIP Server IP Address" is specified for the machine in settings are different, or an [System Settings].
- Page 174 10. Troubleshooting Message Causes Solutions "Check whether there are E-mail transmission was • Check that User Name and any network problems." rejected by SMTP Password for the following authentication, POP before settings in [System Settings] are [14-09] SMTP authentication, or login listed correctly.
- Page 175 Messages Displayed When You Use the Facsimile Function Message Causes Solutions "Check whether there are No POP3/IMAP4 server • Check that the correct Server any network problems." address is registered. Name or Server Address is listed in [POP3 / IMAP4 Settings] of [15-01] [System Settings].
- Page 176 10. Troubleshooting Message Causes Solutions "Check whether there are Cannot find the DNS server • Check that the following settings any network problems." or POP3/IMAP4 server. in [System Settings] are listed correctly. [15-11] • IP address of the DNS Server •...
-
Page 177: When The Remote Fax Function Cannot Be Used
Messages Displayed When You Use the Facsimile Function • Settings that can be confirmed in System Settings or Facsimile Features on the control panel can also be confirmed from Web Image Monitor. For details about how to confirm the settings from Web Image Monitor, see Web Image Monitor Help. - Page 178 10. Troubleshooting Message Causes Solutions "Check whether there are • An IP address has not • Check that the correct IP address any network problems." been registered for the is specified for the machine in main machine. [System Settings]. For details [16-00] about the IP address of the main •...
- Page 179 Messages Displayed When You Use the Facsimile Function Message Causes Solutions "Connection with the remote The settings or machine For details about the settings and machine has failed. There is configurations for using the machine configurations for using the a problem with the remote remote fax function to remote fax function to connect to a machine structure.
-
Page 180: Messages Displayed When You Use The Printer Function
10. Troubleshooting Messages Displayed When You Use the Printer Function This section describes the principal messages that appear on the display panel, error logs or reports. If other messages appear, follow their instructions. Messages Displayed on the Control Panel When You Use the Printer Function •... - Page 181 Messages Displayed When You Use the Printer Function Message Causes Solutions "Load following paper in n. The printer driver settings are Check that the printer driver settings To force print, select incorrect or the tray does not are correct, and then load paper of another tray and press contain paper of the size the size selected in the printer driver...
- Page 182 10. Troubleshooting Message Causes Solutions "Problems with the wireless The machine has detected a Check that the Bluetooth unit is card. Please call service." Bluetooth failure, or it could not installed properly, or contact your detect a Bluetooth unit. It may service representative.
-
Page 183: Messages Printed On The Error Logs Or Reports When You Use The Printer Function
Messages Displayed When You Use the Printer Function Message Causes Solutions "Unable to access the • An error occurred Save the file to a different memory specified memory storage when the machine storage device, and then print again. device." accessed the memory storage device or a file stored on the memory storage device. - Page 184 10. Troubleshooting Message Causes Solutions "Error occurred while The resolution is set to a On the printer driver, set the resolution processing an Unauthorized value less than 600 dpi to 600 dpi or higher, or cancel Copy Prevention job. Job when [Unauthorized Copy [Unauthorized Copy Prevention].
- Page 185 Messages Displayed When You Use the Printer Function Message Causes Solutions "Classification Code is The classification code is not Select [Optional] for incorrect." supported with the printer classification code. For details driver. about how to specify classification code settings, see "Configuring Classification Codes", Print.
- Page 186 10. Troubleshooting Message Causes Solutions "Staple Cancelled" Stapling printing was canceled. Check the paper orientation, paper quantity, print orientation, and staple position. Certain settings can produce print results that might not be as expected. When documents cannot be stored in the Document Server Message Causes Solutions...
- Page 187 Messages Displayed When You Use the Printer Function Message Causes Solutions "Exceeded max. number of The maximum page Delete some of the files stored in the pages of Document Server. capacity of the Document Document Server or reduce the number Cannot store."...
- Page 188 10. Troubleshooting Message Causes Solutions "HDD Full" The hard disk became full Delete unneeded files stored on the while you were printing a machine. Sample Print, Locked Print, Alternatively, reduce the data size of Hold Print, or Stored Print the Sample Print, Locked Print, Hold file.
- Page 189 Messages Displayed When You Use the Printer Function Message Causes Solutions "You do not have a privilege The logged in user does not For details about how to set to use this function. This have the privileges to permissions, see Security Guide. operation has been register programs or change cancelled."...
- Page 190 10. Troubleshooting Message Causes Solutions "99: Error" This data cannot be printed. Check that the data is valid. For details The specified data is either about the kinds of data that can be corrupt or it cannot be printed from a memory storage device printed from a memory using the Direct printing function, see storage device using the...
- Page 191 Messages Displayed When You Use the Printer Function Message Causes Solutions "Exceeded Max. Stored While printing a Sample Delete unneeded files stored on the Files" Print, Locked Print, Hold machine. Print, or Stored Print file, the maximum file capacity was exceeded.
- Page 192 10. Troubleshooting If printing does not start, contact your service representative. • The contents of errors may be printed on the Configuration Page. Check the Configuration Page in conjunction with the error log. For details about how to print the Configuration Page, see "List / Test Print", Print.
-
Page 193: Messages Displayed When You Use The Scanner Function
Messages Displayed When You Use the Scanner Function Messages Displayed When You Use the Scanner Function Messages Displayed on the Control Panel When You Use the Scanner Function This section describes likely causes of and possible solutions for the error messages that appear on the control panel. - Page 194 10. Troubleshooting Message Causes Solutions "Exceeded max. number of The maximum enterable Check the maximum number of alphanumeric characters." number of alphanumeric characters which can be entered, and characters has been then enter it again. For details about exceeded. the maximum enterable number of characters, see "Values of Various Set Items for Transmission/Storage/ Delivery Function", Scan.
- Page 195 Messages Displayed When You Use the Scanner Function Message Causes Solutions "The program is recalled. The program contains a For details about how to set Cannot recall the destination for which the permissions, see Security Guide. destination(s) for which currently logged in user access privileges are does not have permission to required."...
- Page 196 10. Troubleshooting Message Causes Solutions "Exceeded max. data The scanned data exceeded Specify the scan size and resolution capacity." maximum data capacity. again. Note that it may not be possible to scan very large originals at a high "Check scanning resolution, resolution.
- Page 197 Messages Displayed When You Use the Scanner Function Message Causes Solutions "Not all of the image will be Using [Specify Reproduction Specify a large size in [Specify Size], scanned." Ratio] to scale down a large and then scan the original again. document may cause part of If displaying the entire image is not the image to be lost.
- Page 198 10. Troubleshooting Message Causes Solutions "Memory is full. Scanning Because there is not enough Specify whether or not to use the data. has been cancelled. Press free hard disk space in the [Send] to send the scanned machine for delivering or data, or press [Cancel] to sending by e-mail while delete."...
- Page 199 Messages Displayed When You Use the Scanner Function Message Causes Solutions "Transmission has failed. Transmission has failed. Allocate sufficient space. Insufficient memory in the There was not enough free destination hard disk. To space on the hard disk of the check the current status, SMTP server, FTP server, or press [Scanned Files...
- Page 200 10. Troubleshooting When data cannot be sent because there are too many documents or pages Message Causes Solutions "Exceeded max. number of The file being stored has Specify whether to store the data or pages per file. Do you want exceeded the maximum not.
- Page 201 Messages Displayed When You Use the Scanner Function Message Causes Solutions "Cannot start scanning The [Take no action] setting Open scanner properties, click the because communication was has been selected on the [Events] tab, and then select [Start this failed." client computer, forcing the program] as the computer's response client computer to remain...
- Page 202 10. Troubleshooting When documents cannot be stored on a memory storage device Message Causes Solutions "Cannot write on the The memory storage device • Replace the memory storage memory storage device is full and scan data cannot device. because remaining free be saved.
-
Page 203: Messages Displayed On The Client Computer
Messages Displayed When You Use the Scanner Function Message Causes Solutions "Memory is full. Press [Write] The scan could not be Specify whether or not to save the to write the current scanned completed because there scanned document to the memory data to the memory storage was insufficient hard disk storage device. - Page 204 10. Troubleshooting Message Causes Solutions "Clear Misfeed(s) in ADF." A paper misfeed has • Remove jammed originals, and occurred inside the ADF. then insert them again. For details about jammed paper, see "Removing Jammed Paper", Troubleshooting. • When a misfeed occurs, replace the jammed originals.
- Page 205 Messages Displayed When You Use the Scanner Function Message Causes Solutions "Insufficient memory. Reduce Scanner memory is • Reset the scan size. the scanning area." insufficient. • Lower the resolution. • Set with no compression. For details about the settings, see TWAIN driver Help.
- Page 206 10. Troubleshooting Message Causes Solutions "Scanner is in use for other A function of the machine • Wait for a while, and then function. Please wait." other than the Scanner connect to the network again. function is being used such •...
- Page 207 Messages Displayed When You Use the Scanner Function Message Causes Solutions "Cannot find "XXX" scanner The machine is not • Check that the previously used used for the previous scan. connected to the network scanner is connected to the "YYY" will be used instead." correctly.
- Page 208 10. Troubleshooting Message Causes Solutions "Scanner is not available. Network communication is • Check whether the machine's host Check the scanner not available because the name is specified in the Network connection status." machine's IP address could Connection Tool. For the WIA not be obtained from the driver, check the [Network host name.
-
Page 209: When Other Messages Appear
When Other Messages Appear When Other Messages Appear Message Causes Solutions "Cannot connect with the • The wireless LAN Turn off the power, and then check the wireless card. Turn the main board was not inserted wireless LAN board is inserted power switch off, then check when the machine was correctly. -
Page 210: When There Is A Problem Scanning Or Storing Originals
10. Troubleshooting Message Causes Solutions "Self checking..." The machine is performing The machine may perform periodic image adjustment maintenance during operations. The operations. frequency and duration of maintenance depends on the humidity, temperature, and printing factors such as number of prints, paper size, and paper type. -
Page 211: When The Home Screen Cannot Be Edited (When Using The Standard Operation Panel)
When Other Messages Appear When the Home Screen Cannot Be Edited (When Using the Standard Operation Panel) Message Causes Solutions "The image data size is not The image data size is not For details about file size for shortcut valid. See the manual for valid. -
Page 212: When Data Cannot Be Sent Due To A Problem With The Destination
10. Troubleshooting Message Causes Solutions "Updating the destination The destination list is being Wait until the message disappears. Do list... Please wait. Specified updated from the network not turn off the power while this destination(s) or sender's using Web Image Monitor. message is displayed. -
Page 213: When The Machine Cannot Be Operated Due To A Problem With The User Certificate
When Other Messages Appear When the Machine Cannot Be Operated Due to a Problem with the User Certificate Message Causes Solutions "Invalid certificates or no S/ The user name and For details about the device certificate MIME certificates were password differ from those (S/MIME), see Security Guide. -
Page 214: When Problems Occur While Logging In
10. Troubleshooting Message Causes Solutions "XXX cannot be YYY The device certificate (PDF A new device certificate (PDF with because the Digital with digital signature or digital signature or PDF/A with digital Signature's device certificate PDF/A with digital signature) must be installed. For details is not currently valid."... -
Page 215: When The User Lacks Privileges To Perform An Operation
When Other Messages Appear When the User Lacks Privileges to Perform an Operation Message Causes Solutions "You do not have the The logged in user name For details about how to set privileges to use this does not have permissions permissions, see Security Guide. - Page 216 10. Troubleshooting...
-
Page 217: 11. Information For This Machine
11. Information for This Machine This chapter describes environmental precautions and regulations. Information on Environmental Regulations User Information on Electrical and Electronic Equipment (mainly Europe) Users in the countries where this symbol shown in this section has been specified in national law on collection and treatment of E-waste Our Products contain high quality components and are designed to facilitate recycling. -
Page 218: Environmental Advice For Users (Mainly Europe)
Toner and ink cartridge return program Toner and ink cartridge for recycling will be accepted free of charge from users in accordance with local regulations. For details about the return program, please refer to the Web page below or consult your service person. https://www.ricoh-return.com/... - Page 219 Information on Environmental Regulations Energy efficiency The amount of electricity a machine consumes depends as much on its specifications as it does on the way you use it. The machine is designed to allow you to reduce electricity costs by switching to Ready mode after it prints the last page.
- Page 220 11. Information for This Machine...
- Page 221 INDEX Duplex Copy........... 11, 63 Duplex unit............. 2 Sided Print............E-mail address............. Address Book........13, 82, 83, 209 E-mail destination........115, 117 ADF.............. 9, 27, 57 E-mail transmission..........ADF's extender............Embedding text information........Authentication screen..........Energy Saver key..........Auto document feeder..........Enter key..............
- Page 222 IP-Fax..............One-Sided Combine..........Options..............Orientation-fixed paper........Journal..............Original orientation..........LAN-Fax..............Paper capacity............ LDAP Server............Paper guides............Loading orientation-fixed paper......Paper size............ 134, 141 Loading paper............. Paper thickness............ Loading two-sided paper........Paper tray............Locked Print............Paper type............Logging in............Path............... Logging in to the machine......54, 55 PCL................
- Page 223 Searching by what you want to do...... Sending scan files........... 12, 22 Vents..............27, 29 Shared folder............Shortcut..............Shortcut icon..........38, 39, 43 Web Image Monitor........24, 129 Shortcuts from the application list screen.... What you can do with this machine..... Shortcuts to bookmarks.........
- Page 224 MEMO...
- Page 225 MEMO...
- Page 226 MEMO D193-7501...
- Page 227 © 2013...
- Page 228 D193-7501...
Need help?
Do you have a question about the MP C401 SERIES and is the answer not in the manual?
Questions and answers