Table of Contents
Advertisement
Quick Links
Advertisement
Table of Contents

Related Manuals for Lilin UFG1122


Summary of Contents for Lilin UFG1122
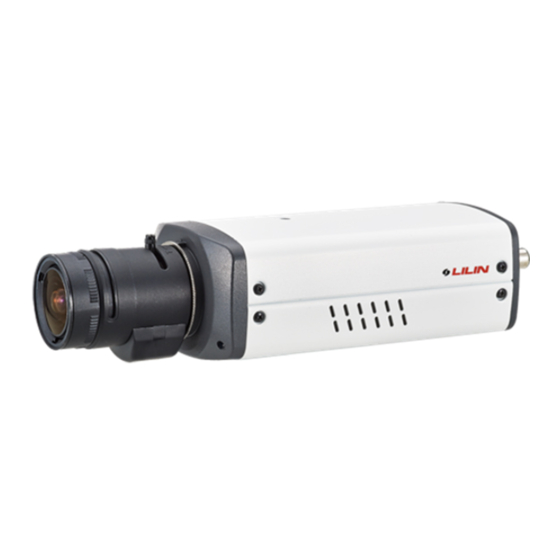
- Page 1 4K Ultra HD IP Camera Start Guide...
- Page 2 Page2 Summary LILIN 4K Ultra HD IP cameras are one of our Ultra family that use the latest compression technologies, which allow Triple Streaming of H.264 and JPEG in different resolutions. LILIN’s Triple Streaming technology transmits digital video at various bit rates and frame rates to suit both high and low bandwidth network environments.
-
Page 3: Key Features
Supports PCM/G.711 Supports ONVIF protocol Supports LILIN Navigator Trademark Acknowledgments Microsoft, Windows 2000, Windows XP, Windows Vista, Windows 7, ActiveX, and Internet Explorer are registered trademarks of Microsoft Corporation in the U.S. and/or other countries. Java and all Java-based trademarks and logos are trademarks or registered trademarks of Sun Microsystems, Inc. -
Page 4: Mobile Devices
Sample codes and documents are included in the product CD and can be downloaded from our company website. LILIN HTTP API For non-ONVIF integration, see the LILIN HTTP API document. HTTP API is used in all LILIN IP cameras. Caution ... -
Page 5: Chapter 1 System Overview
Chapter 1-2 Software Requirements Merit LILIN Universal ActiveX software components or QuickTime are required for a web browser to display JPEG or H.264 4K Ultra HD video. When you first log in to our IP camera, you may see a prompt box:... - Page 6 Ultra Series IP Camera Start Guide Page6 Chapter 2 Before Accessing IP Cameras Before accessing the IP cameras, make sure that the camera’s RJ-45 network connector, audio cable, and power cable are properly connected. To set the IP address, consult your network administrator. The default IP address for each IP camera is 192.168.0.200.
-
Page 7: Chapter 2-3 Web Browser Settings & Software Components Required
Ultra Series IP Camera Start Guide Page7 Chapter 2-3 Web Browser Settings & Software Components Required Make sure your Internet browser allows signed ActiveX plug-in to run on your PC. Set Download Signed ActiveX plug-in controls to Prompt and enable Run ActiveX control and plug-in. You can set this in Internet Explorer→Tools→Internet Options→Security→Custom Settings. - Page 8 Ultra Series IP Camera Start Guide Page8 Chapter 3 H.264 4K Ultra HD IP camera network features When logged in as an administrator, two main features are available: 1) camera operations and 2) configurations. Chapter 3-1 IP Camera Operations Profile switching menu—Switching from one profile to another ActiveX display screen—Display RTSP H.264 or JPEG network video Quick control panel—IP camera control panel Setup menu—IP camera setup menu...
-
Page 9: Chapter 3-2 Ip Camera Main Controls
Ultra Series IP Camera Start Guide Page9 Move your cursor to the PIP window and drag inside it to perform ePan and eTilt actions. The scroll wheel can be used to zoom in and zoom out. Right-click to exit the ePTZ mode. Chapter 3-2 IP Camera Main Controls The quick control panel buttons are described below: Snapshot: Take a snapshot of the video... - Page 10 Ultra Series IP Camera Start Guide Page10 Click the speaker icon to monitor the audio of a remote site. Click the icon again to turn the speaker off. Note: Only audio-ready IP camera models support this feature. Chapter 3-2-2 Record to a Local PC To record to a local PC, right-click anywhere on the screen.
-
Page 11: Chapter 4 Basic Settings
Ultra Series IP Camera Start Guide Page11 Chapter 4 Basic Settings As an administrator, you can configure the IP camera via a standard HTML webpage. Click Setup at the top- right corner of the screen after you log in to the camera. Chapter 4-1 System Settings Under system settings, you will see server system information, such as MAC address, firmware version, user settings, and system time settings. -
Page 12: Chapter 4-2 User Setting
Ultra Series IP Camera Start Guide Page12 Display the device name you entered on the OSD. OSD Time Display camera time on the OSD. ActiveX OSD Name The string you enter here will be displayed on the ActiveX OSD. Chapter 4-2 User Setting Our camera supports up to the creation of 10 user accounts. -
Page 13: Chapter 4-4 Video / Audio Settings
Ultra Series IP Camera Start Guide Page13 Synchronize with a NTP server To synchronize with a NTP server, change the Synchronize with NTP to Every Hour. The H.264 4K Ultra HD IP camera will synchronize its system time with a time server every hour. Note: NTP servers require Internet connection. - Page 14 Ultra Series IP Camera Start Guide Page14 Profiles: choose from 6 different profiles VBR: variable bit rate, an encoding mode that reduces the use of bandwidth; CBR: constant bit rate, an encoding mode that consumes more bandwidth Bit rate: the maximum bit rate available for your network connection ...
-
Page 15: Chapter 4-6-1 Dhcp Setting
Ultra Series IP Camera Start Guide Page15 To acquire Internet access, contact your local Internet Service Provider (ISP) for a global IP address. Enter the IP address (global), subnet mask, and gateway IP provided by your ISP. Default DNS—The IP address of the default and first DNS server ... -
Page 16: Chapter 4-8 Ddns Settings
Chapter 4-8 DDNS Settings The DDNS service allows you to automatically update the DNS server. LILIN provides three DDNS servers to choose from (we recommend you use the first one in the drop-down menu). Click Submit for the changes to take effect. -
Page 17: Chapter 4-10 Maintenance
Ultra Series IP Camera Start Guide Page17 Chapter 4-10 Maintenance In the Maintenance page, you can click Load Default to restore the camera to factory settings, or click Reboot System to restart the camera. Restoring to factory settings does not affect IP addresses. To update the firmware of your IP camera, click Browse and locate the update file. - Page 18 Ultra Series IP Camera Start Guide Page18 Chapter 5 Advanced Mode The Advanced Mode provides several professional settings that are not available in the Basic Mode. Chapter 5-1 System Settings Chapter 5-1-1 System Log You can view the system-generated log in this page. Click Save to export the log to a text file. Chapter 5-2 Advanced Video/Audio Settings Chapter 5-2-1 Quality Advanced In this page, you have access to Exposure, Automatic Gain Control, White Balance Control, etc.
-
Page 19: Chapter 5-2-2 Sense Up
Ultra Series IP Camera Start Guide Page19 Video setting options are described as followed: Exposure Value: adjusts the value of image exposure WDR: enables or disables Wide Dynamic Range Back-light Compensation: increases the exposure of objects with insufficient light ... - Page 20 Ultra Series IP Camera Start Guide Page20 Chapter 5-2-3 Day/Night Mode Switch The Day/Night Mode Switch allows you to schedule IR activities by (1) auto, (2) day, (3) night, (4) schedule, or (5) external control. When the setting is set to Auto, the IR module is turned on/off automatically according to the signal from the light sensor.
- Page 21 Ultra Series IP Camera Start Guide Page21 Note: By enabling privacy masking, ROI will be turned on automatically, and EPTZ will be disabled. Chapter5-2-7 Audio Settings Detailed audio settings are described below: MIC Volume: MIC or line-in volume Audio Input Mode: choose between MIC or line-in ...
-
Page 22: Chapter 5-3-2 Ip Address Filtering
Ultra Series IP Camera Start Guide Page22 Chapter 5-3-2 IP Address Filtering Ultra series provides a IP address filter to help you block unauthorized IP addresses from accessing the camera. Go to Advance→Network→IP Address Filtering. Enable the service before you enter the IP address you want to block, and press Add. - Page 23 Ultra Series IP Camera Start Guide Page23 Chapter 5-3-3 Bonjour Bonjour is Apple’s implementation of zero-configuration networking protocol. Click Enable to activate this service. Chapter 5-3-4 SDDP/Heartbeat With SDDP/Heartbeat support, you can connect to any compatible devices. Enable the service before you make the connection.
- Page 24 Ultra Series IP Camera Start Guide Page24 Then the page you see allows you to choose the action to take when the chosen events are detected, such as sending JPEG images to an FTP server or an email account, and/or triggering SD card video recording. To schedule event monitoring, choose Schedule and highlight the time periods you want the camera to detect events.
- Page 25 Ultra Series IP Camera Start Guide Page25 When the detected sound exceeds the sensitivity level, the audio detector will trigger an alarm and send a notification. Chapter 5-4-4 Alarm Input Detection Event If you connect an external alarm digital input to the IP camera, enable Alarm Notification and switch between NO (normally open) and NC (normally closed) for the input.
- Page 26 Ultra Series IP Camera Start Guide Page26 Chapter 5-5-1 FTP Service Enter the required FTP information to send alarm snapshots to an FTP server. FTP server IP/DNS— IP address or domain name of the FTP server Account— account name to log in to the FTP server ...
- Page 27 Ultra Series IP Camera Start Guide Page27 Chapter 5-5-3 HTTP POST Service Through the POST protocol, the camera can automatically send notification snapshots to a website if an alarm is triggered. Chapter 5-5-4 Event Triggering SD Card Recording Ensure an SD card is properly installed to the camera before you enable the SD recording option. The camera will start recording videos when an alarm occurs.
Need help?
Do you have a question about the UFG1122 and is the answer not in the manual?
Questions and answers