
Related Manuals for Webasto DUAL TOP RHA 100


Summary of Contents for Webasto DUAL TOP RHA 100
- Page 1 Integriertes Heizgerät Einbauanweisung Integrated Heater Installation Instructions Riscaldatore integrato Istruzioni di montaggio DUAL TOP RHA 100 (für Trinkwasser) (for drinking water) (per acqua potabile) 03/2009...
-
Page 2: Table Of Contents
Cooling air system ................22 10.1. Installation ..................22 Validation and commissioning ............46 Boiler drainage and pressure relief system ........23 Technical data ..................47 20.1. Fuel for Dual Top RHA 100 ..............47 Fuel supply ..................24 20.2. Technical data ...................48 12.1. General ..................... 24... -
Page 3: General
Dual Top and the vehicle. In that case, Webasto will refuse all liability. Do NOT install or repair a Webasto Dual Top RHA 100 heater, if you have not successfully finished the training by Webasto for acquiring the necessary technical skills. -
Page 4: Statutory Regulations Governing Installation
Statutory regulations governing installation Dual Top Statutory regulations governing installation The Dual Top RHA 100 heater has been type-tested and approved in NOTE: accordance with EC Directives 72/245/EEC (EMC) and 2001/56/EC (heater) For vehicles with an EU permit, no entry in accordance with § 19 with the following EC permit numbers: Sub-Section 4 of Annex VIII b to the Road Traffic Act is required. - Page 5 Dual Top Statutory regulations governing installation 2.2.2. The combustion heater shall not constitute a risk of fire, 2.5. Combustion air inlet even in the case of overheating. This requirement shall be deemed 2.5.1. The air for the combustion chamber of the heater must not to be fulfilled if the installation ensures an adequate distance to all be drawn from the passenger compartment of the vehicle.
-
Page 6: Use Of The Integrated Air / Water Heater
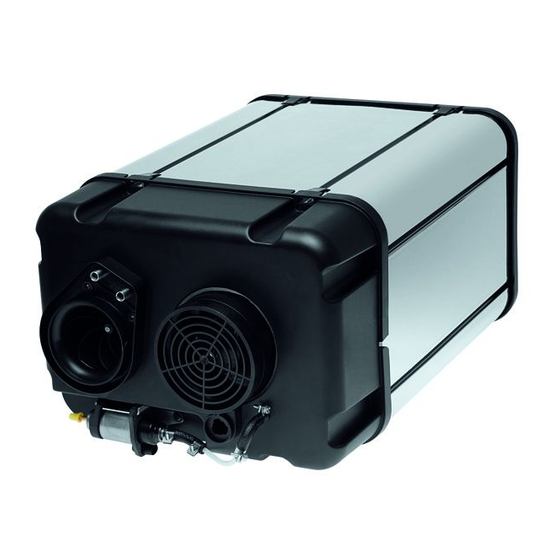
Use of the integrated air / water heater Dual Top Use of the integrated air / water heater The Webasto Dual Top RHA 100 integrated air / water heater has been designed to heat and to provide hot water (drinking water) in motor homes and similar vehicles. -
Page 7: Additional Safety Instructions
Additional safety instructions Additional safety instructions • If the Dual Top falls to the floor, it must be returned to Webasto for a safety inspection/repair. • It is not allowed to paint or re-paint the Dual Top heater partly or... -
Page 8: Installation Example
Installation example Dual Top Installation example Fig. 1: Installation example for heater in camper... - Page 9 Dual Top Installation example Interior temperature sensor Water lines Webasto Dual Top RHA 100 heater Cooling air intake adapter Webasto dual adapter Combustion air intake silencer Exhaust silencer Fuel tank connector Fuel tank 10 Fuel pump 11 LED dashboard 12 Water pump...
-
Page 10: Heater Installation
Heater installation Dual Top Heater installation 6.1. General IMPORTANT The regulations specified in chapter 2, "Statutory regulations governing installation" must be adhered to. NOTE: Observe the installation details specified by the manufacturer of the relevant vehicle type. 6.2. Dual Top connections Fig. -
Page 11: Installation Location
Dual Top Heater installation 6.3. Installation location At all sides of the heater there should be at least 20 mm space. Intake cap Outlet cap >200 >20 >150 Fig. 3: Dimensions [mm] of the heater • Space requirement for hot air outlet > 150 mm •... - Page 12 Heater installation Dual Top Find a suitable location for the heater. IMPORTANT Make sure that after installation the casing of the heater is not in contact Space for the heater: with any parts of the vehicle body. Ensure that all moving parts can move easily.
-
Page 13: Connecting The Wiring Harness
Dual Top Heater installation 6.4. Connecting the wiring harness Connect the wiring harness plug X11 (12 poles) to the matching connector of the heater. Fig. 6: Removal front cover Fig. 7: Connection wiring harness 1. Intake cap 2. Intake cap fixing screws 3. -
Page 14: Installing The Heater
• Mount heater, brackets and vibration dampers in such a way that dampers will be compressed by the weight of the heater. • See Webasto camping catalogue for different kinds of fixation brackets. See Fig. 8 • At least 4 fixation points. - Page 15 Dual Top Heater installation Fig. 9: Fixation brackets and vibrations dampers (examples)
-
Page 16: Identification Plate
Identification plate Dual Top Identification plate The identification plate must be positioned so that it cannot be damaged and must be clearly legible when the heater is installed (otherwise a duplicate identification plate must be used). Inapplicable years must be erased from the identification plate and the current year must be readable. -
Page 17: Hot Water System
(e.g. 98/83/EC, DIN 2001-2, DVGW W 291). To connect water pipes or hoses to the Dual Top RHA 100 heater, use a standard 10 mm pipe connector (e.g. John Guest / ASP). • Place a thermostatic mixing valve if required. - Page 18 (see Operating Instructions). Use Webasto dual adapter to connect the air intake hose to the heater and secure it with a clamp. See Fig. 12.
-
Page 19: Hot Air System
(1 hPa corresponds to 1 mbar corresponds to 10 mm water column). The points table for air guide parts in the Webasto air and water heaters accessory catalogue can be used to design the hot air system. -
Page 20: Heating Air Intake
Hot air system Dual Top 9.1. Heating air intake 9.1.1. General 9.1.2. Installation NOTE: The length of air intake hose outside the interior shall be as short as The heating air has to be drawn from the interior. possible, ideally less than 1 m. This is to avoid heat losses and to protect the water pipes from freezing. - Page 21 Dual Top Hot air system • Identify the position of a hole in the floor for the pass through of the air intake hose. • Drill a hole in the floor with a diameter of 100 mm. • Seal the gap between floor and hose. •...
-
Page 22: Hot Air Distribution
WARNING: reducers. Drill holes in furniture and floor where necessary. Risk of fire. Only use high temperature resistant Webasto hot air hoses. Through an appropriate selection of branches and diameters the air The hot air opening is to be positioned in such a way that the air is not flow and thus the heat flow can be influenced. - Page 23 Dual Top Hot air system Fig. 16: Heating air distribution Dark colour = below interior, insulated Bright colour = inside interior...
-
Page 24: Cooling Air System
Cooling air system Dual Top Cooling air system Cooling air is required to protect the heaters’ electronics and motor against overheating. Cooling air shall be taken from outside and not from inside the vehicle. The air has to be discharged outside the vehicle. The heater is equipped with a motor and a ventilator to transport the cooling air. -
Page 25: Boiler Drainage And Pressure Relief System
Dual Top Boiler drainage and pressure relief system Boiler drainage and pressure relief system The heater is equipped with a drainage system that drains the water contents automatically as a protection against frost (boiler water temperature below 6 ºC). It is also possible to drain the unit manually; pressure relief system that prevents pressure above 4 bar inside the boiler. -
Page 26: Fuel Supply
Fuel supply Dual Top Fuel supply 12.1. General The fuel is typically taken from the vehicle’s own fuel tank. It may also be taken from a separate fuel tank (accessory). The permissible values for the maximum pressure at the fuel pump entry side are shown in Fig. 18. NOTE A sign must be affixed to the fuel filler neck warning that the heater must be switched off before refuelling. -
Page 27: Fuel Pump
Dual Top Fuel supply 12.2. Fuel pump The DP40 fuel pump is a combined delivery, metering and a shut-off pump has to be installed separate from the heater. In this case, extend the system and is subject to certain installation criteria (see Fig. 18 and Fig. 20). wiring harness for the fuel pump. -
Page 28: Fuel Extraction
The line from the T-junction towards the fuel pump should run downwards. Fig. 22: Webasto fuel extractor 1 - fuel extractor 2 - sealing ring 3 - tank extracting device Webasto fuel extractor. See Fig. 23. Fig. 21: Connection to vehicle’s fuel line with a Webasto fuel connector... -
Page 29: Fuel Lines
Avoid passing or crossing of hot areas (e.g. crossing of exhaust line) at a Fig. 23: Webasto fuel extractor distance of less than 100 mm without using thermal shields. Fuel lines must be tightened to the vehicle’s chassis to prevent sagging. -
Page 30: Connecting Two Pipes With A Hose
Fuel supply Dual Top 12.4.2. Connecting two pipes with a hose The correct procedure for connecting fuel lines with hosing is shown in Fig. 24. Ensure that there are no leaks. Correct Wrong Fig. 24: Pipe / hose connection 1 = clip 2 = air or gas bubble 12.5. -
Page 31: Combustion Air Supply
Dual Top Combustion air supply Combustion air supply 13.1. General 13.2. Combustion air intake line The combustion air always has to be taken from outside the vehicle; not from areas occupied by people. See chapter 2, "Statutory regulations governing installation", directive 2001/56/EU. Length of the combustion air inlet line max. - Page 32 Combustion air supply Dual Top NOTE Combustion air intake hose should point downwards from the heater. If The intake opening for combustion air must be located so that it cannot this is not possible, make a condensate drain hole with a diameter of 4 mm become clogged with dirt or snow.
-
Page 33: Exhaust System
Dual Top Exhaust system Exhaust system 14.1. General See chapter 2, "Statutory regulations governing installation" for requirements on exhaust system. NOTE: An exhaust silencer must be fitted to reduce the noise level. The silencer should ideally be installed near the heater (not more than 0.20 m distance);... -
Page 34: Exhaust Line
A fixing bracket is required no further than 150 mm from the end of has to be connected to the heater using a Webasto exhaust clamp. An the exhaust pipe to ensure that the angle 45 ~ 70° is achieved. - Page 35 Dual Top Exhaust system Fig. 31: Elbows, cast (left) and bent pipe (right) Fig. 33: Avoid the line becoming clogged with dirt Fig. 32: Prevent the formation of condensate...
- Page 36 Exhaust system Dual Top (front view) 45 ~ 70º Fig. 34: Location and direction of exhaust A: Flow exhaust fumes 45 ~ 70º downwards and at side to avoid exhaust bag under vehicle B: End exhaust line nearly aligned with side of vehicle body C: End exhaust line cut horizontally to avoid that ambient wind can enter...
-
Page 37: Electrical Connections
Dual Top Electrical connections Electrical connections The electrical connection is made as shown in Fig. 35. Dual Top RHA 100 Fuse 10 A Wiring harness Fuse 15 A Control Panel Fuel pump Vehicle’s leisure battery Interior temperature sensor Fuse 5 A 10 Wiring interior temperature sensor Fig. -
Page 38: Supply Voltage Connection
Electrical connections Dual Top 15.1. Supply voltage connection Use 12 V DC only. Ensure that you take it directly from the vehicle‘s leisure battery. Without any additional switches, so, just the Control Panel’s switch. Switching the heater on and off shall only be done with the Dual Top Control Panel. -
Page 39: Interior Temperature Sensor
Dual Top Electrical connections 15.2. Interior temperature sensor The remote interior temperature sensor must be installed at medium height in the interior on vertical surfaces. Avoid that the interior temperature sensor is: • in the direct current of hot air (from the vehicle‘s own heating system or the hot air heater);... -
Page 40: Control Panel Connection
Electrical connections Dual Top 15.3. Control Panel connection • Determine the best position of the Control Panel. The Control Panel must be located in the driver's field of view. It should be visible and accesible for the operator. Not accesible for children. -15°... - Page 41 Dual Top Electrical connections Fig. 40: Electrical connections Control Panel NOTE: See Fig. 40. Connector X2 is for: – Webasto Thermo Test PC-diagnosis and – Webasto Telestart / Thermo Call (for optional programmable Control Panel).
-
Page 42: Circuit Diagram
Circuit diagram Dual Top Circuit diagram Fig. 41: Circuit diagram for Dual Top RHA 100... -
Page 43: Legend For Circuit Diagram
Item Description Comment Plug connector, 2-pin To Control Panel Plug connector, 4-pin To PC-diagnosis / Telestart / Thermo Call Plug connector, 4-pin To Control Panel Plug connector, 2-pin To fuel pump Plug connector, 12-pin To heater Dual Top RHA 100... -
Page 44: Starting The Heater For The First Time
Starting the heater for the first time Dual Top Starting the heater for the first time • After you have installed the heater, bleed the fuel supply line carefully. NOTE: Due to the low fuel consumption the heater may have to be switched on several times to fill the fuel line completely. -
Page 45: Fault Lock-Out
The heater is able to identify faults on individual components and during be judged by the sound of the heater). the operation. Deleting failures can also be done with the Webasto Thermo Test PC- Diagnosis. The Control Panel gives out the fault code in a flashing mode. - Page 46 Check connections of Control Panel. Check fuse 15A. Check wiring harness. Contact Webasto. No start (after 2 attempts to start) Check fuel supply (enough fuel, at least 8 ltr.; check fuel connection and tubes), reset heater (by switching off for at least 30 sec.)
- Page 47 Dual Top Fault lock-out Number of RED Meaning Remedy flashes Early flame detection See fault code 12 Electrical safety/drain valve disconnection / short circuit See fault code 12...
-
Page 48: Validation And Commissioning
Consists of 2 parts: WARRANTY CERTIFICATE: Should remain with customer (in booklet). (A) CONTROL CARD: To be sent by customer to Webasto Product International BV, The Netherlands. Installer shall complete for customer with technical information, installation date and stamp. Installers keeps a copy. -
Page 49: Technical Data
± 10 % at an ambient temperature of + 20 °C and at the rated voltage and in rated conditions. 20.1. Fuel for Dual Top RHA 100 The diesel fuel specified by the manufacturer must be used. Class EL heating oil, L heating oil or PME (bio-diesel) must not be used. -
Page 50: Technical Data
Technical data Dual Top 20.2. Technical data Heater Operation Dual Top RHA 100 Type approval heater: e1 00 0195 EMC: e1 03 5000 Model Air heater with evaporator burner Heat output Control range 1.5 - 6.0 kW Fuel Diesel, DIN/EN 590... - Page 51 Dual Top Technical data Heater Operation Dual Top RHA 100 Heater dimensions Length: 530 ± 2 mm Width: 352 ± 1 mm Height: 256 ± 1 mm Weight (w/o water contents) 20 kg...
- Page 52 Webasto AG Kraillinger Straße 5 D - 82131 Stockdorf In multilingual versions the German language is binding. Germany Bei mehrsprachiger Ausführung ist Deutsch verbindlich. Tel: +49 (0)89 85794 - 0 Fax: +49 (0)89 85794 - 448 Nel caso di una versione plurilingue il tedesco è vincolante.
Need help?
Do you have a question about the DUAL TOP RHA 100 and is the answer not in the manual?
Questions and answers