Nice Oview Instructions And Warnings For Installation And Use
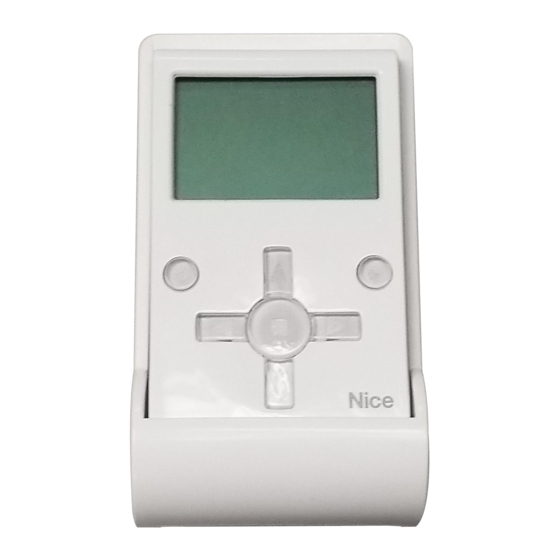
Display programmer for devices equipped with bus t4 connection
Hide thumbs
Also See for Oview:
- Instructions for installation and use manual (116 pages) ,
- Original instructions (4 pages) ,
- Operation manual (3 pages)
Table of Contents
Advertisement
Available languages
Available languages
Quick Links
Oview
Instructions and warnings
for installation and use
Istruzioni ed avvertenze per
Display programmer
l'installazione e l'uso
Instructions et avertissements
pour l'installation et l'utilisation
Instrucciones y advertencias
para la instalación y el uso
Installierungs-und Gebrauchsanleitungen
und Hinweise
Instrukcje i ostrzeżenia do
instalacji i użytkowania
Aanwijzingen en aanbevelingen voor
installatie en gebruik
Advertisement
Table of Contents

Related Manuals for Nice Oview


Summary of Contents for Nice Oview
- Page 1 Oview Instructions and warnings for installation and use Istruzioni ed avvertenze per Display programmer l’installazione e l’uso Instructions et avertissements pour l’installation et l’utilisation Instrucciones y advertencias para la instalación y el uso Installierungs-und Gebrauchsanleitungen und Hinweise Instrukcje i ostrzeżenia do instalacji i użytkowania...
-
Page 2: General Safety Warnings And Precautions
ENGLISH GENERAL SAFETY WARNINGS AND PRECAUTIONS TRADEMARK INFORMATION WORKING IN SAFETY! CAUTION! – For personal safety it is important to observe these The names BLUETOOTH , GPRS , and GSM are registered trademarks of ® ® ® instructions. the respective owners; the product names stated in this manual may also be registered by the respective owners. - Page 3 L’Oview and accessories Use of Oview only (BusT4) ® (Bluetooth Use of OVBT module 10-15m and Software OVBT (BusT4) ® (Bluetooth module Use of OVBTGSM (GSM ® module and a mobile phone (Gsm ® OVBTGSM (BusT4) module (Adsl) (Internet) Use of the...
- Page 4 1.2 – Accessories (optional) barriers with mobile arms and similar applications. Oview is supplied with a 2 m cable for direct connection to a device and a sup- Any other use is to be considered improper! The manufacturer declines all port for wall-mounting.
- Page 5 OVIEW INSTALLATION AS A CONTROL DEVICE To use Oview as a fixed control for automations, it must be installed in a suit- able location, out of the reach of children and at a height of at least 150 cm from the ground.
- Page 6 Oview (fig. 4) and the “BusT4” socket on the control unit of the • In the case of a network of devices, the total cable length must be calculated as follows: device to be programmed (fig.
- Page 7 GENERAL USE OF OVIEW Oview is only activated when connected to a live device, as it is powered direct- ly by the latter. 1 2 3 4 1 2 3 4 4 3 2 1 1 2 3 4 On activation of Oview, the icon representing the connected device is displayed on screen.
- Page 8 2 (02) required. Note – In the event of a power failure, the clock in Oview continues to operate as normal, but if delivery of a command was programmed during the 00:01:14 black-out, this will not be performed.
- Page 9 “automations”: the window displays the list of devices connected and present in this series. – name: used to assign a personal name to Oview, for easy identification in a device network; c) This window enables the user to: –...
- Page 10 – network options: this item contains the parameters “series” and “address”. still be displayed, but remain read-only (not modifiable). These are used to modify the series to which Oview belongs and the personal – To perform the “Log In” or “Log Out” procedure on request of a pass- address of the latter;...
-
Page 11: Product Disposal
(obstacle free) or a few metres in the presence of obstacles (walls or similar). local standards – Internet connectivity: enables the user to connect to Oview using a Gsm ® As indicated by the symbol alongside, disposal of this product module (to be installed on Oview). -
Page 12: Technical Specifications Of Product
A copy of the original declaration for each product can be requested from Nice S.p.a. (TV) I. I Type: control, programming and diagnostics unit for devices equipped with... - Page 13 However, if Oview is not used for a short period of time, the screen sets to standby (reduced brightness). In this case, to restore brightness, press any key.
- Page 14 Note – In the event of a power failure, the clock in Oview continues to operate as normal, but if delivery of a command was programmed during the black-out, this will not be performed.
- Page 15 • Working with the “user password” – name: used to assign a personal name to Oview , for easy identification in a de- vice network; To restrict access to a number of programmable functions (for example timed set- –...
-
Page 16: Avvertenze E Precauzioni Ge Nerali Per La Sicurezza
ITALIANO AVVERTENZE E PRECAUZIONI GE NERALI PER LA SICUREZZA INFORMAZIONE SUI MARCHI OPERARE IN CONDIZIONI DI SICUREZZA! ATTENZIONE! – Per la sicurezza delle persone è importante rispet- I marchi BLUETOOTH , GPRS , GSM sono marchi registrati dai rispettivi tito- ®... - Page 17 L’Oview e i suoi accessori Uso del solo Oview (BusT4) ® (Bluetooth Uso del modulo OVBT e del 10-15m Software modulo (BusT4) ® (Bluetooth OVBT Uso del modulo (GSM ® OVBTGSM e di un telefono cellulare (Gsm ® modulo (BusT4)
-
Page 18: Descrizione Del Prodotto Edestinazione D'uso
L’Oview ha in dotazione un cavo di 2 m per il collegamento diretto a un dispo- sitivo e un supporto per il fissaggio del prodotto su una parete. - Page 19 “Oview software suite”. INSTALLAZIONE DELL’OVIEW COME DISPOSITIVO DI COMANDO Per utilizzare l’Oview come dispositivo fisso per il comando di automazioni, è necessario installarlo in un luogo appropriato, lontano dalla portata dei bambini e ad un’altezza da terra non inferiore a 150 cm.
- Page 20 (2 m) collegandolo alla presa dell’Oview (fig. 4) e alla presa • In presenza di una rete di dispositivi, la lunghezza totale del cavo deve essere calcolata “BusT4”...
- Page 21 “Nice Opera System Book”. UTILIZZO GENERALE DELL’OVIEW L’Oview si attiva esclusivamente quando è collegato ad un dispositivo alimenta- to, in quanto trae alimentazione da questo. All’accensione dell’Oview, compare sul suo schermo un’icona che raffigura il dispositivo collegato.
- Page 22 (02) mare l’invio automatico dei comandi ad un’automazione, in giorni e orari desi- derati. Nota – Se a causa di un black–out elettrico all’Oview non arriva l’alimen- 00:01:14 tazione il suo orologio continua a funzionare regolarmente; però se durante il 09.11.07...
- Page 23 In questa schermata è possibile: – nome: serve per assegnare al l’Oview un nominativo personale, per identifi- – scorrere l’elenco dei nomi dei dispositivi presenti, utilizzando i tasti freccia carlo facilmente in una rete di dispositivi;...
- Page 24 ® “password utente”) e programmare la password desiderata. La voce “bluetooth” contiene due funzioni: “Passkey bluetooth” e “Pairing Nota – Quando una password è attiva, le funzioni e i parametri dell’Oview sono list”. comunque visibili ma non modificabili. • “Passkey bluetooth”: serve per personalizzare la “Passkey” (password) –...
-
Page 25: Smaltimento Del Prodotto
® Il prodotto contiene una pila: questa va rimossa e non deve essere buttata nei comunicare con l’Oview da una distanza massima di circa 10–15 m in assenza rifiuti comuni, in quanto contiene sostanze inquinanti e quindi, occorre smaltirla di ostacoli, o di pochi metri in presenza di ostacoli (muri o altro). -
Page 26: Caratteristiche Tecniche Del Prodotto
è aggiornata alla data di edizione del presente manuale ed è stata riadattata per motivi editoriali. Copia della dichiarazio- ne originale per ogni prodotto può essere richiesta a Nice S.p.a. (TV) I. I Tipologia: unità di comando, programmazione e diagnostica per dispositivi dotati di connessione BusT4 Il sottoscritto Lauro Buoro in qualità... - Page 27 L’uso dell’Oview come dispositivio di comando fisso a parete, permette a questo di essere sempre attivo, in quanto viene alimentato direttamente e permanentemente dall’automatismo a cui è collegato. Però, se l’Oview non viene utilizzato per un breve periodo di tempo, il suo schermo entra in stand–by (si abbassa la luminosità). A que- sto punto, per riattivarlo è...
- Page 28 • Programmare i comandi orari comandare uno o più dispositivi. L’Oview dispone di un orologio interno che può essere utilizzato per programmare F – “menu”: questa voce permette di accedere a tutte le funzioni disponibili per l’invio automatico dei comandi ad un’automazione. Nota – Se a causa di un programmare un dispositivo.
- Page 29 – Per effettuare il “Log In” o il “Log Out”, in presenza della password: se l’Oview – password installatore: fare riferimento al paragrafo “Operare con le password”; è bloccato dalla password, per poter iniziare le operazioni di programmazione è indi- –...
- Page 30 FRANÇAIS RECOMMANDATIONS ET PRÉCAUTIONS GÉNÉRALES POUR LA SÉCURITÉ INFORMATION SUR LES MARQUES OPÉRER EN CONDITIONS DE SÉCURITÉ ! ATTENTION ! – Pour la sécurité des personnes, il est important de Les marques BLUETOOTH , GPRS , GSM sont des marques enregistrées ®...
- Page 31 L’Oview et ses accessoires Utilisation uniquement de l’Oview (BusT4) ® (Bluetooth Utilisation du module OVBT et du 10-15m logiciel module (BusT4) ® (Bluetooth OVBT Utilisation du module (GSM ® OVBTGSM et d’un téléphone mobile (Gsm ® module (BusT4) OVBTGSM (Adsl)
-
Page 32: Description Du Produit Et Application
1.2 – ACCESSOIRES (en option) 1.1 – Principales caractéristiques de fonctionnement de l’Oview L’Oview est fourni avec un câble de 2 m pour le raccordement direct à un dis- positif et avec un support pour la fixation du produit sur un mur. - Page 33 à l’automatisme à travers un appel ou un Sms ; de plus, avec le smartphone, qui fonctionne avec le système d'exploitation Window Mobile, il est possible d'utiliser également le logiciel « Oview ® software suite ». INSTALLATION DE L’OVIEW COMME DISPOSITIF DE COMMANDE Pour utiliser l’Oview comme dispositif fixe pour la commande d’automatismes,...
- Page 34 (2 m) en le connectant à la prise de l’Oview (fig. 4) et à la prise « BusT4 » • En présence d’un réseau de dispositifs, la longueur totale du câble doit être calculée de présente sur la logique de commande du dispositif à...
- Page 35 Touche G qui sert à sélectionner l’option qui apparaît en bas à droite de l’écran (10). • Page initiale de l’Oview Après avoir activé l’Oview une page dite « page initiale » s’affiche. Les éléments qui composent cette page sont (fig. 7) : A – Nom du dispositif sélectionné.
- Page 36 L’Oview dispose d’une horloge interne qui peut être utilisée pour programmer l’envoi automatique des commandes à un automatisme les jours et aux 00:01:14 horaires désirés. Note – Si à cause d’une panne de courant l’Oview n’est pas 09.11.07 alimenté, son horloge continue à fonctionner régulièrement ; par contre, si l’en- voi d’une commande était programmé...
- Page 37 Dans cette page, il est possible de : – nom : sert à attribuer à l’Oview un nom personnel, pour l’identifier facilement dans un réseau de dispositifs ; – faire défiler la liste des noms des dispositifs présents, en utilisant les touches –...
- Page 38 Les mots de passe de l’Oview mots de passe » ; L’Oview permet de programmer un « mot de passe installateur » et/ou un « mot – mot de passe utilisateur) : se référer au paragraphe « Opérer avec les mots de passe utilisateur ».
-
Page 39: Mise Au Rebut Du Produit
– La connexion Internet : permet de se connecter à l’Oview grâce à un module Comme l’indique le symbole ci–contre, il est interdit de jeter ce (à installer sur l’Oview). Ce type de connexion permet de communiquer ®... -
Page 40: Caractéristiques Techniques Du Produit
; elle est mise à jour à la date d’édition du présent manuel et a été réélaborée pour des raisons d’édition. Une copie de la décla- ration originale pour chaque produit peut être demandée à Nice S.p.a. (TV) I. I Typologie : unité de commande, programmation et diagnostic pour disposi- tifs munis de connexion BusT4 Je soussigné... - Page 41 • Page initiale de l’Oview • Légende des touches de l’Oview Après avoir activé l’Oview une page dite « page initiale » s’affiche. Les éléments qui L’Oview comprend les parties suivantes (fig. A) : composent cette page sont les suivants (fig. B) : 1 –...
- Page 42 (fig. B) l’option « commandes » avec la touche G (7 – fig. A) et sélectionner ensuite l’option « exécuter commande ». Puis Pour régler les paramètres de fonctionnement de l’Oview, il faut sélectionner dans la sélectionner la commande désirée dans la liste qui apparaît.
- Page 43 à la valeur minimum réglée ; Note – Quand un mot de passe est activé, les fonctions et les paramètres de l’Oview – mot de passe installateur : se référer au paragraphe « Opérer avec les sont visibles quand même mais pas modifiables.
- Page 44 ESPAÑOL ADVERTENCIAS Y PRECAUCIONES GENERALES PARA LA SEGURIDAD INFORMACIÓN SOBRE LAS MARCAS ¡TRABAJAR EN CONDICIONES SEGURAS! ¡ATENCIÓN! – Para la seguridad de las personas es importante res- Las marcas BLUETOOTH , GPRS , GSM son marcas registradas por sus ® ®...
- Page 45 El Oview y sus accesorios Utilización del Oview solo (BusT4) ® (Bluetooth Utilización del módulo OVBT 10-15m y del Software módulo (BusT4) ® (Bluetooth OVBT Utilización del (GSM ® módulo OVBTGSM y de un teléfono móvil (Gsm ® módulo (BusT4)
-
Page 46: Descripción Del Producto Yuso Previsto
1.2 – Accesorios (opcionales) 1.1 – Características funcionales principales del Oview El Oview incorpora un cable de 2 m para la conexión directa a un dispositivo, y un soporte para la fijación a la pared. El dispositivo Oview dialoga con otros dispositivos a través del cable BusT4;... - Page 47 – un módulo GSM y un software dedicado, para comunicar los datos por ® Internet entre el Oview y un Ordenador Personal o un Ordenador Palmar. Con il modulo Gsm è possibile usare anche uno smartphone e un comu- ®...
- Page 48 Oview (fig. 4) y a la toma “BusT4” presente en la • Ante la presencia de una red de dispositivos, la longitud total del cable debe ser calcu- lada de la siguiente manera: Central de mando del dispositivo a programar (fig.
- Page 49 El Oview se activa sólo cuando está conectado a un dispositivo, puesto que toma la alimentación directamente de este último. Al encenderse el Oview, en su pantalla aparece un icono que representa el dis- positivo conectado. • Leyenda de los botones del Oview El Oview está...
- Page 50 (02) envío automático de los mandos a una automatización, en días y horarios deseados. Nota – Si por un corte de energía eléctrica el Oview se quedara sin 00:01:14 alimentación, su reloj seguirá funcionando regularmente; pero si durante el cor- 09.11.07...
- Page 51 – nombre: sirve para asignar al Oview un nombre personal para identificarlo c) En esta ventana es posible: fácilmente en una red de dispositivos;...
- Page 52 – luminosidad botones: sirve para regular la luminosidad de los botones. Esta solución evita que haya que hacer en el Oview un nuevo “log in” cada vez Puede ser configurado con un valor comprendido entre un mínimo de 0% y que se cambia de dispositivo durante la programación.
-
Page 53: Eliminación Del Producto
® El producto contiene una pila que debe quitarse y no debe arrojarse en los resi- ción con el Oview desde una distancia máxima de alrededor de 10-15 m sin duos normales porque contiene sustancias contaminantes; por consiguiente, obstáculos, o de pocos metros con obstáculos (paredes o demás). -
Page 54: Características Técnicas Del Producto
Una copia de la declaración original de cada producto puede ser solicitada a Nice S.p.a. (TV) I. I Tipología: unidad de mando, programación y diagnóstico para dispositivos con conexión BusT4... -
Page 55: Manual De Uso
Si el Oview no se utiliza por un breve período de tiempo, su pantalla se coloca en stand-by (la luminosidad baja). Para reactivarlo es suficiente pulsar cual- quier botón. - Page 56 • Programación de los mandos horarios para accionar uno o varios dispositivos. El Oview incorpora un reloj interno que puede ser utilizado para programar el envío F – “menú”: este elemento permite acceder a todas las funciones disponibles para automático de los mandos a una automatización. Nota – Si por un corte de energía programar un dispositivo.
- Page 57 – informaciones: sirve para visualizar exclusivamente los datos técnicos del – Para realizar el “Log In” o el “Log Out” con la contraseña: si el Oview está blo- Oview, sin la posibilidad de modificarlos;...
- Page 58 DEUTSCH HINWEISE UND GENERELLE SICHERHEITSVORSCHRIFTEN INFORMATION ÜBER DIE MARKENZEICHEN UNTER SICHEREN BEDINGUNGEN ARBEITEN! ACHTUNG! – Für die Sicherheit der Personen müssen diese Anlei- Die Markenzeichen BLUETOOTH , GPRS , GSM sind von den jeweiligen ® ® ® tungen eingehalten werden. Eigentümern registrierte Markenzeichen;...
- Page 59 Das Oview und seine Zubehörteile Ausschließliche Anwendung des Oview (BusT4) ® (Bluetooth Anwendung des Moduls OVBT 10-15m und der Software moduls (BusT4) ® (Bluetooth OVBT Anwendung des (GSM ® Moduls OVBTGSM und eines Mobiltelefons (Gsm ® moduls (BusT4) OVBTGSM (Adsl)
- Page 60 1.2 – Zubehörteile (Optionals) Kabel BusT4; somit kann sie nur ausschließlich mit den Produkten kommuni- Das Oview besitzt ein 2 m langes Kabel für den direkten Anschluss an eine Vor- zieren, die über einen Stecker BusT4 verfügen, d.h. die Teil des Systems “Nice- richtung und eine Halterung zur Befestigung des Produkts an die Wand.
- Page 61 Handcomputer; – ein Modul GSM und eine diesbezügliche Software für die Kommunika- ® tion der Daten via Internet zwischen Oview und einem Personal Computer oder einem Handcomputer. Mit dem Modul Gsm ist es möglich, auch ein Smartphone und ein nor- ®...
- Page 62 Stecker anzuwenden (Abb. 3). Kabel UTP Kategorie 2 500 m 500 m 400 m 05. Dann das Kabel an den Anschluss des Oview (Abb. 4) und an den An - Kabel STP Kategorie 5 700 m 700 m 400 m schluss “BusT4”...
- Page 63 Book”. Oview aktiviert sich ausschließlich, wenn es an einer gespeisten Vorrichtung angeschlossen ist, da es von dieser gespeist wird. Beim Einschalten des Oview erscheint auf dem Bildschirm eine Ikone, die die angeschlossene Vorrichtung darstellt. • Zeichenerklärung der Tasten des Oview Das Oview besteht aus den folgenden Teilen (Abb.
- Page 64 ändern sich aufgrund der Typologie der gewählten Automatisierung. • Die Uhrzeitensteuerungen programmieren Das Oview verfügt über eine interne Uhr, die genützt werden kann, um die auto- matische Übertragung der Steuerungen an eine Automatisierung an den gewünschten Tagen und Uhrzeiten zu programmieren. Anmerkung – Wenn...
- Page 65 Bildschirmseite vorgegangen werden. c) In dieser Bildschirmseite ist es möglich: – Name: wird genützt, um dem Oview einen persönlichen Namen zuzuweisen, – Die Liste der Namen der vorliegenden Vorrichtungen mit den Pfeiltasten um es leicht in einem Netz von Vorrichtungen identifizieren zu können;...
- Page 66 Fremde und Kinder zu einigen programmierbaren Funktionen (zum Beispiel die – Netzoptionen: Dieser Punkt enthält die Parameter “Gesamtheit” und Uhrzeitenprogrammierungen). “Adresse”. Sie werden benützt, um die Gruppe zu ändern, zu der Oview und die diesbezügliche persönliche Adresse gehört; – Zum Einstellen eines Passwords: Auswählen in der Anfangsbildschirmseite –...
-
Page 67: Entsorgung Des Produkts
® stanzen enthält; sie muss entsorgt oder recycelt werden, wobei die Mülltren- die Kommunikation mit Oview bei einer max. Distanz von zirka 10–15 mm, nungsmethoden gemäß den örtlich geltenden Bestimmungen eingehalten wenn keine Hindernisse vorliegen, oder wenige Meter, bei Anwesenheit von werden. - Page 68 EG – Konformitätserklärung gemäß Bestimmung 1999/5/EG Anmerkung – Die vorliegende Konformitätserklärung fasst den Inhalt der einzelnen Das Oview wird von Nice S.p.a. (TV) – I – produziert. Konformitätserklärungen der einzelnen genannten Produkte zusammen; sie weist das Ausgabedatum dieses Handbuchs auf und wurde aufgrund von Ausstellungsgründen angepasst.
- Page 69 Die Anwendung des Oview als feste Wandsteuervorrichtung ermöglicht diesem, immer aktiv zu bleiben, da es direkt und ständig durch den angeschlossenen Auto- matismus gespeist wird. Wenn das Oview über kurze Zeit nicht benützt wird, geht sein Bildschirm auf stand-by über (die Leuchtkraft wird schwächer). Zur erneuten Aktivierung ist es ausreichend, eine beliebige Taste zu drücken.
- Page 70 • Programmieren der Uhrzeitsteuerungen E – “Steuerungen”: Dieser Punkt ermöglicht den Zugang zu allen verfügbaren Das Oview verfügt über eine interne Uhr, die benützt werden kann, um die automati- Funktionen, um eine oder mehrere Vorrichtungen zu steuern. sche Übertragung der Steuerungen an eine Automatisierung zu programmieren.
- Page 71 In der Anfangsbildschirmseite (Abb. B) den Punkt “Menü” mit der Tas- “Adresse”. Sie werden benützt, um die Gruppe zu ändern, zu der Oview und te G (8 – Abb. A) und daraufhin den Punkt “log in” wählen. In der folgenden Bild- die diesbezügliche persönliche Adresse gehört;...
- Page 72 POLSKI OGÓLNE ZALECENIA I OSTRZEŻENIA DOTYCZĄCE BEZPIECZEŃSTWA INFORMACJE O ZNAKACH FIRMOWYCH PRACUJĄC ZACHOWAJ ZASADY BEZPIECZEŃSTWA! UWAGA! – Dla bezpieczeństwa osób ważne jest przestrzeganie Znaki BLUETOOTH®, GPRS®, GSM®są zarejestrowanymi przez odpowied- poniższych zaleceń. nich właścicieli znakami towarowymi; nazwy produktów używane w niniejszej instrukcji także mogą...
- Page 73 Oview i akcesoria Używanie samego Oview (BusT4) ® (Bluetooth Używanie modułu OVBT oraz 10-15m oprogramowania modułu (BusT4) ® (Bluetooth OVBT Używanie modułu (GSM ® OVBTGSM oraz telefonu komórkowego (Gsm ® modułu (BusT4) OVBTGSM (Adsl) Używanie modułu (Internet) (Gprs) OVBTGSM oraz...
- Page 74 Uwaga - W celu uzyskania dodatkowych informacji na temat jak utworzyć sieć na pędu bram, bram garażowych, szlabanów oraz innych podobnych zasto- Bus oraz jak ją skonfigurować i zarządzać za pomocą Oview należy zapoznać sowań. się z instrukcją “Nice Opera System Book” na stronie internetowej www.nicefo- Jakiekolwiek inne użycie jest uważane za niewłaściwe! Producent nie...
- Page 75 Aby zamontować je na ścianie, należy wykorzystać wspornik (jest w komple- cie), postępując jak pokazano na rys. 2. Następnie podłączyć Oview do automatyki, zgodnie z opisem w Rozdziale 3. ––– OBOWIĄZKI INSTALATORA ––– WAŻNE – Po zainstalowaniu i zaprogramowaniu Oview jako urządzenia sterującego instalator powinien przekazać...
- Page 76 Do tego podłączenia można wykorzystać kabel będą- wolnemu pojedynczemu urządzeniu albo umieszczonemu w centrum gwiazdy. cy na wyposażeniu (2 m), podłączając go do gniazda Oview (rys. 4) oraz do • W przypadku sieci urządzeń całkowita długość kabla powinna być obliczona w sposób gniazda “Bus T4”...
- Page 77 OGÓLNE UŻYTKOWANIE OVIEW Book”. Oview uaktywnia się wyłącznie wtedy, gdy jest podłączone do zasilanego urzą- dzenia, z którego pobiera zasilanie. Wraz z włączeniem Oview pojawia się na ekranie ikona, która przedstawia pod- łączone urządzenie. Opis przycisków Oview • Oview jest złożony z następujących części (rys. 6): 1 –...
- Page 78 Uwaga – Jeżeli na skutek braku zasilania elektryczne- 00:01:14 go Oview nie będzie zasilany, zegar wewnętrzny działa nadal; jeżeli jednak pod- 09.11.07 czas braku zasilania miałoby nastąpić zaprogramowane uruchomienie jakiegoś...
- Page 79 (rys. 7) wybrać opcję “menu” przyciskiem G (poz. 8 – rys. 6) a następnie wybrać opcje “automations”: na ekranie pojawi się – name: tego parametru używa się w celu przypisania do Oview indywidualnej wykaz urządzeń podłączonych i występujących w tym zestawie.
- Page 80 – key brightness: tego parametru używa się do regulacji jasności podświetle- hasła dla wszystkich urządzeń, łącznie z Oview. W ten sposób uniknie się w nia klawiatury. Może on być ustawiany w zakresie od 0 % do 100%. Uwaga Oview podczas programowania konieczności ponownego logowania przy każ-...
-
Page 81: Utylizacja Produktu
Bluetooth®(do zainstalowania w Oview). Ten typ łączności umożliwia komuniko- cać wraz ze zwykłymi odpadkami, ponieważ zawiera substancje szkodliwe; wanie się z Oview na odległość maksimum 10–15 m przy braku przeszkód, lub należy zatem poddać ją utylizacji lub recyklingowi, stosując metody ‘selektyw- kilku metrów w przypadku występowania przeszkód (mury lub inne przeszkody). -
Page 82: Dane Techniczne Produktu
Treść deklaracji przed- stawia stan na datę wydania niniejszej instrukcji, a forma jej tekstu została dostosowa- na dla potrzeb druku. Istnieje możliwość wystąpienia do Nice S.p.a. (TV) Włochy o I Typologia: jednostka sterowania, programowania i diagnostyki dla kopię... -
Page 83: Instrukcja Użytkowania
Użycie Oview jako urządzenia sterującego umocowanego na ścianie pozwala na jego stałą aktywność, o ile będzie zasilane bezpośrednio i stale z układu automa- tyki, z którym jest połączone. Jeżeli jednak Oview nie będzie używane przez krótki okres czasu, jego ekran przejdzie w stan czuwania (zmniejsza się jasność świece- nia). - Page 84 Uwaga – Jeżeli na skutek braku zasilania elektrycznego Oview nie będzie zasilany, zegar wewnętrzny działa nadal; jeżeli jednak podczas braku zasilania miałoby nastąpić zaprogramowane uruchomienie jakiegoś polecenia, to nie zostanie ono wykonane, ale pozostanie zaprogramowane.
- Page 85 – key brightness: tego parametru używa się do regulacji jasności podświetlenia Uwaga – Gdy hasło jest aktywne, funkcje i parametry Oview są widoczne, ale nie klawiatury. Może on być ustawiany w zakresie od 0 % do 100%. Uwaga - po 30 można ich zmienić.
- Page 86 NEDERLANDS ALGEMENE AANBEVELINGEN EN VOORZORGSMAATREGELEN VOOR DE VEILIGHEID INFORMATIE OVER DE MERKEN WERK ONDER VEILIGE CONDITIES! LET OP! – Voor de veiligheid van de betrokken personen is het De merken BLUETOOTH , GPRS , GSM zijn merken die zijn geregistreerd ®...
- Page 87 De Oview en zijn accessoires Gebruik van alleen de Oview (BusT4) Gebruik van de OVBT module 10-15m en de software module (BusT4) OVBT Gebruik van de (GSM ® OVBTGSM module en een mobiele telefoon module (BusT4) OVBTGSM (Adsl) (Internet) Gebruik van de...
- Page 88 De Oview is een apparaat dat bestemd is voor de programmering en besturing In het geval van via een netwerk met elkaar verbonden inrichtingen, biedt het van Nice inrichtingen die voorzien zijn van “BusT4”...
- Page 89 INSTALLATIE VAN DE OVIEW ALS BESTURINGSINRICHTING Om de Oview als vaste inrichting voor de besturing van automatiseringen te ge - bruiken, dient hij op een geschikte plaats te worden geïnstalleerd, buiten bereik van kinderen en op een hoogte vanaf de grond van niet minder dan 150 cm.
- Page 90 500 m 400 m beide connectors dezelfde draadvolgorde gebruikt (afb. 3). STP kabel categorie 5 700 m 700 m 400 m 05. Sluit de kabel vervolgens aan op de aansluiting op de Oview (afb. 4) en op 5 – Nederlands...
- Page 91 Opmerking – Voor meer informatie over de in dit hoofdstuk besproken onder- werpen raadpleegt u de handleiding “Nice Opera System Book”. De Oview wordt alleen actief wanneer hij wordt aangesloten op een van stroom voorziene inrichting, aangezien hij voor zijn stroomvoorziening rechtstreeks op deze andere inrichting is aangewezen.
- Page 92 • Programmeren van getimede instructies run 2 (02) De Oview heeft een interne klok die gebruikt kan worden voor het programme- 00:01:14 ren van de automatische verzending van instructies aan een automatisering op 09.11.07 gewenste dagen en tijdstippen.
- Page 93 – naam: dient om een eigen naam aan de Oview toe te kennen, om hem in c) In dit scherm is het mogelijk: een netwerk van inrichtingen gemakkelijk te kunnen identificeren;...
- Page 94 Oview, gelijk is. Op die manier voorkomt u dat er bij iedere verandering waarde; van inrichting gedurende de programmering hiervan op de Oview een nieuwe –...
-
Page 95: Afdanken Van Het Product
Met deze software kan de installateur niet alleen alle handelingen uitvoeren die normaal gesproken met de Oview verricht kunnen worden, maar heeft hij of zij ook de mogelijkheid een gegevensarchief aan te maken, om de wijzigingen die zijn doorgevoerd op de geprogrammeerde inrichtingen te kunnen beheren en opslaan;... -
Page 96: Technische Gegevens Van Het Product
EG conformiteitsverklaring volgens de richtlijn 1999/5/EG Opmerking – Deze Conformiteitsverklaring verzamelt de inhoud van de aparte confor- De Oview is geproduceerd door Nice S.p.A. (TV) I. miteitverklaringen van de aparte producten die genoemd worden; de verklaring is bij- gewerkt op de datum van uitgave van deze handleiding en werd om uitgeversredenen heraangepast. - Page 97 Om een automatisering te besturen volstaat het om de naam en het pictogram op te roepen op het scherm van de Oview en de instructie te verzenden met behulp van een toets (lees voor meer details het hoofdstuk “Gebruik van de Oview als besturingsinrichting”).
- Page 98 (5 – afb. A) • Instellen van de werkingsparameters van de Oview Om de werkingsparameters van de Oview in te stellen, moet u in het beginscherm 2) Voor het versturen van een speciale instructie die beschikbaar is op de auto- (afb.
- Page 99 – naam: dient om een eigen naam aan de Oview toe te kennen, om hem in • Programmeren van de functie van een automatisering een netwerk van inrichtingen gemakkelijk te kunnen identificeren;...
- Page 100 Fax. +33.(0)4.42.62.42.50 info@uk.niceforyou.com info@es.niceforyou.com Sarmeola di Rubano PD Italia infomarseille@fr.niceforyou.com Ph. +39.049.89.78.93.2 Nice Australia Fax +39.049.89.73.85.2 Nice Polska Nice France Rhône Alpes Wetherill Park Australia infopd@niceforyou.com Decines Charpieu France Pruszków Polska Ph. +61.(0)2.96.04.25.70 Ph. +33.(0)4.78.26.56.53 Ph. +48.(022).759.40.00 Fax +61.(0)2.96.04.25.73 Nice Roma Fax +33.(0)4.78.26.57.53...
Need help?
Do you have a question about the Oview and is the answer not in the manual?
Questions and answers