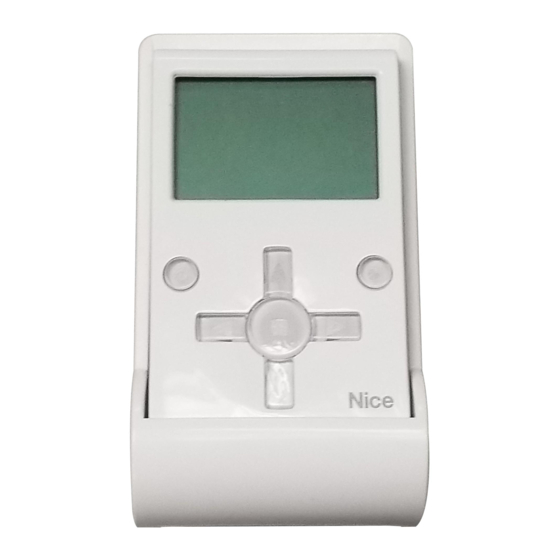
Nice Oview Original Instructions
Control and programming unit
Hide thumbs
Also See for Oview:
- Instructions for installation and use manual (116 pages) ,
- Instructions and warnings for installation and use (100 pages) ,
- Operation manual (3 pages)
Advertisement
Oview with firmware vers. OV04 has two new func-
EN
tions, not dealt with in the instruction manual: "event
log" and "control unit update".
• Events log
This function enables the user to display on Oview all operations
performed by the devices on the network to which Oview is con-
nected. Data acquisition (events log) is performed from the start,
automatically and not visible to the installer, as soon as Oview
is connected to the network: this searches for all devices on the
network and stores the events log of each in its specific memory,
overwriting data of previous versions. After searching for devices
on the network, with Oview still connected, the events log of a
device can be viewed one at a time, as follows: select the de-
vice, followed by the item "Advanced functions" > "Events log".
To scroll through events, use keys p and q.
The events log can also be viewed using "Oview Software
Suite". In this case, connect Oview to the Pc or to the palmtop
in which the software is installed, then in the main screen select
"Oview", followed by "O-View Functions" > "Settings" > "Events
log". A list is displayed, with the events log of all devices on the
network to which Oview was last connected and, to view the
events of a single device, use the field "Device filter", selecting
the required device from the list displayed.
The acquired events log remains in the Oview memory until it is
connected to a different network.
• Control unit update
This function enables the user to update the firmware of a con-
trol unit using the internal memory of the additional module
OVBT (or OVBTGSM) in conjunction with Oview. The procedure
involves two steps, which can also be performed at different
times and locations: 1) loading of new firmware in the additional
module of Oview; 2) downloading of the firmware onto the con-
trol unit.
1 – Loading the new firmware onto the additional module
of Oview. To load the firmware onto the additional module
OVBT (or OVBTGSM), install the module on Oview, open the
software "Oview Software Suite" (version 1.3 or later), start up
the search for devices and select the device Oview; then select
the item "advanced functions" followed by "Load control unit
firmware". At this point select the file with the new firmware and
confirm. The file will be memorised automatically onto the addi-
tional module.
2 – Downloading the new firmware onto the control unit. To
download the firmware onto the control unit, connect the latter
to Oview equipped with the additional module with the memo-
rised new firmware and proceed with the update as follows: re-
move any passwords; then select the item "Menu" on Oview,
followed by "Automations" > "Control unit functions" > "Ad-
vanced functions" > "Update firmware". At this point Oview
checks whether the new firmware is compatible with the control
unit: if compatible, the item "Start" is displayed; otherwise the
update process cannot be started. After starting the process, if
the update fails the control unit remains blocked pending com-
pletion of the procedure. To unblock, select the item "Menu" >
"Devices in boot phase" and restart the firmware loading
process.
Oview
Control and programming unit
EN
- Addendum to Oview manual
IT
- Addendum al manuale Oview
FR
- Addenda au guide Oview
ES
- Anexo del manual Oview
DE
- Addendum Handbuch Oview
PL
- Załącznik do instrukcji obsługi Oview
NL
- Addendum bij de handleiding Oview
Original instructions
Istruzioni originali
Instructions originales
Instrucciones originales
Originalanleitungen
Instrukcje oryginalne
Originele instructies
Advertisement
Table of Contents

Summary of Contents for Nice Oview
- Page 1 To scroll through events, use keys p and q. The events log can also be viewed using “Oview Software Suite”. In this case, connect Oview to the Pc or to the palmtop in which the software is installed, then in the main screen select “Oview”, followed by “O-View Functions”...
- Page 2 La storia eventi può essere visualizzata anche con “Oview Soft- tionner le dispositif, puis la rubrique « Fonctions avancées » > ware Suite”. In questo caso, collegare l’Oview al Pc o al palmare « Historique évènements ». Pour faire défiler les évènements uti- liser les touches p et q.
- Page 3 Beginn automatisch und ist für den Instal- por el instalador, ni bien el Oview es conectado a la red: éste lateur nicht sichtbar, wenn Oview an das Netz angeschlossen...
- Page 4 De gebeurtenissenhistorie kan ook worden weergegeven met podłącz Oview do komputera lub do palmtopa, w którym opro- “Oview Software Suite”. In dit geval sluit u de Oview aan op de Pc gramowanie zostało zainstalowane, wybierz na stronie głównej of de palmcomputer waarop de software geïnstalleerd is, selecteert hasło “Oview”, następnie “Funkcje O-View”...


Need help?
Do you have a question about the Oview and is the answer not in the manual?
Questions and answers