Table of Contents
Advertisement
Advertisement
Table of Contents

Related Manuals for LifeFitness LifeCycle GX


Summary of Contents for LifeFitness LifeCycle GX
- Page 1 OPERATION MANUAL...
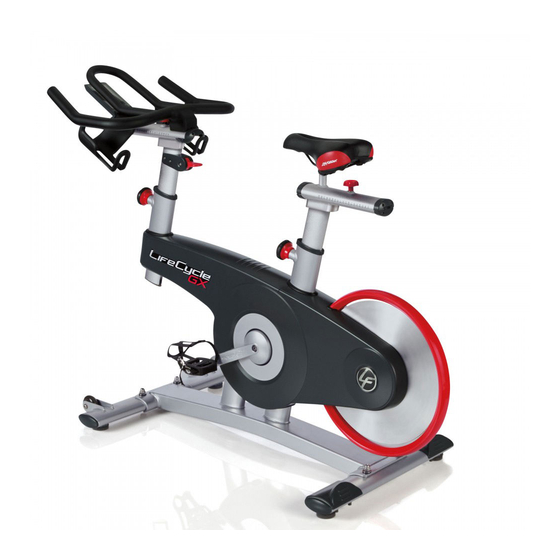
- Page 3 08:30-17:00 (GMT) Statements of purpose Global website: www.lifefi tness.com ALL OTHER ASIA PACIFIC COUNTRIES AND The Life Fitness LifeCycle GX exercise bike is DISTRIBUTOR BUSINESS ASIA PACIFIC* a machine that simulates the movements of Germany and Switzerland Life Fitness Europe...
-
Page 5: Table Of Contents
CONTENTS LIFECYCLE ® GX IMPORTANT SAFETY INSTRUCTIONS Locking System LIFECYCLE GX POSITION AND SETUP Seat height Saddle forward and back position Handlebar height Handlebar forward and back position Pedal strap adjustments and SPD usage Resistance control/brake lever Optional console display... -
Page 6: Important Safety Instructions
• • WARNING: This is a Home use Product, when product is not in Never face backward while using a LifeCycle GX exercise bike. use, the equipment must be locked to prevent the drive gear • This unit is NOT equipped with a freewheel system. If the from movement. -
Page 7: Locking System
LOCKING SYSTEM This exercise bike is equipped with a locking system to prevent the uncontrolled use or moving of rotating parts. Install cable and lock as shown below. • WARNING: The equipment must be locked when not in use. SAVE THESE INSTRUCTIONS FOR FUTURE REFERENCE. ©... -
Page 9: Lifecycle Gx Position And Setup
LIFECYCLE GX POSITION AND SETUP © 2013 Life Fitness... -
Page 10: Seat Height
LIFECYCLE GX POSITION AND SETUP This section outlines a step-by-step guide to ensuring the user is set up correctly. The correct setup sequence is: Seat height Seat forward and back position Handlebar height Handlebar forward and back position Pedal strap adjustments and SPD usage... -
Page 11: Handlebar Height
SEAT FORWARD HANDLEBAR AND BACK HEIGHT POSITION Handlebar height varies between users due to personal preference, Once the proper saddle height has fi tness and fl exibility. A general been established, bring the pedals starting point is to adjust the to the horizontal position of 9 and handlebar height so that it is in 3 o’clock. -
Page 12: Handlebar Forward And Back Position
HANDLEBAR FORWARD AND BACK POSITION The position of the handlebar fore and aft ensures that the user rides with as little stress as possible on the spine, lower-back muscles, shoulders and neck. Users should be able to reach Position 3 without having to slide forward on the saddle. -
Page 13: Pedal Strap Adjustments And Spd Usage
PEDAL STRAP BRAKE LEVER ADJUSTMENTS AND ADJUSTMENTS SPD USAGE Pedalling resistance is controlled by the incremental Pedal straps: Adjust to fi t snugly brake lever located under the around the shoes and hold the foot handlebars. The intensity of in the pedal. the ride and cadence can be varied by using the lever. -
Page 14: Optional Console Display
Correct setup of the console will ensure the user has will allow the instructor to implement new and innovative accurate feedback and a positive experience. classes. Current brands supporting the LifeCycle GX are: DISPLAY 2 Pedal to wake OK and LOGO:... -
Page 15: Console Setup
CONSOLE SETUP • Change language: English, Spanish, German, Italian, French, Dutch, Portuguese • Change weight setting: lbs or kg • Change system setting: miles or km • Change backlight time: 5 or 15 or 30 • Confi guration: show version, calibration, exit setup After setup is completed for the fi... -
Page 16: User Settings
USER SETTINGS • Set weight: lbs or kg USER USER (as defi ned in SETUP mode) ENTER WEIGHT (start with default value) ENTER AGE • Set age (start with default value) NAVIGATING THE USER MODE 1. To enter USER mode from other display mode, press LOGO button 2. - Page 17 DISPLAY MODE 2 – ONSCREEN INFORMATION All workout data shall be updated once every second in real time. An HR strap is required to monitor HR max, percentage of heart rate max, average and percentage of average. Cadence max DISPLAY 2 and average RPM MAX RPM AVG...
-
Page 19: Cycling Technique Skills
CYCLING TECHNIQUE SKILLS © 2013 Life Fitness... - Page 20 CYCLING TECHNIQUE SKILLS Once the bike is set up correctly the user is in a position to adopt a safe, effi cient and enjoyable workout. CORRECT POSITIONING • Sit with your backside at the rear of the saddle so that your sitting bones are supported •...
- Page 21 PEDALLING The push phase The basics are If you imagine a clock face, the push phase is • Abs engaged approximately at the 2’o clock position and will fi nish • at the 5 o’clock position. This phase produces the Toes slightly down most amount of power by recruiting the gluteals, •...
-
Page 22: Upper Body And Hand Positions
UPPER-BODY AND HAND POSITIONS The position of the upper body is key in achieving good form and technique. The positioning of the hands will determine posture, breathing, comfort levels and can determine the objective for the particular block of workout such as a seated climb or sprint. - Page 23 POSITION 3 (TIME TRIAL, LONG EFFORTS) In Position 3 the hands are placed in the aero position in the middle of the bars. This position is commonly used for sustained eff orts and seated high-cadence eff orts in a tucked position. •...
-
Page 24: Training Information
TRAINING INFORMATION HEART RATE MONITOR TRAINING By using the LifeCycle GX console in combination with a heart rate monitor a user can directly measure their exercise intensity. Using an HR monitor ensures that they are training within a specifi c HR zone by either monitoring their current HR or % max HR on the console. -
Page 25: Warm-Up And Cool-Down
WARM-UP AND COOL-DOWN The warm-up is essential in preparing the body physically and mentally for the workout ahead and should include the following: • Progress naturally in a controlled manner • Intensity should be enough to raise the HR and body temperature •... - Page 26 RPE SCALE: The RPE scale is used to measure the intensity of your exercise. The RPE scale runs from 0 – 10. The numbers below relate to phrases used to rate how easy or diffi cult you fi nd this activity. 0 –...
- Page 27 © 2013 Life Fitness...
-
Page 28: Lifecycle Gx Sample Workouts
LIFECYCLE GX SAMPLE REPEAT X1 • 2mins 70-75% MHR, RPE 4, Position 1 WORKOUTS • 2mins 75-80% MHR, RPE 5, Position 2 • 2mins 80-90% MHR, RPE 6, Position 2 out the saddle All these workouts can be done by beginners to •... - Page 29 DROP DOWNS • 4mins easy spin 90rpm+ or 60-65% MHR, RPE 2, Position 1 WARM UP • REPEAT X6 4mins easy spin 90rpm+ or 60-65% MHR, RPE 2, • Position 1 45secs 75-80% MHR, RPE 5, Position 3 • • 3mins going up each minute in %MHR from 70-75% –...
-
Page 30: Service And Technical Data
WARRANTY • Locate the product in a cool, dry place WARRANTY INFORMATION: LifeCycle GX • Apply the lubricant to a cotton cloth, then wipe on the upper area of the lower fore/aft sliders as needed. Note: only a few drops of lubricant WHAT IS COVERED? are required per usage. -
Page 31: Warranty Coverage
All terms of this warranty are void if this product is moved WARRANTY COVERAGE beyond the continental borders of the United States of America (excluding Alaska, Hawaii and Canada) and are then subject to FIVE YEARS THREE YEARS ONE YEAR 6 MONTHS 90 DAYS the terms provided by that country’s local authorised STRUCTURAL FRAME... - Page 32 YOUR PARTNER FOR SUCCESS 800.634.8637 lifefi tness.com follow us © 2013 Life Fitness, a division of Brunswick Corporation. All rights reserved. Life Fitness and LifeCycle are a registered trademark of Brunswick Corporation. Printed in USA. PM-034-11 (12.11) Part No. 9307801 REV. A-1...
Need help?
Do you have a question about the LifeCycle GX and is the answer not in the manual?
Questions and answers
How do I open the console to replace the batteries?
To replace the batteries on a LifeFitness LifeCycle GX console, follow these steps:
1. Locate the plastic panel on the console where the batteries are housed.
2. Remove the two small Allen head screws securing the panel.
3. Take off the plastic panel to access the battery compartment.
4. Replace the two D-cell (1.5V alkaline) batteries.
5. Reattach the plastic panel and secure it with the screws.
This answer is automatically generated
What is best heart monitor strap to use with Lifecycle GX?