Table of Contents
Advertisement
eiQ-R900M Antibacterial
Vacuum Cleaner and Floor Mopping Robot
with self-charging home dock
USER MANUAL
Thank you for choosing ElectriQ
Please read this user manual before using this robotic vacuum cleaner
and keep it safe for future reference.
Visit our page www.electriQ.co.uk for our entire range of Intelligent Electricals
1
Advertisement
Table of Contents

Related Manuals for ElectrIQ eiQ-R900M


Summary of Contents for ElectrIQ eiQ-R900M
- Page 1 USER MANUAL Thank you for choosing ElectriQ Please read this user manual before using this robotic vacuum cleaner and keep it safe for future reference. Visit our page www.electriQ.co.uk for our entire range of Intelligent Electricals...
-
Page 2: Table Of Contents
CONTENTS 1. FEATURES 2. SAFETY INSTRUCTIONS 3. PARTS AND ASSEMBLY 4. FUNCTIONS 5. FEATURES AND CLEANING MODES 6. BATTERY INSTALLATION AND CHARGING 7. ZONE DIVIDER 8. CONTROL PANEL 9. SCHEDULING 10. CLEANING AND MAINTENANCE 11. MOP ASSEMBLY 12.TROUBLESHOOTING... -
Page 3: Features
FEATURES ElectriQ brings you an easy to use robot vacuum cleaner that works both on hard floor surfaces and carpets and also can be used for wet light mopping operations. This is not just sweeper but a real vacuum cleaner with powerful suction and the latest dual side brush system. - Page 4 • Never operate this appliance if the cord or power supply is damaged. Ensure the power cord is not stretched or exposed to sharp object / edges. • Do not use the appliance if any part or any accessory is damaged or defective. •...
-
Page 5: Parts And Assembly
Parts 1. The Robot 2. Charging dock 3. User Manual 4. Remote Control 5. Zone divider 6. Power supply adaptor 7. Battery 8. Spare parts box 9. Cleaning brush 10. Hair Removal Tool (inside the dock) 11. Wet Mopping Base Assembly... -
Page 6: Functions
Functions... - Page 7 Features & Cleaning Modes Robotic Features 1. Scheduler / Recharging Home Dock — Auto cleaning with scheduler & auto recharge when low on battery. 2. Ultrasonic navigation with obstacle detection 3. Ultrasonic collision detection 4. Anti-falling cliff detection sensor 5. Ultrasonic dirt / dust sensors — when is dirty area is detected, the robot will perform detail cleaning using spiral mode 6.
-
Page 8: Features And Cleaning Modes
4. Mop Track — fully use every part of the mop instead of just the edge of the mop 5. UV Light — sterilises the floor, exterminating bacteria and mites. 6. Wet Mopping Base — uses wet mop with mop track and reservoir first then is finished using the dry mop Cleaning Modes 1. -
Page 9: Battery Installation And Charging
Notes: 1. The robot is suitable for hard floor and low to medium pile carpet. 2. This robot is not suitable for very uneven surface. Do not use in long pile/tick carpet. Fold carpet fringes under the carpet before starting operation 3. - Page 10 Charging If the robot shuts down while working or the battery indicator flashes, please charge the robot immediately. When the robot completes its cleaning cycle or the battery level is low, the robot will return to its dock automatically if there is enough power left to do this.
-
Page 11: Zone Divider
Zone divider The zone divider creates an invisible ultrasonic barrier that eiq-R900M will not cross. 1. The zone divider is powered by 2 AA batteries. Make sure to install the AA batteries with correct polarity. - Page 12 You can charge the zone divider battery by plugging the zone divider into charging base, please see the figure above. Step 1: The power switch of Virtual Wall must set to "ON" position. Step 2: Press and slide out the DC Plug from charging dock. Step 3: Plug the DC Plug into DC Inlet, the LED light will blink.
-
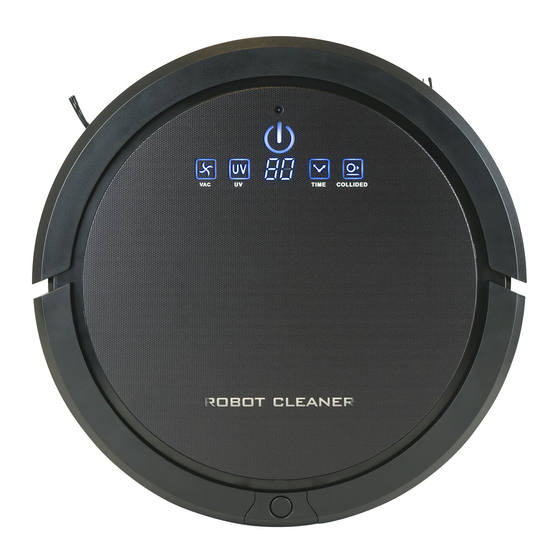
Page 13: Control Panel
Spinning side brushes Installation: Insert each side brush into the socket. Press it firmly until it is properly locked. Removal: Pull the side brush from the bottom. Rolling Brush Installation: Insert the rolling brush, then press the “Push” button and close the cover. Removal: Removal: Press the “Pull“... - Page 14 1. Start/Stop Button: Press this button and it will light up blue. The robot is activated to perform the cleaning cycle. Press the button again to stop the cleaning cycle. 2. Timer Different cleaning time Settings options are available. Users may use their remote control to enter specific cleaning time settings (e.g.
- Page 15 6. UV Light UV light can be activated to sterilize the floor surface. REMOTE CONTROL All function buttons on the robot's front panel are available on the remote control. There are some additional unique buttons on the remote control shown below. Power Button Press this button to activate or to shut down the robot.
-
Page 16: Scheduling
Scheduling the robot Users may program the robot to perform the cleaning cycle on any preferred day and time. This scheduling function is built— into the dock with the LCD display and several setting buttons. In order to perform this function, the docking station needs to be plugged in at all times. -
Page 17: Cleaning And Maintenance
12. To check the programmed cleaning time, press and hold the “Schedule” button. 13. For changing or deleting the set schedule, repeat the previous setting process. Auto Start When the robot is docked and recharging. 1. Press the "Start" button. The LCD display will show "AUTO". The robot will start one cleaning cycle as soon as the battery is fully charged. - Page 18 Rolling brush 1. Remove the Rolling Brush from its holder 2. Take out the cleaning tool included on the rear side of the dock 3. Slide the cleaning tool through the rolling brush Side brushes 1. Remove the side brushes from their holders 2.
-
Page 19: Mop Assembly
Mop assembly Only use the mop on hard surfaces such a wooden, laminate or tiled floors. Remove the mop attachment when cleaning carpets. Mop clothes are washable. Please wash at 40⁰C and do not spin dry. Remove the mop set Using 2 hands push and lift in the same time. -
Page 21: Troubleshooting
Troubleshooting Please read this instruction manual carefully before you send the robot to the service centre Solution Problem Cause Error message Sensor malfunction or system jammed Check the error messages on next section for correct action The Robot cannot The battery is not installed or installed Check if the battery is still in good power on incorrectly... -
Page 22: Product Specifications
Errors Codes Error Message Suggested Actions E1 Front Cliff Sensor The robot might be trapped in a specific area where there are stairs or floor edge. E2 Charging Error Please refer to the correct installation process of the charging dock and try it again E3 Front Bumper Error The robots front bumper is stuck. - Page 23 Please contact the local council for details of your local household waste recycling centres. ElectrIQ UK SUPPORT www.ElectriQ.co.uk/support If the unit still fails to operate call: 0871 620 1057...
Need help?
Do you have a question about the eiQ-R900M and is the answer not in the manual?
Questions and answers