Table of Contents
Advertisement
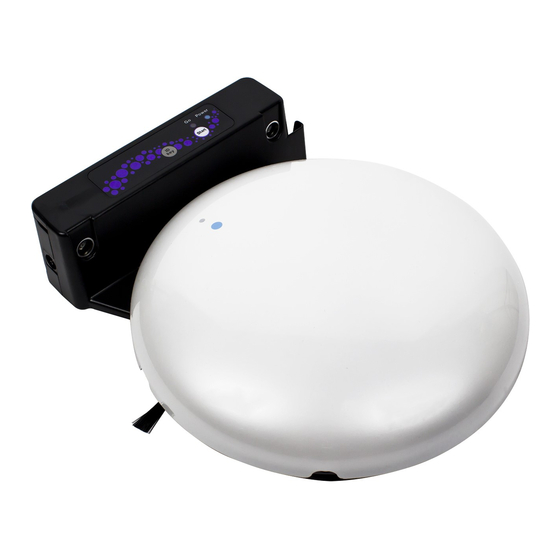
eiQ-C22EW WIFI Robot Vacuum Cleaner
with HEPA filter and
self-charging home dock
USER MANUAL
Thank you for choosing ElectriQ
Please read this user manual before using this robotic vacuum cleaner
and keep it safe for future reference.
Visit our page www.electriQ.co.uk for our entire range of Intelligent Electricals
1
Advertisement
Table of Contents

Related Manuals for ElectrIQ eiQ-C22EW


Summary of Contents for ElectrIQ eiQ-C22EW
- Page 1 HEPA filter and self-charging home dock USER MANUAL Thank you for choosing ElectriQ Please read this user manual before using this robotic vacuum cleaner and keep it safe for future reference. Visit our page www.electriQ.co.uk for our entire range of Intelligent Electricals...
-
Page 2: Table Of Contents
CONTENTS FEATURES SAFETY INSTRUCTIONS PARTS PRODUCT DIAGRAMS FEATURES AND CLEANING MODES BATTERY INSTALLATION AND REMOVAL CHARGING DOCK PAIRING THE CHARGING DOCK SIDE BRUSH FITTING AND REMOVAL ZONE DIVIDER (Optional Extra – Available Separately) GENERAL OPERATION REMOTE CONTROL CONNECTING VIA THE APP CLEANING AND MAINTENANCE TROUBLESHOOTING SPECIFICATION... -
Page 3: Features
FEATURES ElectriQ brings you an easy to use robot vacuum cleaner that works both on hard floor surfaces and carpets. This is not just sweeper but a real vacuum cleaner with powerful suction and the latest dual side brush system. - Page 4 • This robotic vacuum cleaner been tested and is safe to use. However, as with any electrical appliances - use it with care. • Disconnect the power plug from unit before dismantling, assembling or cleaning. • Do not clean the unit by spraying it or immersing it in water. •...
-
Page 5: Parts
PARTS 1. Robot Vacuum Cleaner 2. Battery 3. DC Power Adaptor 4. HEPA Filter 5. Side Brush 6. Remote 7. Charging Base... -
Page 6: Product Diagrams
DIAGRAMS FEATURES AND CLEANING MODES Robotic Features 1. Home Dock — Auto cleaning with scheduler (Through App) & auto recharge when low on battery. 2. Ultrasonic navigation with obstacle detection 3. Ultrasonic collision detection 4. Anti-falling cliff detection sensor 5. Ultrasonic dirt / dust sensors — when is dirty area is detected, the robot will perform detail cleaning using spiral mode 6. - Page 7 CLEANING MODES 1. Auto Mode Once the robot is activated without specific cleaning instructions, it will automatically execute the auto function by repeating the five different modes. The combination of different cleaning patterns will ensure the robot finishes the cleaning of any given space or area. Manual Mode Users can manually instruct the robot to perform any specific cleaning pattern depending on the different spaces to be cleaned.
-
Page 8: Battery Installation And Removal
BATTERY INSTALLATION AND REMOVAL The robot battery is user replaceable. If the battery stops holding its charge, please re-order a replacement from the manufacturer or retailer. To remove the battery, please follow the steps below: 1. Remove the top cover from the robot vacuum cleaner 2. -
Page 9: Charging Dock
CHARGING DOCK The charging dock must be positioned on an even floor surface against a wall with at least a 60 cm (2 ft) clearance around. Connect the AC adaptor to the power socket on the rear side of the dock or robot. -
Page 10: Pairing The Charging Dock
PAIRING THE CHARING DOCK The charging base provided with your robot vacuum cleaner comes pared to the cleaner, but there are times when the dock may require manually pairing. This would be the case if the dock was replaced, or an additional charging dock is added. -
Page 11: Zone Divider (Optional Extra - Available Separately)
ZONE DIVIDER (Available Separately) The zone divider is available seperately from the same retailer as the Robotic vacuum cleaner. It creates an invisible ultrasonic barrier (Virtual Wall) that the robot vacuum cleaner will not cross. 1. The zone divider is powered by 2 AA batteries. Make sure to install the AA batteries with the correct polarity. -
Page 12: General Operation
GENERAL OPERATION Power switch The power switch on the underside of the robot vacuum cleaner can be used to turn the unit on and off. When the unit is turned on, the indicator LED light on the unit will illuminate to show the battery status, as shown in the table below: Indicator LED Light System Status... -
Page 13: Connecting Via The App
CONNECTING VIA THE APP Your Robot vacuum cleaner also has the ability to be controlled over Wifi from your smart phone. The first step is to download the correct app. The IOS version is available from itunes by searching for "ERC-283"... - Page 14 Open the app and press on Select Wi-Fi setting at the Enter your wifi password into the plus in the top right bottom of the screen the box, and press next (Please hand corner. note the password is case sensitive). This will now take up to 60 seconds to connect your Robot to your network.
-
Page 15: Cleaning And Maintenance
CLEANING AND MAINTENANCE 1. Make sure the unit is unplugged before performing any cleaning operation. 2. Before first use and continuing after each use, wipe the unit with a damp cloth and dry thoroughly. 3. Clean all the brushes and empty the rubbish container. Vacuum or wipe the inside of the container with a cleaning wipe. -
Page 16: Troubleshooting
3. Wipe them thoroughly with a cloth and let it rest until completely dry Wheels and Sensor 1. Check and remove all debris and dirt 2. There are three ground sensors. Please clean them gently using a wet cloth or tissue. Do not use any solvents as they may damage the sensors. -
Page 17: Specification
The Robot keeps moving Cliff sensors are blocked or covered by Wipe all sensors with a dry clean cloth. backward or turning around dust... - Page 18 Please contact the local council for details of your local household waste recycling centres. ElectrIQ UK SUPPORT www.ElectriQ.co.uk/support If the unit still fails to operate call: 0871 620 1057 or complete the online form Office hours: 9AM - 5PM Monday to Friday www.ElectriQ.co.uk...
Need help?
Do you have a question about the eiQ-C22EW and is the answer not in the manual?
Questions and answers