Table of Contents
Advertisement
Quick Links
Advertisement
Table of Contents

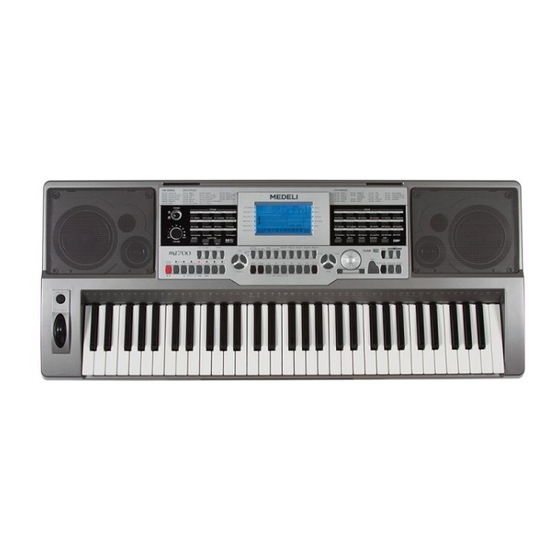
Related Manuals for Medeli MD700


Summary of Contents for Medeli MD700
- Page 2 Congratulations on your purchase of this Electronic keyboard! The keyboard is an user friendly keyboard with fabulous sound quality and advance feature such as style record and self-learning. No matter you are adult or children, you will enjoy playing the keyboard as it provides amazing styles for accompaniment, expressive tones, and real time record.
- Page 3 Your keyboard will give you years of playing pleasure if you follow the simple rules given below: Location Cleaning Clean the unit with a soft dry cloth Do not expose the unit to the following conditions to avoid deformation, Slightly dampen a cloth helps to remove discoloration, or more serious damage stubborn grime and dirt Never use cleaners such as alcohol or...
- Page 4 Main Features KEYBOARD RECORD 61-key touch response keyboard 3 recording song. Each recording song has 6 tracks--1 ACCOMP track and 5 LCD DISPLAY melody tracks The staff area of the LCD indicates the notes you play on the keyboard STYLE RECORD 3 recording style,they will not be erased even VOICE the power is off and you can also save the...
-
Page 5: Table Of Contents
Contents General Guide........Memory..........Front Panel............Bank..............Rear Panel............. Store and Load............LCD Display............Memory Data............One Touch Setting..........Preparation........Power Supply..........Record..........Setting Music Stand.......... Real-time Recording..........Start Recording............Connections........Stop Recording............. Headphone Jack..........Playback Recording Song......... 34-35 AUX.OUT Jack..........Delete Recording Song........... -
Page 6: General Guide
General Guide Front Panel POWER ON/OFF PLAY/STOP MASTER VOLUME ACCOMP MIXER MELODY1 MELODY2 FUNCTION NEXT MELODY3 FUNCTION BACK MELODY4 ACCOMPANIMENT VOLUME MELODY5 ACCOMPANIMENT VOLUME BANK TEMPO STORE M1-M6 TEMPO In the Style mode ONE TOUCH SETTING (M1-M4) ONE TOUCH SETTING START/STOP SONG SYNC STOP... -
Page 7: Rear Panel
General Guide MODULATION PITCH BEND PHONES PHONES Rear Panel USB JACK MIDI THRU MIDI IN MIDI OUT SUSTAIN VOLUME MIDI THRU MIDI IN MIDI OUT SUSTAIN VOLUME AUX.OUT AUX.OUT LCD Display ACCOMP MELODY 1 MELODY 2 MELODY 3 MELODY 4 ACCOMP DUAL MELODY 5... -
Page 8: Preparation
Preparation Power Supply Using the AC Adaptor 1. First, please ensure the keyboard is turned off, then turn VOLUME knob to the minimum volume level. 2. Connect the adaptor into the AC wall outlet and the cord into the unit. MIDI THRU MIDI IN MIDI OUT... -
Page 9: Connections
Connections Headphones Jack If you prefer to play with headphones for high quality personal monitoring, plug a set of stereo headphone into the PHONES jack. Plug a set of headphones into the [PHONES] jack and the speakers will be shut automatically. PHONES Never use headphones in high volume, as it may hurt your ears. -
Page 10: Sustain Jack
Connection Sustain Jack An optional footswitch can be plugged into the [SUSTAIN] jack for sustain control. MIDI THRU MIDI IN MIDI OUT SUSTAIN VOLUME AUX.OUT The footswitch functions like the damper pedal on a piano, Step on the footswitch,all notes played on the keyboard have a longer sustain effect. -
Page 11: Basic Operation
Basic Operation Power Switch & Volume First, please ensure the correct connection based on previous instruction. Turn the VOLUME knob to reach the minimum volume level, then turn the [POWER] switch on. The LCD display lights up. Adjust volume Use the [VOLUME] control knob... -
Page 12: Voices And Effects
Voices and Effects 559 voices in total (See appendix: page 61). Select a Voice Press [VOICE] button to enter " voice mode " . The default VOICE R1 is No:001 Stereo Grand Piano ; " " LCD displays " VOICE R1 "... -
Page 13: Lower Voice/Split Point
Voices and Effects During the VOICE R1 status, press [DUAL] button to DUAL enter the dual voice mode. "VOICE R2" and "DUAL" SPLIT icon would be lightened simultaneously. The number of the dual voice will be displayed on the LCD. Now, TOUCH you can get two different sounds at the same time SUSTAIN... -
Page 14: Touch
Voices and Effects Touch This function allows you to activate the dynamic DUAL level while playing the keyboard. SPLIT The LCD displays the touch value ranging from off to TOUCH level 3. Press [+/YES] [-/NO] button, or turn the DIAL to SUSTAIN change the touch response level. -
Page 15: Dsp Effect
Voices and Effects DSP Effect This function allows you to perform the overall sound in a realistic style. DUAL SPLIT The DSP effect is set to ON when keyboard power on. TOUCH SUSTAIN DUAL SPLIT TOUCH SUSTAIN Press [DSP] button to turn off the DSP effect. Pitch Bend The pitch bend wheel can be used to bend the note H igher (+2) -
Page 16: Transpose
Voices and Effects Transpose You can shift the pitch of the entire keyboard with the TRANSPOSE function by semitone steps. enter he first time press [TRANSPOSE] button to Transpose setting mode. CARD MENU EXECUTE to adjust the value from -12 to +12 [+/YES] [-/NO] semitones The default value is 0. -
Page 17: Piano
Voices and Effects 数码效果 [-/NO] together will set the octave Press [+/YES] value to the default one. -/NO +/YES If you don't press any button for 5 seconds after entering the Octave setting mode, it will quit this mode automatically. Piano Press [PIANO]... -
Page 18: Style Control
Style Control The keyboard has a total of 203 styles, from 001 to 203, including 3 user styles. The default style is 001. (See appendix: page 66) Select a Style 1. Press [STYLE] button to set the keyboard to the style "... -
Page 19: The Accompaniment Section
Style Control The Accompaniment Section Accompaniment consists of Intro, normal , variation, fill (a-a, a-b, b-a, b-b), ending. Using different sections based on the structure of styles enables you to enhance musical performance. INTRO Press the [INTRO/END] button to insert an intro section before you start to play . - Page 20 Style Control Sync start: Press [SYNC START] button to enter the sync start waiting mode. The 4 beats on LCD flash together. If the A.B.C. mode is on , play any key in chord area , the style start playing with bass and chord.If the A.B.C. Mode is off, play any key on keyboard;...
-
Page 21: Fill A/B
Style Control Fill A/B 1. In NORMAL mode, press [FILL A] button to insert 1 measure fill and LCD flashes 'A'. After one measure is over, NORMAL style will be returned. 2. In NORMAL mode, press [FILL B ] button to insert 1 measure fill and LCD flashes 'B'. -
Page 22: Stop A Style
Style Control Stop a Style: Stop immediately: The accompaniment can be stopped at any time by pressing the [START/STOP] button. Flashing Ending stop: the style will stop after Press the [INTRO/END] button, the ENDING section over. Sync Stop: [SYNC STOP] would be enabled only when A.B.C. -
Page 23: Tempo
Style Control Tempo Press the [TEMPO+] [TEMPO-] button to change the tempo, the DIAL can also be used to change the tempo . Press the [TEMPO+] [TEMPO-] simultaneously set the tempo value back to the default one. Selecting the style when it stops, the tempo will change with the style automatically to the default one. -
Page 24: Recognizing Chords
Style Control Recognizing Chords Default mode for A.B.C. is off on the keyboard. Press [A.B.C.] button to turn on this auto bass chord " " mode . The left section of the keyboard is known as " " the chord area , while playing the chord, both the bass and the chord voices sound. -
Page 25: Chord Basics
Style Control Chord Basics Three or more notes played together constitute a chord " ". The most basic chord type is the "triad" consisting three notes: the root, third, and fifth degrees of the corresponding scale. A "C major triad", for example, is made up of the notes C (the root), E(the third note of the C major scale),and G (the fifth note of the C major scale). -
Page 26: Metronome
Style Control 节拍器 Metronome 1. Press the [METRONOME] button to turn on the metron- ome. 2. Press the [METRONOME] button again to turn off the CARD metronome. MENU EXECUTE Metronome can be played in tempo with the accompani- ment whenever you turn on the sytle. 节拍器... -
Page 27: Function Menu
Function Menu Press [FUNCTION/NEXT] [FUNCTION/BACK] button to enter the menu of function. The default option of the menu is TUNE . When you enter the menu next time, you will find the option is the same as " " last time. Press [FUNCTION/NEXT] [FUNCTION/BACK] button to select the option to be set. -
Page 28: Beat
Function Menu Beat This function sets the beat value ranging from 0, 2-9. MIXER FUNCTION BACK NEXT The LCD displays the beat value. [+/YES] [-/NO] DIAL to change the BEAT value. - /NO +/YES Split Point MIXER FUNCTION This function sets the point that separate the entire keyboard to two section. -
Page 29: Reverb Level
Function Menu Reverb Level MIXER FUNCTION BACK NEXT The LCD displays the reverb level. The level ranges from 0 to 127. The default level is 40. [+/YES] [-/NO] DIAL to change the reverb level. -/NO +/YES Chorus Level MIXER FUNCTION BACK NEXT The LCD displays the chorus level. -
Page 30: Mixer Menu
Mixer Menu MIXER FUNCTION BACK NEXT Press [MIXER] button to enter the menu of MIXER. The default option of the menu is "Rhythm s " , When you enter this menu next time, you will find the option is the same as last time. -
Page 31: Memory
Memory Memory feature can be used to preset 48 complete setups which could be recalled whenever needed. Bank There are 8 banks in total; each bank has 6 memories (M1~M6). Press [BANK] button, the LCD displays 00x Mem Bank " ", with 00x showing the Bank that has been selected. -
Page 32: One Touch Setting
One Touch Setting One Touch Setting is a powerful and convenient function that allows you to reconfigure all settings instantly with the touch of a single button. In this function, 4 types of parameters (M1~M4) will be loaded to match the current style. -
Page 33: Record
Record 3 user songs can be recorded with 6 tracks (1 ACCOMP track, 5 MELODY tracks) each. The recorded data will not be lost when you turn off the power. Hold down [RECORD] [PLAY/STOP] button,then Press power on the keyboard,all recorded data will be erased. together Real-time Recording Start Recording... -
Page 34: Stop Recording
Record Choosing Tracks The track cursor on the left side of the LCD has 3 status Lighten, Flashing, Darken. When the cursor is flashing, it indicates the flashing track is the track to be recorded. When the cursor is lightened, it indicates there recorded data in this track . -
Page 35: Delete Recording Song
Record On the left side of LCD, cursor indicates whether or not trackdata has been recorded . If there's data on this track, the cursor will be lightened. Otherwise the cursor will not be ligntened To mute a track , simply press the button of selected track and cursor will be darkened. -
Page 36: Style Record
Style Record Style record allows user to produce a new rhythm through recording and editing an built-in style. Be note that the built-in rhythm are programmed with CM7. 3 styles can be recorded and the data will not be lost after the power is off. -
Page 37: Record A Style
Style Record Record a new Style Press [FUNCTION / NEXT] to enter STYLE choice menu. LCD will display Record " ". MIXER FUNCTION BACK NEXT There are 5 submenus in this menu: Record, Copy, Quantization, Edit and Delete. If a new style is being recorded, only Record and Copy are available. - Page 38 Style Record Press [FUNCTION/NEXT] button to MIXER FUNCTION STYLE enter the paragraph menu. BACK NEXT Press [+/YES], [-/NO] button or rotate DIAL to select the paragraph of rhythm: Main _ A, Main _ B, Intro _ M, Intro _ m, Fill _ A, Fill _ B, Ending _ M, STYLE Ending _ m.
- Page 39 Style Record Press [FUNCTION/NEXT] to enter the record ready menu. STYLE Beat now flashes, indicating ready to record. MIXER FUNCTION Flash together BACK NEXT Press [START/STOP] button to start recording. STYLE The selected paragraph of the original rhythm begins to play in a loop way.
-
Page 40: Copy A Style
Style Record Copy a Style Select a user style slot to be used to store the new style. STYLE Press [FUNCTION/NEXT] button to enter choice menu. -/NO +/YES Press [+/YES], [-/NO] button or rotate DIAL to choose " Copy . "... -
Page 41: Quantify A Style
Style Record Quantify a Style As timing of the recording may not be as accurate as it should be, Quantization helps users to correct the timing by aligning the notes to the exact beat. we'd suggest choosing the shortest note of the piece as the quantization precision for best result. -
Page 42: Edit A Style
Style Record Press [FUNCTION/NEXT] to enter the Track menu. STYLE Press [+/YES], [-/NO] button or rotate the DIAL to select the track: Rhythm sub, Rhythm main, bass, chord 1, MIXER FUNCTION chord 2, chord 3, phrase 1, phrase 2. BACK NEXT Press [FUNCTION/NEXT]... - Page 43 Style Record STYLE Press [FUNCTION/NEXT] button MIXER FUNCTION to enter the rename menu (full name). BACK NEXT The user style name includes 1-8 characters which can be inputted 、 with the keyboard. Keyboard & ASCII Character Relative Table is as follows: Explanation: [DELETE]: [SHIFT]:...
-
Page 44: Delete A Style
Style Record Delete a style Select the user style that needs to be deleted. STY LE Press [FUNCTION/NEXT] button to enter choice menu. -/NO +/YES Press [+/YES], [-/NO] button or rotate the DIAL to choose Delete " ". STY LE Press [FUNCTION/NEXT] button... -
Page 45: Song
Song Total of 100 songs, in which there are 10 piano songs. Each song can be practiced in LESSON mode. (See appendix: page 68) START/STOP the song: Press [SONG] button to enter the song mode. It will play in circle all songs Press [START/STOP]... -
Page 46: Lesson Mode
Song Lesson Mode There are 2 different ways to practise the songs by the time value training and note correction training. And the keyboard offers the GRADE function to help you know well about your progress. L ESSON 1 In song mode, press [LESSON] button to enter lesson mode. -
Page 47: Lesson 2
Song Lesson 2- Practice a note accuracy Press [LESSON] button again to enter the lesson 2 mode. In LESSON 2 mode, the keyboard only grade your practice by the note, do not care the correction of the time value.Only when you play the correct note, the song will continue to the next note. -
Page 48: Chord Dictionary
Chord Dictionary Chord dictionary is essentially a built-in "chord book" that help you to check the Chord notes It is ideal when you know the name of a certain chord and want to quickly learn how to play it. DICT 1 (CHORD LEARNING MODE) Press and hold the [CHORD DICT./R]... - Page 49 Chord Dictionary When the Chord Type and Chord Root are confirmed, the LCD will display the chord and its keyboard position. A bell sound will be heard when you play it correctly. Individual notes Notation of chord Chord name (root and type) of chord (keyboard) DICT 2 (CHORD TEST MODE) Press...
- Page 50 Chord Dictionary 24 chords will be displayed in the dictionary mode as follows: Chord Root: Note Chord Root Note Chord Root F / G C /D A / G E /D B /A # Chord Type: Note Chord Type Note Chord Type 7(b9) M(9)
-
Page 51: Pedal
Pedal Foot Switch The keyboard can assign the pedal in function menu. (See FUNCTION) MIXER FUNCTION BACK NEXT PEDAL SUSTAIN If pedal assign is set as pedal sustain , Step on the " " sustain pedal ,all notes played on the keyboard have a longer sustain. -
Page 52: Sd Function
SD Function There is a standard SD external interface which supports CARD MENU EXECUTE the cards of 16M ~ 2G capability. It is compatible with the file system format of the FAT 16/32. Press the [MENU] button to enter the SD CARD sub menu which includes: LESSON 1 、... -
Page 53: Load
SD Function CARD If there is no midi file identified inside the current MEN U EXECUTE directory, LCD will display the sub-directory name and the "d" sign. Press the [EXECUTE] button to enter the current sub-directory, the n new MIDI files or subdi rectories of t he direct ory will be di spla yed. - Page 54 SD Function Load Song CARD MENU EXECUTE Select the menu LoadSong and press the " " EXECUTE button, the user songs you saved or directory in the root of SD are displayed on the LCD, the main name of the file includes 8 characters, the postfix name is MID.
-
Page 55: Save
SD Function Save CARD MENU EXECUTE Select the menu Save and press the " " [EXECUTE] button, the Save menu are displayed on the LCD, it includes " SaveSong , SaveSty and SaveMem . " " " " " You can select either with DIAL or the [+/YES]... -
Page 56: Delete
SD Function CARD MENU EXECUTE just need to press the [EXECUTE] button to save the file. CARD Save Memory MENU EXECUTE Select the menu "SaveMem" and press the [EXECUTE] button, you can select the storage directory with DIAL [+/YES] [-/NO] button. - Page 57 SD Function The file name includes 1-8 characters which can be inputted with the keyboard. Keyboard & ASCII Character Relative Table is as follows: 、 Explanation: [BACK]: [SHIFT]: [DELETE]: 26 letters will be displayed with To erase the character which move the current cursor to the left.
-
Page 58: Midi Function
MIDI Function What is MIDI MIDI stands for Musical Instrument Digital Interface " ", that is the standard interface between a PC and other electronic instrument(s). USB connection can be used for midi data transference with computer or other USB host devices that support USB audio device with an USB cable. -
Page 59: Midi Connection
MIDI Function MIDI Connection Connection rule In midi connection, the equipment which control another one is called Host equipment , while another is called " " "A ffiliated equipment . " The host equipment's MIDI OUT connects with affiliated equipment's MIDI IN Note that MIDI OUT cannot connect with MIDI IN on the same equipment. -
Page 60: Specifications
Specifications Multi-functional LCD LCD display Keys 61 keys with Touch Response Polyphony 64-note polyphony(max) Voice 559 Voices. Style 203 Styles, including 3 user styles. Song 100 Songs Demo 2 Demos Power on/off, Volume, Accomp Volume +/-,Tempo +/-, Lesson, L&R, Control button Chord Dictionary, Mixer, Function Back/Next, Voice, Style, Song, O.T.S. -
Page 61: Appendix
Appendix 1-Voice List Velocity Cro ssfade E.P. 2 Name Name Piano Layered E.P. 1 Vibraphone 1 / W Vibraphone 2 / W Stereo Grand Piano 1 Layered E.P. 2 Vibraphone & Bell Stereo Grand Piano 2 Nylon E.P. ibraphone & Harpsichord Stereo Grand Piano / W Warm E.P. - Page 62 Appendix 1- Voice List Name Name Name Accordion 2 Stereo Muted G.T. Fretless Bass Detuned 2 Fretless Bass Detuned 3 Accordion 3 OverDriven G.T. 1 Chorus Accordion Slap Bass 1 OverDriven G.T. 2 Mustte Slap Bass 2 Detuned Overdriven G.T. Accord ItSolo Slap Bass 3 Distortion G.T.
- Page 63 Appendix 1- Voice list Name Name Name Tremo lo S trings 1 E cho Syn th Voice S ynt h Br ass 2 29 4 Tremo lo S trings 2 O rchestra Hit 1 S ynt h Br ass 3 29 5 Slow Tremolo Strings 1 29 6...
- Page 64 Appendix 1- Voice List Name Name Name PWM P ad Sitar 37 7 Blow n B ottle Sin e Pad Sha kuha chi De tune d Sitar 37 8 Whistle 1 Wa rmly Pad Ba njo 37 9 Horn Pad Sh ami sen Whistle 2 38 0...
- Page 65 Appendix 1- Voice List Name Name Ster eo Strings & Piano Breath Noise 2 Orch estr a Heartbea t Full Strin gs 1 Laugh Full Strin gs 2 Applause 2 Sym phon ic Helic opter 1 Stereo Choir & Strings Fire Trombone &...
-
Page 66: Appendix 2-Style List
Appendix 2- Style List Number Name Number Name Number Name Quick Step 8BEAT Natural Ballad DANCE 8 Beat Rock Love Ballad Down Beat Guitar Pop 1 Easy Ballad Techno 8 Beat 1 Slow Ballad Sweet Beat Progressive Folk Ballad 8 Beat Dance Rap 1 Pop Ballad 1 8 Beat Disco... -
Page 67: Appendix 2-Style List
Appendix 2- Style List Number Name Number Name Number Name Acid Jazz Lambada Polka2 Cool Jazz Ballad Pop Cha Cha1 US March Pop Cha Cha2 Swing Shuffle Musette Big Band 40 s ' Salsa French Musette Big Band Medium Bossa1 Mazurke Dixieland World... -
Page 68: Appendix 3-Song List
Appendix 3-Song List Name Number CLASSICAL Carmen -EntracteII Annen Polka Pianosonatan 08 IN Cm IN Pathetique Brahms Waltz Aida Carmen -Prelude L'Arlesienne Uungarische Tanz Mazurka Menuett Musical Moments Pizzicato Polka Rigoletto Serenade Song Without Words Swan Prelude To Act 2 (Swan Lake) Valse (Swan lake) The Happy Farmer The Sleeping Beauty... - Page 69 Appendix 3- Song List Name Number Battle Hymne Of The Republic The Old Gray Mare American Patrol In The Rain GOLDEN & POP On London Bridge Are You Lonesome Tonight Only You End Of The World House Of Rising Sun ’...
-
Page 70: Appendix 4-Demo List
Appendix 3- Song List Num ber Name I Can..Sea Shore Guitar&Saxphone Blue Lunch Cobweb Wine Jazz Old Man Dark Eyes Carlos The Jazz ORIENTAL South Mud Bay Give You A Rose Flowi n g Rill PIANO Habanera Four Little Swans Turkish March Moseta Dance Aria... -
Page 71: Appendix 5-Chord List
Appendix 5- Chord List C Madd9... -
Page 72: Appendix 6-Midi Implementation Chart
Appendix 6- MIDI Implementation Chart Functio n Transmitted Re cogn ized Remarks Basic De fau lt Channel Changed 1- 16ch 1- 16ch × De fau lt × Mode Messages × Alte re d *********** Note 0- 12 7 0- 127 Number :... - Page 73 MD700_G09...
Need help?
Do you have a question about the MD700 and is the answer not in the manual?
Questions and answers