Table of Contents
Advertisement
Quick Links
Advertisement
Table of Contents

Related Manuals for Medeli MC70


Summary of Contents for Medeli MC70
- Page 1 R E S P O N S E...
-
Page 2: Table Of Contents
Content General Guide 1. Front Panel 2. Rear Panel Jack 3. LCD Display Introduction Care of your electronic keyboard Power supply Connections -The headphone jack - The sustain jack - The Aux. Out jack - The MIDI OUT jacks Play demo songs Play the songs Lesson - start lesson... -
Page 3: Lesson
Record and play back 19-20 -Record -Play back Chord dictionary MIDI -What is MIDI? -MIDI OUT Specifications Appendix 1-Voice List Appendix 2-Style List Appendix 3-Song List Appendix 4-DEMO List Appendix 5-MIDI Implementation Chart Appendix 6-Chord Table... -
Page 4: General Guide
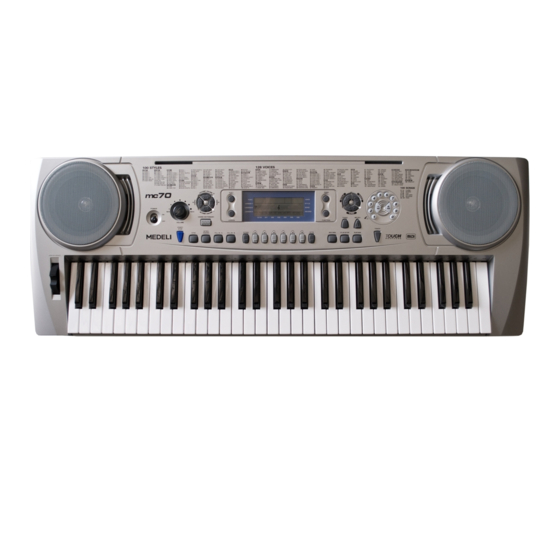
General Guide R E S P O N S E 1. FRONT PANEL POWER SWITCH MASTER VOLUME ACCOMP VOLUME TEMPO CHORD DICTIONARY 2. REAR PANEL JACK START/STOP MIDI OUT PHONES SYNC SUSTAIN DC 12V INTRO/ENDING AUX.OUT FILL-IN A/FILL-IN B STORE/M1-M6 O.T.S. -
Page 5: Introduction
Introduction Thank you for purchasing the electronic keyboard. This electronic keyboard provides you the following features and functions. 128 Voices ( 121 PCM voices,6 Chinese voices and one set of drum kit). 100 auto accompany styles. 100 songs of different style. The song lesson mode can be used in three status (Lesson 1,Lesson 2,Lesson 3) Chord dictionary for beginners. -
Page 6: Connections
Insert 6 "D" size batteries into the battery compartment by following the polarity markings on the cabinet. Close the battery compartment and make sure the battery compartment cover locks firmly. Low battery indications Any of the following symptoms indicate low battery power. Replace the batteries as soon as possible whenever any of the following occurs. -
Page 7: The Aux. Out Jack
The Aux. Out jack The AUX. OUT jack delivers the output of the keyboard for connection to an external amplifier. Using an audio cord to plug into AUX. OUT jack located on the rear panel. Then plug the other end of the cord into LINE IN or AUX. IN of the amplifier. Stereo System The MIDI OUT jacks... -
Page 8: Play Demo Songs
Play demo songs A selection of 6 demo songs are built-in for the player. They will give you a good idea of what your keyboard can do. Connect the DC power correctly and then press [POWER] to turn it on. Adjust the volume to a appropriate level by turning the [VOLUME] switch. -
Page 9: Play The Songs
Play the songs A selection of 50 songs are built-in for the player. You can use the Melody Off function to turn off the melody of the song and learn to play by following the signals on the display. Press the [SONG] button. All 100 songs will play from the current song in sequence. At this time, the Song indicator on the LCD will light up, and the LCD displays the song number s-xx. -
Page 10: Start Lesson
: Start lesson In song mode, press the [LESSON] button to choose one of the three lesson modes or to exit the lesson mode in a loop. Press the [START/STOP] button to start or stop the lesson. If you play wrong or miss a note, you score will be deducted. :... -
Page 11: Selecting & Playing A Voice
Select & Playing Voices The keyboard has 128 voices that you can select and play on the keyboard. Before you select a voice, make sure you have selected VOICE mode. Press the [VOICE] button to select the VOICE mode. The[ +/YES] and [-/NO] buttons: Press [VOICE] button to enter voice mode. -
Page 12: Voices And Effects
Voice and Effects Piano voice Press [PIANO] to the piano mode. The LCD displays PIANO, and the voice is changed to piano immediately. The piano mode does not function when the style is playing. Press [PIANO] again or [FUNCTION], [DEMO],[VOICE],[O.T.S],[REPLAY],[SONG],[STYLE],[RECORD] and the memory keys will exit the PIANO mode. -
Page 13: Sustain Voice
Sustain voice After power is turned on, the Sustain function is automatically set to off. Press the [SUSTAIN] button to shift the SUSTAIN ON/OFF status and the SUSTAIN indicator on the LCD will light on or off in this status. You can also control the sustain effect by a sustain pedal. -
Page 14: Selecting A Style
Selecting a Style The keyboard has 100 different auto-accompaniment styles. Its sophisticated Auto Accompaniment system can provide automatic bass and chord backing that perfectly match to the selected accompaniment style. After power is turned on, the style is automatically set to number one. When you press [STYLE] -... -
Page 15: Playing A Style
Playing a Style Playing a selected Style Start a style Press [START/STOP ] button, the drum part of the style will play at once. When the ABC is turned on, you can hear the drum part as well as the bass and chord after you play a chord Sync start Press [SYNC] button and the beat indicator will flash at the speed of current tempo. -
Page 16: Set The Tempo
Set the Tempo Press [TEMPO +] and [TEMPO-] button to change the style tempo. (Ranging from 30-280) When style stops, the tempo will change with the style's default tempo. When style is playing, the tempo will not change with the style. To revert back the default tempo of a style, press both [TEMPO+] and [TEMPO-] button simultaneously. -
Page 17: Accomp Volume
FILL-IN B: When the style is playing, press [FILL-IN B] to insert a fill in and enter the variation status. When fill in is playing, the indicator VAR on the LCD is flashing. ENDING: When the style is playing, press [INTRO/ENDING] to play an ending. Normally the style ends with the ending. -
Page 18: Memory
Memory There are 6 memories in the keyboard. Press and hold the [STORE] button. Then press M1(or M2-M3) to store the voice ,style, tempo, accomp volume, sustain, touch. You can easily recall them by pressing the button during the performance. The memory data will change to its default after power off. -
Page 19: Function Select
Function Select Function parameter: Contents LCD display Range Default TRANSPOSE XPS 00 - 6 - BEAT MET 04 00 02 0 9 MIDI CHA 01 01 16 EFFECT EFF ON ON/OFF Transpose: Press [FUNCTION] button and the LCD displays : XPS 00, then use the [+]/[-] to change the transpose value from 6 to + 6. -
Page 20: Metronome
Metronome Press the [ METRO] button, then the metronome will work as the current tempo, and the beat dot will flash one by one. The tempo can be changed. Press the [METRO] again to turn the metronome off. The beat count follows as the style when style is playing.The value is in beat when the style stops. -
Page 21: Play Back
3. Finish record : Press [RECORD] button to stop recording. If the memory for record is full, the recording stops automatically and the LCD displays: FULL for a few seconds. When style is playing, press the [INTRO/ENDING] button . When ending is over, the recording stops automatically. Play back When recording stops, press [PLAY/STOP] to play back your record. -
Page 22: Chord Dictionary
Chord Dictionary You can use this function to learn how to play chords. You can not enter the DICTIONARY mode when metro, song or style is on. Operation guide: , 1. Press the [CHORD DICTIONARY] button and the LCD displays DICT. The default chord is CM. -
Page 23: Midi
MIDI What is MIDI? MIDI stand for Musical Instrument Digital Interface. MIDI is a world wide standard that makes it possible for various electronic musical instruments and other devices, such as computers, to "communicate with each other". The keyboard is equipped with MIDI OUT terminals, which located on the rear panel. MIDI OUT It can send out several kinds of MIDI messages (such as: PROGRAM CHANGE, NOTE, PITCHBEND and so on).Please refer to the MIDI Chart list. -
Page 24: Specifications
Specifications Keys: 61 keys with Touch Response LCD Display: Multi-functional LCD Voices: 128 voices, including 121 PCM voices,6 Chinese voices and one of drum kit Styles: 100 styles Song: 100 songs of different style, 3 lesson modes for user learning DEMO Song: 6 demo songs Overall Control:... -
Page 25: Appendix 1-Voice List
Appendix 1-Voice List PC GENERAL MIDI PC GENERAL MIDI PC GENERAL MIDI GEN ER AL MIDI (Gran d) P iano 1 Aco ust ic Ba ss Soprano Sax FX 1 (ra in) (Bright) P iano 2 Fin ger Bass Alto Sax FX 2 (so und track) (El. -
Page 26: Appendix 2-Style List
Appendix 2-Style List Style Style... -
Page 27: Appendix 3-Song List
Appendix 3-Song List Son g name Song name... -
Page 28: Appendix 4-Demo List
Appendix 4-DEMO List DEMO name Appendix 5-MIDI implementation chart Level... -
Page 29: Appendix 6-Chord Table
Appendix 6-Chord Table...
Need help?
Do you have a question about the MC70 and is the answer not in the manual?
Questions and answers