Table of Contents
Advertisement
Quick Links
Advertisement
Table of Contents

Subscribe to Our Youtube Channel
Related Manuals for Medeli MC760


Summary of Contents for Medeli MC760
- Page 2 Congratulations! Congratulations on your purchase of the electronic keyboard! It is a sophisticated. It has up to 142 voices, 100 styles ,8 demos,100 albums and 60 songs. Before you use the electronic keyboard, we recommend you to carefully read through this manual. Please keep this instruction manual for future reference.
-
Page 3: Table Of Contents
Contents General Guide Function 17-20 Power Supply 1.Transpose 2.Tune The Connectors 3.Octave 1.The headphone jack 4.Beat 2.The damper jack 5.Touch 3.The Aux.Out jack 6.Split point 4.The volume jack 7.Pitch bend range 5.The MIDI IN/OUT jacks 8.Portamento time Basic Operation 9.PAD assign 18-19 Power switch &... -
Page 4: Main Features
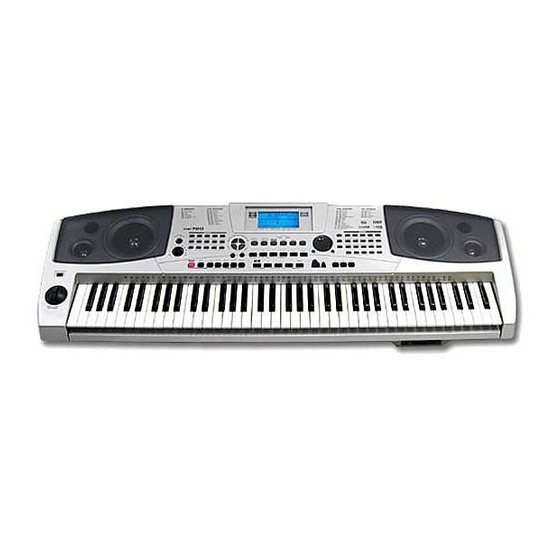
Main Features 76 keys touch keyboard,3 kinds of touch level. Multi-functional LCD which can display the staff. Use the +/- key or wheel to select voice, style or song. Function features that include transpose, tune, octave, split point, pedal select, touch, DSP, midi etc. 142 high quality voices at all, including 128 GM Voices. -
Page 5: General Guide
General Guide Front panel POWER SWITCH MIDI I N MID I O UT S USTAIN VOL UME PH ON ES DC 12V OU T MASTER VOLUME DIRECT SELECT STYLES Rear panel FUNCTION- BACK/ FUNCTION + NEXT AUX.OUT MIDI IN TEMPO +/- PHONES MIDI OUT A.B.C./MELODY OFF... -
Page 6: Power Supply
Power Supply This electronic keyboard can be powered by current from a standard household wall outlet (using the specified AC adaptor). Using the AC adaptor Make sure that only the AC adaptor specified for this electronic keyboard is used. The adaptor shall be 12V DC output, and center positive type. -
Page 7: The Volume Jack
The volume jack An optional volume control can be plugged into the VOLUME jack for adjusting the volume AU X M IDI I N MI DI O UT SU STAI N VOL UM E P HONES DC 9 ~1 2V O U T of sound. -
Page 8: Voice And Effects
Vocies and Effects Voice selecting Voice numeber 142 voice at all (Appendix 1), including 128 GM voice, 12 Chinese voices, and 2 percussion voices. Voice setting Press [VOICE] button to select three separate voice modes: VOICE R1,VOICE R2,VOICE L. The default VOICE R1 is No.001; LCD displays "VOICE R1"and the voice name. -
Page 9: Lower Voice
Lower voice You can split the keyboard to right and left area in this function. Press [SPLIT/LOWER VOICE] button to turn on the lower voice. LCD lights the lower voice flag and displays "VOICE L" and the lower voice name. Press [+/YES]/[-/NO] button or the dial to select the lower voice number. -
Page 10: Keyboard Function
Keyboard Function The keyboard not only plays three voices at the same time, but also has other necessary functions. ABC on SPLIT POINT(#F3) Turn ABC on. The left area of keyboard is chord area. When you play the chord, both the bass and the chord voice will phonate. -
Page 11: Sustain
Sustain Press the [SUSTAIN] button to turn the SUSTAIN effect on. The sustain icon will appear next to "sustain" on the LCD. All notes played on the SUSTAIN keyboard will have a longer sustain effect. When the Sustain feature is ON, press the [SUSTAIN] button to turn the SUSTAIN effect OFF. -
Page 12: The Accompaniment Section
Sync start flash Press the [SYNC] button. The Beat display will flash at the current tempo when the synchronized start mode has been selected. The keyboard will start to play the accompaniment by pressing "recognized" chord. Play another chord. Press the [START/STOP] button to stop playing the style. - Page 13 Play the Main(A/B) section. Choose the desired style and press the [START/STOP] button. Press the [FILL A] button.The fill a-a or fill b-a will begin immediately and smoothly lead into the normal. LCD displays :"MAIN A". Press the [FILL B] button.The fill a-b or fill b-b will begin immediately and smoothly lead into the VARIATION.
-
Page 14: Chord Recognize
Chord Recognize Press the [A.B.C/MELODY OFF] button to turn on the A.B.C. mode. The A.B.C icon will appear next to "A.B.C" on the LCD. In this mode, play the chords the chord section below the split point. You can change the chords of the accompaniment by playing keys in the auto accompaniment section of the keyboard using either the "Single Finger"... -
Page 15: Volume Control
Volume Control Accomp volume control MIXER To adjust accomp volume control, please [MIXER] button. LCD displays :"108 Accomp V". You can adjust the volume values of ACCOMP with dial, [+/YES], [-/NO]. Parameter range: 000-127. / NO / YES Press [+] and [-] at the same time will set the ACCOMP volume to 0. -
Page 16: Tempo
Tempo Press the [TEMPO+] or [TEMPO-] button. The tempo value will be flashing. At that time, the tempo can be adjusted in the range of 30-280. Hold down the [TEMPO+] or [TEMPO-] button and adjust the tempo continuously. Press [TEMPO+] and [TEMPO-] simultaneously to set the tempo value back to the default one. -
Page 17: Memory
When the style is playing, press [O.T.S] to turn on the O.T.S mode to inset a "Fill in " automatically. To insert "FILL A-A'',"FILL A-B'',"FILL B-A'' or "FILL B-B" ,please press memory number. NOTE: Press [O.T.S] key again to turn O.T.S mode off. LCD displays MEMORY. -
Page 18: Album
There are 8 demos at all. You can select the demo number with dial,[+/YES],[-/NO]. Press the [DEMO] or [START/STOP] button to exit demo mode. NOTE: All function keys on the panel are void. Album Press [ALBUM/SONG/STYLE] button to the album mode. -
Page 19: Function
Function Press the [FUNCTION+/NEXT] or [FUNCTION-/BACK] button to enter or exit the menu of function. Transpose Press the [FUNCTION+/NEXT] button to adjust transpose parameter with dial,[+/YES],[-/NO]. Parameter Range:-12 to +12 semitones. NOTE: X'pose 1: Adjust the transpose parameter of voice R1; X'pose 2: Adjust the transpose parameter of voice R2, X'pose L: Adjust the transpose parameter of voice L. -
Page 20: Split Point
Split point Press the [FUNCTION+/NEXT] button to adjust split point parameter with dial,[+/YES],[-/NO] or press the corresponding key. Parameter Range:from 1 to 76. Pitch bend range Press the [FUNCTION+/NEXT] button to adjust pitch bend range parameter with dial,[+/YES],[-/NO]. Parameter Range:from 0 to 12. Portamento time Press the [FUNCTION+/NEXT] button to adjust portamento time with dial,[+/YES],[-/NO]. -
Page 21: Dsp On/Off
If you select the AccompSt pedal, it has the same function as press the [START/STOP] button by stepping the pedal. If you select the TEMPOTAP pedal, you can quickly adjust the tempo of songs, demos, and styles, by stepping the pedal four times continuously, If you select the MEMORY SELECT pedal, you can select each memory in turn by stepping the pedal. -
Page 22: Local On/Off
Local on/off Press the [FUNCTION+/NEXT] button to turn local on/ off with dial,[+/YES],[-/NO]. Receive channel Press the [FUNCTION+/NEXT] button to adjust receive channel with dial,[+/YES],[-/NO]. Parameter Range: 1 16 ALL. If you select All , the instrument can receive midi message from all (1-16) midi channel. -
Page 23: Disk
Disk Using floppy disks List Song Names of Disk Insert the floppy disk that containing standard midi file into the disk drive, and then press the [DISK] button, … "Wait "will display and the disk icon will flash on the LCD during loading disk song names. -
Page 24: Disk Utility
If the track number of a playing song is more than 64, the LCD will display:"Track Err". If the midi format of a playing song is not format0 or , format1 the LCD will display :"Format Err". If the ticks in one beat of a playing song is more than 1024 or less than 24, the LCD displays :"Midi Err". - Page 25 Disk format Press [UTILITY] button and then press [+] button or , rotate data dial LCD will display: "U2:Format". ? Press [FUNCTION+/NEXT] button."FORMAT "will appear on the display. Press [+] button to execute the format operation (or press [-] button to cancel )."Wait.."will appear and disk icon will flash on the display when format is in process.
- Page 26 Press [NEXT] button and LCD will display:"Delete ?" … If you are sure, press [+] button and "Wait ."will appear on the LCD. If you do not want to delete the song, press [-] button . Return to step 2 after the step above. Delete memory Select the disk memory deletion function by pressing the [UTILITY] and [+] button or rotating data dial.
-
Page 27: Disk Save
NOTE: Load mid function is only used for the midi files that be saved by the piano. If the midi files saved from PC or other midi devices, their names will not display on LCD and this function will be no effect. If you modified the midi file with PC, the midi file will not display in this function. -
Page 28: Record
← → Input file name: If you want to enter a new name for the saved song, you can press the [ ] keyboard or[ ] keyboard to move the position of character you want to modify and then press the other special keyboard to name the song. -
Page 29: Playback Recording
A melody track will be selected automatically after entering recording mode. You can also press melody track buttons to select other track for recording. The recording will start as soon as you play a note on the keyboard or press [START/STOP] button. The TEMPO data will display with current TEMPO value and beat will appear on the LCD. -
Page 30: Midi
MIDI What is MIDI Musical Instrument Digital Interface. The standard interface between PC and Electronic instrument. It is equipped with standard MIDI interface, including 1 MIDI IN and 1 MIDI OUT. Connection It can connect with PC or other MIDI equipment. MIDI connection Connection rule In midi connection, the equipment which controls... -
Page 31: Specifications
Specifications Keyboard 76 keys touch keyboard,3 kind of touch level. Voice 142 Voices Style 100 Styles Demo Song Album 8 Demos and 60 Songs and 100 albums Max, Polyphony 64-note Polyphony (max) Display Multi functional LCD display with blue backlit Switch and Buttons POWER SWITCH, VOLUME,ALBUM/SONG/STYLE,DUAL, O.T.S, DEMO, TOUCH, DIAL, TEMPO,ACCOMP VOLUME,NUMERIC... -
Page 32: Appendix 1-Voice List
Appendix 1-Voice List Santur Jazz Classic... -
Page 33: Appendix 2-Style List
Appendix 2-Style List BALL ROOM 8 BEAT DANCE 8 Beat1 Disco1 Twist Be guin e 1 8 Beat2 Disco2 Tang o 8 Beat3 Dance Cha Cha 8Bt Clas House Techno Be guin e 2 8Bt Hiph Rhumba2 8 Bt Roc k SWING &... -
Page 34: Appendix 3-Demo List
Appendix 3-Demo List The Fusion The Ballad Latin The Jazz Pop Rock My Motherland Jasmine Appendix 4-Song List Concerto for Violin and Orchestra in a Minor Nocturne Symphone No.94 Suprise... -
Page 35: Appendix 5-Album List
Appendix 5-Album List ALBUM ALBUM ALBUM FUNK&SO UL FAVORITE 07 7 Dance O f The Crown Beer Tub B oercar 0 01 Eas y Sunday 039 Down By The Riverside 079 The Happiness Of Bumper 040 Billy Bailey 0 02 Moon Light 080 Amusement 041 Greensleeves 0 03 Love Me Or Not... -
Page 36: Appendix 6-Chord Chart
Appendix 6-Chord Chart Chord Name [Abbreviation] Normal Voicing Chord Display Major[M] 1-3-5 Major sixth [6] 1-(3)-5-6 Major seventh [M7] 1-3-(5)-7 Major seventh sharp Eleventh [M7#11] 1-(2)-3-#4-(5)-7 CM7#11 CM7#11 Major add ninth [Madd9] 1-2-3-5 Cmadd9 Cm(9) Major ninth [M9] 1-2-3-(5)-7 CM(9) Major sixth add ninth [6 9] 1-2-3-(5)-6 C6 9... -
Page 37: Appendix 7-Midi Chart
Appendix 7-MIDI Chart Function Recognized Remarks Transmitted 1 ch Basic Default Channel Changed 1 -16 ch 1-16 ch × Default × × Mode Message × Altered ** ********* 0 —127 Note 36-96 0 —127 Number : True voice 1-60/72-127 〇 〇...
Need help?
Do you have a question about the MC760 and is the answer not in the manual?
Questions and answers
Como voltar para o modo normal doteclado
To return to normal mode on the Medeli MC760 keyboard, press the [O.T.S] button again to turn off the One Touch Setting (O.T.S) mode. The LCD will display "MEMORY," indicating that the mode has been turned off.
This answer is automatically generated