
Subscribe to Our Youtube Channel
Related Manuals for Medeli MC49A


Summary of Contents for Medeli MC49A
- Page 1 ELECTRONIC KEYBOARD aw_MC49A_Manual_G07_110722 2011 14:45:48...
- Page 2 INFORMATION FOR YOUR SAFETY! THE FCC REGULATION PRECAUTIONS WARNING (for USA) PLEASE READ CAREFULLY BEFORE This equipment has been tested and found to PROCEEDING comply with the limits for a Class B digital device, pursuant to Part 15 of the FCC Rules. Please keep this manual in a safe place for future reference.
-
Page 3: Table Of Contents
Contents Panel & Display Description Front Panel ............................Rear Panel............................4 Display.............................5 Setup Power Supply...........................6 Connections Connecting a pair of Headphones....................7 Connecting an Amplifier........................7 Connecting a Computer........................7 Playing the Demos.........................8 Playing the Voices Selecting a Voice..........................8 Sustain.............................8 Modulation............................9 DSP Effect............................9 Transpose............................9 Playing the Styles Selecting a Style..........................10 Playing a Fill-In..........................10... -
Page 4: Panel & Display Description
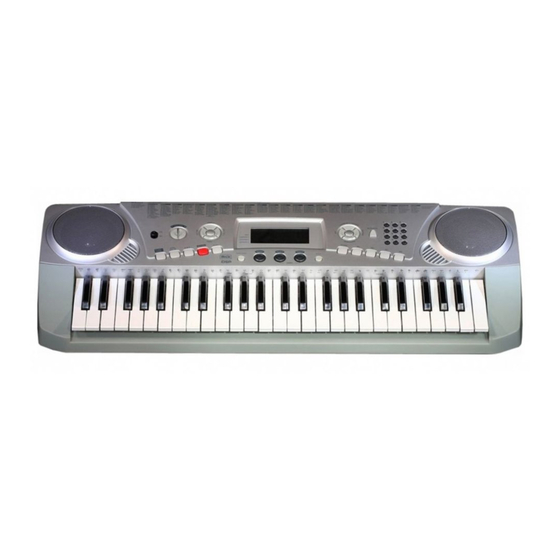
Panel & Display Description Front Panel POWER ON/OFF 6. SYNC/FILL-IN 10. FUNCTION Turn the power on and off. Turn the SYNC START on and Change the adjusted off. function. 2. MASTER VOLUME Play the FILL-IN Adjust the master volume. SONG 7. -
Page 5: Display
Panel & Display Description 20. +, -, NUMBER KEYS 17. MODULATION 15. DSP Select the number or adjust Turn the Modulation effect Turn the DSP effect on and the parameters. on and off. off. 21. STORE 18. SUSTAIN 16. CHORD DICT./LESSON Register the memory. -
Page 6: Setup
Setup This section contains information about setting up your instrument and preparing to play. Please go through this section carefully before turning the power on. Power Supply You can power the unit either by batteries or by power adaptor. Follow the instructions described below. Using Batteries 6 pieces of C size (SUM-2 or R-14) or equivalent alkaline batteries must first be installed into the battery... -
Page 7: Connections
Connections Connecting a pair of Headphones A standard pair of stereo headphones can be connected to the PHONES jack for private practice or late-night playing. The internal stereo speaker system is automatically shut off when a pair of head phones is plugged into this jack. -
Page 8: Playing The Demos
Playing the Demos The instrument features 80 demo songs. 1. Press the [STYLE] and [VOICE] buttons simultaneously to start playing the demo. 2. Select a demo song. Use the number keys, [+] or [-] button to select the desired demo song. Adjust the volume with the [MASTER VOLUME] buttons. -
Page 9: Modulation
Playing the Voices Modulation The Modulation function applies a vibrato effect to notes played on the keyboard. Press the [MODULATION] button while playing the keyboard then you will hear the vibrato effect. DSP Effect This function allows you to perform the overall sound in a more realistic effect. -
Page 10: Playing The Styles
Playing the Styles The instrument features 100 styles in a variety of different musical genres. Try selecting some of the different styles (Refer to Style List) and play with the auto accompaniment. Note: The styles (91-99 and 00) are the piano styles. If you don't turn on A.B.C. and play a chord, the auto accompaniment does not work. -
Page 11: Tempo
Playing the Styles Tempo Each style of the instrument has been programmed with a default tempo; however, this can be changed by using the [TEMPO+] or [TEMPO-] buttons. 1. Use the [TEMPO+] or [TEMPO-] button to change the tempo. The value ranges from 40 to 240. 2. -
Page 12: One Touch Setting
Playing the Styles One Touch Setting One Touch Setting is a convenient function that allows you to automatically play a preset voice to match a selected style you have changed. Follow these steps to activate One Touch Setting. 1. Press the [O.T.S.] button to turn on the One Touch Setting for current style. -
Page 13: Memory
Memory Memory There are 4 memories (M1-M4). 1. While holding the [STORE] button, press one of the MEMORY buttons: [M1] - [M4] to register the panel settings. The new settings will replace the previous memory data. The settings include the number of voice, the number of style, tempo, beat value, sustain effect, etc. -
Page 14: Chord Dictionary
Chord Dictionary Chord dictionary is essentially a built-in “chord book” that help you to check the Chord notes. Press the [CHORD DICT.] button to enter this mode, the LCD displays “ ”, the Chord Type and Chord Notes. 2. In this mode, the key above G 3 are used to assign the Chord Type, the keys above C5 are used to assign the Chord Root. -
Page 15: Playing The Songs
Playing the Songs The instrument features 80 songs (Refer to Song List). Each song can be practiced in LESSON mode. Listening to the Songs 1. Press the [SONG] button to enter the song mode. It will play all songs circularly. The display indicates "SONG" and the number of the current song. -
Page 16: Recording And Playback
Recording and Playback You can record your performance (up to 200 notes), and the accompaniment. 1. Press the [RECORD] button, the “REC” appears, the beat flashes. 2. Play the notes you want to record or press the [START/STOP] button to start recording. If you want to record your performance accompanied with the style, please turn on the A.B.C., and play the chords on the left of the keyboard. -
Page 17: Midi Functions
MIDI Functions By using the MIDI functions you can expand your musical possibilities. This section explains what MIDI is, and what it can do, as well as how you can use MIDI on your instrument. What's MIDI? MIDI is an acronym that stands for Musical Instrument Digital Interface, which allows electronic musical instruments to communicate with each other, by sending and receiving compatible Note, Control Change, Program... -
Page 18: Troubleshooting
Troubleshooting Problem Possible Cause and Solution The speakers produce a “pop” sound This is normal and is no cause for alarm. whenever the power is turned ON or OFF. No sound results when the keyboard is Make sure the master volume is set at appropriate played. -
Page 19: Voice List
Voice List Name abbr. Contrabass Contrabass Lead 8 Bass&Lead (Bass&Lead) PIANO Pad 1 New Age Tremolo Strings Tremolo Strs (New Age) Acoustic Grand Piano Grand Pno Pizzicato Strings Pizzicato Strs Pad 2 (Warm) Warm Bright Acoustic Piano Bright Pno Orchestra Harp Orchestra Harp Pad 3 Polysynth... -
Page 20: Style List
Style List Name abbr. Cool Jazz Cool Jazz BEAT & POP Pop Swing Pop Swing 8 Beat 1 8 Beat 1 Swing Fox Swing Fox 8 Beat 2 8 Beat 2 Big Band Big Band 8 Beat 3 8 Beat 3 Big Band Medium Big Band Medium 8 Beat 4... -
Page 21: Song List
Song List Name Bridge Sippin’ Cider Through A Straw FAVORITE The Old Gray Mare JAZZ & FUSION In The Rain June Samba Jeanie With The Light Brown Hair Guitar & Saxphone American Patrol The Hip Hop’s Night Heidenroslein Blue Lunch Music Box Dancer Cobweb Rondo... -
Page 22: Chord List
Chord List Chord Name/[Abbreviation] Normal Voicing Chord (C) Display Major [M] 1-3-5 Major sixth [6] 1-(3)-5-6 Major seventh [M7] 1-3-(5)-7 Major add ninth [Madd9] 1-2-3-5 Cmadd9 Augmented [aug] 1-3-#5 Caug Caug Minor [m] 1-b3-5 Minor sixth [m6] 1-b3-5-6 Minor seventh [m7] 1-b3-(5)-b7 Minor major ninth [mM7] 1-b3-(5)-7... -
Page 23: Midi Implementation Chart
MIDI Implementation Chart aw_MC49A_Manual_G07_110722 2011 14:45:54... - Page 24 MC49A_G07 aw_MC49A_Manual_G07_110722 2011 14:45:54...
Need help?
Do you have a question about the MC49A and is the answer not in the manual?
Questions and answers