Advertisement
Advertisement

Subscribe to Our Youtube Channel
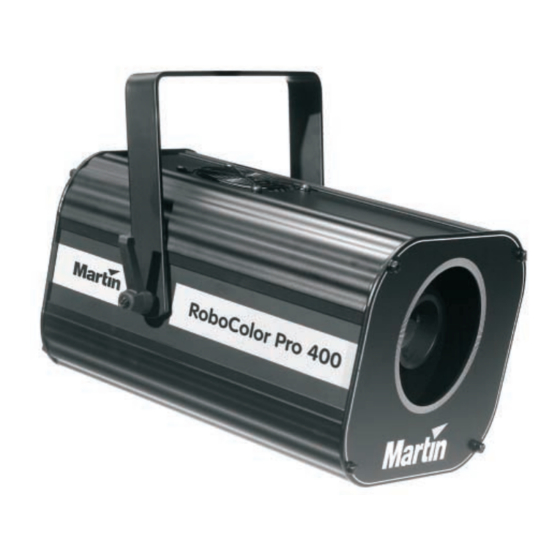
Summary of Contents for Martin RoboColor Pro 400
- Page 1 RoboColor Pro 400 users guide audiovias.com...
-
Page 2: Table Of Contents
......15 PECIFICATIONS © 1998, 2000 Martin Professional A/S, Denmark. All rights reserved. No part of this manual may be... -
Page 3: Introduction
• Power Factor Correction to allow low current consumption • Efficient fan cooling and over-heat protection This user's guide describes the features in firmware version 6.5. The latest information about the RoboColor Pro 400 is available from the Martin web site at http://www.martin.dk. -
Page 4: Safety
If you have questions about how to operate the fixture safely, please contact your Martin dealer or call the Martin 24-hour service hotline at +45 70 200 201. - Page 5 • The exterior of the fixture can reach temperatures up to 65° C (150° F). Allow the fixture to cool for at least 5 minutes before handling. • Do not modify the fixture or install other than genuine Martin parts. • Do not operate the fixture if the ambient temperature (Ta) exceeds 40° C (104° F).
-
Page 6: Installation
INSTALL LAMP The Philips MSD 200 is the only lamp approved for use in the RoboColor Pro 400. 1 Remove the 3 thumbscrews that secure the access plate of the lamp socket assembly at the rear of the RoboColor and withdraw the lamp socket assembly. -
Page 7: Stand - Alone Operation
TAND ALONE OPERATION The RoboColor Pro 400 may be operated in stand-alone mode without a controller. Music-trigger uses a built in microphone for sound-activated control and auto- trigger runs at a preset speed using an internal trig source. 1 Use the DIP-switch on the rear panel to select a trigger type. To select music- trigger, set DIP-switch pins 1, 2, and 10 to ON. -
Page 8: Controller Operation
2 to hot (+) and pin 3 to cold (-). When connecting a RoboColor Pro 400 to a DMX device (pin 2 cold and pin 3 hot), you must swap pins 2 and 3 with a phase-reversing cable. - Page 9 The total number of channels required depends on the operation mode. The RoboColor Pro 400 requires 1 channel (from 1 to 32) when operated via a Martin lighting controller. It requires 7 channels when using DMX mode 2 (DMX vector control) and 5 channels in DMX modes 1 and 3.
- Page 10 ABOUT FAN CONTROL Beginning with CPU firmware version 6.5, fan control is completely automatic. The fan operates as follows: • Fan speed is automatically reduced to 50% after protocol detection and the fan stops 1 minute later if the lamp is still off. •...
-
Page 11: Dmx Protocol
PROTOCOL DMX Mode PL11 Jumper Location Channels Mode 1: Tracking (DEFAULT) No jumper Mode 2: Vector Pin 4 and 5 Mode 3: Tracking + Lamp Off via DMX Pin 5 and 6 Channel DMX Value Percent Effect Strobe /Stand-Alone/Reset fixture/Lamp On Strobe Off Strobe Off / Fan Low* 8-199... - Page 12 Color 1 Scrolling Colors White Yellow Fern Green Flame Red Cyan Blue Turquoise Purple Fixed Colors 157-171 62 - 67 Purple 172-185 67 - 73 Turquoise 186-199 73 - 78 Cyan Blue 200-214 78 - 84 Flame Red 215-227 84 - 89 Fern Green 228-241 89 - 95...
-
Page 13: Service
ERVICE This section describes how to adjust the lamp for best performance and how to change the default DMX mode setting. Refer all other service to a Martin technician. Warning! Disconnect the fixture from power before removing any cover. LAMP ADJUSTMENT Fine adjustment of the lamp position may improve performance. - Page 14 DMX MODE SETUP The DMX mode is selected with a jumper on the main circuit board inside the fixture. The factory default is DMX mode 1. 1 Disconnect the fixture from power. 2 Release the 4 bolts that secure the top cover to the fixture and remove the cover.
-
Page 15: Specifications
PECIFICATIONS Length incl./excl. bracket ........306 mm (12.0") / 306 mm (12.0") Width incl./excl. bracket......... 337 mm (13.3") / 225 mm (8.9") Height incl./excl. bracket........282 mm (11.1") / 198 mm (7.8") Weight incl. bracket ................11.0 kg (24 lb) Power and current consumption ....... 250 W, 290 VA, 1.3 A at 230 V AC voltage and frequency (EU model) ...230V/50Hz, 240V/50Hz, 250V/50Hz AC voltage and frequency (US model)....210V/60Hz, 225V/60Hz, 225V/50Hz Mains fuse ....................


Need help?
Do you have a question about the RoboColor Pro 400 and is the answer not in the manual?
Questions and answers