Table of Contents
Advertisement
Quick Links
Advertisement
Table of Contents

Related Manuals for Martin Raptor


Summary of Contents for Martin Raptor
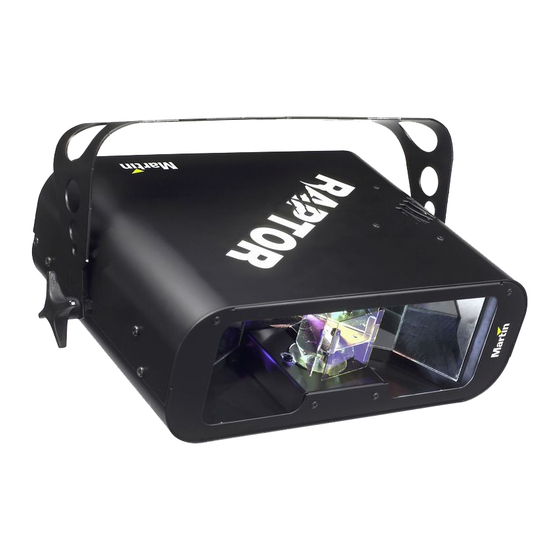
- Page 1 Raptor user manual...
- Page 2 4 lamp access screws 5 air vents © 2001 - 2002 Martin Professional A/S, Denmark. All rights reserved. No part of this manual may be reproduced, in any form or by any means, without permission in writing from Martin Professional A/S, Denmark.
- Page 3 S A F E T Y P R E C A U T I O N S The Raptor is not for household use. It is not a toy: it presents risks of serious injury due to electric shock, high heat, and intense light. For safe operation, read this manual before using the fixture and observe all warnings and precautions printed here and on the fixture.
- Page 4 • Do not illuminate surfaces within 1 meter (39 inches) of the fixture. • Do not operate the fixture if the ambient temperature exceeds 40° C (104° • Never place filters or other objects over the lens or mirrors. • Refer all service to a qualified technician. Raptor user manual...
-
Page 5: Installing A Plug On The Mains Lead
AC mains voltage by more than five percent. Important! Electric dimmers may damage the electronic components. Although the Raptor cannot be dimmed, it may be switched on and off remotely using switch packs or the full-on and full-off levels on dimmer packs. -
Page 6: Installation
NSTALLATION The Raptor can be permanently installed with suitable 5 mm (3/16 in.) hardware, hung with a rigging clamp, or placed directly on a level surface. For maximum lamp life, provide sufficient ventilation to keep the air around the fixture below 40° C (104° F) and do not place the fixture directly on or beside a loudspeaker. - Page 7 U S I N G T H E B R A C K E T A S A F L O O R S T A N D 1 Install the mounting bracket in either position as described above. 2 Set the fixture upside-down on a stable surface. Adjust the mounting bracket and tighten both swivel locks.
-
Page 8: Operation
PERATION The Raptor is fully automated. The lamp turns on as soon as power is applied and the effects start moving as soon as sound is picked up by the built-in microphone. An Automatic Gain Control (AGC) adjusts sensitivity when the average sound pressure alters. -
Page 9: Replacing The Lamp
ERVICE The lamp is the only user-serviceable part inside the Raptor. Please refer all service to a Martin distributor, dealer, or service center. L A M P R E P L A C E M E N T The Raptor is shipped with a Philips 24V/250W ELC 500 hour halogen lamp installed. - Page 10 1 Unplug the mains cable from the input socket. Pry open the fuse holder and remove the fuse. 2 Replace the fuse with one of the same type. The fuse rating is listed on serial number label. Raptor user manual...
-
Page 11: Specifications
Martin DMX Switch Pack, 210-245 V ........ - Page 12 • Olof Palmes Allé 18 • 8200 Aarhus N • Denmark Tel: +45 8740 0000 • Fax +45 8740 0010...
Need help?
Do you have a question about the Raptor and is the answer not in the manual?
Questions and answers