Advertisement
Quick Links
Advertisement

Related Manuals for IC Realtime IC720


Summary of Contents for IC Realtime IC720
- Page 1 INSTRUCTION MANUAL...
- Page 3 TABLE OF CONTE NT S F e a t u res a n d S p e ci f i ca t i o n s We b GU I | I C72 0 M a n a g e m e n t a.
- Page 4 R E A L T I M E F E ATURE S AN D SPE CI F I CAT I ON S...
- Page 5 24/7 operation. Utilizing both H.264 video compression and A AC audio compression technolog y enables the highest qualit y of recorded audio/video, while maintaining the lowest bitrate utilization. The IC720 series camera is an HD, dual lens 12 MegaPixel IP Camera...
- Page 6 1b. FEATURES SD Card Storage: As a standalone device, the IPC can hold a 32GB IC Realtime IC720 series IP Cameras all support the following features: micro SD card suitable for storing video direct from the camera. HD, 360 x 360 Video Monitoring: This IP Camera uses two SONY 1c.
- Page 7 1.d SPECIFICATIONS Electromagnetic IR-CUT Field of View 360 x 360 degree - No Blind Spots! IR CUT switch Optical Configuration 2 x Fish Eye Lens; Back-to-Back IR Illumination External IR Illuminator Lens All Glass, FOV=188º, f/2.8 Microphone Built in 2 x SONY IMX172 Image Sensor Type 1/2.3’’, 12 Megapixel, CMOS Audio Compression...
- Page 8 R E A L T I M E 1.d SPECIFICATIONS (Continued) IC Realtime NVR-8128; NVR-8256 Memory Slot Micro SD (up to 32GB Power Supply 12VDC, PoE Power Consumption ~8 Watts Mount Wall, Ceiling, Corner, Pole Size 4.2’’ x 11.7’’ x 2.9’’ (108mm x 293mm x 73mm)
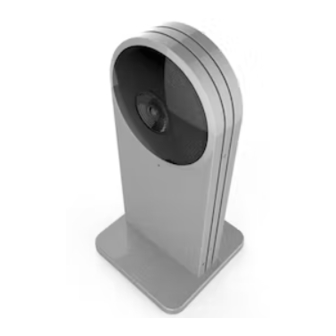
- Page 9 1.e DIMENSIONAL VIEWS Bottom view of the IC720 Camera. The cable harness extends out of the center. The ‘ front ’ of the IC720 Camera. Ceiling mount orientation.
- Page 10 R E A L T I M E CA M E R A I N S TALL AT I ON...
- Page 11 2.a CEILING INSTALLATION: STEP BY STEP This section outlines the proper way to mount and install an IC720 series IP Camera. Suitable methods of installing the IPC include either Ceiling installation, Corner installation, or Pole Installation. Note that hardware including screws and anchors are included for the camera installation.
- Page 12 Step 1: Install the Beauty Shroud Step 2: Install the Interface Plate Slide the shroud over the IC720 Camera body from the top. Attach the interface plate with (4) #10-24 Pan Head screws and locking washers. Tighten to secure the interface plate to the camera body.
- Page 13 Step 3: Connect Wiring Step 4: Secure the Camera Assembly to the Ceiling Mount Pass cables the cables through the pole mount and then connect Secure the assembly to the ceiling mount itself with (3) M3 your Ethernet and power cables (if not using Power Over Cap screws.
- Page 14 R E A L T I M E 2.b CORNER/POLE MOUNT: STEP BY STEP This section outlines the proper way to mount and install an IC720 series IP Camera. Suitable methods of installing the IPC include either Ceiling installation, Corner installation, or Pole Installation. Note that hardware including screws and anchors are included for the camera installation.
- Page 15 Step 1: Install the Beauty Shroud Step 2: Install the Interface Plate Slide the shroud over the IC720 Camera body from the top. Attach the interface plate with (4) #10-24 Pan Head screws and locking washers. Tighten to secure the interface plate to the camera body.
- Page 16 R E A L T I M E Step 3: Connect Wiring Step 4: Secure the Camera Assembly to the Pole Mount Connect your Ethernet and power cables (if not using Power Over Secure the assembly to the ceiling mount itself with (4) M8 Ethernet).
- Page 17 WE B GU I | I C72 0 M ANAGE M E NT...
- Page 18 R E A L T I M E This section outlines how to assign an IP address to the camera, and how to access and configure the IC720 Beam via it ’s built in Web Step 2: Assign an IP address to the IP Camera.
- Page 19 3.b LOGGING IN, AND MAIN INTERFACE Step 1: Open up your Web Browser (Safari, Chrome, Firefox, or IE) and input the IP address of your IP camera. In Example, open Safari and browse to http://192.168.1.108 Step 2: Login to the camera with the default credentials By default, the username is ‘admin’...
- Page 20 Network Menu allows you to assign an IP address, as well as change the default port settings. System Menu allows for configuration of the Date/ Time, Language, as well as the IC720 Beam camera device logs. Accounts Menu allows you to manage accounts (Add/Delete/...
- Page 21 3.c Connecting IC720 to an NVR IC720 utilizes the industr y standard ONVIF protocol, so connecting to an NVR should be a breeze. Each image of the camera (2 total) has an independent ONVIF port number for connection. Here’s an example of pairing the IC720 device to an ICRealtime NVR.
- Page 22 R E A L T I M E Step 3: Double click on the IP Address of your IC720 from the ‘Device Search’ menu to add the first IC720 sensor. This will automatically add this to your NVR, without needing to input any additional information.
- Page 23 APPE N D IX: TOXI C AN D HA Z ARDOUS M ATE R IAL S RE POR T...
- Page 24 R E A L T I M E Note Toxic or Hazardous Materials or Elements Component Name This user manual is intended for reference only. Slight Cr VI PBDE dif ferences may be found in the user interface as products continually develop. Circuit Board Component Device Case All designs and sof tware herein are subject to change...
- Page 26 © 2015 IC Realtime, LLC. 3050 N Andrews Ave Ext Pompano Beach, FL 33064 Phone 866.997.9009 • Fax 866.860.3860...
Need help?
Do you have a question about the IC720 and is the answer not in the manual?
Questions and answers