Table of Contents
Advertisement
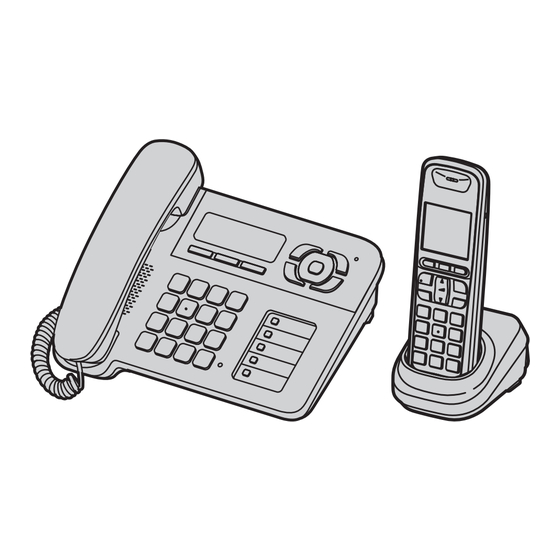
Operating Instructions
Digital Cordless Answering System
KX-TG6461AL
Model No.
Thank you for purchasing a Panasonic product.
This unit is compatible with Caller ID. You must subscribe to the appropriate service offered
by your service provider/telephone company.
Charge the batteries for about 7 hours before initial use.
Please read these operating instructions before using the unit and save them for future
reference.
Advertisement
Table of Contents

Related Manuals for Panasonic KX-TG6461AL


Summary of Contents for Panasonic KX-TG6461AL
-
Page 1: Operating Instructions
Digital Cordless Answering System KX-TG6461AL Model No. Thank you for purchasing a Panasonic product. This unit is compatible with Caller ID. You must subscribe to the appropriate service offered by your service provider/telephone company. Charge the batteries for about 7 hours before initial use. -
Page 2: Table Of Contents
Table of Contents Introduction Useful Information Accessory information..... 3 Character entry......38 Wall mounting . -
Page 3: Accessory Information
*1 The telephone line cord comes connected with the telephone plug. *2 See page 3 for replacement battery information. *3 The handset cover comes attached to the handset. Additional/replacement accessories Please contact your nearest Panasonic dealer for sales information. Accessory item Model number Rechargeable... -
Page 4: Expanding Your Phone System
Introduction Expanding your phone system You can expand your phone system by registering optional handsets (6 max.) to a single base unit. L Optional handsets may be a different colour from that of the supplied handsets. Optional handset feature overview Feature KX-TGA641AZ KX-TGA648AZ... -
Page 5: Important Information
Important Information Medical For your safety L Consult the manufacturer of any personal medical devices, such as pacemakers or hearing aids, to To prevent severe injury and loss of life/property, read this determine if they are adequately shielded from external section carefully before using the product to ensure RF (radio frequency) energy. -
Page 6: Important Safety Instructions
Information on Disposal in other Countries outside Base unit location/avoiding noise the European Union The base unit and other compatible Panasonic units use radio waves to communicate with each other. L For maximum coverage and noise-free communications, place your base unit: –... -
Page 7: Specifications
Important Information Specifications ■ Standard: GAP (Generic Access Profile) ■ Frequency range: 1.88 GHz to 1.90 GHz ■ RF transmission power: Approx. 10 mW (average power per channel) ■ Power source: 220–240 V AC, 50/60 Hz ■ Power consumption: Base unit: Standby: Approx. -
Page 8: Getting Started
L USE ONLY Ni-MH batteries AAA (R03) size. L Do NOT use Alkaline/Manganese/Ni-Cd Connections batteries. L Confirm correct polarities (S, T). L Use only the supplied Panasonic AC adaptor PQLV219AL. ■ Base unit Rechargeable Ni-MH ONLY (220-240 V AC, 50/60 Hz) -
Page 9: Note When Setting Up
Note for battery installation L Use the supplied rechargeable batteries. For replacement, we recommend using the Panasonic rechargeable batteries noted on page 3, 5. L Wipe the battery ends (S, T) with a dry cloth. L Avoid touching the battery ends (S, T) or the unit contacts. -
Page 10: Controls
Getting started Handset Controls Base unit F G H I A Charge indicator Ringer indicator B Speaker Q R S C Soft keys D {C} (Talk) A Corded handset E {s} (Speakerphone) B Receiver F Dial keypad C Soft keys G Receiver D Display H Display... -
Page 11: Display
Getting started Using the navigator key/volume key Display (VOL., ?) Display items Item Meaning Paging, intercom mode. Handset is on an outside call. Ringer volume is off. (page 21, ■ Scrolling through lists or items New voice mail message By pressing this key ({^} or {V}) repeatedly, you received. -
Page 12: Turning The Power On/Off
Getting started Soft key icons Turning the power on/off Icon Action Y Handset Returns to the previous screen. Displays the menu. Power on Accepts the current selection. Press {ih} for about 1 second. Displays the character entry mode for phonebook search. (page 17) Power off Selects a character entry mode. - Page 13 Getting started Y Handset Important: L When the language selection is displayed after installing the batteries for the first time, perform step 5. 8 (middle soft key) {V}/{^}: “Handset Setup” i M {V}/{^}: “Display Setup” i M {V}/{^}: “Language” i M {V}/{^}: Select your desired language.
-
Page 14: Making/Answering Calls
Making/Answering Calls Adjusting the receiver or speaker Making calls volume Using the base unit = = Base unit / Y Handset Dial the phone number. Press {^} or {V} repeatedly while talking. L To correct a digit, press ^. Making a call using the redial list Lift the corded handset. -
Page 15: Answering Calls
Making/Answering Calls Proceed with the operation for your unit. Auto talk Base unit: Lift the corded handset. You can answer calls simply by lifting the handset Handset: {C} off the charger. You do not need to press {C}. To Note: turn this feature on, see page 22. -
Page 16: Handset Key Lock
Making/Answering Calls Mute Handset key lock While mute is turned on, you can hear the other party, but the other party cannot hear you. Y Handset = Base unit / Y Handset The handset can be locked so that no calls or settings can be made. -
Page 17: Phonebook
Phonebook Finding and calling a phonebook Base unit/handset entry phonebook = Base unit / Y Handset The phonebook allows you to make calls without having to dial manually. You can add names and Scrolling through all entries phone numbers to the base unit and handset n (left soft key) phonebook independently. -
Page 18: Speed Dial
Phonebook Y Handset = Base unit / Y Handset Find the desired entry (page 17). i 8 Proceed with the operation for your unit. Base unit: {V}/{^}: “Edit” i M During an outside call, press n. Edit the name if necessary (16 characters Handset: max.;... -
Page 19: Copying Phonebook Entries
L In step 1, if no phone number is stored to the speed dial button, you can assign a number by *1 Panasonic compatible handset pressing n and continue from step 1, “Assigning a phonebook entry to a speed dial Copying an entry button”, page 18. - Page 20 Phonebook Y Handset n (left soft key) i 8 {V}/{^}: “Copy All” i M Enter {0} for the base unit or the handset number you wish to send the phonebook entry L When all entries have been copied, “Completed” is displayed. {ih}...
-
Page 21: Programming
Programming Programmable settings You can customise the unit by programming the following features using the base unit or handset. Programming by scrolling through the display menus = Base unit / Y Handset 8 (middle soft key) Press {V} or {^} to select the desired main menu. i M Press {V} or {^} to select the desired item in sub-menu 1. - Page 22 Programming Handset Main menu Sub-menu 1 Sub-menu 2 Page – – Caller List – 31, 31 Answer System Play New Msg. – 31, 31 Play All Msg. – Erase All Msg. Greeting Start REC Play Greeting Default Settings Remote Code Number of Rings <4 Rings>...
- Page 23 Programming Main menu Sub-menu 1 Sub-menu 2 Page – – Base Unit Setup Privacy Mode <Off> > – Recall/Flash <100 msec.> – Area Code – Base Unit PIN <0000> – Repeater <Off> – – Caller Barred *1 If you program these settings using one of the handsets, you do not need to program the same item using another unit.
-
Page 24: Special Programming
Programming Selecting area codes to be deleted Special programming automatically In some situations, phone numbers stored Alarm automatically in the caller list (page 27) will include You can set one of 2 different alarm options (once area codes. If you do not want to dial the area or daily) at a time for each handset. -
Page 25: Registering A Unit
Programming Program this setting using either the base unit or L To erase a digit, press ^. one of the handsets. {ih} Important: L When the unit receives a call from a number that Viewing/editing/erasing bar call numbers is stored in the call barred list, the call is logged = Base unit in the caller list (page 27) with 7 after the call is disconnected. - Page 26 Press and hold {x} for about 5 seconds, until by using a DECT repeater. Please use only the the registration tone sounds. Panasonic DECT repeater noted on page 3. L If all registered handsets start ringing, press Contact your Panasonic dealer for details.
-
Page 27: Caller Id Service
Caller ID Service This is not a fault of the product as these events are normal. Using Caller ID service L The tones are generated by your service provider/telephone company. Important: L This unit is Caller ID compatible. To use Caller Missed calls ID features (such as displaying caller phone If a call is not answered, the unit treats it as a... - Page 28 Caller ID Service Y Handset Erasing selected caller information 8 (middle soft key) = Base unit {V}/{^}: “Caller List” i M \ (right soft key) Press {V} to search from the most recent call, or press {^} to search from the oldest call. {V}/{^}: Select the desired entry.
-
Page 29: Answering System
Answering System Y Handset Answering system 8 (middle soft key) {V}/{^}: “Answer System” i M The answering system can answer and record calls for you when you are unavailable to answer {V}/{^}: Select “Answer On” or “Answer the phone. Off”. i M i {ih} You can also set the unit to play a greeting Note for base unit and handset: message but not to record caller messages by... -
Page 30: Listening To Messages Using The Base Unit
Answering System {ih} Listening to messages using Using a pre-recorded greeting the base unit message The unit provides 2 pre-recorded greeting When new messages have been recorded: messages: – u is displayed with the total number of new – If you erase or do not record your own greeting messages. -
Page 31: Listening To Messages Using The Handset
Answering System *1 If pressed within the first 5 seconds of a Listening to messages using message, the previous message is played. *2 “Remote Code” is displayed first. the handset *3 You can also erase as follows: W i {V}/{^}: “Yes” i M When new messages have been recorded, u is *4 Unit resets to a pre-recorded greeting displayed with the total number of new messages. -
Page 32: Answering System Settings
Answering System Y Handset Operation Play all messages 8 (middle soft key) Play greeting message {V}/{^}: “Answer System” i M Record a greeting message {V}/{^}: “Settings” i M Stop recording {V}/{^}: “Remote Code” i M Stop playback To turn on remote operation, enter the desired Turn answering system off 3-digit remote access code. - Page 33 Answering System there are no new messages. If you call your phone Note: from outside to listen to new messages (page 31), L Provider voice mail can capture messages that you know that there are no new messages when can be missed while the customer is on the the phone rings for the 3rd time.
- Page 34 Answering System {V}/{^}: “Call Screening” i M {V}/{^}: Select the desired setting. i M i {ih}...
-
Page 35: Voice Mail Service
Voice Mail Service Voice mail service Voice mail is an automatic answering service offered by your service provider/telephone company. After you subscribe to this service, your service provider/telephone company’s voice mail system answers calls for you when you are unavailable to answer the phone or when your line is busy. -
Page 36: Intercom/Locator
Intercom/Locator Answering an intercom call Intercom = Base unit Intercom calls can be made: – between the base unit and handset Lift the corded handset or press {x} to answer the page. – between handsets When you finish talking, place the corded Note: handset on the cradle or press {x}. - Page 37 Intercom/Locator Wait for the paged party to answer. Transferring a call without speaking to the L If paged party does not answer, press {x} other handset or base unit user to return to the outside call. Proceed with the desired operation. = Base unit ■...
-
Page 38: Useful Information
Useful Information Character entry = Base unit / Y Handset The dial keys are used to enter characters and numbers. Each dial key has multiple characters assigned to it. The characters that can be entered depend on the character entry mode (page 38). –... - Page 39 Useful Information Extended 1 character table (N) L The following are used for both uppercase and lowercase: Extended 2 character table (O) L The following are used for both uppercase and lowercase: Cyrillic character table (P)
-
Page 40: Wall Mounting
Useful Information Wall mounting Base unit 1 Connect the AC adaptor and telephone line 2 Connect the telephone line cord. Drive the cord. Tuck the telephone line cord inside the screws (not supplied) into the wall. Mount the wall mounting adaptor, then push it in the unit, and then slide it down. -
Page 41: Error Messages
Useful Information Error messages If the unit detects a problem, one of the following messages is shown on the display. Display message Cause/solution L The supplied telephone line cord has not been connected Check Phone Line yet or not connected properly. Check the connections (page 8). -
Page 42: Troubleshooting
Useful Information Troubleshooting If you still have difficulties after following the instructions in this section, disconnect the base unit’s AC adaptor and turn off the handset, then reconnect the base unit’s AC adaptor and turn on the handset. General use Problem Cause/solution The handset does not... - Page 43 Useful Information Programmable settings Problem Cause/solution I have changed the display L Change the display language (page 12). language to a language I cannot read. While programming, the unit starts L A call is being received. Answer the call and start again after to ring.
- Page 44 Useful Information Problem Cause/solution The base unit and/or handset L The ringer volume is turned off. Adjust the ringer volume (page does not ring. 15, 15). I cannot make a call. L The handset is too far from the base unit. Move closer and try again.
- Page 45 Useful Information Answering system Problem Cause/solution The unit does not record new L The answering system is turned off. Turn it on (page 29). messages. L The message memory is full. Erase unnecessary messages (page 30). L The recording time is set to “Greeting Only”. Change the setting (page 33).
-
Page 46: Instructions To Customer
Useful Information Instructions to customer Installation Attached to this telephone is an approval label. This label is evidence that it is a “Permitted Attachment” which has been authorised to be connected to your telephone service. Conditions relating to connection and operation of this Permitted Attachment are contained in Telecommunications General By-Law 220 (5). - Page 47 Useful Information Should the Permitted Attachment not operate when plugged into a socket, it is either faulty or unsuitable for operation with your telephone service. It should be returned to the store where purchased or to an Authorised Service Centre. Service difficulties If at any time a fault occurs on your telephone service carry out the following checks before you call for service:...
-
Page 48: Index
Index Mute: 16 Index Pause: 14 Phonebook: 17 PIN: 24 Additional handset: 25 Power failure: 9 Alarm: 24 Power on/off: 12 Answering calls Privacy mode: 23 Base unit: 15 Handset: 15 Recall/flash: 16, 23 Answering system: 29 Redialling: 14 Call screening: 29 Repeater: 26 Erasing messages: 30, 31, 32 Ringer tone: 22... - Page 49 Notes...
- Page 50 Notes...
- Page 51 Notes...
- Page 52 Copyright: This material is copyrighted by Panasonic Communications Co., Ltd., and may be reproduced for internal use only. All other reproduction, in whole or in part, is prohibited without the written consent of Panasonic Communications Co., Ltd. © Panasonic Communications Co., Ltd. 2009...
Need help?
Do you have a question about the KX-TG6461AL and is the answer not in the manual?
Questions and answers