Gree GWH09TB-D3DNA1A Owner's Manual
Split air conditioner wall
mounted model
Hide thumbs
Also See for GWH09TB-D3DNA1A:
- Service manual (142 pages) ,
- Owner's manual (28 pages) ,
- Installation, service & troubleshooting (136 pages)
Table of Contents
Advertisement
Quick Links
Please read this owner's manual carefully before operating,
Split Air Conditioner Wall
WWW.GREE.CA
St-Mathieu-de-Beloeil (Québec) Canada
1-866-680-GREE
00621_09/03/12
and keep it for reference.
Hansol
Mounted Model
OWNER'S MANUAL
MODELS
GWH09TB-D3DNA1A
GWH12TB-D3DNA1A
GWH18TC-D3DNA1A
GWH24TD-D3DNA1A
®
© Copyright, GREE Canada, 2012
Advertisement
Table of Contents

Related Manuals for Gree GWH09TB-D3DNA1A


Summary of Contents for Gree GWH09TB-D3DNA1A
- Page 1 ® Please read this owner's manual carefully before operating, and keep it for reference. Hansol Split Air Conditioner Wall Mounted Model OWNER’S MANUAL MODELS GWH09TB-D3DNA1A GWH12TB-D3DNA1A GWH18TC-D3DNA1A GWH24TD-D3DNA1A WWW.GREE.CA St-Mathieu-de-Beloeil (Québec) Canada 1-866-680-GREE © Copyright, GREE Canada, 2012 00621_09/03/12...
-
Page 2: Table Of Contents
CONTENTS Operation and Maintenance • Safety Precautions ....................1 • Parts ........................4 • How to Use the Wireless Remote Control ..............5 • Emergency Operation ....................13 • Care and Cleaning ....................14 • Troubleshooting ......................16 Installation Service • Operation Tips ......................19 • Installing and Cleaning the Healthy Filter ..............21 •... -
Page 3: Safety Precautions
If the air conditioner’s the power. Contact an power cord or signal control authorized Gree service wire is damaged, have a centre. professional technician replace it with the appropriate power cord. - Page 4 Safety Precautions ★ Ensure the power supply ★ For safety, turn off the circuit ★ Select the most appropriate is properly grounded. breaker before performing temperature. any maintenance or cleaning, or when the product will not be used for an extended period of time. An ungrounded power supply Accumulated dust may cause It can save electric energy.
- Page 5 Safety Precautions Please read the following carefully before operating ★ Do not cut or damage the power cord or ★ To change the airflow direction, adjust the control cords. If they are damaged, please vertical and horizontal air flow direction contact the dealer or a qualified service using the remote control.
-
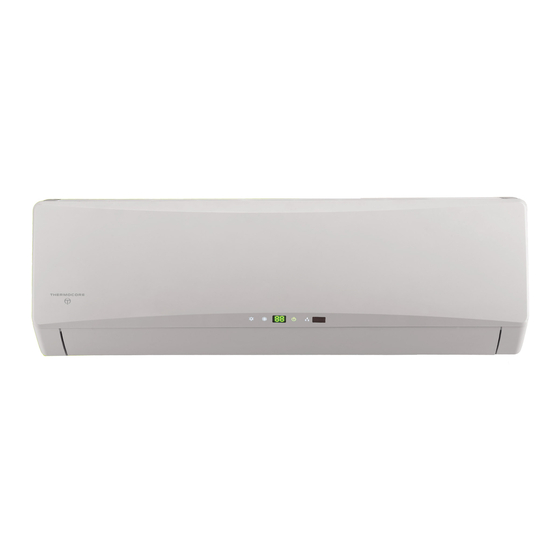
Page 6: Parts
Parts Indoor unit Air in ⑺ Air out The icons displayed: : Cool : Dry : Heat : Power : Set temp. (1) Power cord (2) Remote control (3) Front panel (4) Filter (5) Horizontal louver (6) Wall pipe (7) Sealing tape (8) Connection pipe (9) Drain hose Note: This is just the schematic plan, please refer to the actual product... -
Page 7: How To Use The Wireless Remote Control
How to Use the Wireless Remote Control Parts and functions of the wireless remote control Note: Be sure that there is no obstruction between the receiver and the remote control. Do not drop or throw the remote control. Do not get any liquid on the remote control and avoid placing it in direct sunlight or where it is very hot. -
Page 8: Remote Control
How to Use the Wireless Remote Control Parts and functions of the wireless remote control Note: Be sure that there is no obstruction between the receiver and the remote control. Do not drop or throw the remote control. Do not get any liquid on the remote control and avoid placing it in direct sunlight or where it is very hot. - Page 9 How to Use the Wireless Remote Control Parts and functions of the wireless remote control This wireless remote control is a universal remote control and can be used for various units. Some remote control buttons that are not available on this unit will not be described below. TIMER ON TIMER ON TIMER ON button...
- Page 10 How to Use the Wireless Remote Control Parts and functions of the wireless remote control • Press this button to select Sleep 1 ( ), Sleep 2 ( Sleep 3 ( ) and cancel Sleep, from the sequence. Sleep Cancel is the default setting when the unit is first turned on.
- Page 11 How to Use the Wireless Remote Control Parts and functions of the wireless remote control (3) When initially set to 69°F~81°F and the Sleep function is on, the temperature will decrease 1°F~2°F every hour. After it decreases by 1°F~2°F, the unit will run at this temperature. (4) When initially set to 82°F~86°F and the Sleep function is on, the temperature will decrease 1°F~2°F every hour.
-
Page 12: Special Functions
How to Use the Wireless Remote Control Operating guide - General 1. After the power supply is turned on, press ON/OFF to start the unit. (Note: When the unit is powered on, the main unit’s guide louver will automatically close.) 2. - Page 13 How to Use the Wireless Remote Control ★ About TURBO When this function is on, the unit runs at super-high fan speed to rapidly cool or heat, so that the ambient temperature approaches the preset temperature as soon as possible. ★...
-
Page 14: Changing Batteries And Notices
How to Use the Wireless Remote Control Changing batteries and notices 1. Lightly press “ ” and slide off the back cover of wireless remote control in the direction indicated by the arrow. (As show in figure 1) 2. Take out the old batteries. 3. -
Page 15: Emergency Operation
Emergency Operation Emergency Operation If the wireless remote control is lost or damaged, use the manual switch on the main unit. The unit will run in Auto mode and the temperature setting and fan speed cannot be changed. Use the manual switch according to the directions below. •Turn on the unit: Press AUTO/STOP button to begin Manual Switch AUTO mode. -
Page 16: Care And Cleaning
Care and Cleaning CAUTION • Disconnect the power supply before cleaning and maintenance. • Do not splash water on the units when cleaning, as electric shocks may occur. • Wipe the units with a dry soft cloth, or a cloth slightly moistened with water or cleaner (not with a volatile liquid such as paint thinner or gasoline). - Page 17 Care and Cleaning Check before Use Be sure that nothing is obstructing the air outlet and inlet. Check that the remote control has new batteries. Maintenance after Use Switch off the power supply. Clean the filters and bodies of the indoor and outdoor units. Clear obstructions from the outdoor unit.
-
Page 18: Troubleshooting
Troubleshooting CAUTION The air conditioner should not be repaired by the user. Incorrect repair may cause electric shock or fire. Contact an authorized service centre for professional repair. Checking the following prior to contacting a professional may save you time and money. Problem Troubleshooting Unit does not start:... - Page 19 Troubleshooting Problem Troubleshooting The unit doesn’t start: • Is the power off? • Is the power plug loose? (if applicable) • Is the circuit breaker off? • Is the voltage higher or lower that it should be? (Tested by professionals) •...
- Page 20 Troubleshooting Problem Troubleshooting No air flow from indoor unit: • In the HEAT mode, when the temperature of indoor heat exchanger is very low, air flow stops in order to prevent cold air. (Within 2 minutes.) • In the HEAT mode, when the outdoor temperature is low or humidity is high, frost will form on the outdoor heat exchanger.
-
Page 21: Operation Tips
Operation Tips Cooling Operation Principle: The air conditioner intakes heat from the room and releases it outdoors, so that the indoor ambient temperature decreases. The cooling capacity increases or decrease depending on the outdoor temperature. Anti-freezing function: If the unit is running in COOL mode and at a low temperature, frost may form on the heat exchanger. - Page 22 Operation Tips Tips for saving energy: * Do not overcool or overheat. Setting the temperature at a moderate level helps save energy. * Cover windows with blinds or curtains. Blocking sunlight and air from outdoors helps cool (heat). * Clean air filters once every two weeks. Clogged air filters make the unit function inefficiently and waste energy.
-
Page 23: Installing And Cleaning The Healthy Filter
Installing and Cleaning the Healthy Filter Installation of Healthy Filter (1) Lift the panel from the two ends of the front panel in the direction indicated by the arrows. Then pull the air filter downwards to remove it. (See Fig.a) Fig. -
Page 24: Warranty
Note : The internal compressor is covered by a 5-YEAR limited warranty. During the warranty period, if this air conditioner fails under normal use, GREE will, at its option, either repair the unit or replace it, free of charge, within a reasonable period of time after the air conditioner is returned.
Need help?
Do you have a question about the GWH09TB-D3DNA1A and is the answer not in the manual?
Questions and answers