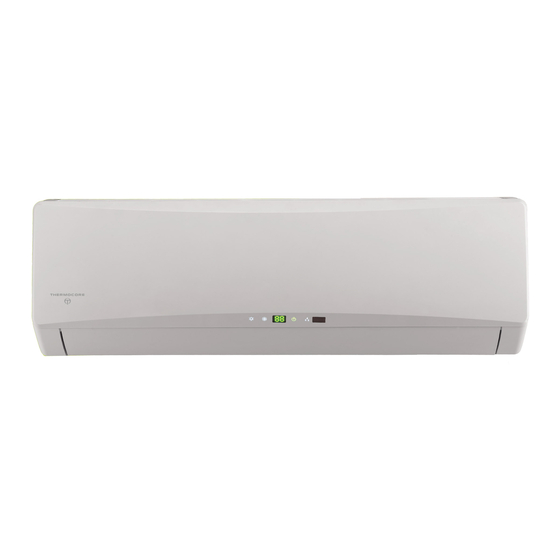
Gree GWH12TB-D3DNA1A Installation, Service & Troubleshooting

Gree GWH12TB-D3DNA1A Installation, Service & Troubleshooting

Ductless heat pump terra
Hide thumbs Also See for GWH12TB-D3DNA1A:

Advertisement

DUCTLESS HEAT PUMP
Installation, Service & Troubleshooting
Models:
GWH09TB-D3DNA1A
GWH12TB-D3DNA1A
GWH18TC-D3DNA1A
GWH24TD- D3DNA1A

Advertisement

Table of Contents
loading
Need help?

Need help?

Do you have a question about the GWH12TB-D3DNA1A and is the answer not in the manual?

Questions and answers

Subscribe to Our Youtube Channel

Summary of Contents for Gree GWH12TB-D3DNA1A

  • Page 1 DUCTLESS HEAT PUMP Installation, Service & Troubleshooting Models: GWH09TB-D3DNA1A GWH12TB-D3DNA1A GWH18TC-D3DNA1A GWH24TD- D3DNA1A...
  • Page 2: Table Of Contents

    Table of Contents Safety Precautions & Warnings......................... Model Number Identi cation..........................Physical & Electrical Data..........................5 - 6 Product Introduction (System Overview)...................... Product Introduction (Refrigeration Cycles)....................8 - 9 Indoor & Outdoor Components........................10 - 11 Operational Data..............................12 - 16 Basic Functions 9,000/12,000 btuh Systems....................
  • Page 3: Safety Precautions & Warnings

    Safety Precautions & Warnings Warning Caution Installing, starting up, and servicing air conditioner can be • Never install the unit in a place where a combustible hazardous due to system pressure, electrical components, gas might leak, or it may lead to fi re or explosion. and equipment location, etc.
  • Page 4: Model Number Identi Cation

    Safety Considerations & Warnings Model Number Identi cation G W H 24 TB - D 3 D N A 1 A/I Gree I = Indoor Unit O = Outdoor Unit R410a Revision No. Wall Mount Panel No. C = Cooling Only...
  • Page 5: Physical & Electrical Data

    Physical & Electrical Data, cont. Model GWH09TB-D3DNA1A GWH12TB-D3DNA1A System Type Heat Pump Power Supply 208-230V / 60Hz 208-230V / 60Hz Rated Current Cooling Amps Rated Current Heating Amps System Performance Cooling Cap (Min/Max) Btu/h 9,000 (3,500-9,600) 12,000 (3,100-13,000) Heating Cap (Min/Max)
  • Page 6 Physical & Electrical Data, cont. Model GWH18TC-D3DNA1A GWH24TD-D3DNA1A System Type Heat Pump Power Supply 208-230V / 60Hz 208-230V / 60Hz Rated Current Cooling Amps Rated Current Heating Amps 10.3 System Performance Cooling Cap (Min/Max) Btu/h 18,000 (4,600-22,180) 24,000 (6,826-29,352) Heating Cap (Min/Max) Btu/h 19,000 (3,400-24,900) 25,000 (7,509-37,543)
  • Page 7: Product Introduction (System Overview)

    Product Introduction System Overview e Terra Ductless split heat pumps are a single zone unit available in size from 9000 btuh to 24, 000 btuh providing heating and cooling. All comfort settings Indoor Display are controlled by a remote control. e Terra unit has many features to enhance comfort and e ciency.
  • Page 8: Product Introduction (Refrigeration Cycles)

    Product Introduction Refrigeration Components Outdoor Unit Indoor Unit Strainer Temperature Heat Sensor Exchanger Temperature Sensor Heat Exchanger 4-way High Pressure Switch Accumulator Compressor Note; Component locations may vary depending on models.
  • Page 9: Cooling Mode

    Electronic Expansion Valve (EEV) and will be regulated to about a 10 de- gree F superheat level. e EEV will adjust its ow based upon the temperature sensor readings.
  • Page 10: Heating Mode

    Product Introduction Heating Mode Outdoor Unit Indoor Unit Temperature Heat Filter Sensor Exchanger Electronic Heat Exchanger expansion valve 4-way valve Accumulator not on all sizes A. Hot gas is discharged from the compressor. e temperature of the gas in monitored by the Discharge Tem- perature sensor and sent to the outdoor control panel.
  • Page 11 Product Introduction Indoor Unit Components Terra 9,000 btuh Indoor Unit Other Terra models may very slightly. Indoor Circuit Board Fan Motor Step Motor Horizontal Swing Motor Vertical Swing Ambient Motor Temperature Sensor Indoor Tube ermistor...
  • Page 12 Product Introduction Outdoor Unit Components Terra 9,000 btuh Outdoor Unit Other Terra models may very slightly. Circuit Board Outdoor Fan Temperature Sensor Accumulator 4-way High Pressure Switch Strainer Compressor Note; Component locations may vary depending on models.
  • Page 13 Product Introduction Operation Characteristic Curve...
  • Page 14 Product Introduction Capacity Variation Ratio According to Temperature...
  • Page 15: Indoor & Outdoor Components

    Product Introduction Operation Data Cooling Heat Exchanger Compressor Pressure Temperature Condition ( Indoor Fan Outdoor Fan Pipe Temperature Model Speed PSI) Mode Mode (rps) Indoor Outdoor T1 ( T2 ( 57.2 98.6 Turbo High 98.6 Turbo High 80.6/66.6 95/75.2 18/24K 131-160 167-181.4 to 46.4-51.8 to...
  • Page 16 Product Introduction Noise Criteria Curve Tables...
  • Page 17 Product Introduction System Operation 9,000/12,000 btuh Models Basic Functions e compressor should stay o for at least 3 minutes before starting the unit. e compressor circuit has a 3 minute delay if the compressor is de-energized during a run cycle. If the compressor starts from a de-energized cycle, there will be no time delay.
  • Page 18 Product Introduction System Operation 9,000/12,000 btuh Models, cont. Basic Functions 3)Heating Mode Heating Process When the indoor ambient drops 2 F below the preset temperature, the unit will start the heating cycle. e outdoor fan, compressor and 4-way valve will operate. e indoor fan will operate in the “Cold Air Prevention”...
  • Page 19 Product Introduction System Operation 9,000/12,000 btuh Models, cont. Basic Functions Defrost Process e unit will enter defrost when the following conditions are met: A. Outdoor ambient <= 41 F B. Compressor had accumulated more than 3 hours of operation in heating mode e outdoor coil <= 32 F Note: e compressor runtime will be cleared when the outdoor ambient is >...
  • Page 20 Product Introduction System Operation 9,000/12,000 btuh Models, cont. Basic Functions System Protection Cold Air Prevention (Heating mode with compressor running) e system guards against discharging cold air in heating mode. It will delay the indoor fan until the evaporator coil has warmed up to discharge warm, comfortable air into the room.
  • Page 21 Product Introduction System Operation 9,000/12,000 btuh Models, cont. Basic Functions 6)Common Protection Functions and Fault Displays Coil High Temperature Protection = measured temperature of outdoor coil in cooling mode, measured temperature of indoor coil in heating mode. tube 1) Outdoor Coil High Temperature Protection - In cooling mode the so ware will monitor the outdoor coil for an abnor- mal high temperature condition.
  • Page 22 Product Introduction System Operation 9,000/12,000 btuh Models, cont. Other Controls 1)On/O e on-o state will change with each button press. 2)Mode Selection Press the “Mode” button to change from Auto, Cool, Dry, Fan or Hesat Pump 3)Temperature Setting Each time you press the “TEMP+” or “TEMP-” button the temperature setting will change by 1 F. e temperature range is 60.8 F - 86 F.
  • Page 23 Product Introduction System Operation 9,000/12,000 btuh Models, cont. Other Controls 6)Sleep Control e Terra has 3 Sleep mode settings to improve comfort and energy savings. Auto Mode and Fan Mode do not utilize the Sleep Mode Settings Sleep Mode 1 (Gradual Cycle) 1.
  • Page 24 Product Introduction System Operation 9,000/12,000 btuh Models, cont. Other Controls Sleep Mode 2 (Adaptive Cycle) 1. Cool or Dry Mode (Initial setpoint between 61 F. - 74 F.) a) A er 1 hour of operation the temperature setting will raise 2 F every hour b) A er 3 hours of operation the temperature setting will raise 6 F above initial setpoint and stay at this setting c) A er 7 hours of operation, the setpoint will move to 4 F.
  • Page 25 Product Introduction System Operation 9,000/12,000 btuh Models, cont. Other Controls Sleep Mode 3 (Customized Cycle) You will be required to enter 8 room setpoint values for 8 hours of runtime. e last room setpoint value will be main- tained until Sleep Mode is canceled. In Sleep Mode 3, press the “Turbo”...
  • Page 26 Product Introduction System Operation 9,000/12,000 btuh Models, cont. Other Controls Fan Only “Auto” Mode a) T ambient > T + 4 F fan will run on high speed indoor setpoint b) T + 2 F <= T ambient <= T + 4 F fan will run on medium speed setpoint...
  • Page 27 Product Introduction System Operation 9,000/12,000 btuh Models, cont. Other Controls 8) Buzzer Control e buzzer control will send a “Tone” when the air conditioner is powered-up or received information sent by the remote control. You will also hear the tone when there is a button input or if the indoor unit doesn’t receive a signal from the re- mote controller in the Heat Mode.
  • Page 28 Product Introduction System Operation 9,000/12,000 btuh Models, cont. Other Controls 11) Display 1. Operational and Mode Display All the display patterns will display for a time when the power is on, the operation pattern will display in red under standby status.
  • Page 29 Product Introduction System Operation 18,000/24,000 btuh Models Basic Functions e compressor should stay o for at least 3 minutes before starting the unit. e compressor circuit has a 3 minute delay if the compressor is de-energized during a run cycle. If the compressor starts from a de-energized cycle, there will be no time delay.
  • Page 30 Product Introduction System Operation 18,000/24,000 btuh Models, cont. Basic Functions 2) Dry Mode Drying Process is feature will not take the place of a dehumidi er, it is intended to dry the ler and slightly cool the air. If the indoor ambient temperature is greater than the preset temperature, the unit will enter the cooling and drying mode, in which case the compressor will operate and the indoor fan will run at a low speed.
  • Page 31 Product Introduction System Operation 18,000/24,000 btuh Models, cont. Basic Functions Heating Process, cont. Stop heating +9 F + 2 F Defrost Process and Oil Return (Indoor display will indicate “H1”, this is not a fault code) e unit will enter defrost when the following conditions are met: A.
  • Page 32 Product Introduction System Operation 18,000/24,000 btuh Models, cont. Basic Functions Defrost Process, cont. 2) When heating has operated continuously for 45 minutes, or accumulated for 90 minutes, the unit will enter defrost mode in 3 minutes a er meeting any of the conditions below: A.
  • Page 33 Product Introduction System Operation 18,000/24,000 btuh Models, cont. Basic Functions 5)Auto Mode Auto Mode Process Setting the auto mode will run the unit in heat or cool automatically depending on T ambient indoor 1)Operating Parameters A. If the T ambient >= 79 F the unit will operate in cooling mode. e set temperature is 77 F.
  • Page 34 Product Introduction System Operation 18,000/24,000 btuh Models, cont. Basic Functions 6)Common Protection Functions and Fault Displays Overload Protection = measured temperature of outdoor coil in cooling mode, measured temperature of indoor coil in heating mode. tube 1) Outdoor Coil High Temperature Protection - In cooling mode the so ware will monitor the outdoor coil for an abnormal high temperature condition.
  • Page 35 Product Introduction System Operation 18,000/24,000 btuh Models, cont. Other Controls 1)On/O e on-o state will change with each button press. 2)Mode Selection Press the “Mode” button to change from Auto, Cool, Dry, Fan or Heat Pump 3)Temperature Setting Each time you press the “TEMP+” or “TEMP-” button the temperature setting will change by 1 F. e temperature range is 61 F - 86 F.
  • Page 36 Product Introduction System Operation 18,000/24,000 btuh Models, cont. Other Controls 6)Sleep Control e Terra has 3 Sleep mode settings to improve comfort and energy savings. Auto Mode and Fan Mode do not utilize the Sleep Mode Settings Sleep Mode 1 (Gradual Cycle) 1.
  • Page 37 Product Introduction System Operation 18,000/24,000 btuh Models, cont. Other Controls Sleep Mode 2 (Adaptive Cycle) 1. Cool or Dry Mode (Initial setpoint between 61 F. - 74 F.) a) A er 1 hour of operation the temperature setting will raise 2 F every hour b) A er 3 hours of operation the temperature setting will raise 6 F above initial setpoint and stay at this setting c) A er 7 hours of operation, the setpoint will move to 4 F.
  • Page 38 Product Introduction System Operation 18,000/24,000 btuh Models, cont. Other Controls Sleep Mode 3 (Customized Cycle) You will be required to enter 8 room setpoint values for 8 hours of runtime. e last room setpoint value will be main- tained until Sleep Mode is canceled. In Sleep Mode 3, press the “Turbo”...
  • Page 39 Product Introduction System Operation 18,000/24,000 btuh Models, cont. Other Controls 7) Indoor Fan Control, cont. Fan Only “Auto” Mode a) T ambient > T + 4 F fan will run on high speed indoor setpoint b) T + 2 F <= T ambient <= T + 4 F fan will run on medium speed...
  • Page 40 Product Introduction System Operation 18,000/24,000 btuh Models, cont. Other Controls 8) Buzzer Control e buzzer control will send a “Tone” when the air conditioner is powered-up or received information sent by the remote control. You will also hear the tone when there is a button input or if the indoor unit doesn’t receive a signal from the re- mote controller in the Heat Mode.
  • Page 41 Product Introduction System Operation 18,000/24,000 btuh Models, cont. Other Controls 11) Display 1. Operational and Mode Display All the display patterns will display for a time when the power is on, the operation pattern will display in red under standby status.
  • Page 42: Remote Control Operation

    Remote Control Operation Remote Buttons Note: is remote control is used in other models and some features may or may not be available. Consult the owners manual for speci c features for your model. ere should be no obstructions between the remote con- trol and the indoor unit for proper operation.
  • Page 43 Remote Control Operation Display Icons 1. IFeel 2. Auto Mode 3. Cool Mode 4. Dry Mode 5. Fan Mode 6. Heat Mode 7. Sleep Mode 8. Quiet Mode 9. X-Fan Mode 10. Display Temperature Mode 11. Timer On 12. Display Light 13.
  • Page 44: Refrigerant Lines Connection, Evacuating And Charging

    Refrigerant Lines Connection, Evacuating and Charging Refrigerant Lines Preparation & Connection The refrigerant lines should be kept sealed until ready to be connected. Follow the following steps to insure a quality leak proof installation: Step 1. Refrigerant Line Connection Carefully bend and cut the tubing to prepare for fl aring. Use a fl...
  • Page 45 Refrigerant Charging Procedure Please refer to your units installation manual for proper charge. If your lineset exceeds 25’ , additional charge will be required. e charge must we weighed in with a refrigerant charging scale. 1. Determine addition refrigerant charge. Multiply refrigerant charge per by total tubing length - 25.
  • Page 46 Refrigerant Charging Procedure, cont. 5. Begin adding additional refrigerant Open the low side manifold valve to begin the charging process. 6. Charge to the correct weight If the scale was zeroed with the refrigerant tank on the scale, the amount added to the system will be a nega- tive amount since it was removed from the tank.
  • Page 47: Installation

    Installation Proper installation site is vital for correct and e cient operation of the unit. Avoid the following sites where: • Strong heat sources, vapors, ammable gas or volatile liquids are emitted. • High-frequency electro-magnetic waves are generated by radio equipment, welders and medical equipment. •...
  • Page 48 Installation Mounting Plate Installation e mounting plate should be installed horizontally and level. 2. Measure the center of the indoor unit. Please note, that depending on model, the center of the bracket may not correspond with the center of the unit. 3.
  • Page 49 Installation Install Drain Hose 1. Connect the drain hose to the outlet pipe of the indoor unit using appropriate connections. 2. Insulate the condensate to prevent condensation. 3. Fasten the condensate, lineset and wring together to prevent damage and movement. Slant the drain hose downward for smooth drainage.
  • Page 50 Installation Pressure and Leak Test 1. Use only dry nitrogen with a pressure regulator for pressurizing unit. Pressurize with 150 psi of dry nitro- gen. 2. Apply soap and water to check whether the joints are leaky. A leak detector can also be applied for a leakage test.
  • Page 51 Installation Connect the Outdoor Wiring 1. Remove the handle on the right side plate of the out- door unit. 2. Connect power wiring form outdoor disconnect to L1, L2 and ground. 3. Connect wiring from indoor unit to 1,2,3 & ground, being careful to match color code of indoor connections.
  • Page 52: Filter Maintenance And Emergency Operation

    Filter Maintenance and Emergency Operation Cleaning Air Filter 1. Remove the front panel as shown on the picture in the le . e rst stage lter can be cleaned with a vacu- um cleaner or by washing with a mild soap and <...
  • Page 53 Refrigerant Charging Procedure, cont. 5. Begin adding additional refrigerant Open the low side manifold valve to begin the charging process. Picture 6. Charge to the correct weight A er the proper amount of refrigerant has been weighed in, close the low side manifold valve. Picture 3.
  • Page 54: Electrical Schematics

    Electrical Schematics Electrical Legend ese circuit diagrams are subject to change without notice, please refer to the one supplied with the unit.
  • Page 55 Electrical Schematics...
  • Page 56 Electrical Schematics ese circuit diagrams are subject to change without notice, please refer to the one supplied with the unit.
  • Page 57 Printed Circuit Boards Indoor Unit ese circuit diagrams are subject to change without notice, please refer to the one supplied with the unit.
  • Page 58 Printed Circuit Boards Outdoor Unit ese circuit diagrams are subject to change without notice, please refer to the one supplied with the unit.
  • Page 59 Printed Circuit Boards Outdoor Unit ese circuit diagrams are subject to change without notice, please refer to the one supplied with the unit.
  • Page 60 Printed Circuit Boards Outdoor Unit ese circuit diagrams are subject to change without notice, please refer to the one supplied with the unit.
  • Page 61: Troubleshooting Outdoor Components

    Troubleshooting Outdoor Components EEV Troubleshooting Heating Mode Cooling Mode Input Output Output Input To check the operation of the EEV Valve in cool- To check the operation of the EEV Valve in heating ing mode, using a digital thermometer record mode, using a digital thermometer record the tem- the temperature of the input line and the output perature of the input line and the output line of the...
  • Page 62 Electrical Component Reference 4-Way Valve Troubleshooting Heating Mode Cooling Mode Compressor Compressor To Accumulator Discharge Discharge To Accumulator To Condenser To Condenser Coil Suction Line Coil Suction Line Checking the 4-way valve in cooling mode requires Checking the 4-way valve in heating mode re- the measurement of 4 readings.
  • Page 63 Troubleshooting Outdoor Components Temperature Sensor Check Temperature Sensor Using a glass of ice water, place the sensor into the glass with a digital thermometer. Wait a few minutes for the reading to stabilize. Compare the readings to the sensor tables in Appendix “A”, it the reading are not compara- ble, replace the sensor.
  • Page 64 Electrical Component Reference Compressor Windings Compressor Windings Red, Yellow & Blue Wires Compressor Winding Resistance Check: Unplug the wire spade connectors from the circuit board. e spade terminals have a small clip to press for removal. Press this clip slightly inward, then li straight up on terminal. e wires red to yellow, yellow to blue &...
  • Page 65 Electrical Component Reference Base Pan Heater Check Base Pan Heater Resistance Check: Unplug the wire connector from the circuit board. e resistance should read approximately 740 ohms. should be no reading from either wire to ground. If readings vary from these measurements, replace the heater. Compressor Crankcase Heater Check Compressor Crankcase Heater Resistance Check: Unplug the wire connector from the circuit board.
  • Page 66 Electrical Component Reference Reactor Reactor Resistance Check: e line reactor helps to smooth the inrush current , reduce harmonics and noise, and bu ers the system, pro- tecting the electronics from transient voltage noise. e resistance between the coils will be very low, approxi- mately .3 ohms and should not have any resistance to ground.
  • Page 67: Fault & Status Displays

    Fault Displays Outdoor Unit Indicator Display Yellow indicator blinks once Compressor starts (normal) à Yellow indicator blinks twice à Defrosting (normal display of indoor unit) Yellow indicator blinks for 3 Anti-freezing protection (normal display of indoor unit à times Yellow indicator blinks for 4 à...
  • Page 68 Fault and Status Display Table 9,000/12,000 Systems Yellow Malfunction Indoor Lamp for Red LED Malfunction Name Lamp for Lamp for Type Display Opera- Lamp Cooling Heating Lamp tion Malfunction of Circuit for zero Blinks for cross detection 17 times Malfunction protection for Blinks for jumper cap 15 times...
  • Page 69 Fault and Status Display Table 9,000/12,000 Systems High pressure protection for the Blinks system once Low pressure protection for the Blinks for system (reserved) 3 times Lock of compressor (for com- mercial air conditioner) Reset of drive module (for com- mercial air conditioner) Overspeed (for commercial air conditioner)
  • Page 70 Fault and Status Display Table 9,000/12,000 Systems Failure of startup of compressor Blinks for 11 times High discharge temperature Blinks for Blinks for protection of compressor 4 times 7 times Overload protection Blinks for Blinks for 8 times 6 times Overcurrent protection for the Blinks for Blinks for...
  • Page 71 Fault and Status Display Table 9,000/12,000 Systems Frequency limit/decrease for Blinks for Blinks for overload 6 times 3 times Frequency limit/decrease for Blinks for Blinks for Blinks for module temperature protection 6 times 6 times 11 times Oil return in cooling Blinks for 7 times Cold air prevention...
  • Page 72 Troubleshooting 18,000/24,000 btuh Units Indoor Unit Display Outdoor Unit Method Display Method (repeated every 5 Malfunction A/C Status Possible Causes seconds) Name Indoor Operation o = O Display Indicator n = Illuminated « = Blink Possible reasons: 1. Refrig- erant was superabundant; During cooling and drying op- 2.
  • Page 73 Troubleshooting 18,000/24,000 btuh Units, cont. Indoor Unit Display Outdoor Unit Method Display Method (repeated every 5 Malfunction A/C Status Possible Causes seconds) Name Indoor Cool o = O Display Indicator n = Illuminated « = Blink 1. Loosening or bad contact of indoor ambient temp sensor and main- During cooling and drying...
  • Page 74 Troubleshooting 18,000/24,000 btuh Units, cont. Indoor Unit Display Outdoor Unit Method Display Method (repeated every 5 Malfunction A/C Status Possible Causes seconds) Name Indoor o = O Cool Indicator Display n = Illuminated « = Blink Limit/decrease All loads operate normally, Refer to the malfunction O 3S and frequency due...
  • Page 75 Troubleshooting 18,000/24,000 btuh Units, cont. Indoor Unit Display Outdoor Unit Method Display Method (repeated every 5 Malfunction A/C Status Possible Causes seconds) Name Indoor Heating o = O Display Indicator n = Illuminated « = Blink Defrosting O 3S and Defrosting will occur in It’s the normal state blink once...
  • Page 76 Troubleshooting 18,000/24,000 btuh Units, cont. Indoor Unit Display Outdoor Unit Method Display Method (repeated every 5 Malfunction seconds) A/C Status Possible Causes Name Indoor Heating o = O Display Indicator n = Illuminated « = Blink Decrease fre- quency due to All loads operate normally, Refer to malfunction high tempera-...
  • Page 77 Troubleshooting 18,000/24,000 btuh Units, cont. Outdoor Unit Indoor Unit Display Display Method Method (repeated every 5 Malfunction seconds) A/C Status Possible Causes Name o = O Indoor Heating n = Illuminated Display Indicator « = Blink Malfunction of O 3s and During cooling and drying Supply voltage is unstable voltage drop-...
  • Page 78: Error Code Diagnostics

    Error Code Diagnostics C5 Error Code Jumper Cap Malfunction 1. No jumper cap inserted on board Status: 2. Jumper cap not fully seated Wireless remote will not send command to 3. Jumper cap damaged indoor unit. 4. Bad control board Start Troubleshooting Picture of jumper cap Is there a jumper cap on the...
  • Page 79 Error Code Diagnostics EE, EU, FH Error Codes Fault & Status Possible Causes EEProm Malfuntion Status: 1. Faulty outdoor control board, replace AP1 During cooling & dehumidifying, indoor unit operates while other functions stop; During heating operation, complete unit stops 1.
  • Page 80 Error Code Diagnostics E1 - E3 Error Codes Fault & Status Possible Causes High Pressure Protection of System 1. Refrigerant overcharge Status: 2. Dirty outdoor coil During cooling & dehumidifying, indoor unit 3. Blockage of airfl ow operates while other functions stop; During 4.
  • Page 81 Error Code Diagnostics E4 Error Code High Discharge Temperature Protection of 1. Faulty outdoor temperature sensor Compressor. 2. Refrigerant leak Status: 3. Poor airfl ow of outdoor unit Cooling operation, compressor stops while 4. Follow Troubleshooting procedure indoor fans runs. Heating operation, complete unit stops Start Troubleshooting Normal protection, outdoor...
  • Page 82 Error Code Diagnostics E5 - E6 Error Codes Fault & Status Possible Causes Overcurrent Protection 1. Supply voltage is unstable Status: 2. Supply voltage is too low During cooling & dehumidifying, indoor unit 3. Coils are dirty operates while other functions stop; During 4.
  • Page 83 Error Code Diagnostics E6 Error Code Communication Failure 1. Improper voltages Status: 2. Mis-matched indoor and outdoor units Cooling operation, compressor stops while 3. Improper wiring between indoor and outdoor indoor fans runs. Heating operation, complete units unit stops Start Troubleshooting Check for proper wiring of Did the unit operate normally before indoor and outdoor units with...
  • Page 84 Error Code Diagnostics E8 Error Code Overload System Protection Problem 1. Incorrect refrigerant charge Status: 2. Metering device problem Cooling operation, compressor stops while 3. Compressor failure indoor fans runs. Heating operation, complete unit stops Start Troubleshooting after unit is powered off for 20 minutes Is the overload protector positioned and wired...
  • Page 85 Error Code Diagnostics F1 - F5 Temperature Sensor Codes See troubleshooting chart next page Fault & Status Possible Causes Indoor ambient temperature sensor is open 1. Loose or bad contact of indoor temperature or short circuited. sensor Status: 2. Sensor wire leads not properly connected During cooling &...
  • Page 86 Temperature Sensor Troubleshooting Start Temperature Sensor Troubleshooting Is the sensor wire plug loose from the AP2 board? Insert the plug correctly Sensor Connections Is problem corrected? Is there a short circuit in the wire or sensor? Replace sensor or correct wire problem Is problem corrected? Do the temperature sensor readings...
  • Page 87 Error Code Diagnostics F6 - F9 Temperature Sensor Codes See troubleshooting chart next page Fault & Status Possible Causes Decrease frequency due to overload. Status: 1. Refer to “E8” troubleshooting procedures All systems operate normal with decrease in capacity Oil Return in Cooling Normal function Decrease frequency due to overcurrent.
  • Page 88 Start-up Failure Troubleshooting Lc - Start-up Failure Start the unit after waiting 5 minutes Are the compressor wires (UVW) connected properly? Repair Connection, Is unit operating properly? Is refrigerant charge correct? Charge Unit according to service manual Does unit startup normally Compressor Terminals Replace the controller AP1...
  • Page 89 Error Code Diagnostics HC Error Code PFC (Power Factor Correction) Protection 1. Check for damage to the reactor and PFC Status: capacitor of the outdoor unit During cooling & dehumidifying, indoor unit 2. Refer to troubleshooting procedure below operates while other functions stop; During heating operation, complete unit stops Start Troubleshooting Check wiring of the reactor...
  • Page 90 Error Code Diagnostics H0 - H3 Error Codes Fault & Status Possible Causes Decrease frequency due to overload. Status: 1. Refer to “E8” troubleshooting procedures All systems operate normal with decrease in capacity Defrosting Status: Defrosting will occur in heating mode. Normal function Compressor will operate while indoor fan stops.
  • Page 91 Error Code Diagnostics H4 - H6 Error Codes Fault & Status Possible Causes System is Abnormal Status: 1. Refer to “E8” troubleshooting procedures During cooling mode, compressor will stop, indoor fan will run. Heating mode all units stop. IPM Protection Status: During cooling mode, compressor will stop, 1.
  • Page 92 Error Code Diagnostics H7 Error Code, continued on next page Desynchronizing of compressor 1. Check the resistance of the compressor Status: terminals and connections to the compressor During cooling mode, compressor will stop, 2. Check for overcharge of refrigerant indoor fan will run. Heating mode all units 3.
  • Page 93 Error Code Diagnostics H7 Error Code, continued Desynchronizing of compressor 1. Check the resistance of the compressor Status: terminals and connections to the compressor During cooling mode, compressor will stop, 2. Check for overcharge of refrigerant indoor fan will run. Heating mode all units 3.
  • Page 94 Error Code Diagnostics U1, U3, U5, U7, U9 Error Codes Fault & Status Possible Causes Compressor Phase Detection Error Status: During cooling mode, compressor will stop, 1. Replace outdoor control panel AP1 indoor fan will run. Heating mode all units stop.
  • Page 95 Error Code Diagnostics PH, PL, P5, P7, P8 Error Codes Fault & Status Possible Causes 1. Measure the voltage on “L” & “N” on line High DC Bus-Bar Voltage voltage, if it is higher then 265vac, correct Status: high voltage. During cooling mode, compressor will stop, 2.
  • Page 96 Error Code Diagnostics H7 Error Code, continued on next page Charging Malfunction of Capacitor 1. Improper input voltage Status: 2. Poor connection on reactor During cooling mode, compressor will stop, 3. Reactor damaged indoor fan will run. Heating mode all units 4.
  • Page 97 Disassembly of Indoor Unit 9,000 & 12,000 btuh Warning - Wait 10 minutes a er power is disconnected before starting disassembly. 1. Before disassembly of indoor unit Before disassembly of indoor unit 2. Remove lter Step 1. Open the panel Step 2.
  • Page 98 Disassembly of Indoor Unit 9,000 & 12,000 btuh Warning - Wait 10 minutes a er power is disconnected before starting disassembly. 3. Remove guide louver, continued Step 2. Remove the rotating sha of the big guide lover from the groove, slightly bend the big guide Big guide louver louver to remove it.
  • Page 99 Disassembly of Indoor Unit 9,000 & 12,000 btuh Warning - Wait 10 minutes a er power is disconnected before starting disassembly. 4. Remove panel, continued Step 2. Remove the screws holding the display. 5. Remove front case Electrical box cover 2 Screw Step 1.
  • Page 100 Disassembly of Indoor Unit 9,000 & 12,000 btuh Warning - Wait 10 minutes a er power is disconnected before starting disassembly. 6. Remove swing fan blade Clamp Swing connecting rod Step 1. Remove the four screws holding the pro- tective grille, then remove the grille. Loosen the clamps holding the swing connector and remove Protective grilles` the connecting rod.
  • Page 101 Disassembly of Indoor Unit 9,000 & 12,000 btuh Warning - Wait 10 minutes a er power is disconnected before starting disassembly. 7. Remove electrical box sub-assembly Heat exchanger thermistor Bonding wire Step 1. Remove the indoor tube temperature sensor Step 2. Remove the screws holding the bonding wire, then remove the wire Step 3.
  • Page 102 Disassembly of Indoor Unit 9,000 & 12,000 btuh Warning - Wait 10 minutes a er power is disconnected before starting disassembly. 8. Remove evaporator sub-assembly Refrigerant piping Pipe clamp Screw Step 1. Remove the screws holding the pipe clamp. Screws Step 2.
  • Page 103 Disassembly of Indoor Unit 9,000 & 12,000 btuh Warning - Wait 10 minutes a er power is disconnected before starting disassembly. 9. Remove indoor fan blade and motor Step 1. Remove the screws holding the up/down Up/down swing motor swing motor to remove motor Step 2.
  • Page 104 Disassembly of Indoor Unit 9,000 & 12,000 btuh Warning - Wait 10 minutes a er power is disconnected before starting disassembly. 9. Remove indoor fan blade and motor, cont. Screw Motor clamp Step 3. Remove the screws holding the motor clamp.
  • Page 105 Disassembly of Indoor Unit 18,000 btuh Warning - Wait 10 minutes a er power is disconnected before starting disassembly. 1. Before disassembly of indoor unit Before disassembly of indoor unit 2. Remove lter Step 1. Open the panel Step 2. Loosen the clasps on the lter, push the lter inward, then pull upward, removing the lter.
  • Page 106 Disassembly of Indoor Unit 18,000 btuh Warning - Wait 10 minutes a er power is disconnected before starting disassembly. 3. Remove guide louver, continued Step 2. Remove the rotating sha of the big guide lover from the groove, slightly bend the big guide louver to remove it.
  • Page 107 Disassembly of Indoor Unit 18,000 btuh Warning - Wait 10 minutes a er power is disconnected before starting disassembly. 5. Remove front case Electrical box cover 2 Screw Step 1. Remove the screws fastening the electrical box cover to remove cove. Screws Clamps Step 2.
  • Page 108 Disassembly of Indoor Unit 18,000 btuh Warning - Wait 10 minutes a er power is disconnected before starting disassembly. 6. Remove swing fan blade Clamp Step 1. Remove the clamps holding the swing fan Swing connecting rod connecting rod to remove the connecting rod. Step 2.
  • Page 109 Disassembly of Indoor Unit 18,000 btuh Warning - Wait 10 minutes a er power is disconnected before starting disassembly. 7. Remove electrical box sub-assembly Heat exchanger thermistor Bonding wire Screw Step 1. Remove the indoor tube temperature sensor Step 2. Remove the screws holding the bonding wire, then remove the wire Step 3.
  • Page 110 Disassembly of Indoor Unit 18,000 btuh Warning - Wait 10 minutes a er power is disconnected before starting disassembly. 8. Remove evaporator sub-assembly Refrigerant piping Pipe clamp Screw Step 1. Remove the screws holding the pipe clamp. Screws Step 2. Remove the screws holding the evapora- tor sub-assembly, slightly reposition the tubing to Refrigerant piping remove the evaporator.
  • Page 111 Disassembly of Indoor Unit 18,000 btuh Warning - Wait 10 minutes a er power is disconnected before starting disassembly. 9. Remove indoor fan blade and motor Step 1. Remove the screws holding the up/down Up/down swing motor swing motor to remove motor Step 2.
  • Page 112 Disassembly of Indoor Unit 18,000 btuh Warning - Wait 10 minutes a er power is disconnected before starting disassembly. 9. Remove indoor fan blade and motor, cont. Screw Motor clamp Step 3. Remove the screws holding the motor clamp. Step 4. Remove the fan blade and motor Step 5.
  • Page 113 Disassembly of Indoor Unit 24,000 btuh Warning - Wait 10 minutes a er power is disconnected before starting disassembly. 1. Before disassembly of indoor unit Before disassembly of indoor unit 2. Remove lter Air Filter Step 1. Open the panel Step 2.
  • Page 114 Disassembly of Indoor Unit 24,000 btuh Warning - Wait 10 minutes a er power is disconnected before starting disassembly. 3. Remove guide louver Step 1. Along the groove holding thje front panel, slide the rotor sha outward to remove the front panel Step 2.
  • Page 115 Disassembly of Indoor Unit 24,000 btuh Warning - Wait 10 minutes a er power is disconnected before starting disassembly. 5. Remove Axial bushing Axial bushing Hooks Step 1. Remove the axial bushing of horizontal louver to remove the guide louver Guide louver 6.
  • Page 116 Disassembly of Indoor Unit 24,000 btuh Warning - Wait 10 minutes a er power is disconnected before starting disassembly. 7. Remove electrical box sub-assembly Temperature sensor Electrical box cover Step 1. Remove the indoor tube temperature sensor Step 2. Remove the screws holding the bonding wire, then remove the wire Step 3.
  • Page 117 Disassembly of Indoor Unit 24,000 btuh Warning - Wait 10 minutes a er power is disconnected before starting disassembly. 8. Remove evaporator sub-assembly Step 1. Remove the clamps connecting the water tray and chassis, then remove the water tray. Step 2. Remove the screws holding the tubing clamp, then remove the clamp.
  • Page 118 Disassembly of Indoor Unit 24,000 btuh Warning - Wait 10 minutes a er power is disconnected before starting disassembly. 8. Remove evaporator sub-assembly, cont. Step 4. Turn over the indoor unit and adjust the tubing to the position as shown by the broken line Evaporator Step 5.
  • Page 119 Disassembly of Indoor Unit 24,000 btuh Warning - Wait 10 minutes a er power is disconnected before starting disassembly. 9. Remove indoor fan blade and motor, cont. Screws Step 1. Remove the two screws holding the step motor and remove the step motor. Step 2.
  • Page 120 Disassembly of Outdoor Unit 9,000 & 12,000 btuh Warning - Wait 10 minutes a er power is disconnected before starting disassembly. 4. Remove panel and grille 1. Before Disassembly Remove the screws holding the panel, Remove the screws con- necting the panel grille and panel, then loosen clamp. Panel Grille 5.
  • Page 121 Disassembly of Outdoor Unit, continued 9,000 & 12,000 btuh Warning - Wait 10 minutes a er power is disconnected before starting disassembly. 7. Remove fan blade 10. Remove electric reactor Remove the screws holding the reactor to remove Remove the bot holding the fan blade on motor sha , then re- move gasket and washer.
  • Page 122 Disassembly of Outdoor Unit, continued 9,000 & 12,000 btuh Warning - Wait 10 minutes a er power is disconnected before starting disassembly. 13. Remove 4-way valve assembly Properly remove refrigerant charge, then remove valve by heating brazed joints and withdrawing pipe from valve. 4-way valve 14.
  • Page 123 Disassembly of Outdoor Unit 18,000 btuh Warning - Wait 10 minutes a er power is disconnected before starting disassembly. 1. Before Disassembly 4. Remove front panel and grille Remove the screws holding the grille and panel, remove the grille. Remove remaining screws holding the panel, pull panel upward, loosen the clamp on the right side, then rotate panel to the le and remove panel.
  • Page 124 Disassembly of Outdoor Unit 18,000 btuh Warning - Wait 10 minutes a er power is disconnected before starting disassembly. 6. Remove fan blade 8. Remove sound proof barrier Remove the bolt holding the blade then remove. Carefully remove barrier Barrier Fan Blade 9.
  • Page 125 Disassembly of Outdoor Unit 18,000 btuh Warning - Wait 10 minutes a er power is disconnected before starting disassembly. 14. Remove condenser 11. Remove 4-way valve Properly remove refrigerant charge, then remove valve by heating Remove the screws holding the condenser assembly and chassis, then li and remove brazed joints and withdrawing pipe from valve.
  • Page 126 Disassembly of Outdoor Unit 24,000 btuh Warning - Wait 10 minutes a er power is disconnected before starting disassembly. 7. Remove electrical box assembly 3. Remove back panel Remove the screws holding the top panel and side panels. Remove Remove crews holding back panel from chassis and motor the screws holding the front panel and remove the panel support Top Panel...
  • Page 127 Disassembly of Outdoor Unit, continued 24,000 btuh Warning - Wait 10 minutes a er power is disconnected before starting disassembly. 6. Remove right side panel 7a. Remove electrical box (secondary) Remove screws holding right side panel from chassis, valve sup- Remove screws holding secondary electrical box, then remove port and condenser, then remove panel Electrical box...
  • Page 128 Disassembly of Outdoor Unit, continued 24,000 btuh Warning - Wait 10 minutes a er power is disconnected before starting disassembly. 10. Remove motor and support 12. Remove gas and liquid valves Remove the screws holding the motor, remove wire terminals, Remove the screws holding the valve sub-assembly.
  • Page 129 Disassembly of Outdoor Unit, continued 24,000 btuh Warning - Wait 10 minutes a er power is disconnected before starting disassembly. 15. Remove condenser support plate Remove the screws holding support plate, then remove plate Support Plate 16. Remove chassis and condenser Pull condenser upward to remove Condenser Chassis...
  • Page 130 Appendix 1: Resistance Table of Ambient Temperature Sensor for Indoor and Outdoor Units (15K) Temp Temp Resis- Temp Temp Resis- Temp Temp Resis- (ºC) (ºF) tance (ºC) (ºF) tance (ºC) (ºF) tance (kΩ) (kΩ) (kΩ) -2.2 138.1 91.4 10.63 185.0 1.594 -0.4 128.6...
  • Page 131 Appendix 1: Resistance Table of Ambient Temperature Sensor for Indoor and Outdoor Units (15K) Temp Temp Resis- Temp Temp Resis- Temp Temp Resis- (ºC) (ºF) tance (ºC) (ºF) tance (ºC) (ºF) tance (kΩ) (kΩ) (kΩ) 50.0 29.9 143.6 3.454 237.2 0.678 51.8 28.51...
  • Page 132 Appendix 2: Resistance Table of Outdoor and Indoor Tube Temperature Sensors (20K) Temp Temp Resis- Temp Temp Resis- Temp Temp Resis- (ºC) (ºF) tance (ºC) (ºF) tance (ºC) (ºF) tance (kΩ) (kΩ) (kΩ) -2.2 181.4 91.4 14.18 185.0 2.125 -0.4 171.4 93.2 13.59...
  • Page 133 Appendix 2: Resistance Table of Outdoor and Indoor Tube Temperature Sensors (20K) Temp Temp Resis- Temp Temp Resis- Temp Temp Resis- (ºC) (ºF) tance (ºC) (ºF) tance (ºC) (ºF) tance (kΩ) (kΩ) (kΩ) 50.0 39.87 143.6 4.605 237.2 0.904 51.8 38.01 145.4 4.443...
  • Page 134 Appendix 3: Resistance Table of Outdoor Discharge Temperature Sensor (50K) Temp Temp Resis- Temp Temp Resis- Temp Temp Resis- (ºC) (ºF) tance (ºC) (ºF) tance (ºC) (ºF) tance (kΩ) (kΩ) (kΩ) -20.2 853.5 73.4 53.74 167.0 7.224 -18.4 799.8 75.2 51.41 168.8 6.998...
  • Page 135 Appendix 3: Resistance Table of Outdoor Discharge Temperature Sensor (50K) Temp Temp Resis- Temp Temp Resis- Temp Temp Resis- (ºC) (ºF) tance (ºC) (ºF) tance (ºC) (ºF) tance (kΩ) (kΩ) (kΩ) 41.0 125.1 134.6 13.58 228.2 2.568 42.8 119.1 136.4 13.09 230.0 2.498...
  • Page 136 Cat. No. DFS-TERRA-HP-1SM Version 1.1 Gree Electric Appliances, Inc. (C) 2013...

This manual is also suitable for:

Gwh09tb-d3dna1aGwh18tc-d3dna1aGwh24td- d3dna1a

Table of Contents