Table of Contents
Advertisement
www.iconfitness.com
Model No. JMTBW10.0
Serial No.
Write the serial number in the
space above for reference.
Serial Number
QUESTIONS?
If you have questions, or if parts are
damaged or missing, DO NOT
CONTACT THE STORE; please
contact Customer Care.
IMPORTANT: Please register this
product (see the limited warranty
on the back cover of this manual)
before contacting Customer Care.
1-800-288-4802
CALL TOLL-FREE:
Mon.–Fri. 6 a.m.–6 p.m. MT
Sat. 8 a.m.–4 p.m. MT
ON THE WEB:
www.iconservice.com
CAUTION
Read all precautions and instruc-
tions in this manual before using
this equipment. Keep this manual
for future reference.
Decal
USERʼS MANUAL
Advertisement
Table of Contents

Summary of Contents for ICON Health & Fitness . JMTBW10.0
- Page 1 USERʼS MANUAL Model No. JMTBW10.0 Serial No. Write the serial number in the space above for reference. Serial Number Decal QUESTIONS? If you have questions, or if parts are damaged or missing, DO NOT CONTACT THE STORE; please contact Customer Care.
-
Page 2: Table Of Contents
TABLE OF CONTENTS WARNING DECAL PLACEMENT ............. .2 IMPORTANT PRECAUTIONS . -
Page 3: Important Precautions
IMPORTANT PRECAUTIONS WARNING: To reduce the risk of serious injury, read all important precautions and instructions in this manual and all warnings on your weight training system before using your weight training system. ICON assumes no responsibility for personal injury or property damage sustained by or through the use of this product. -
Page 4: Before You Begin
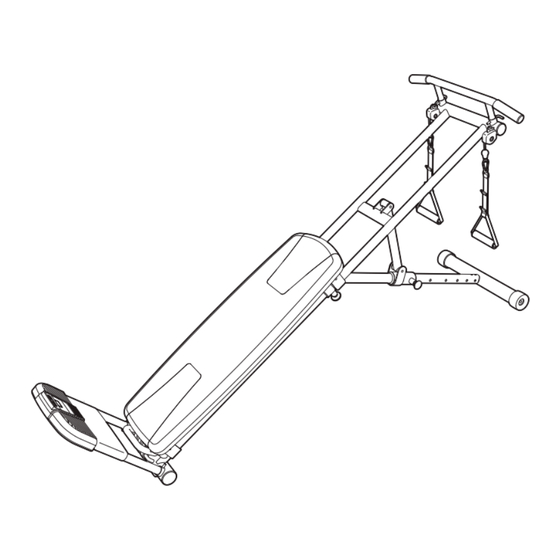
BEFORE YOU BEGIN Thank you for selecting the JILLIAN MICHAELS tions after reading this manual, please see the front BODY SHOP weight training system. The versatile cover of this manual. To help us assist you, note the weight training system is designed to help you product model number and serial number before con- develop the major muscle groups of the body. -
Page 5: Assembly
ASSEMBLY To hire an authorized service technician to assemble the weight training system, call 1-800-445-2480. Assembly requires two persons. Place all parts of the weight training system in a cleared area and remove the packing materials. Do not dispose of the packing materials until assembly is completed. In addition to the included tool(s), assembly requires a Phillips screwdriver To make assembly easier, read the information above before you begin. - Page 6 2. Attach the Stabilizer (6) to the Adjustment Leg (5) with three M10 x 53mm Bolts (40), three M10 Curved Washers (54), and three M10 Locknuts (45). Make sure that the Locknuts are in the hexagonal holes. Hexagonal Holes 3. Note: For clarity, the Foot Bracket (8) is not shown in the drawing.
- Page 7 5. Insert the Handlebar (29) into the Top Frame (1) and secure it with two L-pins (17). 6. Attach a Handle (30) to one end of the Cable (32) with a Cable Clip (33). Attach the other Handle (30) in the same way.
-
Page 8: Adjustment
ADJUSTMENT The weight training system is designed to use your own body weight as resistance. The information below explains how the weight training system can be adjusted and folded for storage. Refer to the accompanying exercise guide to see the correct form for several exercises. Make sure that all parts are properly tightened each time you use the weight training system. - Page 9 ADJUSTING THE RESISTANCE To increase the resistance of the weight training system, pull an 8mm or 10mm Bungee Cord (35, 44) outward from the Bungee Bracket (not shown) and hook it onto the bar on the Bottom Frame (2). For more resistance, hook additional Bungee Cords (35, 44) onto the bar on the Bottom Frame (2).
-
Page 10: Console Operation
CONSOLE OPERATION FEATURES OF THE CONSOLE HOW TO USE THE CONSOLE 1. Turn on the console. Press any button on the console to turn on the console. 2. Insert an iFit card and select a workout. Insert an iFit card into the iFit slot on the console;... - Page 11 To adjust the volume level, press the Volume When you release the button, the selected exer- Increase and Decrease buttons. cise will start. To pause the exercise, press the Pause button. To resume the exercise, press the When the first exercise is completed, the console Play button.
-
Page 12: Exercise Guidelines
EXERCISE GUIDELINES FOUR TYPES OF STRENGTH WORKOUTS workout, and the numbers of repetitions and sets to complete. Progress at your own pace and be sensitive Note: A “repetition” is one complete cycle of an exer- to your bodyʼs signals. Follow each workout with at cise, such as one sit-up. - Page 13 NOTES...
-
Page 14: Part List
PART LIST—Model No. JMTBW10.0 R0910A Key No. Qty. Description Key No. Qty. Description Top Frame M4 x 16mm Screw Bottom Frame 8mm Bungee Cord Backrest Frame M6 Locknut Backrest M10 x 35mm Bolt Adjustment Leg M8 x 60mm Bolt Stabilizer... -
Page 15: Exploded Drawing
EXPLODED DRAWING—Model No. JMTBW10.0 R0910A 19 23... -
Page 16: Ordering Replacement Parts
ORDERING REPLACEMENT PARTS To order replacement parts, please see the front cover of this manual. To help us assist you, be prepared to provide the following information when contacting us: • the model number and serial number of the product (see the front cover of this manual) •...

Need help?
Do you have a question about the . JMTBW10.0 and is the answer not in the manual?
Questions and answers