Table of Contents
Advertisement
Quick Links
Download this manual
See also:
Installation Manual
Advertisement
Table of Contents

Related Manuals for Idis DC-B1101


Summary of Contents for Idis DC-B1101
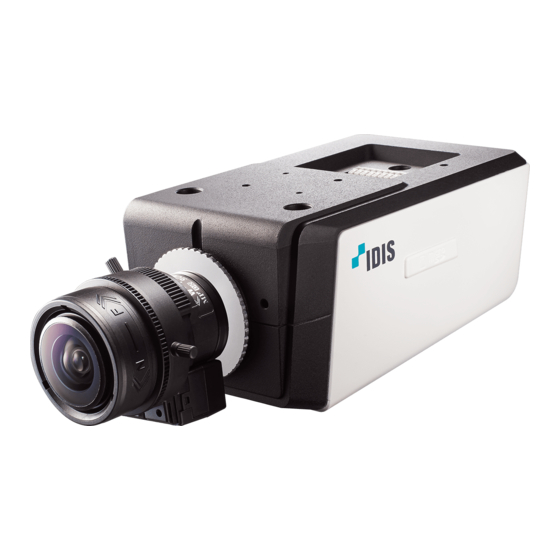
- Page 1 Network Camera Operation Manual DC-B1001 / DC-B1101 DC-B1103 / DC-B1203 DC-B1303 Powered by...
-
Page 2: Safety Symbols
Before reading this manual This is a basic operation manual for use of an IDIS network camera. Users who are using this product for the first time, as well as users with experience using comparable products, must read this operation manual carefully before use and heed to the warnings and precautions contained herein while using the product. -
Page 3: Safety Precautions
Before reading this manual Safety Precautions WARNING RISK OF ELECTRIC SHOCK DO NOT OPEN WARNING: TO REDUCE THE RISK OF ELECTRIC SHOCK, DO NOT REMOVE COVER (OR BACK). NO USER-SERVICEABLE PARTS INSIDE. REFER SERVICING TO QUALIFIED SERVICE PERSONNEL. Important Safeguards 1. -
Page 4: Fcc Compliance Statement
IDIS Co., Ltd. reserves all rights concerning this manual. Use or duplication of this manual in part or whole without the prior consent of IDIS Co., Ltd. is strictly prohibited. Contents of this manual are subject to change without prior notice for reasons such as functionality enhancements. -
Page 5: Table Of Contents
Table of Contents Table of Contents Part 1 - Remote Setup ........7 Camera Protocol. - Page 6 Part 2 - IDIS Web ........
-
Page 7: Part 1 - Remote Setup
- The DirectIP™ NVR also allows you to control all camera settings directly from the NVR, without the need for a computer. Launch the IDIS Discovery program and from the list, For more information on configuring camera settings select a camera whose protocol you wish to change. -
Page 8: Remote Setup
Part 1 - Remote Setup Remote Setup Quick Setup Launch the IDIS Discovery program and then from DC-B1001 / DC-B1101 the main screen, select a network camera whose settings you wish to change. Click on the Setup icon. Select Remote Setup from the Setup menu to load the Remote Setup screen. -
Page 9: System
Part 1 - Remote Setup System General Change the camera’s system information, add users/ • Language: Select the language you wish to use for groups, and/or import/export settings. remote setup. • Name: Enter a name for the camera. (Up to 31 alphanumeric characters, including spaces) •... -
Page 10: Date/Time
Part 1 - Remote Setup • Setup Date/Time - Load Default Setup: Restores all settings other than Date/Time to their factory defaults. Select Include Network Setup to load default network settings as well. For more information on network setup, refer to the Network on page 12. - Import Setup: Open a setup file and apply its settings to the camera. -
Page 11: User/Group
Part 1 - Remote Setup User/Group • Allow Anonymous PTZ Control: Select to control the pan/tilt driver remotely from a website using webcasting. DC-B1103 / DC-B1203 / DC-B1303 only • User/Group settings can only be configured by users belonging to the Administrator group. •... -
Page 12: Network
Part 1 - Remote Setup Network IP Address • Type: Select the type of network you are using. If Change the network settings, enable FEN and security this option has been changed, Remote Setup will features, and control network bandwidth use. terminate after applying the current settings. -
Page 13: Fen
Part 1 - Remote Setup • DNS Server: Enter the DNS server’s IP address. By using the DNS server, you will be able to use domain names instead of IP addresses when configuring the Select Use FEN to enable the FEN feature. FEN, time, or SMTP server. -
Page 14: Port/Qos
By enabling IDIS Web and RTSP message if you do not enter a FEN name or enter ports, you will be able to use the IDIS Web program a name already registered to the FEN Server. If the... - Page 15 – Via Mobile Device: Launch the web browser and then enter http://IP Address:IDIS Web Port Number/ (If Use HTTPS has been enabled, enter https instead of http). Camera's IDIS Web port number and RTSP port number must be configured correctly in order to establish a Click Apply to use the recommended port numbers.
-
Page 16: Bandwidth Control
Part 1 - Remote Setup Bandwidth Control Security Regulates the camera’s network bandwidth use based on network traffic fluctuations. • IP Filtering: Select this option to enable IP Filtering. IP Filtering allows camera access from certain IP Select Network Bandwidth limit and then specify addresses and blocks access from others. -
Page 17: Ieee 802.1X
Part 1 - Remote Setup • SSL: Select this option to enable SSL (Secure Sockets IEEE 802.1X Layer). Enabling this option applies SSL protocol protection on data transmitted out. However, Select the IEEE 802.1X option to enable IEEE 802.1X programs and systems that do not support SSL will network connection authentication. -
Page 18: Video
Part 1 - Remote Setup Video Camera • Pan/Tilt Driver: Select the tab and configure the pan/ Configure Camera, Streaming, Webcasting, MAT, and tilt driver. Specify the mounted pan/tilt driver’s model Privacy Masking options. and then set up an ID. Click Port and enter the pan/ tilt driver’s port speed, data bit, stop bit, and parity values as per the driver manufacturer’s instructions. - Page 19 However, greater clarity in low-lighting conditions. DC-B1001 / this option will not be available if the vertical DC-B1101 only resolution is less than 320. This features is particularly - On/Off: Enable/disable B&W Mode. effective when monitoring hallways, passages, and other confined spaces.
- Page 20 Part 1 - Remote Setup White Balance Exposure Configure White Balance settings. Configure Exposure settings. • AE Target Gain: Specify exposure compensation’s • Preset: Use preconfigured white balance settings. target gain. Exposure is compensated automatically - Auto: Allow the system to adjust the white based on the specified target gain.
- Page 21 • Slow Shutter: Activate Slow Shutter. The electronic Day & Night shutter’s speed will decrease to the specified level Not applicable to DC-B1001 / DC-B1101 under low-lighting conditions to allow more light in and therefore produce brighter images. Configure Day & Night settings.
-
Page 22: Streaming
Tertiary Model Resolution Resolution Resolution DC-B1001 704x480 704x480 DC-B1103 / 1280x720 1280x720 DC-B1101 DC-B1203 1920x1080 704x480 DC-B1303 2304x1296 1280x720 1280x720 • Compression: Choose the streaming compression method. • Resolution: Choose a resolution setting for video streaming. The current stream resolution cannot be higher than the higher stream resolution. - Page 23 Part 1 - Remote Setup • Quality: Choose a quality setting for video streaming. Select On and then specify the streaming area’s resolution. • Bitrate Control: Choose a bitrate control mode for H.264 compression. - CBR (Fixed Bitrate): Maintains the current bitrate regardless of motion change in the video.
-
Page 24: Webcasting
Part 1 - Remote Setup Webcasting Use the webcasting service to view live images from the Select the MAT option to use the MAT (Motion Adaptive camera on a web site. Transmission) feature during video transmission and recording. • HTML Code: Copy and paste the html code shown on •... -
Page 25: Privacy Masking
Part 1 - Remote Setup • Frame Rate: Designate the frame rate to be used Privacy Masking between the end of the Inactivity Period and the next motion detection. When the slow shutter mode is Select Privacy Masking to set up a privacy mask over enabled under Video >... -
Page 26: Audio Dc-B1103 / Dc-B1203 / Dc-B1303 Only
Part 1 - Remote Setup Audio In/Out DC-B1103 / DC-B1203 / DC-B1303 only Configure audio in/out settings. • Audio Codec: Select an audio codec. • Input: Select an option and then an audio input source (microphone or line-in). Adjust the volume. •... -
Page 27: Event Action
DC-B1103 / DC-B1203 / DC-B1303 only Designate event detection alert actions. Select Alarm Out to enable alarm out. DC-B1001 / DC-B1101 • Dwell Time: Designate the alarm out duration. When an event occurs, alarm out will be generated for the specified duration. -
Page 28: Email
Select Email to send out emails. Select Remote Callback to send callback messages to a remote system. • Not supported from the IDIS Web program. • The camera must be registered to the remote system in order to use the Remote Callback feature. -
Page 29: Audio Alarm Dc-B1103 / Dc-B1203 / Dc-B1303 Only
Part 1 - Remote Setup Audio Alarm FTP Upload DC-B1103 / DC-B1203 / DC-B1303 only Select FTP Upload to upload .jpg image of the event detected to an FTP server. Select Audio Alarm to generate audio. • FTP Server: Click Add to register a new FTP server. •... - Page 30 Part 1 - Remote Setup - Resolution/Quality: Choose the resolution and quality of the images to upload to the FTP server. Range of resolution settings you can use here can vary depe nding on the resolution setting applied under Video > Streaming. - Base File Name: Enter a name for the files to be uploaded to the FTP server and then choose file identification options.
-
Page 31: Record
Part 1 - Remote Setup Record Schedule Select the Schedule tab and set up a recording DC-B1103 / DC-B1203 / DC-B1303 only schedule. • Mode: Choose a recording mode. Select Record to record video on the SD card. First, make sure that an SD card (Class 6 or higher) has been - Always - Event: Records video in event mode. - Page 32 Part 1 - Remote Setup - Preference: Designate recording stream priority. Settings Recording using the Time-Lapse/ Select the Settings tab and configure recording Pre-Event and Event streams settings. Recording designated above. Record from the remote program using the designated recording streams.
-
Page 33: Event
DC-B1001 / DC-B1101 functional again. • Recordings saved on the SD card can be searched and played back from the IDIS Solution Suite Compact program or remotely from the remote program. For more information, refer to each program's operation manual. -
Page 34: Alarm In Dc-B1103 / Dc-B1203 / Dc-B1303 Only
• Not supported from the IDIS Web program. • The camera must be registered to the remote system in order to use the Remote Callback feature. -
Page 35: Motion Detection
• Motion Zone: Click Setup and define the motion assumed as events. zone using blocks. (Select)/ (Unselect): Enable/disable motion DC-B1001 / DC-B1101 detection. (Single Block): Select/unselect motion detection blocks individually. (Zone): Select/unselect multiple motion detection blocks. -
Page 36: Trip-Zone
• Not supported from the IDIS Web program. • The camera must be registered to the remote system in order to use the Remote Callback feature. - Page 37 Select In for movement occurring from • Not supported from the IDIS Web program. outside the trip zone in and Out for movement • The camera must be registered to the remote occurring from inside the trip zone out.
-
Page 38: Audio Detection Dc-B1103 / Dc-B1203 / Dc-B1303 Only
• Not supported from the IDIS Web program. • The camera must be registered to the remote system in order to use the Remote Callback feature. -
Page 39: Tampering
• Event Action: Select a tampering detection event alert action. DC-B1001 / DC-B1101 - Alarm Out: Select if you wish to generate an alarm DC-B1103 / DC-B1203 / DC-B1303 only out. -
Page 40: System Event
Select System Event and configure system event • Not supported from the IDIS Web program. settings. With system event enabled, system status, alarm in status, and disk status will be checked •... - Page 41 Action must be configured correctly in order to send out emails and messages. • Remote Callback is not supported on IDIS Web. • The camera must be registered to the remote system in order to use the Remote Callback feature.
-
Page 42: Part 2 - Idis Web
– Tools → Internet Options → Advanced → Security → Use TLS 1.0 (select) • If connecting by entering an IP address and a port number, you can connect by entering just the IP address if IDIS Web connection port number has been set to 80 (443 when entering https). - Page 43 • If running IDIS Web on Internet Explorer 7.0, the bottom section of the screen may get cut off if the address bar or the status bar is shown. In this case, change Internet Options so that the address bar or the status bar is hidden. (Tools →...
-
Page 44: Web Live Mode
2013-05-29 16:25:22 2013-05-29 16:25:22 Press to terminate IDIS Web. Place the mouse pointer on the logo to check IDIS Web's version. TYPE 1 Displays the current time. Click to view the video in full screen. Press the ESC key on the keyboard to return to the previous screen. - Page 45 Part 2 - IDIS Web Shows login information. Indicates the camera's number. Used to control a PTZ camera at a remote location. DC-B1103 / DC-B1203 / DC-B1303 only Used to adjust live video quality. DC-B1103 / DC-B1203 / DC-B1303 Click to control the alarm out device connected to the camera.
- Page 46 Part 2 - IDIS Web Right-click on the screen to display the pop-up menu. • Change Camera Title: Used to change the camera's name. Renaming the camera in Web Live mode does not affect the camera's name on the remote system. If no name is entered for the camera, the name used at the remote locale is shown on the screen.
-
Page 47: Web Search Mode Dc-B1103 / Dc-B1203 / Dc-B1303 Only
113.49 NC-D320-IP & Press to terminate IDIS Web. Place the mouse pointer on the logo to check IDIS Web's version. TYPE 1 Displays time information of the video recording from the remote locale. Click to view the video in full screen. Press the ESC key on the keyboard to return to the previous screen. - Page 48 Part 2 - IDIS Web Click to save the current video screen as an image file. Click to configure rendering mode and OSD settings. Select rendering mode to adjust the video output TYPE 1 rate or select which OSD elements to display on the screen from the OSD list.
- Page 49 Part 2 - IDIS Web Right-click on the screen to display the pop-up menu. • Change Camera Title: Used to change the camera's name. Renaming the camera in Web Search mode does not affect the camera's name on the remote system. If no name is entered for the camera, the name used at the remote locale is shown on the screen.
-
Page 50: Part 3 - Appendix
Part 3 - Appendix Setup Menu Tree (Remote Setup) DC-B1001 / DC-B1101 DC-B1103 / DC-B1203 Remote Setup Remote Setup Quick Setup Quick Setup System System Network Network Video Video Audio System System General General Date/Time Date/Time User/Group User/Group Network Network... -
Page 51: Index
ONVIF Protocol Admin/Watch/Recording/Search Ports Pan/Tilt Driver ID Bitrate Control Quality Camera Name Resolution Compression RTSP Port Date/Time DSCP Time Sync FEN Name FEN Server Frame Rate Use FEN Use HTTPS User/Group IDIS Web Port Use UPnP IPFiltering Network Bandwidth Limit V1.2... - Page 52 IDIS Co., Ltd. For more information, please visit at www.idisglobal.com...
Need help?
Do you have a question about the DC-B1101 and is the answer not in the manual?
Questions and answers