
Related Manuals for MIMAKI ME-300STII


Summary of Contents for MIMAKI ME-300STII
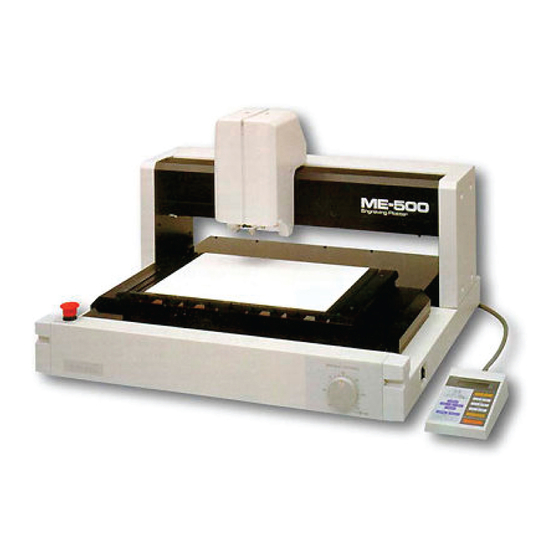
- Page 1 ME-300STII ME-500STII ME-650STII MIMAKI ENGINEERING CO., LTD. URL: http://eng.mimaki.co.jp/ D202838-11...
-
Page 2: Foreword
FOREWORD This operation manual (It is also called this manual.) describes how to operate the Engraving Plotter ME- 300STII/500STII/650STII (It is also called this machine throughout this manual.). Keep this manual on hand. For Safe Operation Read this manual carefully to avoid risks. To use this machine safely, operate this machine correctly and carefully. -
Page 3: Requests
• In no event shall MIMAKI be liable for special, incidental or consequential damages or for loss of profits of dealer or customers of any product. -
Page 4: Before Use
Before Use Do not touch the head and the X bar at work. While this machine is in operation or waiting for data, do not touch the head and the X bar. If touched, fingers will be pinched between the X bar slot and the head and cut. - Page 5 Before Use Move this machine by two or more personnel. This machine weighs 50 kg (ME-300STII), 82 kg (ME-500STII) or 95 kg (ME-650STII). This machine must be carried by two or more people. Follow the installation requirements. Install this machine in a place where meets the following requirements.
- Page 6 Do not shake this machine heavily. Do not shake this machine heavily to prevent breakdown of this precision mechanical equipment. If shaken, cutting accuracy may reduce or the electric parts may be broken. This machine must be carried by two or three people. Handling of water or oil Do not put water or oil on this machine.
-
Page 7: Position Of The Warning Labels
Position of the Warning Labels Position of the Warning Labels The warning labels are adhered on this machine to warn the danger. Be sure to read and understand this before working to avoid the danger. Do not insert fingers between the head and the side frame while the head is moving. -
Page 8: Definition Of Term
Definition of Term This section explains keywords of this manual. Tool Flatness follow-up function ON The instrument mounted on the head The work surface (Z axis reference point) (spindle) when engraving is called Tool. is automatically detected and engraved The tools used on this machine are as fol- every time of up / down of the cutter. -
Page 9: Table Of Contents
TABLE OF CONTENTS FOREWORD............................2 For Safe Operation............................2 Requests ................................3 Before Use............................4 Position of the Warning Labels....................7 Definition of Term ......................... 8 CHAPTER 1 PREPARATION Confirming Accessories ..................1-2 Part Names and Functions ................1-4 Choosing the Installation Site ................1-6 Connecting the Cables.................. - Page 10 Operation Modes....................2-8 How to change the operation mode..................2-8 Local mode ........................... 2-9 Remote mode ........................2-11 Pause mode........................2-12 CHAPTER 3 BASIC OPERATIONS Operation Flow ....................3-2 How to Set the Work ..................3-3 Clamping the work with the clamp tools ................3-4 Attaching the work with a double-sided adhesive tape ............
- Page 11 CHAPTER 4 ADVANCE OPERATION AND ADJUSTMENTS How to Clear Data ....................4-2 How to Copy......................4-3 Relation between overwriting of received data and copying..........4-4 How to Move the Head out of Engraving Area..........4-5 How to Perform Self Test ................... 4-6 How to Set the Mode Switch................
- Page 12 Machine Specification..................6-10 Interface Specification ..................6-11 Supported G-code List ..................6-12...
-
Page 13: Chapter 1 Preparation
CHAPTER 1 PREPARATION This chapter describes the preparation required to operate this machine. -
Page 14: Confirming Accessories
Confirming Accessories When unpacked, confirm accessories. If you find anything missing or damaged, contact a distributor in your district or our office. Standard accessories Part Name Part No. Q’ty Illustration Remarks Cutter Holder SPA-0021 P.1-9 Cutter holder P.6-2 Engraving Cutter SPB-0010 Engraving cutter Flatness Sensor Adjuster... - Page 15 Confirming Accessories Part Name Part No. Q’ty Illustration Remarks Power Cable E300275 Grounding adapter attached P.1-7 D o u b l e - s i d e d A d h e s i v e NO.532 For setting Tape work P.3-4 Wrench...
-
Page 16: Part Names And Functions
Part Names and Functions Indication Name Function in this manual Clamp Table Clamp table The table on which the work is P.3-3 placed Power Off switch Power switch Turns off the power to the machine. P.2-4 Power On switch Power switch Turns on the power to the machine. - Page 17 Part Names and Functions Indication Name Function in this manual Connector for the Opera- Connector for the opera- The operation panel cable is con- P.1-7 tion Panel tion panel nected to the connector. RS-232C Interface Con- Interface connector The interface cable is connected to nector the connector.
-
Page 18: Choosing The Installation Site
1000mm or more A guide for the installation space and the maintenance space (unit: mm) Maintenance Dimensions Installation Space Space Width Depth Height Weight Width Depth ME-300STII 50kg or less 1140 1930 2540 2630 ME-500STII 82kg or less 1385 2050 2785 2750... -
Page 19: Connecting The Cables
Connecting the Cables Connecting the Cables Do not connect cables with the power on. Do not connect cables while the power of this machine or the host is on. It may cause an electric shock, breakdown or abnormal action of this machine. Turn off this machine while connecting cables. -
Page 20: Accessories
Accessories Select the accessories according to the type of work or engraving. For information on how to attach them, see the reference page of each tool. Name Application Illustration Cutter It is used for engraving. P.1-9 Chip Removal Attach- It vacuums dust during engraving. P.1-11 ment It is used when the cutter is used. -
Page 21: Mounting Tools
Mounting Tools Mounting Tools Turn the power of this machine off when mounting tools. If the spindle rotates during mounting the tools, it could cause injury including fracture of fingers or hands, avulsion of nails, or burn. Before mounting the tools, turn the power of this machine off. Attention to the cutting edge of cutting blade Caution to the cutting edge of the cutter during tool exchange. - Page 22 Tighten it with a spanner. Fit a 17 mm spanner to the spindle, and a 12 mm spanner to the cutter. 17mm Holding the spanner on the spindle, turn the spanner on the cutter to the direction of the arrow and tighten it. 12mm 1-10...
-
Page 23: How To Mount The Chip Removal Attachment
Mounting Tools Turn the power of this machine off when mounting tools. If the spindle rotates during mounting the tools, it could cause injury including fracture of fingers or hands, avulsion of nails, or burn. Before mounting the tools, turn the power of this machine off. Mount the tools firmly. -
Page 24: How To Mount The Vacuum Hose
How to mount the vacuum hose Attach the tip of one side of the vacuum hose to the chip removal attachment, and the other side to the vacuum cleaner. Fix it on the head with a hose clip. Use a vacuum cleaner that meets the following conditions. 1. -
Page 25: Chapter 2 Preparatory Operations
CHAPTER 2 PREPARATORY OPERATIONS This chapter describes the most basic operations before starting working with the machine. -
Page 26: Operation Panel
Operation Panel The names and functions of the operation panel components are as follows. - Page 27 Operation Panel Indication Name Function in this manual Power Indicator Lamp POWER lamp Lights up when the power is turned on. LCD Display Gives information required for operation to the operator. (16 columns x 4 lines) REMOTE/LOCAL Key Changes the operation mode between the remote and the local or stops the operation temporarily.
-
Page 28: How To Turn On /Off The Power
How to Turn On /Off the Power Check around this machine before turning the power on. Before turning on the power, check there is no people around this machine (within one meter or less), or there is no object on the table or the X bar. If the power is turned on, the head and the table moves. -
Page 29: How To Stop The Machine In An Emergency
How to Turn On /Off the Power The indication shown on the right appears S y s t e m V e r 1 . 0 0 on the LCD. The numerals may be different. P l e a s e W a i t Initialize after displaying. - Page 30 To release the machine from the emergency stop, turn the switch in the direction of the arrow. To restart work, turn on the power to the machine. This machine cannot be turned on during an emergency stop. To turn the power on, release the emergency stop.
-
Page 31: How To Turn On/Off The Spindle
How to Turn On/Off the Spindle How to Turn On/Off the Spindle Keep your hands or head away from the head while the spindle is rotating. While the spindle is rotating, keep your hands or head away from the head. It could catch hair or a sleeve, or the rotating blade could injure hands. -
Page 32: Operation Modes
Operation Modes How to change the operation mode This machine is operated under the major three different operation modes. Power on Initial action Local Mode Various conditions can be set in this mode before engraving. Every time the power is turned on, the machine will enter this mode. All the keys on the operation panel are operative. -
Page 33: Local Mode
Operation Modes Local mode When the power is turned on, the machine will perform the initial action, then will go to the local mode. Engraving and cutting conditions can be set in this mode. All the keys on the operation panel are oper- ative. - Page 34 Operation Item Description Cut Area Specifies an effective cut area in accordance with the work. P.3-7 Condition Sets the cutting speed and moving speed. P.3-14 Test Cut Engraves as a trial to check whether the cutting conditions are P.3-16 appropriate. Data Clear Clears the operation being executed (engraving).
-
Page 35: Remote Mode
Operation Modes Remote mode The machine waits for data from the host or engraves works in this mode. Press in the local mode to change to the remote mode. [ R e m o t e ] 1 K B S p i n . -
Page 36: Pause Mode
Pause mode Press key while the machine is engraving to enter the pause mode. *1*2*3*4*5 (If the cutter is moving, the machine stops immediately.) [ P a u s e ] E N D K e y C O N T . K e y R e s e t Press... -
Page 37: Chapter 3 Basic Operations
CHAPTER 3 BASIC OPERATIONS This chapter describes the basic operations required to perform engraving. -
Page 38: Operation Flow
Operation Flow The basic engraving procedure is as follows. This chapter describes the operations after the tool is set and the power is turned on. For information on how to attach tools or how to turn the power on, see the previous chapter. 1. -
Page 39: How To Set The Work
How to Set the Work How to Set the Work Stop rotation of the spindle when setting a work and change to the local mode. If this machine receives data in the remote mode, the spindle rotates and the head starts to move. -
Page 40: Clamping The Work With The Clamp Tools
Clamping the work with the clamp tools Set the work along the reference scale, clamp with a clamp tool, and fix it firmly. Attaching the work with a double-sided adhesive tape This is effective for setting an unformed or a large work. Attach a double-sided adhesive tape to the back of the work, and put it on the clamp table. - Page 41 How to Set the Work For a work larger than the table, remove the reference scale and attach with a double-sided adhesive tape.
-
Page 42: How To Set X / Y Axis Origin
E R R O R 9 0 1 O P E R A T I O N How to clear To clear the set origin to return to the lower-left corner press *1. When MIMAKI logo is engraved at the self test. ( P.4-6) -
Page 43: How To Set Cutting Area
Set an effective cutting area in accordance with the size of the work to be engraved on. UR (upper-right point) * Maximum size of the effective cutting area * Model Max. size (mm) Effective cutting ME-300STII 310(X) x 220 (Y) ME-500STII 483 (X) x 305 (Y) Work ME-650STII... -
Page 44: How To Set Z Axis Reference Point
How to Set Z Axis Reference Point The Z axis reference point is a basis of cutting depth and lifting amount of the cutter. Be sure to set this when the power is turned on or works or tools are replaced. Z axis reference •... -
Page 45: When The Auto Flat Detection Switch Is Off (Automatic Setting)
How to Set Z Axis Reference Point When the auto flat detection switch is OFF (automatic setting) Detect the work to be engraved to set Z axis reference point automatically. Before operating below, set the chip removal attachment and move the head onto the work. Press ) to display [ L C L ] S p i n - O F F 4 / 4... -
Page 46: How To Set Flatness Correction Amount
How to Set Flatness Correction Amount Flatness Correction Amount The flatness correction amount is the distance between the tip of the cutter and the top of the chip removal attachment (“h” in the figure on the right). The flatness correction amount needs to be set when the auto flat detection switch is at “ON”... -
Page 47: How To Set
How to Set Flatness Correction Amount Stop rotation of the spindle when setting and change to the local mode. Before setting the flatness correction amount, stop rotation of the spindle and change to the local mode. If setting while the spindle is rotating, the cutter may pass through the sensor adjuster and cut hands. -
Page 48: How To Set Cutting Depth / Lifting Amount In Z Axis
How to Set Cutting Depth / Lifting Amount in Z Axis Specify cutting depth and lifting amount of the cutter in terms of Z axis. A = Cutting depth B = Lifting amount Z axis reference point Lifting amount Cutting depth Work Set Value With the chip... -
Page 49: Lifting Amount
How to Set Cutting Depth / Lifting Amount in Z Axis Lifting amount When engraving multiple works with different thickness at the same time, be careful of the followings to set the lifting amount. 1. When the chip removal attachment is mounted when the flat detection is ON or AUTO: Set the lifting amount larger than the difference in thickness between the thickest and thinnest works. -
Page 50: How To Set Cutting Conditions
How to Set Cutting Conditions Set Item Description Setting Range XY-ES Sets cutting speed in X/Y axis. 0.5, 1, 2, 3, 5, 8, 10, 15, 20, 30, 40, 50, 60 mm/s (Cutting speed in XY axis) Z-ES Sets cutting speed in Z axis. 0.5, 1, 2, 3, 5, 8,10, 15, 20, 30 mm/s (Cutting speed in Z axis) -
Page 51: Error Messages Related To The Cutting Conditions
How to Set Cutting Conditions Error messages related to the cutting conditions The followings are error messages and the causes that will be displayed when setting cutting condi- tions and changing to the remote mode. To solve them, see each reference page. When the flat detection switch is ON or AUTO Error Message Cause... -
Page 52: How To Test-Cut
How to Test-Cut Test whether the cutting conditions (cutting speed, moving speed), cutting depth and lifting amount of the cutter are proper to the work. Starting Point Press to move the cutter to the start position for test-cutting. Press ) and return the local mode. -
Page 53: How To Send Data From The Host
How to Send Data from the Host How to Send Data from the Host Check around this machine before sending data. Before sending data, check there is no people around this machine (within one meter or less). This machine starts to work immediately after receiving data. The head or the table moved sud- denly could contact and injure human body around this machine. -
Page 54: Daily Care
Daily Care Do not clean this machine when the power is on. Do not clean this machine while the power of this machine is on. If the head or the table moves during cleaning, fingers could be pinched and cut between the head cover and the side frame, or you could suffer abrasions or cut on the moving table. -
Page 55: Chapter 4 Advance Operation And Adjustments
CHAPTER 4 ADVANCE OPERATION AND ADJUSTMENTS This chapter describes advanced operations and adjustments of the machine. -
Page 56: How To Clear Data
How to Clear Data Data stored in the receive buffer is cleared in the following procedures. Press ) to display [ L C L ] S p i n - O F F 1 / 4 the first page of the local mode. C o n d i t i o n - - >... -
Page 57: How To Copy
How to Copy How to Copy Data stored in the receive buffer is used to engrave (copying) again in the following procedures. Press ) to display [ L C L ] S p i n . O F F 2 / 4 the second page of the local mode. -
Page 58: Relation Between Overwriting Of Received Data And Copying
Relation between overwriting of received data and copying When the machine receives a new data from the host more than 10 seconds after finishing engraving the last data, the data in the receive buffer of this machine is erased and replaced with a new one. If copying after engraving the new data, only the new data is copied. -
Page 59: How To Move The Head Out Of Engraving Area
How to Move the Head out of Engraving Area How to Move the Head out of Engraving Area The head is moved to the back left of the clamp table in the following procedures. If the cutter is lowered, the head will move after lifting the cutter. Press ) to display [ L C L ] S p i n - O F F 2 / 4... -
Page 60: How To Perform Self Test
LCD. k e y c a n c e l The selected size of the Mimaki logo is displayed at the right edge of the displayed first line. Press to start the test. -
Page 61: How To Set The Mode Switch
How to Set the Mode Switch How to Set the Mode Switch There are the following set items in the mode switch. Change the set value as needed. Set Item Description Set Value AUTO VIEW Sets the time between completion of engraving and *OFF the head moving out of the engraving area. - Page 62 Press ) to display [ L C L ] S p i n - O F F 3 / 4 the third page of the local mode. M o d e S w i t c h - - > S e l f T e s t - - >...
-
Page 63: How To Set Communication Conditions
How to Set Communication Conditions How to Set Communication Conditions Specify the communication conditions for RS-232C interface. Item Indications on LCD Description Baud Rate 1200 1200 bps 2400 2400 bps 4800 4800 bps 9600* 9600 bps 19200 19200 bps Data Bits 7 bits 8 bits Parity... -
Page 64: Setting G-Code Items
Setting G-code Items When a data format (command) sent from the host is set to a G-code, you must set the items below. Switch setting values as needed. This function is compatible with firmware version 1.40 or later. Set Item Description Set Value Character Code System... - Page 65 Setting G-code Items Press ) to display < G - c o d e > 2 / 2 the screen shown on the right. P R O G . S t a r t * O F F > Use function keys from 1 to 2 to select a value for the W o r k C o o r d 1 >...
-
Page 66: Registering An Origin For The G-Code Work Coordinates System
Registering an Origin for the G-code Work Coordinates System If a command is set to a G-code, you can register, in six locations, the X, Y, and Z axes of a work coor- dinates origin serving as the reference point for the cutting position for each work. The registration procedure is shown as below. -
Page 67: To Clear The Registered Origin
Registering an Origin for the G-code Work Coordinates System When you are done moving the X and Y < W o r k . 1 > S p i n . O F F axes to the target positions, press X a x i s 0 . - Page 68 4-14...
-
Page 69: Chapter 5 Errors And Solutions
CHAPTER 5 ERRORS AND SOLUTIONS... -
Page 70: Error Messages And Solutions
If the same error message still appears, contact your distributor An overcurrent error in the motor in ERROR 403 or a sales office of MIMAKI. X CURRENT the head driving motor. An overcurrent error in the motor in ERROR 404 the table driving motor. - Page 71 ERROR 510 If the same error message still X ORIGIN appears, contact your distributor The plotter has failed to detect the ERROR 50A or a sales office of MIMAKI. Y ORIGIN origin sensor. ERROR 511 Z ORIGIN ERR C80 ZM COMM.
-
Page 72: Other Error Messages
Other Error Messages Cause Cutting data exceeds the effective cutting area. [ R E M O T E ] 0 K B Solution Enlarge the effective cutting area. P.3-7) * * * O f f s c a l e * * * REMOTE Cause1... - Page 73 Other Error Messages Cause Cutting depth is set to 4 mm or more with the chip removal attachment mounted when the flat detection switch is OFF. W a r n i n g . 6 R e m o v e c h i p r e - Solution...
-
Page 74: Troubleshooting
Troubleshooting If the following troubles have occurred, check each check point. Power is not turned on. Trou- The power lamp on the operation panel does not light if the power switch is on. Check Point Solution Connect it to the machine and to the receptacle 1. -
Page 75: The Machine Does Not Engrave Finely
Troubleshooting The machine does not engrave finely. Trou- Engraved line width is unequal. Check Point Solution Fix the work firmly on the clamp table. 1. Is the work fixed on the clamp table firmly? P.3-3 Mount the chip removal attachment firmly. 2. -
Page 77: Chapter 6 Appendix
CHAPTER 6 APPENDIX... -
Page 78: How To Install The Cutter
How to Install the Cutter Handle the cutter blade with care. The tip of the cutter blade is so sharp that could cut fingers. If the cutter blade is dropped down, the tip of the blade will be chipped and worsen the engraving quality. -
Page 79: How To Replace The Motor Brush
How to Replace the Motor Brush How to Replace the Motor Brush Unplug the power cable before replacing the motor brush. If the cover of the motor brush is removed with the power on, the moving head could cause injury including cut of fingers or hands, or avulsion of nails. If the spindle rotates during replacing the motor brush, it could cause burn. - Page 80 Remove the CN7 connector from the PCB. Open the lid, remove the old motor brush. “+” side “-” side • Using a flat-blade screwdriver, open the cover. Install a new motor brush. • Please install in the reverse order of removing. •...
- Page 81 How to Replace the Motor Brush Secure the cable. • Secure the lead wire (red / blue) with the new cable tie to the motor. • Fix to the bracket with a cable clamp. When wiring is complete, make sure that the cables are not pulled at the top or the bot- tom of Z axis.
-
Page 82: Cutting Condition Table
Cutting Condition Table Depending on the type of engraving or the material to be engraved, you must change such settings as the cutting conditions, the spindle rotating speed, and the tool. Configure the settings using values in the table below as reference. The table is based on the engraving cutters that come with the product as supplied items. -
Page 83: Modeling
Cutting Condition Table Modeling Cutting Rotating Feed Material Tool depth speed speed Remarks (mm) (rpm) (mm/s) Ball endmill 10000 XY:20 Z:10 1)If the spindle rotating speed is too (f2) high, chippings may remain and make the appearance bad. 2)In general, the quality of the cut sur- face differs depending on whether to cut downward or upward. -
Page 84: Supplied Items
Supplied items Use the supplied items or optional items below. For supplied items or optional items, contact the shop where you purchased our product or our sales office. Supplied items and optional items Unit of Part No. Part Name pack- Remarks / Specifications STII STII... -
Page 85: Starter Kit
Supplied items Unit of Part No. Part Name pack- Remarks / Specifications STII STII STII OPT-C0078 Vacuum Pump Controller 1 set ○ ○ ○ Synchronized with For connection to a vacuum cleaner (on/off control) OPT-C0081 Relay BOX (200V electric- 1 set ○... - Page 86 Machine Specification Item ME-300STII ME-500STII ME-650STII X / Y Engraving Range 310 x 220 mm 483 × 305 mm 650 × 440 mm axis (12.4 x 8.8”) (19.0 x 12.0”) (25.6 x 17.3”) Speed When engraving 0.5, 1, 2, 3, 5, 8, 10, 15, 20, 30, 40, 50, 60 mm/s (0.02 - 2.4”/sec) When moving 20, 40, 60, 80 mm/s (0.8 - 3.1”/sec)
- Page 87 Interface Specification Interface Specification 1. Specifications (CCITT V24, EIA RS-232C, JIS X5101) Transfer method :Asynchronous Transfer speed : 1200, 2400, 4800, 9600, 19200,38400 bit/sec Stop bit :1, 2 bit Parity check :Even parity, odd parity, or not parity Data length : 7or 8 bit 2.
- Page 88 Supported G-code List The following table is a list of G-codes supported by this machine. G-code is compatible with firmware version 1.40 or later. G code Function Positioning Linear interpolation Circular arc interpolation CW Circular arc interpolation CCW Dwell Work coordinates system offset XY plane specification Work coordinates system 1 selection Work coordinates system 2 selection...
- Page 90 D202838-11-28102015 Printed in Japan FW: 1.40 © 2015 MIMAKI ENGINEERING CO., LTD. All rights reserved.
Need help?
Do you have a question about the ME-300STII and is the answer not in the manual?
Questions and answers