Table of Contents
Advertisement
Quick Links
Advertisement
Table of Contents

Related Manuals for SORG kika


Summary of Contents for SORG kika
- Page 3 Rehabilitation of Children and Adolescents Imprint: Technical collaborator: Klaus Pfeil As of 3/7/2013 Technical alterations and misprints excepted. © by SORG Rollstuhltechnik GmbH + Co.KG SORG Rollstuhltechnik GmbH + Co.KG Benzstraße 3-5, 68794 Oberhausen-Rhein- Benzstraße 3-5 hausen, Germany. All texts and pictures are...
-
Page 4: Table Of Contents
User manual Kika Page 4 of 60 Contents 4.2.1 Single-hand push handle, firm or 1. General Information ......5 hinged (optional)........33 4.2.2 Push bar (optional) ....33 1.1 Preamble ..........5 4.3 Tilt function, back angle adjustment 1.2 Reception..........6 ... -
Page 5: General Information
1.1 Preamble in detail in the respective chapter at the end of this manual. Kika will be your child’s reliable companion in their everyday life. For this purpose, your child In case of a reuse of the wheelchair, this has to familiarise with the wheelchair because,... -
Page 6: Reception
User manual Kika Page 6 of 60 1.2 Reception Each SORG wheelchair is mounted and tested for functional efficiency and freedom from defects by our specialists and is then packaged in special paperboard containers by our shipping experts. PLEASE NOTE... -
Page 7: Wheelchair Overview
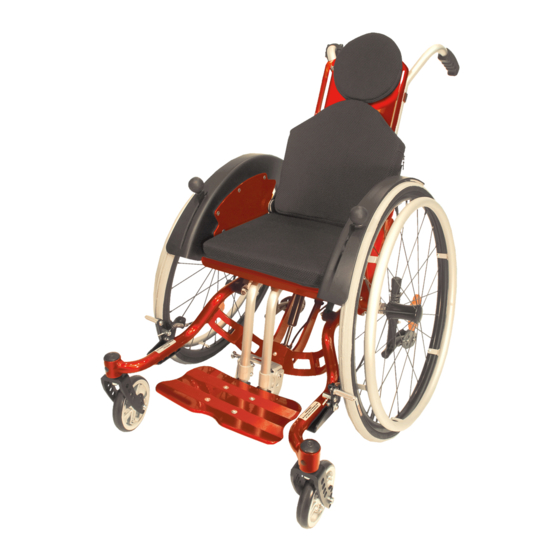
User manual Kika Page 7 von 60 1.3 Wheelchair overview The most important components of the wheelchair: 1. Frame 2. Seat plate 3. Seat cushion 4. Locking brake – operating element 5. Wheel guards 6. Side part 7. Back cushion 8. -
Page 8: Specifications
• Frame size 2 (22’’ and 24’’ wheel) ergonomically ideal grip point, Kika may also be used as an activity wheelchair. Hence Kika Kika is not suitable for use in the following is the perfect combination of an activity cases: wheelchair AND a buggy. -
Page 9: Safety Instructions
Kika into service. It is of utmost importance that both the user and their assistant are able to both understand and ATTENTION realise all instructions. -
Page 10: Before Every Use
User manual Kika Page 10 of 60 ATTENTION 2.2 Before every use Avoid putting your wheelchair into bank positions on uneven or sloping ground to Please check the braking effect of the locking prevent it from tipping sidewards! Always brake (and the drum brake, depending on the drive in right angle from the hillside/the design) before every use. -
Page 11: Coping With Obstacles
User manual Kika Page 11 von 60 2.4 Coping with obstacles ATTENTION Active driving is only permitted with an To surmount level upright back (90°) and WITHOUT seat-tilt. differences, ramps or lifts should be used Adjusting the casters incorrectly (cf. chapter whenever possible. -
Page 12: Heat And Water
User manual Kika Page 12 of 60 2.5 Heat and water 2.6 Driving in road traffic Handrims heat up through strong friction, Keep in mind that as a driver/passenger in especially by braking during fast driving or your wheelchair you are a “participant in along downgrade paths. -
Page 13: Adjustments
The following indications on the adjustments of all movable parts (e.g. pelottes, abduction Kika affect its usage safety! Therefore, we are wedge, etc.) and fixed parts in order to pointing out explicitly that all adjustments,... -
Page 14: Leg Support Adjustment
User manual Kika Page 14 of 60 3.1 Leg support adjustment 3.1.1 Undivided leg-support The leg support is ideally adjusted if the complete thigh rests (with a two finger distance between seat and hollow of knee) evenly on the seat cushion/shells while the leg is standing on the foot rest in a right angle. - Page 15 User manual Kika Page 15 von 60 Locking device (optional) Adjustment of the angle • pull out the spring bolts (A) on both sides, then turn the spring bolt by ATTENTION 90° By changing the distance between the footrest • hinge footrest backwards and the carrier pipes (pos.
-
Page 16: Hinged Leg Support (Opt.)
User manual Kika Page 16 of 60 3.1.2. Hinged leg support (opt.) The hinged leg support is divided: Both sides can be altered in their angles up to a horizontal position (180°), independently from one another. This way the legs can be elevated in the tilted seat position to improve blood circulation. -
Page 17: Leg Support With Support Pad (Optional)
User manual Kika Page 17 von 60 3.1.3. Leg support with support pad (optional) If you choose a leg support with support pad, the opposite side is supplemented with a divided swing-up leg support. The side with the pad does not have a foot rest! Adjustment of the support pad •... -
Page 18: Seat Heights
(Differing adjustments may also make sense in individual cases.) In the case of Kika, the entire seat unit may be altered via the gas pressure spring (there is no other option for this purpose). Therefore the best way to obtain the desired seat inclination is by using the tilting mechanism. -
Page 19: Centre Of Gravity
User manual Kika Page 19 von 60 3.3 Centre of gravity You may change the centre of gravity of the wheelchair (X) by moving the seat plate (pos. 2) in relation to the seat carrier part. When leaving our factory, the wheelchair is preadjusted into a tipping stable position. -
Page 20: Back Height
User manual Kika Page 20 of 60 3.4 Back height In order to provide as much moving space as possible for the arms when driving the wheelchair, the active driver’s back height should generally reach to the bottom line of the scapulae. -
Page 21: Retractable Back Extension With Head Pad (Optional)
User manual Kika Page 21 von 60 3.5 Retractable back • tighten star knobs (pos. 1) firmly extension with head pad • attach the head rest onto the other side with the aid of the Velcro strips (optional) provided We strongly recommend this back extension in order to make sure your child is able to decide when they want to drive actively or rest. -
Page 22: Back Angle
The lever for the locking brake is integrated the side guards so no further adjustments into the clothing guard. need to be done. 3.10 Adjustment of caster and rear wheel Because of its firm wheel base, Kika is free of adjustments concerning the caster–rear wheel–constellation. -
Page 23: Locking Brake
User manual Kika Page 23 von 60 ATTENTION 3.11 Locking brake On a ramp with 6% incline, the rear wheels of the wheelchair with passenger must not Each wheelchair is equipped with two locking slip with the locking brake tightened. -
Page 24: Drum Brake (Optional)
User manual Kika Page 24 of 60 To lock firmly, the latch lever (C) has to snap Adjustment of braking distance/brake lever into the brake lever (B). To unlock, please pull the brake lever further which will release height To adjust the length of the braking distance on the latch lever automatically. -
Page 25: Attendant Brake (Optional)
User manual Kika Page 25 von 60 3.11.3 Attendant brake ATTENTION (optional) Please mind that signs of wear may occur on the brake bolt. So please check the functional efficiency of your brake before The cable brake operated by the attendant... -
Page 26: Anti-Tippers
User manual Kika Page 26 of 60 3.12 Anti-tippers The anti-tippers prevent your wheelchair tipping backwards unintentionally. Correct adjustments are hence very important for the function of the anti-tipper. The correct distance to the ground is 2-5 cm. ATTENTION Please also read the respective chapters 2 of the SAFETY INSTRUCTIONS. -
Page 27: Head Rest (Optional)
• loosen the three screws (B) to adjust the head rest in angle 3.14 Lateral truss pads (optional) If your Kika is equipped with lateral truss pads, you may adjust them in vertical and horizontal position via the different bolts in the moulded back. -
Page 28: Growth Adaption (Optional)
3.16 Growth adaption (optional) • remove rear wheels • remove string which alters the back Kika’s back height is growth-adaptable by up to angle 2.5 cm (1 in) (cf. chapter 3.4) without any • remove screw joint of the moulded additional parts. - Page 29 User manual Kika Page 29 von 60 (image 1) img. 1 • screw moulded back into the inner bolt • for chairs with drum brakes: mount (pos. 2) of the screen angle (image 2) delivered distance (pos. 1) between axle •...
-
Page 30: General Handling
The following indications on the operation of object with your outstretched hand and Kika in everyday life are directed to you as a concentrating on the point where the user of the wheelchair and are supposed to wheelchair starts tipping. -
Page 31: Push Handles
PLEASE NOTE 4.2 Push handles To adjust the height or remove, please proceed in the same way for all variants. We offer three options to push Kika: • Extendable push handles • Single-hand push handle • Push bar (2 variations) -
Page 32: Removing The Push Bars
User manual Kika Page 32 of 60 Removing the push bars At the lower end of the aluminium pipe is a stand spring which prevents the push handle from slipping off the clamp while adjusting its height. Please open the fixation clamp (A). Push the... -
Page 33: Single-Hand Push Handle, Firm Or Hinged (Optional)
PLEASE NOTE Keep in mind that the push bar may influence Kika’s proneness to tipping. ATTENTION Hinging the push handle Do not attach any bags or the like on the • loosen the star knob (pos. 1) push bar, as the wheelchair might tip •... -
Page 34: Tilt Function, Back Angle Adjustment And -Extension
ATTENTION Do not ever operate Kika’s tilt while driving! To do that, please halt your wheelchair, activate the anti-tipper and prevent the chair from rolling away via the locking brake. To keep the... -
Page 35: Back Angle Adjustment
To fold the back to the front, please proceed in the same way and make the bolt snap into the last position. The stabilising bar (pos. 2) may then even serve as a handle to lift your Kika (into a car etc.). -
Page 36: Retractable Back Extension (Opt.)
User manual Kika Page 36 of 60 4.3.4 Retractable back extension (optional) In order to be able to support your child’s head while tilting or adjusting the back angle, we offer a retractable back extension which saves approx. 1 kg of weight compared to conventional head rests. -
Page 37: Anti-Tipper
User manual Kika Page 37 von 60 4.5 Wheels with quick- 4.4 Anti-tipper release-axles The anti-tippers are stored in a rotatable The quick-release-axles provide that all of position within the frame adapter (A). To our rear wheels are easily demountable and activate, push down the anti-tipper on the attachable without using any tools. -
Page 38: Leg Supports
4.6.1 Standard leg support legs at different heights, independently from each other. Kika’s standard leg support can be adjusted in Adjustment of the foot rests (abduction) • loosen both screws (pos. 2) on both its angle and lower leg length. These... -
Page 39: Leg Support With Support Pad (Optional)
User manual Kika Page 39 von 60 4.6.3 Leg support with support pad (optional) Adjustment of support pad • loosen clamping lever (pos. 1) on the bottom of the pad • choose desired position on the row of holes (A) •... -
Page 40: Locking Brake
User manual Kika Page 40 of 60 4.7.3 Drum brakes (optional) 4.7 Locking brake The drum brake can – contrary to the locking brake – be used to decelerate while diving. Our drum brakes additionally 4.7.1 Locking brake, standard possess a mechanism for locking with which... -
Page 41: Loading And Transportation
User manual Kika Page 41 von 60 4.9 Safety of transportation 4.8 Loading and After storing Kika in the transportation transportation vehicle, please proceed the following way: • If you do not remove the rear wheels, ATTENTION please activate the locking brake! The wheelchair is not to be transported without •... -
Page 42: Transportation Of The Wheelchair As Seat In A Passenger Vehicle
According to the regulations of ISO 7176-19, ones liable for that. Kika is certified to resist the forces of a respective crash test and hence is - in Sorg Rollstuhltechnik GmbH + Co.KG holds... -
Page 43: Maintenance
User manual Kika Page 43 von 60 In case of doubt, please consult the medical 5 Maintenance supply store which built your seat shell for advice on cleaning the cover. 5.1 Cleaning and attendance FRAME The frame and the wheels should regularly... -
Page 44: Inspection
User manual Kika Page 44 of 60 MAINTENANCE The following maintenance manual presents 5.3 Inspection (considering possible reuse) a mandatory guideline for the conduction of maintenance For reasons of safety and to prevent accidents resulting from abrasion not recognised on time, work. -
Page 45: Checklist And Maintenance
User manual Kika Page 45 von 60 5.4 Checklist and maintenance WHEN? WHAT? COMMENTS Before each Check wheels/quick-release-axles Conduct yourself or with the help for firm fit of an experienced assistant. You must not be able to pull the wheel out of the quick-release- axle. - Page 46 User manual Kika Page 46 of 60 WHEN? WHAT? COMMENTS Every 4 weeks Retighten all screw joints Conduct yourself or with the help With daily usage leading to of an experienced assistant. permanent vibration, the screws may loosen. This is why we recommend to retighten ALL screw joints systematically.
-
Page 47: Checklist Yearly Inspection
User manual Kika Page 47 von 60 5.5 Checklist yearly inspection Regular, yearly inspection conducted by a qualified medical supply store is an essential compo- nent of the wheelchair’s product liability/safety and long service life. Moreover, the inspections serve as verification of the service ability for the benefactor in case of reusage. -
Page 48: Reparations
User manual Kika Page 48 of 60 For each altering or modification of the wheelchair by your medical supply store, the 5.6 Reparations respective information, like e.g. mounting and/or application indications with the date Please do never conduct reparation and/or... - Page 49 User manual Kika Page 49 von 60 with setting foam (available at the specialised trade). Demounting: In case of a flat tyre, demount the tyre carefully from the rim with suitable mounting tools. Make sure not to damage the rim or the tube in the process.
-
Page 50: Technical Data
User manual Kika Page 50 of 60 6 Technical data 6.1 Measures and dimensions Dimension tolerance ±5° Abbreviations: SW = Seat width SD = Seat depth BH = Back Height LLL = Lower leg length Data: Model: Kika German Aid Index No°: 18.99.02.1009... -
Page 51: Meaning Of Labels
User manual Kika Page 51 von 60 6.2 Meaning of labels The elements of the type plate on the axis of Kika have the following meanings: Manufacturer logo Address of manufacturer Model name Type-number German Aid Index No° Serial number Combined of: Type-N°. -
Page 52: Warranty
2 years (special mountings excluded). Service life Products in reuse are subject to increased strain. Therefore, we recommend, when reusing Kika, not to extent a further service life of 3 years in line with the durability. - Page 53 2. If production and/or material defects occur 2 years after first use, SORG may replace the en- tire wheelchair, or it may replace or repair faulty parts of the frame and/or diagonal braces.
- Page 54 IX. Delivery damages • if SORG assesses that the instructions of Deliveries must be checked for possible maintenance and usage have not been damage immediately on reception and in followed the presence of bearer (!);...
- Page 55 User manual Kika Page 55 von 60 Room for notes e.g. for constructional changes etc.
-
Page 56: Warranty Form
User manual Kika Page 56 of 60 8 Warranty Form Please fill in and, if necessary, make a copy and send in. Warranty date of delivery Model SW/SD/BH Serial number Retailer information Assembly worker: This product conforms to the EC guidelines 93/42/EEC for medical aids. -
Page 57: Life Cycle Record
User manual Kika Page 57 von 60 9 Life cycle record 9.1 User chronology Name of user/legal agent Date of birth Street Postal code/Town Benefactor/Health insurance company Name of user/legal agent Date of birth Street Postal code/Town Benefactor/Health Insurance Company... -
Page 58: Service Book
User manual Kika Page 58 of 60 9.2 Service book Maintenance due every 6 months Maintenance Check and readjust all screw joints including spokes; check and, where needed, at issue: readjust locking brakes/drum brakes; check and readjust all frame parts and... -
Page 59: Yearly Inspection
User manual Kika Page 59 von 60 9.3 Yearly inspection and before every reuse! Yearly According to checklist on p. 46 maintenance: Date, Stamp Medical supply store, Signature Date, Stamp Medical supply store, Signature Date, Stamp Medical supply store, Signature... -
Page 60: Retailer Information
User manual Kika Page 60 of 60 Retailer information Your specialised trade Company stamp Technical alterations and misprints excluded...
Need help?
Do you have a question about the kika and is the answer not in the manual?
Questions and answers