Table of Contents
Advertisement
Advertisement
Table of Contents

Subscribe to Our Youtube Channel
Related Manuals for Sony STR-DH770


Summary of Contents for Sony STR-DH770
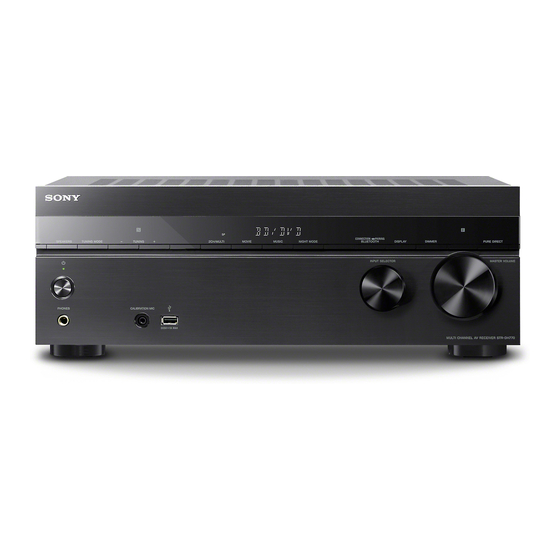
- Page 1 Multi Channel AV Receiver Operating Instructions STR-DH770...
- Page 2 Record these numbers in POUR LES CONSOMMATEURS AUX the spaces provided below. Refer to them ÉTATS-UNIS. NON APPLICABLE AU whenever you call upon your Sony dealer CANADA, Y COMPRIS LA PROVINCE DE regarding this product. QUÉBEC.
- Page 3 12) Use only with the cart, stand, tripod, bracket, To reduce the risk of electric shock, the speaker or table specified by the manufacturer, or cable should be connected to the apparatus and sold with the apparatus. When a cart is used, the speakers in accordance with the following use caution when moving the cart/apparatus instructions.
- Page 4 Electronic Equipment directives (Applicable in the European This product has been manufactured by or on Union and other European behalf of Sony Corporation, 1-7-1 Konan countries with separate Minato-ku Tokyo, 108-0075 Japan. Inquiries collection systems) related to product compliance based on...
-
Page 5: Manuals Provided For This Product
Advanced operations BLUETOOTH function Other features Adjusting Settings Troubleshooting Precautions / Specifications To read the Help Guide, go to the following website: For the customers in Europe http://rd1.sony.net/help/ha/strdh77/h_eu/ For the customers in Taiwan http://rd1.sony.net/help/ha/strdh77/zh-tw/ For the customers in other areas http://rd1.sony.net/help/ha/strdh77/h_zz/... -
Page 6: About These Operating Instructions
Manufactured under license from DTS registered trademarks owned by Bluetooth SIG, Licensing Limited. DTS, DTS-HD, the Symbol, Inc. and any use of such marks by Sony & DTS and the Symbol together are registered Corporation is under license. Other trademarks... - Page 7 End User License Information REAL END USER LICENSE AGREEMENT (Taiwanese models only) 1. End users are prohibited from modifying, translating, reverse engineering, decompiling, disassembling or using other means to discover the software developed by Real or otherwise replicate the functionality of the software, except to the extent that this restriction is expressly prohibited by applicable law.
-
Page 8: Table Of Contents
Table of Contents Supplied Accessories Manuals provided for this product ....5 Remote control (1) About These Operating Instructions ... 6 R03 (size AAA) batteries (2) Supplied Accessories ........8 FM wire antenna (aerial) (1) Parts and Controls ........9 Preparation ... -
Page 9: Parts And Controls
Parts and Controls Receiver Front panel (power) (page 27) CALIBRATION MIC jack (page 30) Power indicator PHONES jack SPEAKERS (page 29) Connect headphones here. TUNING MODE, TUNING +/– Power indicator Operates a tuner function. Press TUNING +/–... -
Page 10: Indicators On The Display Panel
Indicators on the display panel The indicator lights up to indicate the current status. USB D.C.A.C. USB device is detected. The measurement results of the Auto Input indicator Calibration function are applied. SLEEP Indicates the current input. Sleep timer is activated. -
Page 11: Rear Panel
Rear panel HDMI IN/OUT jacks* (page 22, 23, 25) SPEAKERS terminals (page 16, 17, 18, 19, SUBWOOFER OUT jacks (page 16, 17, 18, 19, 20) AUDIO IN jacks (page 22, 24, 26) VIDEO IN/MONITOR OUT jacks (page 24, ... -
Page 12: Input Buttons
Input buttons Remote control Selects the input channel connected to the device you want to use. When you press any of the input buttons, the receiver turns on. FRONT SURROUND, 2CH/MULTI, MOVIE, MUSIC Selects a sound field. NIGHT MODE Activates the Night Mode function. -
Page 13: Preparation
Preparation Installing Speakers You can connect up to 7 speakers and 2 subwoofers to this AV receiver. Place the speakers and subwoofers according to the speaker system of your preference. Location of each speaker Note When you connect only one surround back speaker (SB), place the surround back speaker directly behind the listening position. - Page 14 Speaker configuration and speaker pattern settings Select the speaker pattern according to the speaker configuration which you are using. Speaker configuration “SB ASSIGN”* Speaker pattern to be selected in connection, “<SPEAKER>” see page menu 5.1-channel “OFF” “3/2.1” 7.1-channel using surround back speakers –...
-
Page 15: Connecting Speakers
Speaker Front Center Surround Surround Surround Subwoofer Left/right pattern left/right speaker left/right back left back right front high speaker speaker speaker speaker speaker 3/2.1 ... -
Page 16: 5.1-Channel Speaker System
Examples of speaker connections 5.1-channel speaker system 30˚ 100˚ – 120˚ Surround speakers Center speaker Subwoofer Front speakers Monaural audio cable (not supplied) Speaker cable (not supplied) After you have made the connection, set [Surround Back Speakers Assign] in [Speaker Setting] to [None Speaker]. - Page 17 7.1-channel speaker system using surround back speakers 30˚ 100˚ – 120˚ Same angle. Surround speakers Center speaker Subwoofer Surround back Front speakers speakers* Monaural audio cable (not supplied) Speaker cable (not supplied) * If you connect only one surround back speaker, connect it to the L (+/–) terminals.
- Page 18 7.1-channel speaker system using front high speakers 30˚ 100˚ – 120˚ Surround speakers Center speaker Subwoofer Front high speakers Front speakers Monaural audio cable (not supplied) Speaker cable (not supplied) After you have made the connection, set [Surround Back Speakers Assign] in [Speaker Setting] to [Front High Speakers].
- Page 19 5.1-channel speaker system with Bi-amplifier connection You can enhance the sound quality by connecting different amplifiers to both a tweeter and a woofer, using bi-amplifier connection. 30˚ 100˚ – 120˚ Surround speakers Center speaker Front speaker Front speaker Subwoofer ...
- Page 20 5.1-channel speaker system with Front B speakers If you have an additional front speaker system, connect it to SPEAKERS SURROUND BACK/ BI-AMP/FRONT HIGH/FRONT B terminals. 30˚ 100˚ – 120˚ Surround speakers Center speaker Subwoofer Front B speakers Front A speakers ...
-
Page 21: Connecting A Tv
Connect a TV monitor or a projector to the HDMI TV OUT or MONITOR OUT jack on the receiver. Sony recommends that you use an HDMI authorized cable or HDMI cable made by Sony. Be sure to use a High Speed HDMI Cable with Ethernet. Premium High Speed HDMI Cable with Ethernet is required for 4K/60p 4:4:4, 4:2:2 and 4K/60p 4:2:0 10 bit etc. -
Page 22: Connecting Tv Incompatible With Audio Channel
Connecting a TV incompatible with the Audio Return Channel (ARC) function via an HDMI connection It is not necessary to connect all the cables. HDMI connection for audio/video signals is required. Audio/Video Audio signals signals Optical digital cable (not supplied) Recommended connection ... - Page 23 Connecting a TV compatible with the Audio Return Channel (ARC) function via an HDMI connection With just one HDMI cable connection, you can listen to the TV audio from the speakers connected to the receiver while the receiver sends audio and video signals to the TV. Audio/Video signals ...
- Page 24 Connecting a TV without HDMI jacks It is not necessary to connect all the cables. Connections for video signals are required. Video signals Audio signals Video cable (not supplied) Recommended connection Audio cable (not supplied) Alternative connection Optical digital cable (not supplied)
-
Page 25: Connecting Audio-Visual Devices
Connecting Audio-Visual Devices Connecting devices with HDMI jacks Before connecting cables, be sure to disconnect the AC power cord (mains lead). The HDMI jacks are compatible with HDCP 2.2. To watch content protected by HDCP 2.2, such as 4K content, connect these HDMI jacks to HDCP 2.2-compatible HDMI jacks on the TV and player. Refer to the operating instructions of the connected device for details. - Page 26 Connecting devices with jacks other than HDMI jacks Before connecting cables, be sure to disconnect the AC power cord (mains lead). VCR, DVD recorder, Cable box or satellite box camcorder, video game Audio signals Video signals Audio signals Video signals Audio signals Super Audio CD player, CD player ...
-
Page 27: Connecting The Antenna (Aerial)
Connecting the Antenna Connecting the AC Power (aerial) Cord (mains lead) Before connecting the antenna (aerial), be Before connecting the AC power cord (mains sure to disconnect the AC power cord (mains lead), be sure to make connections for lead). speakers and the other devices. -
Page 28: Setting Up The Receiver Using The Easy Setup
What you can do with Easy Setup Setting up the Receiver using the Easy Setup By performing Easy Setup, you can complete: 1: Selecting the language 2: Selecting the Surround Back Speakers To perform initial setup of the receiver, make Assign sure a TV is connected to the receiver (page Set the assignment for the SPEAKERS... -
Page 29: Selecting The Front Speakers
Selecting the front speakers 2: Selecting the Surround Back SPEAKERS Speakers Assign Press SPEAKERS on the receiver repeatedly. The indicators on the display panel shows which set of terminals are selected. SP A: Speakers connected to the SPEAKERS FRONT A terminals. ... - Page 30 Connect the supplied Select [Proceed] again. calibration microphone to CALIBRATION MIC jack. Set up the calibration microphone at your listening position. The measurement process will take approximately 30 seconds with a test tone. When the measurement ends, a beep sounds and the screen switches. Note Calibration If the measurement fails, follow the message,...
-
Page 31: Listening/Watching
Select [Save&Exit]. Listening/Watching Enjoying Sound and Video Playing AV devices Turn the TV on, and then switch The Auto Calibration is the input of the TV to the input completed. Disconnect the to which the receiver is calibration microphone, then connected. -
Page 32: Enjoying Sound Effects
Note Enjoying Sound Effects Before you turn off the receiver, be sure to turn down the volume level to avoid damaging your speakers. Selecting a sound field You can turn INPUT SELECTOR on the receiver or press the input buttons on the remote control to You can select from a variety of sound field select the device you want. - Page 33 Relations between sound fields and speaker outputs The list below shows which speaker outputs sound when a certain sound field is selected. 2-channel contents Surround Front Center Surround Front high back Subwoofer speakers speaker speakers speakers Sound field Display panel speakers ...
- Page 34 Multi-channel contents Surround Front Center Surround Front high back Subwoofer speakers speaker speakers speakers Sound field Display panel speakers 2ch Stereo 2CH STEREO 2CH/ Multi Channel MULTI ST. MULTI Stereo ...
-
Page 35: Additional Information
1080p, Deep receiver, check the following to resolve the Color (Deep Colour), 4K or 3D transmission. problem before consulting your nearest Sony Premium High Speed HDMI Cable with dealer. Ethernet is required for 4K/60p 4:4:4, 4:2:2 ... -
Page 36: Error Messages
AC power cord TV OUT (ARC) jack when using the Audio (mains lead) and turn on the receiver. If the Return Channel function. problem persists, consult your nearest Sony Set “CTRL HDMI” to “CTRL ON” in the dealer. -
Page 37: List Of Messages After Auto Calibration
Warning 41, Warning 42 List of messages after Auto The input from the microphone is too large. The distance between the speaker and the Calibration measurements microphone may be too short. Set them further apart and perform the Error 30 measurement again. - Page 38 On placement Effective communication range Place the receiver in a location with BLUETOOTH devices should be used within adequate ventilation to prevent heat approximately 10 meters (33 feet) buildup and prolong the life of the receiver. (unobstructed distance) of each other. The ...
-
Page 39: Specifications
Sony shall not be held liable in any way for Measured under the following conditions: damages or other loss resulting from information Area Power requirements leaks during communication using BLUETOOTH technology. USA, Canada, Taiwan 120 V AC, 60 Hz ... -
Page 40: Bluetooth Section
HDMI Video Supported Codecs , AAC Resolution Transmission range (A2DP) 480p/60 Hz 20 Hz – 20,000 Hz (Sampling frequency 576p/50 Hz 32 kHz, 44.1 kHz, 48 kHz) 720p/60 Hz, 50 Hz, 24 Hz 1080i/60 Hz, 50 Hz The actual range will vary depending on factors ... - Page 44 4-584-079-13(2) ©2016 Sony Corporation Printed in Malaysia...
Need help?
Do you have a question about the STR-DH770 and is the answer not in the manual?
Questions and answers